The number of cars painted with metallic paints is growing, but for some reason they suffer in accidents just like the rest. But in repair painting, such coatings are not so simple; for a high-quality result, the painter must have certain qualifications. The reason for this is that the metal particles contained in these paints are insoluble foreign bodies that can behave completely unpredictably in the paint layer.
Therefore, to successfully work with metallized enamels, the painter must not only hone his application skills, but also understand the theory - understand the most important properties of “metallics”, the principles of the “behavior” of these paints.
Types of metallic paint
Currently, there are three types of paint of this format known.
Let's look at each of them:
- Single-layer – covering the surface of a car in one layer is quite a serious task. To implement it, the master must master not only the technology, but also have a light hand, so as not to make stains, for example. In this case, the quality of the coating leaves much to be desired.
- Two-layer paint is a very popular paint. It is quite easy to apply even over primer and leaves no residue at all. Users note that the paint dries quickly. Even if you have some kind of trouble while painting, you can polish this place without any problems.
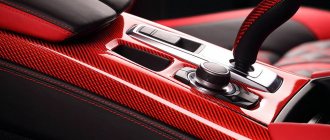
- Three-layer - a similar colorful substance is used to create complex coloring. For example, when you want to create a “chameleon” effect (when the color of the car depends on the viewing angle). The technique is also quite complex and requires knowledge of technology.
Diluent
To thin metallic paint, a special base thinner must be used. Universal thinner for acrylic products or different solvents will not work. The evaporation rate of the thinner must correspond to the temperature in the workshop. A fast thinner will evaporate too quickly and the metallic particles will not have time to lay down as they should, which will give a lighter shade. If the thinner is too slow, the metallic particles will sink into the paint, making the paint shade darker. In addition, too slow a thinner can cause spots and streaks to appear, since metallic particles will float in the paint for a long time and are located randomly.
How to properly create layers of paint
Exactly how the aluminum particles are placed is influenced by a huge number of factors. And they all also depend on the rate of evaporation of solvents and the depth of metal particles buried in layers of paint.
Let's look at them in more detail:
- Look for a happy medium - avoid a layer that is too dry or too wet, otherwise the paint will not apply evenly.
- Avoid applying a thick layer - this is fraught with the fact that the layer will contain a large amount of solvent, which will evaporate for a long time. Since the particles will simply sink, subsequently the layer will not be shiny at all, that is, it will not reflect the color at all.
- Avoid dry application - in this case, of course, there is less solvent in the layer, and it will evaporate much faster, but in this case the metal particles will not have time to sink to a sufficient depth. Particles will remain on the surface, which can lead to roughness. Plus, you'll need a lot more paint to remove all the imperfections.
- Aim for a layer of medium thickness - this type of application is characterized as neither dry nor greasy. The particles in this layer deepen to the required depth and after drying the surface looks incredibly smooth, completely without flaws.
Do-it-yourself car painting
First, wash your car. This will make it easier for you to find damage to the body. In addition to corrosion, the bottom and body receive defects during movement from grains of sand, small stones and other abrasives. The painting procedure can be spot, partial or complete, depending on the body damage. We will talk about a radical change in color.
Remove locks, moldings, seals - they will interfere with work. If you decide to leave them and seal them with tape, the moisture accumulated under these elements will cause irreparable damage to the car. The body must be cleaned, covered with primer and puttied. The old coating is completely removed, and corrosion areas are carefully treated. If necessary, welding or straightening of the body may be necessary.
Use materials from only one manufacturer. Often compositions produced by different companies are rejected from each other. Paint applied to such an unstable preparatory layer may fly off.
Scheme of the main stages of work:
- Car wash. Using car shampoo, remove dirt. Make initial preparations.
- Degrease the body, remove grease, bitumen stains, etc.
- Destroy pockets of corrosion, clean off the old coating with abrasive grinding. The sandpaper should be used so that the difference in the size of the abrasive grains does not exceed 100 units. Treat the surface sequentially in five stages. Otherwise, the material will sag, and stripes and scratches may appear after painting.
- Apply the first and second primer, which will create an anti-corrosion coating. The soil will dry in approximately 3-4 hours.
- The main stage is applying paint.
- The last operation is varnishing the surface.
Paint application technique (step by step)
Of course, everyone agrees that the success of painting a car depends not only on the choice of paint, but also on the specialist and his application technique.
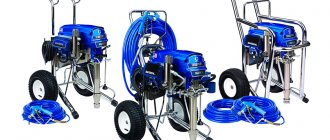
The paint is applied not just with a brush, but with a special sprayer (it is also often called a spray gun). It's not enough to just hold it in your hands, you need to hold it at the right angle and choose the right solo.
If you do something wrong, let's say you stop and apply too thin a layer - you will form so-called “apples” (that is, bulges) and “clouds” (stains on the surface).
The sprayer is usually held at right angles to the surface to be painted. Otherwise, in the case of an inclination, in the upper and lower parts of the spray the distance to the surface will be different, then beige means in one place the layer will be thicker, in another thinner.
Upon completion of work...
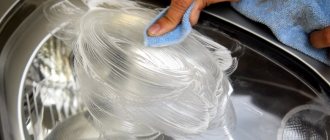
There is another important point in the work of a painter, which is usually not given due importance. This is washing the gun after working with metallic. If this operation is performed carelessly, then particles of “silver” may remain in the gun, which then either clog the nozzle and spoil the shape of the torch, or fly to the surface during the next painting.
Therefore, upon completion of work, take care of the cleanliness of the tool. Rinse the spray gun thoroughly with solvent and blow with compressed air. Don't waste your time and energy on this.
Sincerely admiring the shine of a freshly painted wing or hood, and even metallic, and even silver, and even without “apples”, and even... (sorry, I got carried away) you begin to experience the genuine joy of owning a car. It is so beautiful, shiny, smooth, fresh, inimitable, perfect, corrosion-resistant, on four wheels, five-speed gearbox... Sorry, we got carried away again...
How to prepare a body for painting
In order to carry out painting without errors, it is necessary to properly prepare the surface. What will need to be done for this? The answer is quite simple!
Let's get acquainted with the stages:
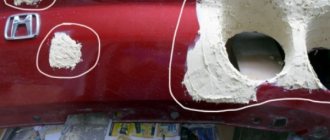
- Puttying is a necessary step if you have defects on the surface. This could include dents, scratches and many other types of damage. Prime and dry the surface in advance before applying putty. After this, you need to sand the surface with sandpaper, rinse with water and dry.
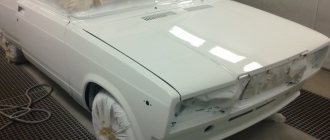
- Painting with a base product - the base is usually applied in two layers. The first layer must be wet, and the second must be dry. The beauty is that you can honestly apply the first layer “anyhow,” but the second should be perfect. Pay attention to the appearance of the layer. You can update the layer only if it has become dull.
- Applying varnish - application occurs in several layers. Each layer must be dried. You can check the varnish for dryness - just test the layer with your finger. If your finger sticks, the layer is not dry enough. Avoid the formation of smudges, they are quite difficult to remove.
Applying metallic paints – we talked about applying this type of paint above. Pay attention to the recommendations described above.
Preparatory work
The beginning of the procedure is priming and puttying the elements of the car body. When choosing the color of the putty, be guided by the future color of the car. Pay special attention to this if it has weak covering properties. These are, for example, red and yellow colors.
A large number of multi-colored putty compounds are now sold. By choosing the right mixture, you will avoid applying additional layers of dye.
Dismantle all parts that do not need to be painted or cover them with masking tape. It is best to start work with the internal parts of the car.
The most important stage of preparatory work when painting a car with metallic paint is degreasing the surfaces and blowing them off. The final result depends on the quality of the procedures. If you do not degrease the car enough, this will lead to poor adhesion of the paint to the body, and small dust particles, invisible at first glance, will appear after work.
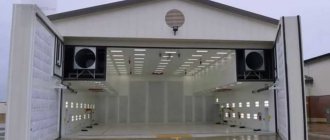
Please note that this work must be carried out exclusively in a paint booth. What you can see by looking at the material on any special website is the technology of metallic car painting: video.
First, thoroughly blow out the entire body of the car, not forgetting hard-to-reach places, where dust and debris can accumulate. After this, proceed to degreasing using a special liquid. Moisten a clean napkin with it and thoroughly wipe the entire body of the car. Then wipe it with a dry cloth.
Next, repeat the blowing operation and complete the preparatory work by wiping the body with a special dust-collecting cloth to remove the smallest dust particles.
Advantages and disadvantages of metallic paint
In order to make a choice in favor of this paint, read all the pros and cons.
The advantages include:
- The car will heat up less, since the particles reflect the light and do not retain it on the car.
- Your surface will be several times more protected from mechanical damage. Scratches on metallic paint are quite easy to repair.
- Low level of rust.
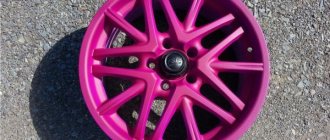
- With metallics you can create an incredible play of light on your car. Having such a surface, people will not be able to take their eyes off you and your car.
Despite the large number of advantages, there are still disadvantages, but, in part, there are not many of them.
The paint is quite difficult to apply. Without an experienced specialist, you will not get an even coating.
Process Features
Masters who have been involved in car painting for a long time certainly have a lot of experience and know how to properly paint a car with metallic paint. The same cannot be said about those who like to paint cars with their own hands. The metallic painting process is quite complex, so before you begin, it is recommended that you thoroughly study this process and the properties of the paint.
Metallic paint is often used to paint cars.
Metallic paint is a one-component composition, and there is no need to add a special hardener to it. The reflective property of paint enhances visible defects that may appear after uneven application of paint.
The main painting defects are applespotting (spotting) and striping. These defects appear due to uneven application of the paintwork.
The reasons for the appearance of such defects are:
- Incorrectly thinned paint. The brand of solvent and hardener must match the brand of the paint itself. Otherwise, color pigments may peel off.
- Weak solvent. This can reduce viscosity, resulting in loss of coating uniformity.
- The nozzle on the spray gun is incorrectly selected. As a result, the paint is directed in a stream onto the part being painted rather than being sprayed evenly.
- The coating layer is too thick. The thicker the metallic coating layer, the darker its shade. Because of this metallic property, spots and stripes appear even with a slight change in the thickness of the layer.
- The jet pressure is too strong.
The process of painting a car with metallic paint is quite complicated.
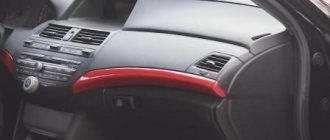
Photo of perfect metallic body paint
Final coating with car varnish
The third and final stage is to distribute the varnish yourself:
- The varnish for this procedure must be diluted with a solvent and a fixative in the proportions specified by the manufacturer. Professionals change the concentration of the substance depending on the layer number - the first is the densest, then lighter ones.
- The varnish is applied in two or three layers, each of them is well dried. You can check the degree of drying only in an inconspicuous area; if the varnish sticks but does not smudge, then you can apply the next layer.
- After applying the last layer, the car must dry for at least a day.