A car is a fairly mass-produced product, which is due to the complexity of its design from scratch. And although recently new technologies have appeared that make it possible to automate this process, there are also opposite trends. For example, the use of universal platforms, on the basis of which all new models are designed. In any case, today's situation cannot be compared with that observed 30 years ago, when most cars were similar in appearance, like twins. Today, in terms of exterior diversity, everything is much more optimistic, but as for the interior design, here, with the exception of elite models, there is much more monotony. Therefore, every car owner strives to somehow individualize his vehicle, to give it a bit of exclusivity. Akvaprint is a technology that provides such an opportunity, and for relatively little money. We will try to tell those who want to make their car unique, different from others, about how aquaprint is made, what tools, materials and equipment are required for this.
Rules for performing aquaprint.
What it is?
Aquaprinting of parts began to be used in Japan approximately 40 years ago. And now in Russia the method is in demand among car enthusiasts. Special pattern transfer technology allows you to create unique surfaces with:
- wood texture;
- the plane of the stone;
- reptile scales.
Carbon fiber trim is often chosen for sports cars. Metal and plastic elements of the interior of exclusive cars are designed to match the structure of the leather and seats.
How is aquaprint made? The technology is:
- surface cleaning;
- applying the main shade and preparing the film;
- film activation;
- immersion in containers to transfer the image to the part;
- drying and varnishing.
To ensure that the coating is evenly and efficiently distributed, the image textures are adjusted according to parameters several centimeters larger than the plane of immersion of the element.
Workshop workers
There are two ways to organize the activities of an immersion printing workshop: mastering the technology yourself and finding an experienced specialist.
In the first option, the entrepreneur will have to look for training courses on this topic: many suppliers provide them for free when purchasing a set of equipment. It is also advisable to study master classes and videos published on the Internet. Finally, you can purchase a starter kit for aquaprinting, which includes several types of films and all the necessary reagents.
The second option is more difficult to implement: even in a large city you can only find a couple of dozen immersion printing experts. Therefore, the business owner will have to either send an apprentice to the same courses, or use a third way - learn how to apply the image yourself, and hire an experienced car painter to prepare and paint the parts: fortunately, such masters are more common than waterprint specialists:
Employees of the aquaprint workshop
| Job title | Rate, rub. | Qty | Amount, rub. |
| Painting specialist | 25000 | 1 | 25000 |
| Accountant at ½ rate | 10000 | 1 | 10000 |
| Payroll tax | – | – | 10500 |
| Total: | 45500 | ||
What is decorated with this method?
Aquaprint is also called hydrographic, impression or hydrographic printing. This is an effective decoration method that allows you to achieve high-quality results. Typically, the technology is used to decorate cars - external and internal parts. The use of hydrographic film allows you to achieve a unique appearance of transport. This will also protect against theft, since cars with noticeable designs are stolen less often.
The film attaches well to metal, plastic, wood, and glass. On each material, the image lasts for a long time after being fixed with varnish and subject to the decoration technology. Such an image does not deform for a long time even from temperature and moisture. How aquaprint is made is described below.
Car parts suitable for waterprint
For decoration with a special texture or specific pattern, most car parts that have a pronounced plane for design are suitable. The elements of the interior exterior of the car look original:
- steering wheel plane;
- console elements;
- door trims;
- inserts on the dashboard;
- door cards and armrests.
The image is also applied to the body planes of external parts:
- roof rails;
- wheel disks;
- planes of mirrors and spoiler.
Premises requirements
Aquaprinting can be done at home, without the participation of a specialist. Decorating things is allowed at home if it comes to small details. It is more convenient to carry out hydrographic printing in a utility room or garage with an area of at least 20 square meters. m. The main thing is that there is a container for work, where the part to be decorated can completely fit. Moreover, the container must be installed stably so that it does not swing, otherwise the design will be transferred unevenly.
In the room where hydrographic printing is planned, there must be hot water - connected or heated. This is due to the fact that to decorate with film, the container is filled with water at a temperature of at least 35 degrees. Hydraulic printing is a simple and inexpensive procedure that is also accessible to beginners.
How much can you earn from water printing?
At first, the main clients of the workshop will be car enthusiasts. Assessing actual labor productivity, we can say that two specialists will completely process a car in two days. However, at the start you can hardly expect an intense flow of clients, and therefore in order to develop an aquaprint business plan that is adequate to reality, you should reduce the estimated workload by at least one and a half times:
- The workshop will service two cars per week (8 cars per month);
- The average surface area to be treated will be 8000 cm²;
- The cost of consumables per client is 2035 rubles;
- The total cost of covering one car at a tariff of 4 rubles/cm² is 32,000 rubles.
Now you can determine how much profit an immersion printing business will bring and how quickly the initial investment will pay off:
Calculation of the payback of aquaprint
| Article | Meaning |
| Gross income, rub. | 256000 |
| Costs per month, rub. | 119480 |
| Tax base, rub. | 136520 |
| PSN tax, rub. | 2400 |
| Net profit, rub. | 134120 |
| Profitability, % | 112 |
| Investments, rub. | 610780 |
| Payback period, months | 4,5 |
Materials and equipment
How is aquaprint made? First you need to prepare everything you need for work. Used or new equipment can be used. Equipment for water printing will require:
- a tank that will be sufficient to immerse the part;
- containers for washing finished decorative products;
- special film for image transfer;
- a set of devices and tools for preparation - roughing and grinding;
- activators of film, paints and varnish;
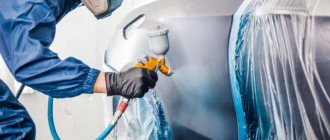
- painting gun - spray gun or compressor with a spray gun.
The surface with old worn paint or with chips is sanded and sanded before priming. Having removed dirt and roughness from the part, you need to degrease the surface and apply the base color.
Since the immersion printing process requires maintaining a temperature (29-32 degrees), a thermometer (mercury or alcohol) and an electric industrial boiler with a heating sensor are required. The thermometer must be fixed on the surface of the liquid. A boiler is needed to temporarily turn on and heat water.
To carry out aquaprinting with your own hands, you can use an old bathtub. You can make the container yourself from a barrel, sawing it vertically, and also installing it on clamps in the form of a platform. The second half can be adapted for washing products.
To drain the waste liquid, wash the tank and fill the bath, a pipeline with a drain and a water supply with taps are installed. If there is no central connection for communications, then a special filter and pump are installed in the pipeline. It is necessary to install an additional reservoir into which the filtered solution will be pumped. This helps to carry out the process according to the principle of circulation of filtered liquid.
The work can be done at home if you follow the aquaprint technology. It is important to familiarize yourself with all the nuances in advance. Only after this can you begin to do the work.
Advantages and disadvantages of business
Despite the fact that aquaprint technology was patented almost forty years ago, it has become widespread among small businesses only in recent years. Therefore, many entrepreneurs still have no idea how such a service can be beneficial.
The advantages of immersion printing look like this:
- The business is considered profitable. Considering how much aquaprint film costs, we can assume that the profitability of the service will be several hundred percent;
- The technology is generating interest among consumers. The target audience includes not only car enthusiasts, but also designers, gadget owners, and athletes;
- The workshop does not require significant investment. When using a minimum set of equipment for water printing, you can invest 100,000 rubles;
- The market is far from full. This is due to poor awareness of citizens about the service and a lack of qualified specialists.
This technology has fewer disadvantages, but for novice entrepreneurs they can also be significant:
- Coating is a delicate and responsible process. Therefore, the entrepreneur will have to acquire the necessary skills himself or look for a master;
- Due to the high cost of work, aquaprint may not be in enough demand among people experiencing financial problems.
Preparation
How is aquaprint made? First, the surface is cleaned with coarse sandpaper. Rubberized areas are removed and surfaces with corrosion are sanded with primer and varnish.
Cleaning from oil stains and dust is required. It is convenient to process a large area with a grinding machine, and for small, hard-to-reach areas of bends, grinding is carried out manually or using a drill with a small grinding attachment. High-quality grinding can be done with a special paste or automotive primer.
After cleaning the parts, they are degreased with pure gasoline or alcohol. Then automotive primer is applied. After drying, secondary sanding with sandpaper and degreasing is performed. Then you can proceed to the next stage.
Surface cleaning and matting
Before you begin applying the image, the part should be prepared. The first stage is removing contaminants. The surface is cleaned with water, a sponge and detergents. In some cases, a solvent may be required to deal with difficult stains. However, for plastic, this method must be used with caution so as not to damage the product.
When the part is washed and dried, you can begin matting. To ensure high-quality fixation of the coating on the surface, it is treated with abrasive materials. At this stage, minor surface defects are eliminated: scratches, bulges, nicks. In addition, if there is old paintwork, it is also recommended to remove it using abrasive materials to the base.
Film
To create an aquaprint at home, fill the container with water and heat it to 35 degrees. Then, according to the sketch of the part, the film is cut based on the 3D geometry of the form.
Guessing the area for complex geometry is not so easy. Craftsmen make sketches of the dimensions of the part in advance, perform development and drawing of the surfaces of the planes. The size of the film is made with a margin; small notches need to be created on the edges in increments of 2 cm. The activator is prepared for work and the pattern is transferred.
Consumables for aquaprint
If you remember how aquaprint is made, you can understand that film is, although the main, but not the only material that is used in the process. To prepare the part for decoration and subsequent finishing you will need:
Necessary materials for aquaprint
| Position | Price | Consumption per 1 m² | price, rub. |
| Materials for drawing | |||
| Film for aquaprint 50cm | 160 rub./m | 2.5 m | 400 |
| Activator | 650 rub./l | 60 ml | 39 |
| Latex gloves | 3 RUR/pcs. | 1 PC. | 3 |
| Materials for preparing the part | |||
| Sandpaper | 15 RUR/pcs. | 3 pcs. | 45 |
| Grinding wheel | 20 rub./pcs. | 3 pcs. | 60 |
| Polishing wheel | 220 RUR/pcs. | 0.1 pcs. | 22 |
| Painting materials | |||
| Binder for base enamel | 890 rub./l | 150 ml | 133 |
| Primer for metal | 800 rub./l | 160 ml | 128 |
| Primer for plastic | 930 rub./l | 160 ml | 148 |
| Epoxy primer | 790 RUR/kg | 200 g | 158 |
| Plastic restoration glue | 1350 rub./l | 200 ml | 270 |
| Base paint white | 1200 rub./l | 200 ml | 240 |
| Metallic base paint | 1850 rub./l | 200 ml | 370 |
| Candy concentrate in a set | 1770 RUR/pcs. | 0.1 pcs. | 177 |
| Polishing paste | 1890 RUR/kg | 100 g | 189 |
| Solvent for varnishes | 60 rub./l | 0.25 l | 15 |
| Degreaser | 780 rub./l | 0.25 l | 195 |
| Gloss varnish | 790 rub./l | 200 ml | 158 |
| Matt lacquer | 930 rub./l | 200 ml | 186 |
| Scotch Brite | 120 RUR/pcs. | 0.2 pcs. | 24 |
| Masking tape | 2 rub./m | 25 m | 50 |
| Mattifying sponge | 60 rub./pcs. | 1 PC. | 60 |
Thus, the cost of materials for waterprinting per square meter of surface is 1,761–2,544 rubles.
Transferring a drawing
This is the next stage of do-it-yourself waterprinting at home. The prepared film is placed on the water in the bath. To do this, fingers are dipped and an impression is made on the edge of the film. It is important that the sticky surface rests on the surface of the water.
The notches made on the film are gradually rolled up. If bubbles appear under the surface of the film, carefully blow them out. 2 minutes after turning the areas, apply the activator with a spray gun using S-shaped movements. After 10 seconds, the film dissolves, and a jelly-like mass with a pattern remains on the surface.
Then the prepared part is immersed in the bath at an angle of 45 degrees. All movements must be neat, smooth and uniform. After immersion, the parts are taken out. You need to inspect it - the paint should lie evenly.
: Attaching handles to the object to be painted
If you want to paint the surface on all sides, you need to attach handles so that the paint covers the entire surface (except for the part under the handles). It’s better to have pens in the paint than your hands. By choosing the right location for handles, you can keep unpainted surface area to a minimum.
I installed the handles on my board where I then attached the velcro tape so there are no unpainted areas showing on my skateboard.
Difficulties
Aquaprinting at home is a simple technology. But it has features that you need to know in order to avoid mistakes:
- If the water in which the film is placed is cold, then folds will form on the product. The best temperature is 30-35 degrees.
- It is important to choose the right amount of activator. If there is not enough of it, the coating will peel off, and if there is too much, it will smear. There should be enough developing component so that the film stretches without wrinkles.
- Washing must be done with clean water, otherwise the image will be damaged and the varnish will be applied unevenly.
- Preparing the product for applying the image must be done carefully. If there are traces of rust and dirt, the image will not transfer smoothly.
Choosing a film for hydrographic printing: what to look for
Film for aquaprint is an important material on which more than half of the success of the entire decoration depends. It can be purchased at a hardware store or ordered online. An important advantage of this material is a very wide selection of colors and textures.
Films can imitate valuable wood, stone, carbon, camouflage, metal, snakeskin and any other pattern. In any case, the choice in the online store will be wider. On average, a meter of film costs from 160 rubles. The price may vary depending on the complexity of the pattern and the width of the film.
When choosing, you need to pay attention not only to the color of the material and its cost, but also to the width of the film : it should be enough for the width of your product. Keep in mind that for high-quality decoration it is necessary that the size of the film exceed the size of the product by at least 3-4 centimeters - this way the image is applied more evenly.
Aquaprint as a business
Before opening a business providing these services, you need to familiarize yourself with the pros and cons of the activity. The advantages include:
- high demand;
- low competition;
- good profit;
- lack of large investments.
Due to the high demand, hydrographic printing is highly profitable. People's desire for unique things makes such a business in demand. After all, many motorists want to have a car with an unusual exterior. Waterprinting is also done on mobile phones, laptops and other things.
Today, this business is not very widespread, so it will become a source of stable and high income. As practice shows, this area is profitable due to its low cost. If a person has printing skills, then he can achieve success without large investments.
One of the shortcomings of the business is the lack of experienced specialists who can do the work themselves. If a novice businessman has the skills of this technology, then he can teach those who want to become familiar with the principles of aquaprinting.
Workshop assortment
Due to the lack of a formed market, there is no single pricing policy for immersion printing services: each entrepreneur himself determines how much an aquaprint costs. Most often, the workshop price list sets fixed rates for standard parts of known shapes and sizes, and the processing fee for non-standard elements is determined taking into account their dimensions. Here are the average prices in the Moscow region:
Cost of aquaprint
| Product | price, rub. |
| Car interior detail, per cm² | 4–6 |
| Full interior, sedan | 8000–10000 |
| Full interior, SUV | 10000–12000 |
| Full interior, golf class | 5000–7000 |
| Body element, per cm² | 4–6 |
| Motorcycle helmet, bicycle helmet | 6000–8000 |
| Parts of a gun or crossbow | 10000–18000 |
| Musical instrument, per cm² | 6–8 |
| Smartphone case, mouse, laptop cover, per cm² | 8–10 |
| Set of wheels R15 | 15000 |
| Set of wheels R16 | 16000 |
| Set of wheels R17 | 17000 |
| Set of wheels R18 | 18000 |
| Set of wheels R19 | 19000 |
| Set of wheels R20 | 20000 |
| Set of wheels R22 | 22000 |
In general, to determine the cost of work, entrepreneurs are guided by the following rules:
- When calculating the area of a part, the maximum length and width are taken into account;
- The presence of holes does not affect the cost;
- If it is necessary to putty chips and scratches, the price is increased by 20%;
- With a large area of elements, it is practiced to provide a discount of up to 50%.
Akvaprint in simple words: general information about technology
Do-it-yourself hydrographic printing at home is quite affordable. Before we tell you in more detail how exactly to make aquaprint at home, we will describe this technology in general terms. This way you can understand how accessible the technology is to you personally.
Hydrographic printing uses a special film, which you have to buy in a specialized store. The film with a pattern, which is planned to be placed on the product, is spread on the surface of a container (usually a bathtub) with warm water.
Then it is treated with a special solution - an activator - which will help transfer the image. The part to be decorated is immersed in a bath of dissolved film, and after complete immersion, it is immediately removed, dried and varnished.
If all stages of the process were followed, and the part was immersed carefully, without vibrations or shifts, you will become the owner of a unique, beautifully decorated item.
Now you know in general terms what hydrographic printing technology is. In the following sections we describe in detail how aquaprinting is done and what is required to do it at home.
Acquaprinting step by step
So, let's look at how to make hydrographic printing step by step:
- Preparation of the product to be decorated (cleaning, degreasing).
- Filling the container with warm water.
- Spread the film on the surface of the water (sticky side up).
- After 1.5-2 minutes, the activator is applied to the film from a spray bottle.
- The product is carefully completely immersed in a container with an activated film on the surface, avoiding vibrations.
- The product is quickly removed from the water, washed to remove excess paint, and dried with a hairdryer or at room temperature.
- After drying, the parts are varnished in several layers and, if necessary, polished.
Film for aquaprint is an important material on which more than half of the success of the entire decoration depends.
How to prepare a product for hydrographic printing
Now let's look at what needs to be done to prepare the product for waterprinting. The quality of the applied pattern will depend on good pre-treatment. An uneven coating will ruin even the most beautiful film, so you should not ignore this stage.
The product must be cleaned of old paint, varnish and any other coatings. The surface should be as smooth, uniform and, of course, clean as possible. Any traces of rust must be removed. Old stains of dirt or oil (for example, on rims) will ruin the whole endeavor.
After thorough cleaning and, if necessary, polishing of the product, it must be degreased. Alcohol is best suited for this purpose. A good idea would be to sand the part with sandpaper and apply automotive primer. The main goal of preliminary preparation is to create a smooth and clean surface on which the film will easily lie.
Working with film: what needs to be done before applying an image
After processing the product, it is necessary to prepare the film. Firstly, it needs to be cut taking into account the geometric shape and size of the product. You need to leave a margin of at least 3 centimeters at the edges. Do not cut immediately - double-check the calculations several times so as not to spoil the material.
When the film is adjusted to the size of the product, it is spread on the surface of warm water (usually about 35 degrees, but you need to check the characteristics of the specific material when purchasing). Then a special developer or activator is carefully and evenly applied to the film. If everything is done correctly, literally after 10 seconds the film will disappear, and the coloring material will remain in the water (the texture resembles jelly). It is in this that the product will need to be immersed.
The most important stage of hydrographic printing is transferring the image onto the product.
How to transfer a design to a product
The most important stage of hydrographic printing is transferring the image onto the product. When the film has dissolved and only paint remains in the water, you need to carefully immerse the part to be decorated into the bath. Usually start with sharp corners, lowering the object at an angle of 45 degrees.
Do not make sudden movements; place the item in the bath smoothly and gently, avoiding water fluctuations and shocks. Immediately after the product is completely under water (or in paint, if only part of the surface is painted), you need to get it back.
The final stage of hydrographic printing: drying and varnishing
A product with a freshly applied picture must be cleaned of sticky residues of paint and film. You need to rinse it with clean running water. Water from a container will not work - it may contain paint residues that will interfere with the adhesion of the design to the surface of the part and the application of protective varnish.
After washing and removing all foreign elements, the painted part should be dried at room temperature. If possible, small parts should be hung on a hook, and larger parts should be laid on a horizontal surface.
When the product is completely dry, it must be varnished. As a rule, the varnish coating is applied in several layers, and after it dries, it is additionally polished. Varnish helps objects retain their design quality longer.
Required equipmenttools
One of the main questions of interest to car owners who want to personalize the interior of their “iron horse” is the cost of aquaprint. It all depends on the scale. It’s one thing if you plan to subsequently earn extra money from this, and quite another if this procedure will be used only for personal pleasure. So, to carry out home waterprinting of the car interior, we will need the following equipment, tools and materials:
- a sufficiently voluminous and easy-to-use water container;
- a watch with a timer or stopwatch function (in the era of smartphones this is not a problem);
- special immersion film;
- film activator;
- a compressor or self-contained spray gun used to apply the activator;
- varnish;
- container for washing parts with already applied patterns.
Note that the bathtub in which you are used to soaking up after a busy day at work is not very suitable for these purposes, but in principle you can use it, ensuring that the required temperature is maintained. So you should stock up on a thermometer, as well as a special filter that removes film residue from the liquid.
Immersion film is not sold everywhere - only large construction hypermarkets sell it, but most users order it on the Internet. It already contains a drawing that will be transferred to the part being processed. The pattern can be different - imitate natural materials, animal skin (snake, leopard), you can find abstract designs and various geometric patterns. If you want something truly exclusive, you can order film on the Internet with your own design (for example, a photograph) in the required sizes, which, of course, will cost more than finished products. Immersion film with a finished pattern costs 250-700 rubles per linear meter, the width of the film is usually 0.5-1.0 meters.
How to make hydrographic printing with your own hands. Preparing a part for aquaprint
Drawings made using immersion printing can be found on weapons, furniture, sports equipment and office equipment. However, aquaprint is most popular among car enthusiasts. This technology allows you to radically transform the interior of your car. Hydraulic printing is not particularly complex or technologically advanced. The entire process can be replicated at home or in the garage.
Surface cleaning and matting
Before you begin applying the image, the part should be prepared. The first stage is removing contaminants. The surface is cleaned with water, a sponge and detergents. In some cases, a solvent may be required to deal with difficult stains. However, for plastic, this method must be used with caution so as not to damage the product.
When the part is washed and dried, you can begin matting. To ensure high-quality fixation of the coating on the surface, it is treated with abrasive materials. At this stage, minor surface defects are eliminated: scratches, bulges, nicks. In addition, if there is old paintwork, it is also recommended to remove it using abrasive materials to the base.
Abrasive materials
For abrasive processing, sheet material, sponges, meshes and matting pastes are used. The most popular due to their low cost are fabric or paper based abrasives. The so-called "skins". Their disadvantage is that, unlike meshes, they quickly become clogged with dust. For complex surfaces, it is rational to use Scotch Brite and paste.
Regardless of the type of abrasive, it has a gradation in grain size. This parameter is designated by the letter “P” and a digital index. The higher the value, the less rough the material leaves. On sale you can find products marked from P-60 to P-6000. As a rule, P-150 is used to prepare for the application of secondary primer and P-220 immediately before painting.
Matting can be done either manually or using an electric tool. Use special grinding machines or screwdriver attachments.
Automation of the process significantly reduces the time of operations. To reduce the amount of dust, it is practiced to moisten the surface.
However, when wet sanding, sponges and sandpaper become clogged much faster and lose their abrasive properties.
Primer and painting
The cleaned and matted part must be degreased. To do this, pour a small amount of isopropyl or ethyl alcohol onto a lint-free cloth and wipe the surface. For plastic, it is recommended to use compounds with an antistatic effect to prevent dust from settling.
Then primary primer is applied from a can or using a spray gun. Let it dry for ten minutes and start painting. Any one-component paint can be used. It will play the role of a substrate (base) for the water print.
In order to avoid smudges, apply several layers at intervals of about 10 minutes. If there are unpainted areas left the first time, there is nothing to worry about. They will close the second or third time.
A layer that is too thick will start to leak and you will have to wash everything off with a solvent and re-degrease and prime. Dry the painted parts at room temperature for at least half an hour.
If the plastic on which you plan to apply a design using hydrographic printing is structural or has significant defects, the preparation process will become somewhat more complicated.
To begin with, the surface is leveled using coarse abrasive paper. Then secondary primer is applied. Its purpose is to fill in depressions and roughness.
If one layer was not enough, then after a ten-minute exposure, apply a second one.
Drying the secondary soil takes from two to three hours. The time can be significantly reduced if the process is carried out at a temperature of 60°C. In this case it will take about an hour. Then they move on to the matting stage. If plastic is exposed during the stripping process, these areas should be re-primed. Next we apply the base paint.
The final stage is applying the texture using aquaprint film.
Hydraulic printing technology
How to make a spray gun for whitewashing with your own hands How to make a spray gun with your own hands Types of paint spray guns
The technology of hydrographic printing is not as simple as it might seem at first glance. It requires care, accuracy and adherence to precise settings. In order to fully master this technology, it is best to undergo professional training. So, what is needed to carry out the process of decorating products using the “aquaprint” method?
- A special technological bath, the configuration and overall dimensions of which are selected in accordance with the technical features of the part being decorated;
- Immersion film - a specific material with a selected texture;
- An activator is a special technical substance that prepares the film for application and makes it elastic;
- Varnish is a protective coating.
