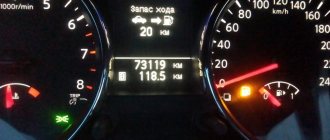
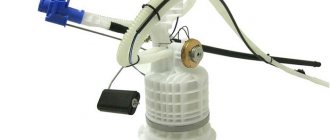
It becomes extremely inconvenient to operate a car if the fuel level indicator on the dashboard is lying or not working. To avoid getting into a hopeless situation with an empty tank, the driver has to record the odometer readings and calculate the approximate mileage based on fuel consumption. Another option is to constantly carry a spare canister filled with gasoline or diesel fuel in the trunk. Getting rid of these inconveniences is a trip to a car service center or self-diagnosis and troubleshooting.
Other fuel level sensor options
As an alternative, various non-contact sensors, such as MAAPS or an inactive magnetic position sensor, are used to measure the amount of fuel in the vehicle tank. The MAAPS sensing element does not come into contact with the fuel.
It has the following operating principle. Such a sensor determines the amount of fuel remaining in the tank using a float connected to a permanent magnet via a lever. The magnet moves along a sector on which a large number of plates of various lengths are deposited with rays. Electrical signals are formed in the plates under the influence of a magnetic field (different in each plate), depending on what signal the sensor gives, the remaining fuel is determined.
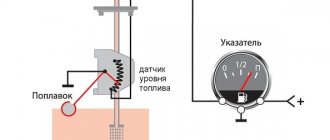
Operating principle of FLS
The principle of operation of fuel level sensors is classic and simple - changes in the position of the float are “read” by the control device and transmits the information via a digital or analog signal to visual control devices. The accuracy of the data determines the type and design features of the control equipment.
We recommend: Which is better, electric corrector or hydrocorrector for headlights on a VAZ 2110: pros and cons
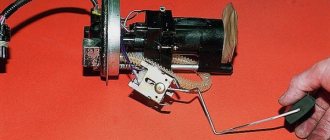
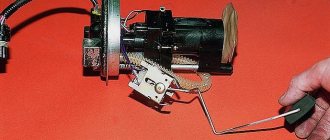
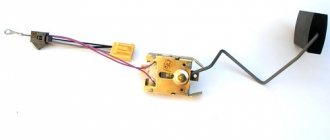
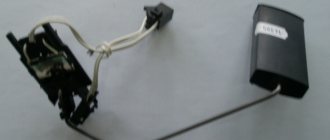
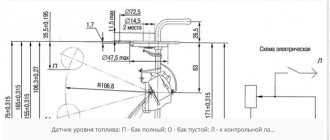
Lever type
The interaction of sensor elements of this type is presented as follows:
- the float constantly occupies the upper fuel level;
- a potentiometer connected to the car’s electrical network through an indicator on the dashboard, when the gas tank is completely filled, creates a resistance of about 7 Ohms, which corresponds to the “P” mark on the control device;
- when the engine is running, gasoline is consumed, reducing the amount of fuel in the tank - the float drops along with the drop in level, moving the potentiometer slider;
- the movement of the latter along the resistive plates smoothly increases the resistance to 230 - 340 Ohms (depending on the characteristics of the car), where the maximum value informs about a completely empty tank.
The reliability of this design has been proven over years of use. At the same time, the accuracy of the readings deteriorates over time due to wear of the resistive plates and the slider.
Tubular type
The operation of a tubular type sensor uses a control principle similar to the acquisition of information by lever systems, but there are fundamental design differences. Its main elements are presented:
- Housing with guide post and resistive wire.
- Float equipped with slip rings.
- Device mounting flange with a contact group for connecting control wires.
Fuel level control is carried out in the following order:
- fuel enters through a hole in the lower part of the body;
- as the tank fills, the float mechanism moves and will remain at the top point;
- its movement changes the resistance and, therefore, the tank fullness indicator on the indicator;
- at the top point, a small section of the contact wire is involved, and the resistance has a minimum value, at the bottom - the length increases, with a corresponding increase in the final indicators.
Placing the float in a limited space that smoothes out vehicle vibrations provides information about the fuel level more accurately than lever-type units. But the possibility of installation on cars is limited by the design features of fuel tanks.
Electronic (contactless)
Electronic fuel level sensors are installed in the tank when using modern types of ethanol-based, methanol-based gasoline or biodiesel, since the installation of contact units for level determination is not effective - the readings are inaccurate, and the wear of parts is high. In turn, the inactive magnetic fluid position sensor copes with the task successfully and has the following features:
- The executive part is located in a sealed housing; only the magnetic float and lever come into contact with the fuel.
- Fuel height measurements are carried out by a signal generated by a magnetic field.
- Changes are recorded by predetermined segments, the passage of which changes the amplitude of the feedback signal. So, when filling the tank “to full”, the sensor will change readings only after passing the next mark, and the driver will not be able to observe the smooth drop in level.
Important! If you can choose a sensor to install to replace a damaged one, it is preferable to choose a model with digital information transmission - its data has less error than analog devices.
In order not to be left without fuel in the middle of the journey, you need to know the amount of fuel in the tank. Thanks to the device, you can understand whether or not you need to visit a gas station, how much gasoline is in the tank, and whether you can continue driving. This is not just a useful device, but a device responsible for the level of safety on the road. Modern legislation requires the presence of such a sensor and its good condition.
Description of the fuel level sensor operation
The operating principle of any FLS boils down to the fact that a specific signal corresponds to a certain level of fuel in the tank. But this is not enough for correct operation.
The fact is that modern cars use tanks of complex shape, adapted to the shape of the body. It follows from this that the remaining fuel does not depend linearly on its level. There is also a design feature of all sensors: the fuel level must drop to a certain value before the FLS detects its change. As a result, measurement error occurs. It is especially pronounced in domestic cars, such as the VAZ-2109 or VAZ-2110. As a result, it happens that after refueling, the car has driven 50 km, and the indicator still shows the maximum amount of fuel in the tank.
To combat measurement errors, engineers have found an effective remedy. All sensors according to the type of transmitted signal are divided into:
The analog signal is a change in voltage across the potentiometer. The error can be reduced by converting such a signal to a digital one. For this purpose, the FLS is equipped with a microprocessor that not only converts the signal, but also corrects the error.
How to check the functionality of the sensor?
To check whether the FLS is working or not, without having measuring instruments at hand, you need to remove it from the fuel tank and connect it to the vehicle’s on-board network. Then you need to turn on the ignition and move the lever with the float. If the fuel gauge readings change, the sensor is working. You especially need to pay attention to the indicator readings at the extreme positions of the moving contact. If the level is displayed incorrectly, it is better to replace the sensor.
If you have a multimeter, checking the sensor readings is even easier. You just need to measure the resistance at different positions of the moving contact. If it changes, then the FLS is working. » alt=»»>
The lack of real data about the remaining gasoline in the tank is always annoying on the road and forces the driver to constantly check everything with improvised means, which is not very convenient. At the same time, adjusting or replacing the fuel level sensor will not require large financial and time expenditures.
Replacing a fuel level sensor is very inexpensive
How to prevent the problem
It is almost impossible to prevent sensor damage, since mechanical wear of the sectors or float is an absolutely natural phenomenon. Therefore, if the indicator needle begins to behave strangely, and the check reveals problems with the sensor, it is better to replace it as an assembly, fortunately its price is not very high.
The same statement is true if the indicator itself breaks down. Service work to prevent damage to this device is not provided - only replacement if a malfunction is detected. Problems with electrical wiring, including a break in the wire leading from the fuel level sensor to the indicator, can also be solved by replacing the wire.
Fuel level sensor VAZ 2110
In the case of the VAZ 2110, the fuel level sensor is a classic potentiometer, which is a resistor with metal strips of nichrome conductor applied to its surface. The resistor has a moving contact, which is driven by a lever with a float at the end. In general, the principle of operation of the sensor is to create variable resistance to the electric current flowing through it. In a certain place (at the minimum permissible level of residue in the gas tank), the lever closes an additional contact, signaling by the light of a light bulb on the dashboard about the use of the reserve fuel supply (4-6 liters).
Dismantling and assembling FLS in VAZ Kalina
Replacing the fuel sensor on Kalina is done in the following order:
- the tips of the fuel pipes are removed and secured with spring clips;
- using a bit and a hammer, unscrew the pressure ring, moving it in the direction opposite to the clockwise rotation;
- pry it off with a screwdriver and remove it from the hatch;
- is taken out carefully, tilting the structure slightly so as not to damage the sensor lever. Near the pump, the guide clamps are retracted and the module cover is moved to the side;
Defective fuel level sensor
The removed device is inspected and, if necessary, repaired and adjusted. If restoration cannot be achieved, the FLS is replaced with a new one. Assembly is done in reverse order. A carefully assembled block is inserted into the gas tank so as not to bend the lever with the float part. It is installed in such a way that the arrow shown on the cover is directed in the opposite direction of the vehicle’s movement, and the fixing part fits into a special groove on the opening of the fuel tank. The pressure ring is installed, having previously been treated with petrol-resistant sealant, then scrolled clockwise. When the module is securely fastened, the pipelines and connector with electrical wiring are connected. To check the tightness of the system, start the car and perform a visual inspection. If there are no leaks, and the correct readings of the presence of gasoline in the tank are recorded on the instrument panel, it means that the replacement of the fuel level sensor was carried out successfully. We screw the hatch cover and install the seat in its regular place. Despite the simplicity of the procedure for disassembling and installing a device for measuring the amount of gasoline in a gas tank, this work requires care and adherence to basic safety rules. Careless, careless handling of them can lead to a fire, since gasoline ignites quickly.
In appearance, the VAZ family cars to some extent correspond to European automotive trends. But domestic cars have many technical shortcomings that do not allow them to compete with global brands.
An example is the performance of the fuel level sensor. Many car owners have had to deal with a situation where the device showed unreliable data. Sometimes the needle points to zero, although there is still a lot of gasoline in the tank. In some cases, the opposite situation is observed. This usually applies to older cars, but there are exceptions. Such signs indicate that the device is failing and needs to be replaced. The work can be done with your own hands, without the involvement of specialists.
Where is the FLS (motor injector) located?
Since the fuel level is determined by the sensor using a conventional float mechanism, the potentiometer is placed directly in the “tens” gas tank. To save space, the FLS (fuel level sensor) is installed together with the pump. Therefore, for maintenance, repair or replacement of the first one, the second one will also need to be removed from the seat. You can find the body of the VAZ 2110 fuel pump under the passenger sofa - it is hidden there behind a black technical hatch.
Video tutorial on checking the fuel sensor in a car tank
Choosing something new
Purchasing a fuel sensor for a VAZ 2110 is not at all a problem if you have already removed the old element from your car.
It is not recommended to just go out and buy the first one you come across, even if it is high-quality, since it may simply not be suitable.
There are two ways to solve this issue.
- Remove the old element, take it to an auto parts store and purchase a similar one.
- Take a look at your car's owner's manual to find out which sensor with which characteristics is used for your car. Buy a similar one.
It is important to note that the VAZ 2110 is equipped with various measuring devices from the factory, the resistance values of which are not identical. Therefore, it is important to replace the old element with exactly the same one in order to avoid possible problems.
How to change a sensor if it doesn't work
The easiest way to get to the fuel sensor itself and replace it is in this order:
- turn off the ground using the button or reset the negative terminal from the battery;
- lift the second row seat and clean the service hatch area from dust and accumulated debris;
- using a Phillips screwdriver, remove the screws that hold the hatch in place;
- disconnect the wiring harness from the connector;
- using a 17 key, you need to unscrew the fittings and move the fuel pipes to the side so that they do not interfere with the dismantling of the fuel pump housing;
- Now you need to unscrew the fastening nuts that secure the clamping ring - a socket head 7 is suitable for this;
- if the nuts are soured, use WD-40 or another similar product;
- by removing the fasteners and slightly prying the ring, you can carefully remove the entire assembly from the gas tank, including the lever with the float;
- the next step is to unscrew the two screws on which the FLS is held using a Phillips screwdriver and release the electrical connector of the pump;
- Now the guides are removed from the pump housing (the clamps can be bent with a screwdriver);
- it is necessary to unscrew the bolts on the pump cover, holding the nuts with a 5 wrench;
- by removing the cover, you gain access to the sensor;
- installation of a new sensor is carried out in the reverse order;
- During assembly, it is additionally recommended to treat the joint between the pressure ring and the gasket with a petrol-resistant sealant.
The operating principle of the FLS is to create variable resistance to the electric current flowing through it.
Replacing the FLS on a VAZ-2114
Even a novice driver can repair the sensor with his own hands. Of course, the breakdown should not be serious, then replacing the failed element will not be difficult and will not take much time. For example, if a float breaks, you can always purchase a new copy on the automobile market. The old float is easily removed from the holder and a new one is installed in its place.
Oxidized wires are also often replaced with new ones if stripping them is impossible. The price of a new sensor is relatively low, so most often drivers prefer to simply purchase a new mechanism.
The process of replacing the FLS on a VAZ-2114 includes the following procedure:
- Remove the lower part of the rear seat and remove the upholstery, since the sensor is a structural part of the fuel pump. It is impossible to get to the mechanism without going through the module.
- Using a key number 7, release the two screws securing the gas tank cap.
- Then you need to unscrew eight more screws securing the edge of the lid.
- After these steps, the cover can be easily moved forward.
When access to the fuel pump is ensured, it is necessary to remove part of the wire block. Don't forget to unscrew the line nuts. Before the cap is completely released, it must be turned once, this way the pressure in the system will be reduced.
It is necessary to carefully and carefully release the fuel pump so as not to damage the float; it should first be lifted, and then turned clockwise and tilted. Once you have the fuel pump in your hands, you can start looking for the sensor itself.
The procedure is as follows:
- use a screwdriver to move the locking ring;
- remove the module cover;
- remove the sensor terminals and release the fastenings from the cover;
- disconnect the block;
- Release the fuel sensor clamps and remove the mechanism.
At this point, the work of replacing the sensor is considered complete. It is necessary to install the new mechanism in place and assemble the module in the reverse order. As you can see, there is nothing difficult in performing this work; you just need to arm yourself with the necessary equipment: screwdrivers and a set of keys.
Price of a new sensor
On the "ten", there are mainly two types of fuel level sensors:
- under the panel with “Kursk” (JSC “Sche instrument cluster;
- under the VDO "tidy".
At the same time, experts still do not recommend choosing the FLS “by eye”, since then the needle may “float”. It is better to replace the old sensor with the same model. You can find the catalog number on the body of the sensor itself. There are DUT-1-01, DUT-1-02, etc. (modifications of the first generation), they should not be confused with DUT-2-01, DUT-2-02. Interchangeability can only take place within one generation, and even then the connection diagram may have to be changed. The cost of a new sensor will average 230-350 rubles.
If the fuel sensor is lying (incorrectly shows the remaining amount)
It happens that the situation with the sensor fibbing the data on the level of gasoline in the tank can be solved with little expense. First of all, you need to pay attention to the contacts that supply current to the instrument panel, in particular to the section responsible for the fuel level.
To eliminate more serious interference, you will have to remove the pump from the tank. Here the checking algorithm is simple: the lever with the float is moved to the extreme position at which the tank should be full.
In this case, the maximum scale value – “1” – will be displayed on the instrument panel. If this is not the case, then try bending the adjusting “tongue”, which will increase the arrow travel. Similarly, experiment with the minimum position of the float - so that the device always truthfully notifies you of a situation when the fuel is running out (or even exaggerate things a little).
Typical faults
In the VAZ 2110 car, the fuel sensor is based on a rheostat with a resistor, which is made of nichrome particles. The moving element of the rheostat is lowered into the fuel and moves using a lever and a float.
The second part of the lever is, in fact, an additional contact. If you place it in a certain position, the circuit regulating the process of replenishing with spare fuel will be closed. In the domestic “ten”, the volume of reserve fuel is about 4-6.5 liters.
Alas, despite the importance of a fuel level meter, its quality is far from perfect, which is why car owners often have to deal with sensor malfunctions.
It is important to note that not all breakdowns necessarily require replacement. Sometimes you can get by with a simple tweak that will allow you to return the previous functionality to the pointer.
Typical breakdowns
There are several typical malfunctions that even a beginner can cope with.
- The fuel level indicator suddenly changes its values. Most likely, the contact track has worn out due to the slider. If the wear is not severe, it is enough to simply bend the fasteners of the slider so that it is slightly above the problem area. But when wear is severe, the contact track changes completely.
- The indicator arrow is at a level that is not true. For example, it shows an empty tank even though you just filled up. This will require some adjustment. Disconnect the sensor from the gasoline tank and adjust the indicator. It is enough to move the arrow from the value at which it is stuck to zero. Most often, this measure helps.
- The arrow barely moves and cannot reach the desired position. In such a situation, the tongue bends slightly, which allows you to increase the range of the pointer arrow. It is possible that the contacts on the pointers have broken or come loose. To do this, look under the dashboard and check the condition of the wiring.
- It is possible that the fasteners securing the wires have become loose. They need to be tightened up. If the instrument panel is in good condition, examine the entire wiring path. A short circuit often occurs, causing the measuring device to stop working.
If all the measures taken have not yielded any result, the sensor continues to show complete inoperability, you will have to replace it.
