02/28/2022 21,374 VAZ 2114
Author: Ivan Baranov
Domestic motorists are accustomed to doing most of the technical and repair work on their cars themselves. If you are one of these drivers, then you will most likely be interested in learning how to replace the clutch cable of a VAZ 2114, what is needed for this and how to replace the cable with your own hands. In addition, we will show you a video that will help you with the replacement process if this is your first time.
Car VAZ 2114 [Hide]
Basic faults
The main reasons why cable replacement is required:
- souring (rust and dirt inside);
- break;
- tight movement;
- damage (unraveled).
A breakdown can be detected by the following faults:
- The clutch pedal does not disengage completely and you have to press it several times to return it to its original position.
- The clutch pedal slips or goes to the floor. When driving uphill, the car seems to lack power.
- Extraneous sounds when pressing the pedal.
- The pedal does not return to its original position at all, it just fell to the floor - this indicates a break in the clutch cable.
- A change in pedal travel is a sign that it is time to replace the clutch cable.
Changing the clutch cable on a VAZ-2114 with your own hands
It is possible to replace the clutch cable on a VAZ-2114 at home and you don’t have to go to a car service center, where they will charge a considerable amount of money for repair operations. So, many motorists, as practice shows, carried out the replacement with their own hands. This article will tell you how to perform this procedure, and will also tell you about some of the nuances and subtleties.
Why change the cable?
The VAZ 2114 clutch cable must be replaced when the first signs of its malfunction are detected: the pedal sticks, moves slowly or has completely fallen. Otherwise, the operation of the clutch will be disrupted, and damage to the gearbox and other transmission elements may occur. And this is a more complex repair and completely different costs.
If during disassembly you find that the cable is not damaged, but its movement is nevertheless tight, it is necessary to develop the part. Pour oil into the casing and pull it toward and away from you until the movement weakens.
How to change the clutch cable on a VAZ-2114 with your own hands (video inside)
It is possible to replace the clutch cable on a VAZ-2114 at home and you don’t have to go to a car service center, where they will charge a considerable amount of money for repair operations. So, many motorists, as practice shows, carried out the replacement with their own hands. This article will tell you how to perform this procedure, and will also tell you about some of the nuances and subtleties.
Replacement
For the work we will need a 17 mm wrench, lubricant, a ruler and a new clutch cable.
- Open the hood and disconnect the engine terminals.
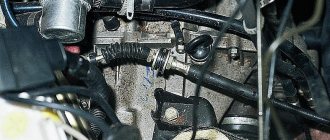
- Unscrew the nuts holding the lower end of the cable using a wrench.
- We pull out the cable and remove it from the clutch fork.
- Let's go to the salon.
- We remove the carpet under the driver's seat.
- We remove the carpet under the pedals.
- We take out the corkscrew ring and pull out the finger holding the cable on the pedal.
- Remove the cable eye from the pedal hook.
- We pull out the cable. To do this, we push it away from us; if it doesn’t go, it means it’s gone sour. We fill in the special liquid and start pulling back and forth. Help from the other side of the hood would not be superfluous, but if there are no volunteers, you can do it on your own.
- Lubricate the mount on the pedal and the new cable with grease, insert the clutch cable in place of the old part.
The cable installation is complete, but that's not all.
Analogs
In addition to the original part, you can find analogues that are recommended for installation on the VAZ-2114. So, what non-original parts can be found on the spare parts market:
- Adriauto 0101 is an Italian manufacturer that offers high-quality clutch cables. The average cost is 1000 rubles.
- ABS K22120 – part made in the Netherlands. High quality and not expensive. The average cost is 1200 rubles.
- TRW GCC 3123 – German spare part. The company is known for its wide range of products for domestic cars, as well as the excellent quality of parts. The price will be 1500 rubles.
Replacement result
After carrying out work to replace the clutch cable, it is necessary to adjust it. The essence of this stage is to change the length of the cable. Place the car on a flat surface. We start the engine and smoothly begin to move away. It is necessary to catch the position of the pedal in which the car begins to move.
Using a special nut, you should select the appropriate parameter: the pedal should move 12.5 - 13.5 cm - the distance from the floor to the pedal. If you need to lower the pedal, then turn the nut counterclockwise, and raise it in the opposite direction. At the end of the work, be sure to tighten the control nut.
To check that the work is being done correctly, we depress the pedal several times, measure its stroke and compare it with the passport values. Got it? So everything is correct! Otherwise, we set it up again.
Clutch pedal adjustment
Periodic adjustment of the VAZ 21014 clutch pedal is carried out for the following reasons:
- When driving on a non-adjustable clutch pedal, subsequent repairs are possible, because exaggerated energy costs for incorrect operation of the mechanism will cause malfunctions of other components of the car.
- Due to improper functioning, the clutch pedal periodically does not function. This leads to the fact that the pressure plate of the unit is forced into “engagement” with the motor flywheel, as a result of which they are subject to accelerated wear.
- If the pedal stroke is insufficient, the vehicle slips, i.e. the required torque of the wheel pair is lost.
To carry out diagnostic work on adjusting the clutch pedal, you need to use an arithmetic ruler to measure the length of the pedal stroke to the floor. If it does not correspond to 16 cm, then adjustments are necessary.
Signs of incorrect operation of the clutch mechanism: there is no possibility of a smooth start from a standstill, movement from a standstill is accompanied by jerks and jolts, when changing gears the transmission makes increased noise, the pedal of the mechanism falls to the lower position. In practice, it turns out this way: if the vehicle began to move from the moment the pedal began to be lowered, then the free play does not correspond to the required value. When the pedal is completely released, the vehicle does not move, which means there is no free movement in the car.
Clutch pedal adjustment:
- Unscrew the nut located under the clutch pedal.
- Tighten the locknut located below until it stops.
- Next, screw in the fasteners located under the clutch pedal.
- We tighten the rubber washer to the clutch fork as far as possible.
- To increase the pedal stroke, you need to screw the fastener onto the tip. To reduce the pedal stroke, you need to unscrew this fastener. The VAZ 2109 clutch pedal is adjusted until the limit of 12-13 cm is reached.
- After completing the pedal adjustment operations, you need to: depress the pedal three times, measure the length of the pedal stroke, adjust the operation until the required stroke length is achieved.
To adjust the hydraulics you need:
- Remove the spring from the mountings of the working cylinder and the clutch fork.
- Adjust the fasteners located on the clutch cylinder rod.
- The recommended free play value is 0.5 cm.
Often, a large pedal stroke depends on the height of its location from the driver's floor, and this creates certain difficulties. To adjust the height, a series of simple plumbing operations and a wrench set to “12” are required:
We find two fasteners on the steering column shaft, one is a thrust screw that limits the height adjustment position, the second is a lock nut that changes the movement of the pedal.
- Unscrew the stop screw.
- We give it rotation until the pedal movement normalizes.
- Screw in the locknut.
If slippage is observed after adjusting the clutch, then the following operations must be performed:
- Remove the stem locknut.
- Move it until there is no free movement.
- Return the rod one full turn.
- Determine whether the clutch has free play.
- Test the operation of the transmission gears. If there is an incomprehensible noise, you need to perform the above operations again.
- Screw in the locknut.
How to replace and adjust the clutch drive cable on a Lada Samara yourself?
When discussing independent car maintenance or repair, every motorist must truly evaluate not only the current situation, but also his capabilities. For example, many people can choose a set of clutch elements for a Lada Samara, but they prefer to entrust its replacement to specialists from a car service center. Changing the cable is another matter - such an operation, provided that you have a minimum of tools and skill, is quite capable of anyone.
When should you change?
Car enthusiasts who believe that replacing the clutch cable of a VAZ 2114 is an extraordinary situation need to be reassured. The part is a consumable item, and its operational wear is not uncommon on cars of this series. There can be several reasons for cable failure:
- Condensation of moisture inside the braid, leading to corrosion.
- Jamming of frayed steel threads inside the cable jacket.
- Poor adjustment and cable breakage.
The service life of this component is difficult to determine - sometimes it functions properly over a mileage of 100 thousand kilometers, and sometimes the cable breaks 10,000 km after installation. In certain cases, Lada Samara clutch drive If you pay attention to specific signs, you can determine in advance the moment to repair the clutch release control unit:
- The clutch does not disengage completely; to return the pedal to its initial position, you have to press it several times.
- When you press the accelerator sharply, the car accelerates slowly, which indicates that the clutch is slipping.
- Extraneous crackling sound when pressing the pedal.
- A complete cable break is characterized by a “fallen” pedal, i.e. it does not return to its original position under any circumstances.
- A changed pedal stroke, when adjustment does not help, indicates that the VAZ 2114 cannot do without replacing the faulty clutch cable.
The appearance of these signs cannot be ignored. Failure to operate the control unit can result in serious damage to the manual transmission and other transmission components. This is a completely different item of financial expenses, for which you will have to blame yourself.
Experienced car enthusiasts always carry a spare cable in the trunk, since it takes up little space. This option is very justified, because amateur road repairs are not always justified.
How to replace the clutch cable on a VAZ 2114 without the help of a car service?
Anyone who has already changed the clutch release cable on a Lada 2110 knows that to successfully complete the job, it is not at all necessary to have a special room and a super set of keys. Repairs can be done even outdoors when there is no precipitation. The technology involves the use of:
- Two keys “17”.
- Pliers.
- Grease.
- Ruler for setting.
- Knitted gloves.
You may need to spray WD-40 on areas that have been damaged by corrosion. Litol or graphite lubricant are suitable as grease lubricants.
Dismantling the cable mechanism
As usual, you should first disconnect the negative terminal to prevent a short circuit during the operation. For convenience, it is advisable to remove the air filter. Further actions are performed in the following sequence:
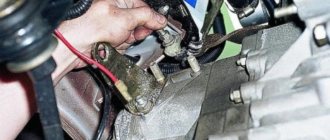
- Using two 17mm wrenches, loosen the nuts securing the cable to the bracket.
- Lift the cable by hand and remove it from the mounting hole.
- Disconnect the cable guide from the clutch fork by hand.
- Clear the area around the clutch pedal from the carpet and remove the locking bracket on the pedal bracket pin using pliers.
- Disconnect the end of the cable drive from the pedal bracket.
- Push the cable into the engine compartment.
- Remove the rubber cushion with the cable from the engine compartment side.
When replacing the clutch cable on a VAZ 2114 car, you should check the condition of the bushing and replace it if necessary.
Installing a new cable
Before installation, the new cable in open areas must be treated with lubricant (Litol), and then disperse it inside the braid with forward movements. The installation process of a new part is carried out according to the following points:
- Insert the cable through the hole into the interior.
- Install the cable end onto the pedal bracket pin and secure it with the bracket.
- In the engine compartment, place the cable lead on the release fork.
- Install the cable into the hole in the bracket and secure it with nuts.
The process of changing the transmission control element takes 30-40 minutes in the most severe case. Upon completion of installation, the system must be adjusted.
Algorithm of actions
To understand how to change the clutch cable on a VAZ 2114, you need to remember the following algorithm:
- Open the hood.
- Remove the negative terminal from the battery.
- Find the cable under the hood.
- Using a 17 key, unscrew the fastenings of the element.
- Remove the part from the clutch fork and bracket.
- Move into the car interior.
- Remove the driver's foot mat and lift the carpet.
- Remove the cable eye from the pedal mount. The locking bracket, which allows you to release the element, sometimes causes difficulties for some VAZ 2114 owners.
- Pull the element out from under the hood into the interior. It is not advisable to remove it from the engine compartment, as there is a risk of damage to the wiring and other parts of the machine.
- Disassemble the housing and remove the cable.
- Place the new part in the housing and assemble.
- Perform the previously described steps in reverse order.
- Adjust the cable tension. It is necessary to ensure free movement of the pedal. But it should not be pressed too tightly or too lightly.
You can replace the part yourself. It is recommended to work in a garage, especially in the cold season. It is not necessary to contact a car service to check and replace the element. This may only be necessary as a last resort if the cause of unusual clutch behavior cannot be found. Perhaps it was not the cable that failed, but other parts of the mechanism that broke.
ABOUT THE CLUTCH DEVICE
Its design on this car is similar to mechanisms 2113 and 2115. It is made of a dry, single-disc mechanism. It is produced with a device that dampens torsional vibrations, and also has a pressure spring. The VAZ 2114 clutch device is shown in the figure.
Clutch components
The VAZ 2114 clutch consists of (see picture):
- Cable with a casing;
- Cable tip (lower);
- Adjusting nut;
- Housing for attaching the shell to the gearbox;
- Separating washers;
- Nut for adjustments;
- Rubber protective shell;
- Cable lead;
- Shutdown plug;
- Basket;
- Bolts securing the basket to the flywheel;
- Pressure disk;
- Flywheel;
- Driven disk;
- Gearbox input shaft;
- Shield;
- casing;
- Spring (pressure);
- "Squeeze";
- Pad;
- Release housing;
- Cable end;
- Cable thrust washer;
- Cable fastening unit;
- Pedal axle;
- Release spring;
- Off pedal.
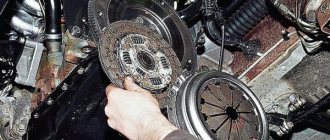
As can be seen from the mechanism diagram, there are two working units, one of them will be the master, and the second will be the slave. The second includes a disk with linings riveted on both sides and damper springs installed. It is installed and moves along the splines that are present on all gearbox input shafts. When the pedal is pressed, the driven disk is pressed against the flywheel by the pressure disk.
The drive unit includes a pressure disc with a clutch housing, which is attached to the flywheel with six bolts. To center it, there are pins on the flywheel and guide holes in the housing. The clutch has a backlash-free design and is operated by a cable.
To turn it off, a clutch drive is installed, which operates by pressing the pedal. The cable is hingedly attached to it with its upper tip. The lower end of the cable also has a hinged connection with the shutdown fork. With its movement, the “cable” turns it, and it moves the “releaser”.


