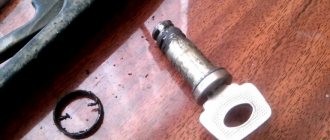
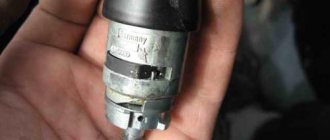
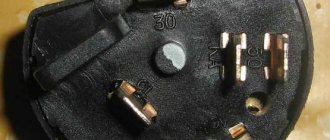
The lock cylinder (lock cylinder) is a type of lock security mechanism, in the form of a cylinder, the working part of which can be rotated in the body only when a key is inserted into the cylinder hole. The uninterrupted operation of the lock cylinder protects the car from unauthorized entry and protects the owner’s property. Therefore, a malfunction of the lock cylinder is a serious concern that requires an immediate solution, and many car enthusiasts are seriously thinking about how to change the lock cylinder of a VAZ 2114 with their own hands.
Reasons for replacing the VAZ 2114 lock cylinder
The mechanism is silent, but if an extraneous sound appears when opening the door element, the device will have to be dismantled or rebuilt. Replacing the front door lock cylinder on a VAZ 2114 is required for a number of reasons:
- a sharp drop in temperature;
- failure of the locking ring;
- loss of the fixing column;
- destruction of the plastic rod cap;
- wear of internal pins and teeth.
In winter, the locking devices freeze, causing the key to turn with difficulty or not move. If a person makes an effort, then there is a risk of breaking the opening element in the core of the lock.
When individual parts wear out, they will cling to each other, blocking the rotation function. The main factor indicating a repair is turning the key.
Trunk lock repair
As a rule, the trunk lock on VAZ cars lasts longer than door locks, which is caused by fewer openings/closings in an equal period of time. But, due to complete wear and tear (or loss of the keys), it still has to be replaced. In most cases, the lock mechanism itself, as well as its body, remains fully operational - only the cylinder into which the keys are directly inserted wears out. It will then need to be replaced with a new one.
To do this you will need:
- crosshead screwdriver;
- slotted screwdriver;
- a set of keys.
The trunk lock cylinder of a VAZ 2114 is replaced as follows:
- Open the trunk.
- Remove the plastic rivets (“hedgehogs”) holding the plastic socket around the lock by picking them up with a slotted screwdriver or a special extractor.
- Remove the panel.
- Unscrew the fasteners holding the lock.
- Remove the lock.
- Unscrew the fastening screws holding the cylinder in the lock and remove it.
- Install a new cylinder inside the lock.
Removing the rivets
Unscrew the fasteners
Reassembling the lock and installing it in place is performed in exactly the same order, but in reverse order.
New lock cylinders are sold with keys inserted into the keyhole. You should not remove them before the cylinder is installed inside the lock, since this threatens its individual elements falling out, which will be extremely difficult to install in place.
After the VAZ 2114 lock cylinder has been replaced and the lock itself has been installed in place, you should carefully inspect its counterpart, called the latch (the lock tongue goes behind it when the trunk is locked). In most cases, there is no need to replace the retainer because it has no moving parts and has a very long service life.
Replacement may only be necessary if a crack appears on the body of the clamp (it is made of silumin). The replacement process itself is simple and consists of unscrewing the old fastener and installing a new device.
Adjusting screws for the trunk lock of the VAZ 2114
The only thing you will need to pay attention to is the correct setting of the lock. To check its quality, you just need to close the trunk lid and see how it locks. If locking does not occur, it is too tight, or, on the contrary, a noticeable play is felt, then the lock is not adjusted.
To configure, you need:
- loosen a pair of fastening bolts of the clamp;
- close the trunk (at this moment the latch itself will adjust to the location of the lock tongue);
- open the trunk;
- tighten the retainer mounting bolts.
If after the adjustment procedure the trunk begins to lock even worse, then most likely the mating part of the locking element is skewed. It is enough to unscrew the fasteners, place it straight without moving the lock itself, tighten the bolts - and the trunk will be easy to lock.
Recommendations
Reassembling and lubricating individual parts will not work if the fragments are heavily worn. It is better to remove the cylinder from the core and install a new one. Recommendations for replacing the VAZ 2114 door lock:
- Partial repairs or lubrication will only temporarily restore life to the closing mechanism. If problems arise, it is better to replace the entire cylinder.
- After installation, it is necessary to periodically lubricate the mechanism. Experienced motorists use silicone substances for this.
- The repair procedure is carried out in a well-lit room at a comfortable temperature.
- To change the element, you will need a set of screwdrivers, pliers and lubricant.
- Sometimes the springs have to be replaced along with the cylinder. They are purchased separately.
Useful video
Published December 25, 2019
The lock cylinder (lock cylinder) is a type of lock security mechanism, in the form of a cylinder, the working part of which can be rotated in the body only when a key is inserted into the cylinder hole. The uninterrupted operation of the lock cylinder protects the car from unauthorized entry and protects the owner’s property. Therefore, a malfunction of the lock cylinder is a serious concern that requires an immediate solution, and many car enthusiasts are seriously thinking about how to change the lock cylinder of a VAZ 2114 with their own hands.
Withdrawal procedure
Depending on the reason, a complete or partial replacement is performed. It is not recommended for the average person to engage in reassembly, since there are too many nuances in this process, but almost anyone can replace the mechanism. Step-by-step instruction:
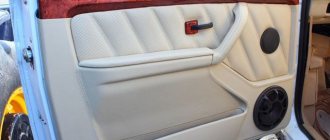
- Three screws are unscrewed. They are located on the inside of the handle. To do this, use a Phillips screwdriver to remove the cover.
- The front trigger glass position switch is removed along with the wiring harness block. To do this, the wires are first disconnected.
- The plug on the armrest handle is removed, the element is picked up with a thin corner of a screwdriver.
- Unscrew the 2 screws on the handle that hold the inner panel.
- The plastic clips are pressed out to remove the lining.
- 6 pistons are removed to remove the door card.
- The external fastenings are removed, the nuts are unscrewed with an 8mm wrench.
The last action is to gain access to cravings.
How to replace all door locks, rods and cylinders on a VAZ 2113-VAZ 2115?
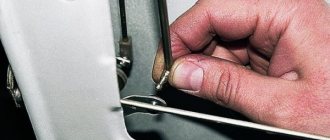
Removal: 1) First, let's start with the most important thing, without this you won't be able to replace the locks, but in general you won't be able to start the operation because all the work to replace all the things that are listed in the title is carried out with the trim removed from the door, it is removed quite easily and in more detail about how to do this, if you don’t already know, read the article: “Replacing a door on a VAZ” in paragraphs 1-8, and after the trim is removed, proceed to removal, let’s immediately note a couple of facts so that to replace the cylinder, the rods will need to be disconnected from it, but to replace the rods, you don’t need to remove or disconnect anything, the same with the door locks, the rods from them will also need to be disconnected and only after that unscrew the screws that secure the locks, so first Let's start with the rods themselves and explain how they are removed, firstly, you can start disconnecting them from absolutely any side and from any place, for example, start disconnecting the rod first from the internal lock as shown in photos 1 and 2 (Photo 1 shows disconnecting with a locking screwdriver the washer that holds the rod, and already in photo 2 the disconnection from the internal lock of the rod itself is shown), then using a screwdriver and your hands, disconnect the other rods and continue the entire operation until the rods on both sides are disconnected, as soon as they are disconnected on both sides , completely remove them from the car (there are several rods in the car and each one goes to the locks and there is even a rod to the cylinder, they are disconnected, as you already understood, with a screwdriver and your hands, in the beginning just disconnect all the lock washers or plastic clamps and pull them by hand by the rod, disconnect it from the lock or from the cylinder, etc., but the rod is not always secured with the help of clamps, sometimes it is hooked at one end to something, in this case, also disconnect its end with a screwdriver and then remove it completely rod), thus remove all rods from the car.
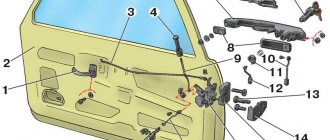
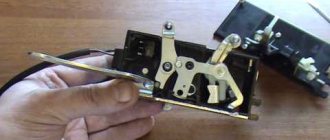
2) After the rods are removed or disconnected from those things that you are going to replace, proceed to removing these things themselves, first we will look at the removal of both door locks, the internal lock and the external one are removed together, that is, if you decide to change the external lock, then you the internal one will have to be touched (You don’t even have to replace the internal lock with a new one, but you’ll just have to tinker with it even if you only need to replace the external one) and vice versa, everything is the same, to remove the external lock you will need to loosen the two screws that it is secured (Please note, loosen, the impact screwdriver does not serve anything else, we recommend that you completely unscrew the screws with a regular screwdriver) these screws are also indicated by arrows in photo 1, as soon as the screws are unscrewed, go further and pull the lock, remove it from car (see photo 2) if you also need to replace the internal lock, then in this case remove the door opening handle (read how to do this in the article: “Replacing a window lifter on a car”, everything is described in the paragraphs) and then into the internal climb up part of the door and use a screwdriver and your hands to disconnect the two rods (Those rods that you will need to disconnect from the internal lock are shown in the photo below under number 1), as soon as the rods are disconnected, pull out the internal lock and as soon as it is removed, proceed to disassembling it, to do this, remove the lock washer from it using a screwdriver that secures the internal drive rod (see. photo 3, on it the lock washer is indicated by an arrow) and then disconnect the rod itself from the lock (see photo 4), disconnect the other rod in almost the same way, it is attached to the internal lock by a plastic retainer, you just need to move it and the rod can then be safely disconnected from the lock; see the video clip at the end of the article for more details.
How to remove cravings
To remove this piece, you will need an impact screwdriver and a size 8 wrench. The piece is attached to the internal locking mechanism and the lock switch. Algorithm of actions:
- The internal lock of the outer handle rod is completely disconnected.
- The handle is removed along with the rods.
- The pin is removed from the end of the rods.
- The plastic tip is removed from the core of the cylinder device.
- The return spring is removed. The old larva is being removed.
Usually the rods are fixed with plastic hinges, so they can be disconnected with a flat-head screwdriver.
Replacement of all door locks, rods and cylinders on VAZ 2113, VAZ 2114, VAZ 2115
Welcome! Door - it consists of a cylinder, a rod, an external lock, an internal lock, etc., thanks to which the door of the car is held while moving, preventing it from opening; over time, the locks or the cylinder itself become unusable and when inserted the key into the cylinder, turning it in it, the door may not open or close, this will indicate that either the cylinder, or the rod, or the internal lock has become unusable and it’s time to change them, this is not very difficult to do and can be done Even an ordinary car enthusiast can do this if he does everything carefully and follows the instructions that we described in this article.
Note! To replace the lock on a car door, you will need to take from the tools: an impact screwdriver, as well as a regular screwdriver, you will also need grease, and the new parts themselves!
Summary:
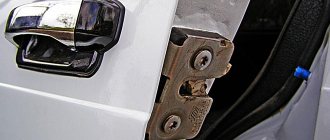
Where are all the door locks, rods and cylinders located? As you already understood, there are only two locks, one of them is internal, which is located inside the door and is hidden by the trim, and the other is external, you see it constantly when you open the door and for clarity in the photo below it is also indicated by an arrow, in addition to this, the larva is also present thanks to which opens the internal lock and there is also a thrust that goes from the cylinder to this lock, by the way, if the thrust suddenly jumps off the cylinder, then you will no longer open the door and therefore you will have to remove the trim from the door on which the cylinder is faulty or replace it with a new one (If the old one is deformed) or simply put the rod on the larva as it was put on before (This is done with the help of your hands) and everything will start working for you again.
When do you need to change all door locks, rods and cylinders? If any of the things listed in the question itself become unusable, then your door will either stop opening (This may be due to a malfunction of the locks), or it will open, but by inserting the key into the cylinder, you will be able to close and open the car too (This either the rod has jumped off the cylinder, or the cylinder itself has worn out), it may also be that the key simply does not turn (the lock cylinder itself is definitely to blame for this and it must be replaced).
Installing a new part
The removal and assembly algorithm is the same, although the instructions for installing the cylinder mechanism have its own nuances. Before inserting a new cylinder into the core, the part is lubricated with a silicone substance and only then inserted into the handle. Further algorithm of actions:
- The return spring is inserted next to the cylinder.
- The functionality of the key is checked. It should turn easily in all positions.
- A pin is installed on the tip of the rotary rod. Connection is being made.
- The inner and outer panels are screwed on, the handles are fixed, and the plug is returned to its place.
- The main three screws are tightened from the inside.
You won’t have to change the lock cylinder for a long time if you carefully use the opening mechanism.
Recommendations from experienced car mechanics
There are several tips that you need to follow when handling the VAZ lock cylinder and when replacing it. Experts recommend:
- If the lock is jammed and has problems opening, you need to choose the time to replace it. Lubricating the mechanism or repairing it are only temporary measures that can delay the failure of the locking device for several months.
- To avoid having to replace it again after a year, it is necessary to lubricate regularly. To do this, you need to use silicone-based products.
- Along with the cylinder, you will have to change the springs. Please note that they must be purchased separately.
- Before removing the lock cylinder from the packaging (new) or before dismantling it, you must insert the key into it. This will help hold the pins in place. If this is not done, they will fall out, and the work contractor will have to collect them from the floor of the box for a long time.
- The service life of the lock depends on the user. If you carry out preventive maintenance in a timely manner and work with it carefully, the mechanism will last longer.
To replace the lock, you will need to have a set of screwdrivers, pliers, and silicone grease on hand. But the most important thing is to purchase a complete cylinder kit.
Try to choose high-quality spare parts, since cheap locks from China (about 150 rubles each) usually do not survive the winter season. It is best to purchase domestically produced kits (AvtoVAZ or DAAZ), which are more expensive, but will also perform their functions for several years.
The procedure for removing the outer door handle on a VAZ 2106
First, perform the following procedure: Removing the trim from the front door.
Next we need a head with an extension. The handle is secured from the inside with two nuts. First, unscrew its left side:
The second nut is in a more difficult to reach place, so you will have to gain access to it first. To do this, you need to unscrew the three bolts securing the door lock, as shown in the photo below:
Now from the inside we move the lock mechanism a little to the side so that we can put the head on the second nut securing the door handle:
After which, on the reverse (outer) side, the handle will be released, but will still be held on by the rod, which is attached to the lock cylinder.
To disconnect the door handle, you need to pull with medium force for up to three times until the rod comes off the hook of the cylinder:
That's all done, now the handle is disconnected from the VAZ 2106 door and is ready for replacement.
Installing the new one is done in reverse order. The price of a new such part is 170 rubles on average in all auto parts stores.
Door lock device VAZ 21099
The auto parts store for VAZ sells locks with cylinders and the cylinders themselves separately. There are no complaints about their quality. In some cases, drivers change the entire lock. This repair takes longer than replacing the cylinder.
It should be remembered that the key is already inserted into the purchased cylinder. It cannot be removed. Otherwise the mechanism will fall apart. It will take a lot of time to put it back together. A door lock consists of three main elements:
- external door handle with cylinder;
- internal lock mechanism;
- internal door handle with cylinder.
If your car has electric windows, then before replacing the cylinder, you need to remove the terminals from the battery.
To replace the larva you will need:
- Screwdriver Set;
- a set of small keys or heads;
- small hammer or awl;
- pliers;
- new door lock cylinder;
- lubricant
How to replace a lock cylinder
Very often it is the lock cylinder that fails, so we will look below in more detail about how to replace it. To do this, you will need a thin wire or needle and a flat-head screwdriver.
First of all, we remove the spring, which throws the key in the lock when opening. Just pry it off with a screwdriver and remove it, first remembering its position so that you can put it back in the same way:
Now we take a thin wire and with its end we squeeze out the cylinder fixation rod, as shown in the photo below:
After which the upper ring is removed and the larva is removed from the reverse side:
The cylinders are replaced in pairs, on both the left and right doors, and also at the same time as the trunk lock, so that you have just one key for everything! Otherwise, you will have to carry several keys with you, which is not very convenient. The price of the set is 300 rubles maximum, so your wallet won’t be too empty.
Features of door adjustment
The adjustment work involves changing the height of the rods.
The rods are attached using plastic tips that have a ball joint inside. Correct adjustment of the door lock is carried out by pulling out the groove. Next, you will need to twist slightly counterclockwise or clockwise. The lock is adjustable by selecting the ideal length. So please be patient. After the repair, you will have to adjust the sash slamming mechanism. By the time you move on to setting it up, you can already return the trim back to the door, since the work will be carried out with the latch on the body. Move the clamp up or down until you achieve the perfect result. The door should latch easily, without noise or effort. This adjustment can be made without replacing the lock cylinder if you are not satisfied with the need to apply force when closing.
