How to remove the trim and the side mirrors themselves of a VAZ 2190
- Remove the mirror element. To do this, carefully bend it with your fingers so that you can see the latches that are located along the entire contour of the mirror. You need to bend 5 pieces.
- Remove the mirror covers. To do this, we snap off the latches that are visible from the side of the removed mirror; another latch is visible when bending the mirror towards the stack.
Detailed and universal method
Universal method
In the car interior, you need to unclip the plastic cover that covers the mirror mounting screws. After removing the cover, unscrew the three screws that hold the mirror in place and remove it. After this, you need to carefully remove the rubber gaskets -
If the rubber gaskets are damaged, it will be very difficult to buy new ones; they are rarely sold separately.
Now you need to unscrew the two screws securing the mirror adjustment joystick. Disassembling the joysticks themselves is a simple procedure; you just need to carefully remember the position of the cables and the color, since different colors are responsible for their adjustment. Next, you need to remove the three screws that are located on the lower plastic corner - it is most susceptible to damage during vehicle operation. After that you need to remove it too. How to remove the mirror element has already been described above. After removing the mirror element, you need to unscrew the four screws and remove everything else.
Place on silicone glue
The easiest way, of course, is to ask a mechanic you know or send the car to a car service center if you need to replace the mirror or paint it. But most owners are accustomed to repairing their car themselves - after all, this is a significant saving of money.
How to remove Lada Granta mirrors
You will need : flat-blade and Phillips-blade screwdrivers, pliers and remove the door trim.
Depending on the Grant configuration, rear view mirrors can be installed with a mechanical or electric drive.
Removing power mirrors:
- Remove the mirror adjuster retaining bracket.
- Remove the 3 screws securing the mirror to the door frame.
- Remove the mirror.
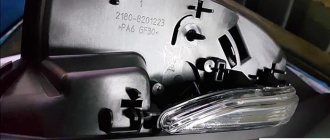
- The photo shows the Granta side mirror assembled.
Installation of mirrors is carried out in reverse order.
Removing power mirrors : First you need to disconnect the negative terminal of the battery, and then:
- Disconnect the connector from the power mirror wires.
- Remove the 3 screws securing the mirror to the door frame.
- Remove the exterior mirror Grant assembly.
By the way, do you know how to paint the mirror caps in the body color and install heated mirrors?
Connection
Connector pinout
Connecting the central lock
. We use a circuit of two relays so as not to go under the panel to the central locking unit:
Connecting heated mirrors
(to the wiring harness under the driver's threshold)
thin gray wire
Connecting mirror turn signals
- Option 1: Pull the wire from the direction indicator on the fender.
- Option 2: To the wiring harness under the driver's threshold (blue - left turn signal; blue-white - right).
We transfer the wires from the power windows from the standard buttons to a new block with a joystick.
For Lada Kalina and Granta with heated and electric side mirrors (without direction indicators):
The new mirror has a chip with six wires, but the old one has only five. We pull the sixth contact, which is used to operate the turn signals.
The process of installing exterior mirrors from a liftback on a Lada Granta sedan is also shown in the video:
Are you considering replacing old mirrors with new ones with turn signals?
Let us remind you that we previously talked about how to make lights in the rear-view mirrors on a LADA.
Keywords: side mirrors Lada Kalina | side mirrors of Lada Granta | Lada Granta accessories | Lada Kalina accessories | turn signals Lada Kalina | turn signals Lada Granta | heating for Lada Granta | heating Lada Kalina
6
2
Found an error? Select it and press Ctrl+Enter..
AvtoVAZ continues to hire specialists for its engineering service in 2022
Video review of the new Lada Granta and its configurations
Video review of how the standard Lada Vesta audio system works
Diagnostics, checking the rear suspension of Lada XRAY
Replacing the mirror element on Grant
Many drivers, out of ignorance, change the entire mirror assembly, although in most cases only the mirror element is damaged. And it would be quite ridiculous to pay about 1000 rubles for a complete mirror if you can get by with 300 rubles per element.
The design of the rear view mirrors on Grant, meaning external ones, is the same as on Kalina. That is why the entire process of this repair will be identical. Let's look at the main reasons why this part may be damaged:
- side impact in an accident
- hitting the mirrors when driving on a too narrow section of the road
- other damage not related to the operation of the car
Bottom line
In general, these are the main reasons why the engine may not start, or rather there are many more reasons, but these are the main ones that you can fix with your own hands.
I will say again that you can only try to do something if you at least approximately know what and how to do.
You don’t need to be an extra-class master; you must have some experience in metal tinkering behind your shoulders, straight arms and a good mind.
If you have all these components, you will succeed, and in the event of a minor breakdown you will be able to save on repairs; after all, it’s a pity to pay your hard-earned money to replace fuses or something that you can do yourself.
How to remove an old mirror element
Everything here is done, although not complicated, but quite neatly. If you rush and make excessive efforts, you can damage the internal fasteners of the element, and then you will definitely have to buy the entire part assembled.
First, we remove the mirror assembly from the car, and only after that can we begin the repair. Then we move one side of the mirror element as far as possible to the side so that you can get inside this structure with a screwdriver.
Now, using a screwdriver or by hand, if you were able to insert it there, we move the element latches to the side, as is clearly shown in the photo below.
The latches are located along the entire circumference, so you need to unlatch them from all sides. After which this part can be easily removed with minimal effort on your part.
To see what the design of this fastener looks like, look at the picture below.
In addition to the hooks (clamps, latches), there are 4 more guides that must match the holes in the case when installing a new element. The new one is somewhat easier to install than it is to remove, so there shouldn’t be any special problems with installation. The main thing is not to use excessive force when fixing the element, and try to press the element itself as evenly as possible so that it does not break.
The price of a new such part for Grant is about 300 rubles, and as mentioned above, it is much cheaper than buying an assembled mirror. There are a few more points that relate to replacing the mirror element:
- the design can be electrically driven
- the element may be heated
Due to this, certain issues may arise that have not been described here. This article examined the simplest type of mirror element.
DIY car repair and maintenance
The exterior rear view mirror on the Lada Kalina is designed and dismantled very simply and conveniently, like everything on this model of a domestic car (in my opinion, the best in terms of price-quality ratio).
This particular mirror is suitable for both Tens and Priora. As we can see in the photo above, the mirror mounting principle is the same as on other Ladas, with one small difference. The side mirror is attached to three self-tapping screws using a shaped screwdriver (see photo above).
The side mirror itself (in this case, simple, without a turn signal repeater, with manual adjustment) consists of two parts. The main part (the mirror itself) and the protective cover. Connect these parts carefully and accurately by aligning the grooves on the mirror and the inserts on the lid and press it. It should click into place.
Next, lean the mirror on the outside of the door so that all three guides and the cable connection fall into place (photo above). Then, screw in and tighten the three screws. Make sure that the mirror on the outside of the door is level and properly positioned.
And now, that same “one small difference” - instead of the Zhiguli plastic nut that we screw onto the connection of the control cables, here it is attached to the same Zhiguli corkscrew, which on the classics secures the door lock cylinder. And finally, put on the plastic panel so that the adjustment lever fits into the rubber frame, lean the panel against the two guides in the corresponding holes and press it.
Mirror for Kalina, price 3000 rubles (with mechanical adjustment and without repeater)
Have you decided to install heated mirrors or paint their trims in body color? The first step is to disassemble the side mirror. The principle of disassembling the mirrors of Lada Granta, Lada Kalina 2 and Lada Priora is the same and can be done in several ways.
To remove the rear view mirror covers, it is not necessary to remove the mirror element. To do this you will have to:
- fold the side mirror and unclick the first lock of the trim (only for Lada Kalina 2 and Lada Granta).
- Turn the mirror element to the side as far as possible, insert a screwdriver into the resulting slot and unclip the 4 clips of the cover.
- Separate the side mirror trim from the housing.
The process is shown in the video:
https://youtube.com/watch?v=XhsWGy3pONg
If there is a need to remove the mirror element, then you should:
- tilt the mirror element to the side.
- Unclip the latches in a circle using a screwdriver.
The process is shown in the video:
How to disassemble a car mirror
There are many reasons for disassembling a car side mirror. This may be a desire to paint it, or to put it in order after it was caught by some reckless driver. How to disassemble a car mirror, and before that, how to quickly and easily remove it, is of interest to many car enthusiasts. Due to inept movements, a car mirror can become completely unusable and then it will be necessary to purchase a new one, and as a result, the mirror will be installed in a car service center.
But there are many brands and, moreover, models of cars, as well as mirrors for them. There are also many types of mirrors - electrically driven, folding, with turning elements, and so on. The most important thing is how to remove it so as not to damage it. Below are general steps to disassemble a car side mirror.
How to remove the side mirror of a Lada Granta
Side rear view mirrors are an integral element of the design of any vehicle. They allow better control of the road situation, promote traffic safety, and optimize the aerodynamics of the body.
Some mirrors are additionally equipped with direction indicators (read the instructions for how to replace them), this statement also applies to the popular domestic car Lada Granta. The need to remove mirrors may be due to the following factors:
- Mechanical impact that caused the destruction of the housing.
- A crack or other defect on the mirror element. (Instructions for replacing the mirror element)
- Burnt spiral of heated mirrors or other damage to the electrical part.
In general, the operation of removing a mirror does not present any particular difficulties; it can be done on your own with minimal waste of time, so there is no need to turn to professionals.
To watch online, click on the video ⤵
Lexus mirror repeaters Grants are the BOMB! More details
Painting mirrors Lada Kalina. More details
Lada Granta - installation of mirror covers. More details
Mirror Lada Granta VAZ 2191. Replacing the cladding and mirror element on mirror 2191 electrician. More details
Replacing the mirror element on the exterior rear view mirror of Kalina, Granta and Priora Read more
GRANTA FL — WE INSTALL A NEW STEERING STEERING, MIRROR COVERS, SPACERS (lada granta FL/granta 2019) More details
Replacing the side rear view mirror for the Lada Granta (Granta) 2017 Read more
Mirrors Lada GRANT VAZ 2191 cable. Review 3. Install the turn signal, change the trim. More details
Mirrors Kalina, Granta, Datsun Model range of exterior rear view mirrors VAZ 1118, VAZ 2191. Read more
Lada Kalina. Luxury mirrors with repeaters from Liftback. Refinement of wiring Read more
Lada Kalina replacing the glass in the side mirror. More details
How to install SE mirrors on a Lada Granta WITH YOUR OWN HANDS More details
Granta Liftback mirrors with full power accessories. Unboxing, first look Read more
How to properly remove the mirror trims (cladding) of the Priora, Granta. We disassemble mirrors Read more
INSTALLING HEATED MIRRORS ON THE LADA GRANT BY YOURSELF Read more
Solution to the problem of whistling mirrors Granta Liftback for 5 rubles and rear window seals from Kalina Read more
Granta Liftback - (2-part). Installing repeaters in mirrors without repeaters. More details
Mirrors VAZ 2191 GRANT cable drive. Review 2. Replacement of cladding and mirror element. More details
Heated mirrors Lada Granta detailed installation Read more
Removing the door trim
To gain access to the elements that fix the mirror, you first need to remove the door trim.
The sequence of actions is as follows:
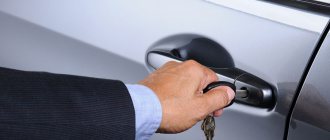
- Removing the key blocking the lock.
- Removing the plugs.
- Sequentially unscrew the screws and screws holding the upholstery.
- To remove the upholstery, you need to insert a flat-head screwdriver wrapped in electrical tape into the groove between the upholstery and the door panel ( but it’s better to use a special device ). The clamps provide some resistance, but significant force during dismantling is unacceptable.
- The rods of the locking mechanism are removed, the upholstery is moved back to a distance limited by the length of the wires supplying the lifts.
- The wiring is carefully removed, after which the door trim is also dismantled.
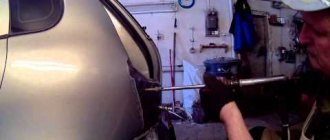
Removing the mirror
The procedure after removing the upholstery is as follows:
- Using pliers, carefully remove the locking bracket, which limits the mobility of the hinge.
- Using a Phillips screwdriver, remove the screws that secure the mirror to the door structure.
- The mirror is removed, all cables and hinge mechanisms are routed through a hole located in the outer door panel.
If we are talking about a mechanically controlled mirror, with automatic control, then it may additionally be necessary to remove the wires that provide the drive with electrical energy.
These wires are fixed in blocks, so disconnecting them is not difficult.
Installing a new mirror occurs in the reverse order of installing door trim.
The main thing is to control the correct connection of the wires in order to maintain the functionality of all electronic systems of the vehicle, direction indicators and heating
DIY car repair and maintenance
The outside rear view mirror on the Lada Kalina is designed and dismantled very simply and conveniently, like everything on this model of a domestic car (in my opinion, the best in terms of price-quality ratio). This particular mirror is suitable for both Tens and Priora. As we can see in the photo above, the mirror mounting principle is the same as on other Ladas, with one small difference. The side mirror is attached to three self-tapping screws using a shaped screwdriver (see photo above).
The side mirror itself (in this case, simple, without a turn signal repeater, with manual adjustment) consists of two parts. The main part (the mirror itself) and the protective cover. Connect these parts carefully and accurately by aligning the grooves on the mirror and the inserts on the lid and press it. It should click into place.
Next, lean the mirror on the outside of the door so that all three guides and the cable connection fall into place (photo above). Then, screw in and tighten the three screws. Make sure that the mirror on the outside of the door is level and properly positioned.
And now, that same “one small difference” - instead of the Zhiguli plastic nut that we screw onto the connection of the control cables, here it is attached to the same Zhiguli corkscrew, which on the classics secures the door lock cylinder. And finally, put on the plastic panel so that the adjustment lever fits into the rubber frame, lean the panel against the two guides in the corresponding holes and press it.
Mirror for Kalina, price 3000 rubles (with mechanical adjustment and without repeater)
Have you decided to install heated mirrors or paint their trims in body color? The first step is to disassemble the side mirror. The principle of disassembling the mirrors of Lada Granta, Lada Kalina 2 and Lada Priora is the same and can be done in several ways.
How to remove an old mirror element
Everything here is done, although not complicated, but quite neatly. If you rush and make excessive efforts, you can damage the internal fasteners of the element, and then you will definitely have to buy the entire part assembled.
First, we remove the mirror assembly from the car, and only after that can we begin the repair. Then we move one side of the mirror element as far as possible to the side so that you can get inside this structure with a screwdriver.
Now, using a screwdriver or by hand, if you were able to insert it there, we move the element latches to the side, as is clearly shown in the photo below.
The latches are located along the entire circumference, so you need to unlatch them from all sides. After which this part can be easily removed with minimal effort on your part.
To see what the design of this fastener looks like, look at the picture below.
In addition to the hooks (clamps, latches), there are 4 more guides that must match the holes in the case when installing a new element. The new one is somewhat easier to install than it is to remove, so there shouldn’t be any special problems with installation. The main thing is not to use excessive force when fixing the element, and try to press the element itself as evenly as possible so that it does not break.
The price of a new such part for Grant is about 300 rubles, and as mentioned above, it is much cheaper than buying an assembled mirror. There are a few more points that relate to replacing the mirror element:
- the design can be electrically driven
- the element may be heated
Due to this, certain issues may arise that have not been described here. This article examined the simplest type of mirror element.
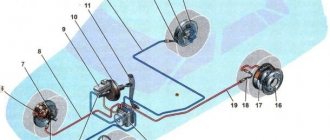
Wiring diagram Grants
Wiring diagram of the front wiring harness of Lada Granta (VAZ 2190) This article provides information on connecting electrical equipment located in the front of the car. (lights, sound signal, connection of generator and starter, washer motor, cooling system fan, etc.) The harness is connected through plugs 9,10,11 to the instrument panel harness - 1,2.
Fig. 1 Electrical diagram of the front wiring harness of Lada Granta 2190 In the diagram, each wire is marked. The first number indicates which element the wire goes to, the second to which contact. Names of elements for the electrical circuit according to Fig. 1: 1.3 - car headlights; 2 — washer motor; 4 - starter; 5 - battery; 6 - power fuse block (located in the engine compartment - see item 10 in the article “Underhood of Lada Granta”); 7 - generator; 8 — sound signal; 9,10,11 - to the instrument panel block (see article “Instrument panel wiring diagram”); 12 — reverse lamp switch; 3 - electric fan of the cooling system (installed on the radiator in the engine compartment) Electrical diagram of the rear wiring harness of the Lada Granta VAZ 2190 (tail lights, license plate lights, fuel pump, etc.) The article provides an electrical diagram of the rear wiring harness, which is responsible for the equipment located on the sides and in the back of a Lada Granta car. These include lighting devices, light switches and a fuel pump module. The wiring harness is connected to the door harnesses and the instrument panel harness.
Fig. 1 Diagram of the rear wiring harness of the Lada Granta. The diagram has wire markings. The first symbol in the marking indicates which element the wire goes to, the second symbol, separated by a fraction, indicates which contact of the element. The following is the name of the circuit elements: 1,2 - rear wiring harness block to the instrument panel wiring harness block; 3 — right side direction indicator; 4 — left side direction indicator; 5 — handbrake lever position sensor; 6 — rear window heating element; 7 — interior lamp; 8 — switch in the driver’s seat belt; 9 — lighting in the trunk; 10 — electric fuel pump module; 11 — right lamp; 12 — electric motor for opening the trunk; 13 — interior lamp switch; 14 — additional LED brake light; 15 — left lamp; 16 — block of the rear wiring harness to the block of the wiring harness of the rear left door (wires for the speaker - brown-blue and blue-white); 17 — block of the rear wiring harness to the block of the wiring harness of the rear right door (wires for the speaker - green-black and yellow-green); 18 — block of the rear wiring harness to the block of the wiring harness of the front right door (wires for the speaker - yellow-white and green-white); 19 — block of the rear wiring harness to the block of the wiring harness of the front left door (wires for the speaker - gray-red and green-red); 20 — airbag control unit; 21 - block of the rear wiring harness to the block of the wiring harness of the state registration number lamps. Wiring diagram of the ignition system of the Lada Grant (VAZ 2190) The article shows the connection of the controller to all sensors, injectors, generator, spark plugs, everything that ensures the correct supply of the air-gasoline mixture to the engine, as well as its timely ignition.
Rice. 1 Diagram of ignition and connection of engine sensors to the controller on a Lada Granta car. The marking of the wires indicates which element the wire goes to and, through a fraction, (/) to which contact of the element. The ignition system diagram is shown for the VAZ 2114 engine. The following is the name of the circuit elements, according to the marked numbers: 1 - engine oil pressure warning lamp sensor; 2 - generator; 3 — throttle pipe with electric drive; 4 — coolant temperature sensor; 5 — block of the ignition system wiring harness to the block of the instrument panel harness; 6 — solenoid valve for purge of the adsorber; 7 — speed reading sensor; 8 — mass air flow sensor; 9 — crankshaft position sensor (the only sensor, if it breaks, the car will not start. If other sensors fail, there will be deviations in engine operation, but the engine will start and run); 10 — oxygen concentration sensor; 11 — car controller; 12 — diagnostic oxygen concentration sensor; 13 — ignition coil; 14 — spark plugs; 15 — nozzles; 16 — blocks of the wiring harness of the ignition system and the wiring harness of the injectors; 17 - engine knock sensor Electrical diagram of the Lada Granta instrument panel (VAZ 2190) This article provides a schematic electrical diagram for connecting the Lada Granta instrument panel. The diagram shows the connection of the mounting block (assignment of fuses and relays), instrument clusters, connection of lighting controls, electric power steering, interior heater, etc.
Rice. 1 Diagram of the VAZ-2190 instrument panel (Click on the picture to view it in full size) Each wire is marked, it indicates which element it is stretched to, and through the fraction to which contact of this element. Below is a description of the elements, according to the diagram below: 1,2 - panel wiring harness block to the front wiring harness; 3.4 — panel wiring harness block to the rear wiring harness; 5 — vehicle lighting control module (dimensions, low beam, hazard warning lights); 6 — ignition switch (mechanical); 7 — on-board computer mode switch (located on the steering column switches); 8 — windshield wiper switch; 9 — instrument cluster; 10 — light signaling switch; 11 — trunk lock drive switch; 12 — diagnostic block (for connecting diagnostic equipment, clearing error codes); 13 — block of the wiring harness of the instrument panel to the block of the wiring harness of the air supply box; 14 — rear window heating switch; 15 — alarm switch; 16 — brake light switch (brake light switch); 17 — block of the instrument panel wiring harness to the radio (acoustic wires to the speaker installation location); 18 — block of the instrument panel wiring harness to the radio (radio power supply); 19 — device rotating on the steering wheel; 20 — driver airbag module; 22 — mounting block; 23 — electric power steering; 24 — cigarette lighter; 25 — backlight lamp for the heater control panel; 26 — lighting lamp; 27 — block of the instrument panel wiring harness to the block of the ignition system wiring harness; 28 — Lada Granta controller is used from Lada Kalina (model 11186-1411020-22); 29 — clutch pedal position signal switch (the car will not start without the clutch depressed); 30 — electronic gas pedal; 31 — additional resistor (to select the speed of the heater fan); 32 — electric motor of the stove; 33 — heater motor switch; 34 - control unit for the door lock system. Application and designation of the relay on the Lada Granta K1 car - relay for the electric fan of the engine cooling system; K2 - door lock relay; K3 - additional starter relay; K4 - additional relay; K5 - relay-interrupter for direction indicators and hazard warning lights; K6 - windshield wiper relay; K7 - headlight high beam relay; K8 - sound signal relay; K9 - relay for low beam headlights; K10 — relay for turning on the heated rear window; K11 - main relay (ignition relay); K12 - fuel pump (gasoline pump) relay. Additional electrical circuits of the Lada Granta (doors, lights, air supply duct) This article provides electrical circuits for: car doors, state registration plate lighting, air supply duct. Electrical circuits for the rear doors (left and right are similar). The wires of the electrical circuits are marked. The first digit indicates which element the wire goes to, the second (through a fraction) to which contact.
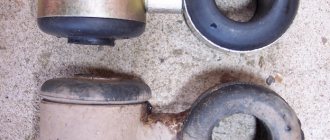
Cost of covers for Kalina mirrors
They cost on average from 500 to 1000 rubles, depending on the shape, color and method of attachment. Unpainted overlays can be purchased for only 200 rubles. Chinese cheap analogues cost very little (100-300 rubles), but are significantly inferior in quality. They are more fragile, brittle and inelastic.
Mirror covers for the Lada Kalina are the simplest but most noticeable tuning element!
The VAZ service station provides complete diagnostics and repairs of the Lada Kalina (1118) sedan.
Our car service specialists have extensive experience in maintaining and repairing VAZ vehicles, and thanks to our own auto parts store, we always have the necessary parts in stock.
View the price list for basic VAZ repair work
Prices for our car service services are significantly lower than the market average, which allows you to carry out high-quality repairs at an affordable price.
STO VAZ provides the following types of services:
- Car repair Lada Kalina (1118) sedan;
- Full diagnostics of VAZ 1118: diagnostics of the engine, brake system, suspension, compression measurement;
- Maintenance of Lada Kalina 1118 sedan: changing engine and transmission oil, replacing filters, replacing technical fluids, replacing the brake system and timing belt;
- Repair of the chassis: suspension, clutch, steering, brake system;
- Tire fitting and storage;
- Car wash;
VAZ-1118 is a new model of AVTOVAZ LLC, the production of which began in 2004. This is a five-seater passenger car with front-wheel drive, a front engine and an all-metal welded body. Lada Kalina is distinguished by a reinforced structure of the roof, sills and central pillar. Additionally, safety is ensured by bumpers made of impact-resistant polypropylene. The engine is four-cylinder, four-stroke, in-line, eight-valve, with a displacement of 1.6 liters.
How to remove an old mirror element
Everything here is done, although not complicated, but quite neatly. If you rush and make excessive efforts, you can damage the internal fasteners of the element, and then you will definitely have to buy the entire part assembled.
First, we remove the mirror assembly from the car, and only after that can we begin the repair. Then we move one side of the mirror element as far as possible to the side so that you can get inside this structure with a screwdriver.
Now, using a screwdriver or by hand, if you were able to insert it there, we move the element latches to the side, as is clearly shown in the photo below.
The latches are located along the entire circumference, so you need to unlatch them from all sides. After which this part can be easily removed with minimal effort on your part.
To see what the design of this fastener looks like, look at the picture below.
In addition to the hooks (clamps, latches), there are 4 more guides that must match the holes in the case when installing a new element. The new one is somewhat easier to install than it is to remove, so there shouldn’t be any special problems with installation. The main thing is not to use excessive force when fixing the element, and try to press the element itself as evenly as possible so that it does not break.
The price of a new such part for Grant is about 300 rubles, and as mentioned above, it is much cheaper than buying an assembled mirror. There are a few more points that relate to replacing the mirror element:
- the design can be electrically driven
- the element may be heated