Responsibility for faulty lighting devices
Traffic rules prohibit operating a vehicle with faulty lighting devices. This is due to safety considerations for all road users. It is also prohibited to use vehicles that use lamps that do not meet the design requirements for the operation of the vehicle.
It is important to remember that you are not the only participant driving on the highway, and it is highly not recommended to install more powerful and brighter lamps in the headlights of your car. By this action you endanger traffic participants moving in the opposite direction.
All changes in the design of the vehicle or non-working lighting devices entail administrative penalties.
Briefly about replacement
- We drive the car into the pit. Next, remove the engine protection.
- We take a 10mm wrench, unscrewing a couple of rear mounting bolts, and then 5 front mounting bolts.
- Carefully remove the mudguard, gaining access to the foglights.
We have a collective farm style.
All this needs to be removed for convenience. Or the whole bumper. optional.
Pull the lock sideways to the right.
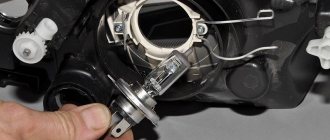
It is not recommended to touch the bulb of a halogen lamp with bare hands. When installing the lighting element, wear gloves or use a clean cotton cloth. If it is missing, then after touching the flask, it should be wiped with a cloth moistened with alcohol.
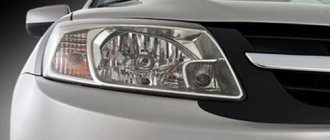
Headlights are the driver’s main safety system, allowing you to avoid crashing into another car or tree. If you don't want an accidental accident on the road, it is advisable to have a spare set for quick replacement. From this article you will find out what lamps are in the Priora.
If you need to sell construction, road, and municipal equipment throughout Russia in a short time and at a good price, then you should look here, where they will buy any special equipment quickly and without unnecessary hassle.
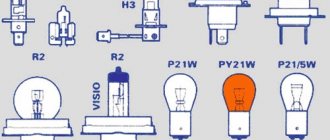
Types of lamps used in Priora
- H7 (Low beam);
- H15 (High beam and DRL);
- PY21W (Turn signal lamp);
- P21W (Reversing lamp);
- P21/5W (Brake and parking lamp);
- H11 (PTF lamp);
- C10W and C5W (Lighting lamp: interior, glove box and trunk);
- W5W (Lamp for side lights of headlights);
- H1 (High beam lamp until 2013 without DRL);
Dorestyling
The life of the owners of pre-restyling cars was darkened by the fact that, in addition to the reduced service life, even then it was darkened by the fact that when replacing some light bulbs it was necessary to remove the socket along with the bulb - this, for example, happened when the owner wanted to replace a side light bulb. Owning a Priora became increasingly expensive; rarely did anyone think about buying another headlight - developed by other companies. Installing light bulbs from foreign manufacturers solved the problem of poor lighting well and for a long time.
Headlight bulbs
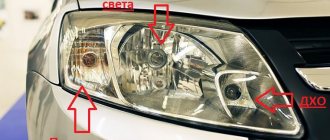
The headlight bulbs of the Lada Priora differ depending on the year of manufacture of the car, since at the end of 2013 daytime running lights began to be installed in the Priora.
Headlight bulbs for Priora models up to 2013.
| Installation location | Lamp type | Power, W) | Number in photo |
| Low beam | H7 | 55 | 1 |
| High beam | H1 | 55 | 9 |
| Turn signal | PY21W | 21 | 3 |
| parking lights | W5W | 5 | 8 |
Headlight lamp for Priora after 2013
| Installation location | Lamp type | Power, W) | Number in photo |
| Low beam | H7 | 55 | 1 |
| High beam/DRL | H15 | 55/15 | 2 |
| Turn signal | PY21W | 21 | 3 |
| parking lights | W5W | 5 | 8 |
Replacing low and high beam bulbs in the headlight
- To replace the high and low beam lamps, you must remove the rubber or plastic headlight protection covers. Then pull the connector towards you and remove it from the lamp. By pressing on the lamp clamp, release it from the clamps and remove the lamp.
Replacing the turn signal lamps in the headlight
- Replacing the turn signal lamps must be done by turning the socket counterclockwise and removing it towards you from the headlight.
Replacing the headlight bulb
- To remove the side light bulb, you need to pull the bulb socket towards you.
What is the volume of the VAZ cooling system
Published: 10/04/2017
Spread the love
Spread the love Pictures of VAZ cooling system VAZ Contents1 Pictures of VAZ cooling system VAZ1.1 Volume of the VAZ cooling system 21141.2 Volume of the VAZ cooling system 21071.3 Volume of the VAZ cooling system 21101.4 Volume of the VAZ cooling system 21231.5 Largus cooling system During engine operation, a lot of heat is generated, the cylinder of our engine can heat up to several hundred degrees Celsius. For that …
What is the volume of the VAZ cooling system Read more »
Tail lamps
The taillights also differ depending on the year of manufacture. In cars after 2013. The taillight brake lights have become LED, but the bulbs used in the lights remain unchanged.
| Installation location | Lamp type | Power, W) | Number in photo |
| Reverse | P21W | 21 | 4 |
| Brake light/dimensions | P21/5W | 21/5 | 5 |
| Turn signal | PY21W | 21 | 3 |
| Rear PTF | P21W | 21 | 4 |
Replacing tail light bulbs
- To replace it, you must remove the rear light. To do this, unscrew the 3 screws that secure the light and move it away from the car body. Then unscrew the sockets counterclockwise and remove the desired lamp.
Why you shouldn't mix antifreeze
Published: September 29, 2017
Spread the love
Spread the love What antifreeze can be mixed with each other Surely many car owners had to add coolant to their car, and of course the question arose, is it possible to mix antifreeze? First you need to understand what is different between them. Currently, the composition of most antifreezes is 85% ethylene glycol and distilled water, the remaining percentage depends on ...
Why you shouldn’t mix antifreeze Read more »
Turn signal repeaters
Repeaters are installed in the front fender, with the exception of luxury trim levels, where the repeater is installed in the side rear view mirror.
| Installation location | Lamp type | Power, W) | Number in photo |
| Turn signal | W5W | 5 | 8 |
To remove the lamp in the turn signal, you need to pull it towards you and remove it from the wing. Then turn the socket counterclockwise and remove the lamp.
Step-by-step instructions for installing PTF on Priora
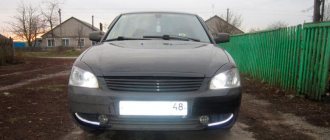
Now let’s try to install fog lights on the Priora ourselves - after all, they do not come with all car trim levels. First of all, you need to buy the lanterns themselves: they can be either lensed or with regular glass. Which ones to take? There are 4 most common and available options:
- Bosch (Germany-Russia).
- Luch (Russia).
- Kirzhach (Russia).
- "Noname" (China).
Fog lights on Lada Priora (from left to right): Bosch, Luch, Kirzhach, China
If on your Priora the places in the bumper reserved for PTF are not round, but like on the Priora Restyling SE (see differences in PTF below), then you will additionally need to purchase special decorative trims.
Covers for round lights
Important! When purchasing PTFs, be sure to ensure that they are certified in accordance with GOST R 41.19-99 (UNECE Rules No. 19). Otherwise, you will not pass the next technical inspection, and if you meet a traffic police officer on the road, you may even lose your license for a year.
What is included in the kit for installing fog lights
In addition to the headlights, you need to purchase a special kit for connecting fog lights. It includes:
- PTF power button;
- set of installation wires;
- fuses (optional);
- PTF control relay;
- connecting blocks.
Healthy! If desired, you can choose a complete set, which even includes fog lights.
Installation process
If everything is purchased, then you can start installing. Let's start with the PTFs and put them in their regular place. To do this, remove the bumper from the Priora by unscrewing all the screws around its perimeter.
Removing the bumper from the Lada Priora
Now we cut out the plugs that cover the holes provided for the PTF.
Plug on the hole for installing fog lights
On some Prior modifications, the plug is not molded into the bumper, but is screwed with three self-tapping screws to the places where the lights are attached.
This plug can be removed with a regular screwdriver.
We install the purchased PTFs in place and secure each one with three self-tapping screws.
Installed fog lights
If you have the SE modification, then before installing the headlight, you need to install the decorative trim, which I wrote about above.
Installation of round PTF on Priora Restyling SE
That's all for the installation. We put the bumper aside and work on the PTF power button. The ideal place for installation is next to the heating button. We remove the plug and in its place we will install the PTF control button. But first it needs to be connected, so it’s time to move on to assembling the electrical circuit.
Connection diagram
How to connect PTF to the on-board network? Let's not reinvent the wheel, but connect it the way the manufacturer intended. Let's look at the standard connection diagram:
Electrical diagram for connecting PTF to Lada Priora
Here, in principle, everything is simple and clear, but it can be made even simpler. Let's start with the fact that we absolutely do not need to go into the mounting block (fuse box). We will place the relay in the engine compartment, and the button, including its backlight, will be powered from the heating button. To do this, pry up the heating button with a screwdriver and remove it along with the power supply.
Removing the heating button (this car has a headlight switch button instead of the PTF button)
We arm ourselves with a tester, turning it on in the DC voltage measurement mode (the limit is not lower than 15 V). We connect one probe of the device to the car body (minus power). Now, with the ignition off, turn on the headlights and use the second probe to find the voltage of 12 V on the heating button block. Connect the backlight LED to this wire. According to the above diagram, this is the white (yellow) wire, terminal “B” of the PTF button.
Reinstalled fog light control button
We choose a place to install the relay, guided by the fact that it can be connected to the positive terminal of the battery, the body, fog lights and the button with wires of a minimum length. And, of course, this place should not get too hot from the engine. We fasten the relay to the body using the provided mounting eye, and under the same screw we insert a wire connected to the 86th contact of the relay (numbering on the device body).
To pin 85 we connect the wire that we routed from the button from the interior. We apply “+” of the on-board network to pin 30, taking it, for example, from the battery terminal. There are lights left, and they need to be connected through fuses (indicated in the diagram as F15 and F16) with a nominal value of 15 A to pin 87 of the relay. We connect the second power wires for the fog lights to the body. We insert the power connectors into the PTF.
PTFs are ready for inspection
Pass-through fuses
Interior lamps
Lada Priora has lighting for the entire interior, glove box, trunk and license plate lighting.
| Installation location | Lamp type | Power, W) | Number in photo |
| Number plate illumination | W5W | 5 | 8 |
| Interior lamp | C10W | 10 | 7 |
| Glove compartment lamp | C5W | 5 | 7 |
| Trunk light | C5W | 5 | 7 |
The best manufacturers
If you decide to use alternative optics, manufacturers Osram, Koito and Philips are considered the most reliable according to drivers' recommendations. The main advantage of the products of these brands is their long service life. The marking of the optics suitable in this case is H7.
We recommend: The dashboard of the domestic “Seven” and its features
Since these are the manufacturers that car owners try to choose, the market is filled with numerous fakes that cost several times less. There are no visually incriminating differences to be found, and sellers often surprise you with their incompetence or even brazenly guarantee you that the products are original.
A car enthusiast must be able to independently find the differences between the original and the fake, and for this a series of tests have been developed.
As part of the testing, it was determined that counterfeits costing 50 rubles. lamps can be signed by any brand, but their operation is not only ineffective, but also dangerous for the safety of the vehicle.
Let's look at the pros and cons of individual manufacturers using specific examples of optics:
- OSRAM H7 . Products of this brand are counterfeited with enviable frequency. The original will fully comply with the standards.
- Philips is the standard best option for those cases where the headlight is correctly adjusted.
- H7 MEGAPOWER+30%! - the least preferred option due to a number of disadvantages: the luminous flux is not standardized, the quality of the base leaves much to be desired, and the light spot also does not meet the state standard. In addition, there is no certification according to European standards - only Russian. The use of such products is not excluded, but it cannot be permanent and long-lasting.
Criterias of choice
The low beam of VAZ-2107 (Lada Priora) cars is implemented using halogen lamps. They have an H7 base and a power of 55 W. Similar lighting devices are produced by all car lamp manufacturers, both European and those from Southeast Asia. The most reliable companies producing H7 light bulbs include:
- A Dutch company whose history goes back 120 years. The range includes a large number of different technical devices. Lighting devices make up only a small part of the total production volume. Famous for quality and reliability. Today the company has factories in many countries around the world;
- Large manufacturer of automobile lamps from Germany. Initially, the company was a division of the Siemens concern. The production of lighting devices is the main specialization of the company, which has achieved great success in this direction. The company's subsidiary, Neolux, which also produces lamps and lighting equipment, is actively operating;
- Another German company whose age exceeded 100 years. It produces a wide range of products; in addition to light bulbs, power tools and automobile accessories are widely known;
- The company was founded in Germany in 1948. The production of electric lamps is the main direction of the company. All products undergo multi-stage quality control and have appropriate certificates;
- Sho-Me. A large Chinese manufacturer of car lamps, accessories and other goods. Most xenon lamps are produced by this company;
- MTF-Light. A Russian company that produces automobile lamps for the domestic market. Production facilities are located in South Korea. The products meet all international standards and are highly valued by users.
The above list is not exhaustive. It is difficult to list all the companies, and there is no point in doing so. New companies are constantly appearing on the market, offering their products to customers.
Epoxy resin based paints and varnishes
Epoxy resins are used to make a huge number of materials for various applications. They are used in the radio electronics, electrical engineering, shipbuilding, aircraft and mechanical engineering industries, including as film-forming paints and varnishes, as components of impregnating and casting compounds, sealants, adhesives, etc. A wide selection of film formers allows you to create products with a wide variety of properties (for example, EP-741 varnish, HP-0064 putty). These compounds are used for anti-corrosion protection of products made of wood, concrete, plastics, metal structures and others. About 50% of the total world production of epoxy resins is used for these purposes. More details
Useful tips
- When choosing components, check their characteristics with the data provided by the manufacturer - the indicators must meet the specified standards.
- Mechanics strongly recommend replacing lamps in pairs. This will allow you to maintain the same glow of the headlights and will help to avoid burning out an unreplaced lamp while driving.
- At the first sign of a malfunction or difficulties with the fuse, contact a service center or replace the lamp yourself.
- When installing xenon or LED lamps, you will need to install fog lights with halogen lighting elements. This is necessary to improve visibility in bad weather conditions.
- If the low beam does not work after replacing the bulbs, check the fuses. They are located in the instrument panel to the left of the steering column.
Sources
- https://carfrance.ru/kakie-lampochki-stoyat-v-fare-blizhnego-sveta-na-priore/
- https://LadaKalina.club/repair/tsokol-lampochki-blizhnego-sveta-lada-priora
- https://RetroTruck.ru/obsluzhivanie-avto/lampochki-v-tumanki-priora.html
- https://PolomkiAuto.ru/rekomenduemye-proizvoditelem-lampy-primenyaemye-v-lada-priora.html
- https://svetilnik.info/avtomobilnyj-svet/lampa-dalnego-sveta-priora.html
- https://avto-o.ru/ts-i-remont/kakie-lampochki-stoyat-na-priore.html
- https://LampaExpert.ru/avtomobilnye-lampy/neispravnosti/lampa-bliznego-sveta-priora
- https://LampaExpert.ru/avtomobilnye-lampy/protivotumannye-fary/kak-ustanovit-na-prioru
- https://tune-priora.ru/obslujivanie/lampy-primenyaemye-v-lada-priora-i-ih-zamena.html
- https://smt-gps.ru/remont-i-tyuning/razmer-protivotumannyh-far-priora.html
- https://av-1.ru/novosti/cokol-v-tumankah-priora.html
- https://avtobak24.ru/lampochka-blizhnego-sveta-priora-kakoj-cokol-v-farah
What kind of light bulbs are in the headlights and lanterns of Lada Priora
Lada (“Lada”) is a brand of cars produced by AvtoVAZ JSC. Previously, it was used only for export cars, and for the domestic market, cars were produced under the Zhiguli brand. In 2004, the management of AvtoVAZ announced the transition to the Latin alphabet for the official spelling of the names of all cars produced by the plant: Lada - instead of "VAZ" and "Lada".
New Lada: Secret functions of LADA cars that few people know about » Lada.Online - all the most interesting and useful about LADA cars
Lada.Online is the largest Russian-language automotive resource with a daily audience of thousands, which is dedicated primarily to cars of this brand, the domestic automotive industry and the automotive world in general.
This site is not the official LADA website.
2021 Lada.Online. Copying of material is permitted only with a link to the source.
Brief description of the model
Production of the Priora model began in 2007. Compared to the VAZ-2110, the new car featured a modern body, different chassis settings and steering with an electric pump.
The Italian engineering company Creative Engineering worked on the interior of the cabin. The body structure has undergone not only external changes, but also received new welds, as well as enhanced passive safety elements.
The old engine from the VAZ-2110 was seriously reworked, installing a new piston with shortened skirts and lightweight connecting rods. The result of the work done was increased efficiency and environmental friendliness. There was only one gearbox available - a 5-speed manual.
Basic equipment included airbags, seat belt pretensioners, and a smart ABS system. Additionally, it was possible to install heated front seats and mirrors, air conditioning, a multimedia system, parking sensors, and electric drive of all windows.
Based on sales results in 2010, Priora became the absolute leader among all models from. Car owners appreciated the work of Russian engineers in modernizing the interior, chassis and power plant.
Adjustment
You managed to install the PTFs, but in order for them to perform their task, they must be configured. Place the Lada Priora on a flat surface. There should be a wall opposite the front bumper; motorists usually use a garage for this. Check the tire pressure - it should be the same.
Connecting the PTF is done in 7-8 steps; if you wish, you can do it yourself in the garage - read about it in this article.
The turning point leads to the choice between lens PTFs in the Priora and LED PTFs. One way or another, when driving in conditions of insufficient visibility, the light will become much larger. The driver will do everything possible to fulfill his duty to ensure traffic safety. But the fulfillment of this duty will have to be supported.
