Print this article Font size 16
Silent blocks are responsible for ensuring high-quality, reliable and safe operation of the car suspension. They influence the behavior of the car when driving and the efficiency of controllability.
Today, replacing silent blocks on a VAZ 2114 can easily be done with your own hands. To do this, you will have to arm yourself with a manual for operating and repairing the car, our advice, as well as a set of necessary tools.
Replacing front suspension silent blocks
If while driving your VAZ-2115 you hear a knocking sound with a characteristic metallic tint, it’s time to change the silent blocks of the front suspension arms.
A sign of such a breakdown may be unstable behavior of the car on the highway (the car jerks back and forth when braking) and a strong hum occurs. To make an auxiliary pressing structure for silent blocks, we recommend using a bushing 60 millimeters long, an M12 bolt 170 millimeters long, a high nut and a bushing 60 millimeters long.
When replacing silent blocks, it is better to buy spare parts from these or SEVI. These manufacturers have gained great popularity among car repair service center technicians. The price of silent blocks for the VAZ-2115 from both manufacturers is the same.
The first step is to place the car in a room where there is an inspection hole. Also, service and repair work can be performed using a lift; if there is none, then an inspection ditch. Next, you need to disable the engine protective function and unscrew the nuts of the mounting bolts on the front arms. Next, using a 17mm wrench, you need to unscrew the nut securing the front stabilizer strut bolt to the lever and knock out the bolt. Then you need to jack up the car, lower the bolts and remove the wheels of the car.
The next step is to clean the threads from dirt, oil, and rust stains. Cleaning work is carried out with a special metal brush. The fastening element must be treated with the technical composition WD40. After this, you can unscrew the nuts of the brace bars with a 24mm wrench. You need to unscrew them completely, grab the ball joint with both hands, take it away from the steering knuckle and remove the lever, having first unscrewed two bolts.
We recommend removing the lever along with the crab and the stretcher. After all, sometimes it is simply impossible to unscrew the tension nuts, especially if the car has been in use for several years.
To unscrew the lever together with the crab and the extension, you need to loosen the extension nut on the crab side. Once the kit is removed, you can begin to unscrew the nut itself. If the nut still cannot be removed, then you should use the heating method. The nut must be heated (for example, with a blowtorch, lighter) and unscrewed or cut with a tool chisel or grinder.
Once the lever is removed, you can proceed to replacing the old silent blocks of the extension with new ones. Dismantling of old silent blocks occurs using a tool chisel. Next, the eye is cleaned with sandpaper to remove rust. New silent blocks must be inserted one by one into the lever element.
It is important to take into account the fact that silent blocks do not shrink completely. Therefore, the lever must be placed on a hard surface and, using a sledgehammer or hammer, the silent blocks must be placed in it
The final step will be to replace the front arm silent blocks. The worn part is removed, and a new silent block is pressed in its place. To do this you need to tighten the bolt. If it gets twisted, use a screwdriver to correct it.
It is important to know! After installing the lever, the nuts on the silent blocks are tightened until they stop only after the car is firmly placed on the wheels. https://www.youtube.com/embed/c49JAJAex-k
Where to begin
Before you start replacing the VAZ 2114 silent blocks, you need to take care of purchasing new parts. Pay attention to the quality of the products you purchase, remember the proverb that the miser pays twice. This must be done so that after a couple of thousand kilometers you do not have to change them again. This, unfortunately, happens often. To work, in addition to a set of wrenches, you will need a hammer, a sharp, thin chisel, and WD 40 fluid. It is also advisable to have a vice and a special puller for removing and installing new hinges.
There may be problems with this, since you will have to look for it from familiar drivers, buy it in retail chains, or make it yourself. To do this, you need to find a bolt with an M12 thread approximately 180-200 mm long. The nut should be of increased length; this will allow you to use the puller for a long time without fear of damaging the thread. You will also need a bushing from a piece of pipe 60 mm long. Its internal diameter should be 38 mm, as well as a wide and thick metal washer.
If everything you need is prepared, and the desire to do the work yourself has not disappeared, let’s look at how to replace the silent blocks of the front arms of a VAZ 2114. First of all, unscrew the nuts on the bolts securing the front arms to the body. Use a thin punch to knock out and remove the bolts from the bracket. After this, to carry out the replacement, you need to lift the car with a car jack. Place stands under the body, after which you can remove the wheels.
Tools and materials
How to make distilled water at home Secrets of making distilled water at home
The tools you will need:
- Spanners (take a full set at once);
- Socket wrenches;
- Vise;
- Chisel;
- Hammer;
- Puller;
- Silent blocks.
There are several important nuances:
- It is strongly not recommended to take silent blocks from repair kits intended for models 2108-2112. You will simply waste your money because they are not suitable for the fourteenth VAZ model.
- The easiest way to purchase a puller is at auto parts stores. But you can ask your friends for it.
- You can make a device for pressing in a new silent block yourself. To do this you will need a 170mm M12 bolt, a bushing, a washer and a high nut. But if you have the opportunity to use a full-fledged, real tool, do just that.
Troubleshooting
Ford Focus 2 rear suspension repairFord Focus 2 rear suspension repair
Deformation of the suspension elements, especially body braces, disorganizes the wheel angles and makes it impossible to adjust the camber and toe. First of all, you should check the car's silent blocks, rubber cushions, ball joints, and the shrinkage of telescopic struts.
Repairing a VAZ-2109 requires replacing rubber cushions and silent blocks if there is rupture and one-sided swelling, including after trimming the end surfaces of rubber elements.
You can check the condition of the front suspension ball joint on the car after removing the wheel, by measuring the distance between the lower arm and the disc element of the brake system. If, after pumping the unit, the distance increases from 0.8 mm or more, the hinge should be replaced.
How to check silent blocks yourself?
If the driver does not have sufficient driving experience, it is better to diagnose any car mechanisms at a bus station. If you have sufficient driving experience, and therefore minor repairs, you can inspect the silent blocks yourself. To do this, you need to drive into the pit and assess the condition of the parts.
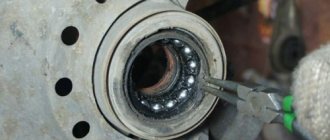
Silent block with signs of wear
An untimely replaced silent block leads to the following consequences:
- Wheel alignment violation;
- Uneven tire wear;
- Knock in the front suspension.
These are signs that should prompt the idea of replacing silent blocks.
If during inspection cracks or tears were found on the rubber joint liner, it should be replaced. The replacement can be done at home - specialized tools or special skills are not required.
Let's take a closer look at the algorithm for replacing the silent blocks of the front levers of VAZ cars.
Replacement
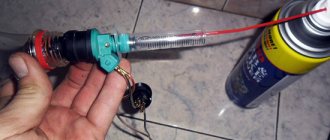
How to Check Injectors at Home
To replace you will need:
- New rear silent blocks;
- A small wooden beam;
- A device for pressing in a silent block (you can do the job without it);
- Open-end wrenches;
- Socket wrenches;
- Spanners;
- Hammer.
When everything is ready, you can start working.
- Place the car on a level surface in the garage above a pit or overpass. Be sure to place wheel chocks and shoes under the wheels. All for your safety.
- It is better to remove the rear wheel to make it easier to work.
- But it is not at all necessary to remove the rear beam. Just complicate your work with unnecessary dismantling processes.
- On the left side of the driver is the pressure regulator rod for the rear brakes. It will disturb you while you work, so we advise you to remove it. This is done by removing the locking bracket of the rod and the handbrake cable. You will remove the latter from the right side from the mount.
- Unscrew the nut from the bolt with a 12mm wrench that holds the rear beam to the bracket. This may cause problems. Place a socket wrench on the driver to increase leverage on the fastener. Remove the bolt, lift the car with a jack and move the beam down. It will come out of the eyelet this way. Do not overdo it to avoid damaging the nearby brake hose. If you press too hard on the pry bar while moving the eye, you risk breaking the hose.
- Take a pre-prepared wooden block and insert it between the body and the beam. This must be done so that the beam is below the eye.
- Using a hammer and a drift (regular metal tubing will do), knock out the old worn bushings. By the way, if you come across such a concept as “fungi”, don’t worry. This is what car enthusiasts often call these bushings because of their external similarity.
- Clean the seat from accumulated dirt and rust. Be sure to lubricate the areas with soapy water. Without it, it will be difficult to press in new silent blocks. Or use a simple dish detergent. Under no circumstances should you lubricate the seats with grease or oil, as these substances will soon begin to corrode the element.
- Now it presses in new elements. Ideally, you should have a special pressing tool. If you don't have one, use a regular hammer.
- Take out a wooden block.
- Armed with a second jack, lift the beam and insert the mounting bolt into place and tighten it with a nut.
- Reinstall the rear wheel and lower the car to the ground.
Only upon completion of all these stages can the bolts of the new silent blocks be tightened until they stop.
Such an operation should not cause any special problems, so it is not at all necessary to go to a service station and spend extra money.
Also check out
- You can begin installing new front suspension silent blocks. You need to treat the seat with soapy water and press it into the hole with a screwdriver (if you lubricate the hole with undiluted liquid soap, the resistance will also decrease). When everything is ready, you can start replacing the front suspension silent blocks with new ones.
- After the silent block enters 50%, remove the tube and press everything to the end. There is no need to rush so that the part is not installed crookedly. You can add soap to make the process easier.
- Check the protrusions of the silent block on all sides (should look like in the photo).
- Replace the silent block of the "daisy" lever. The old ones need to be cut down with a chisel, and new ones installed in this place. Using a vice, press them into the mounting hole. Finish with a hammer and a pointer.
- Reassemble everything in reverse order.
- The actions on the other side are similar.
- You need to tighten the nuts when the car is already on the ground.
Worth checking out:
Replacing daisies on a VAZ-2114 with your own hands video of silent blocks
Daisies, or scientifically called silent blocks, are a car part that is located on the front suspension arm and consists of two components (an external and an internal element). Wear of this part involves delamination of the rubber material due to use. So, replacing silent blocks on a VAZ-2114 car is a fairly simple process and even a novice motorist can cope with it.
Video about replacing the silent blocks of the front arm on a front-wheel drive car of the VAZ family
The video material will tell you how to replace daisies on a car, and also tell you about the nuances and subtleties of the process.
The process of replacing front suspension daisies on a VAZ-2114
Silent blocks of front levers, popularly called “daisies”
Before proceeding directly to the process of replacing daisies, it is necessary to disassemble the lever structure. We will not disassemble the structure of the entire suspension, but simply indicate the location of the silent blocks.
In the picture below, at number 23, there are daisies that need to be replaced.
Schematic design of the front suspension
Location of the daisy in the lever
Now that the location is clear, you can proceed directly to the process itself:
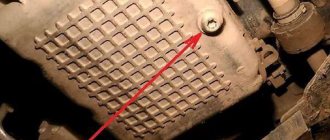
- The first step is to dismantle the lower engine crankcase protection.
Removing the crankcase protection - The next step is to clean the threads. In order for the bolts to unscrew normally, they must be sprayed with WD-40.
- Using a 24mm socket, we dismantle the extension nut from the lever side.
Unscrew the fastening nut of the extension to the leverRemoving the nut. If it doesn’t work, then it’s stuck. Need a lever and special treatment. liquid, such as WD-40
- Using a 17mm wrench, unscrew the extension bracket.
Unscrew the extension bracket - We dismantle the element.
Removing the brace with bracket - Using a chisel, knock the silent block out of its seat. There is an alternative option - burning.
Chamomile burning processThis silent block is much easier to remove from the seat
- We press the new part with a hammer. Simply put, we hammer the chamomile into the seat.
We press new silent blocksPress-fitting process
- We carry out the assembly in the reverse order.
Part selection
New daisy in the lever
When the replacement process is considered, we proceed directly to the selection of the part. So, in addition to the original part, there are a number of substitutes that can be installed on a car.
Some manufacturers offer a part whose quality is much better than the standard factory spare part.
Original
2108-2904046 – original catalog number of the silent block manufactured by AvtoVAZ. This part is of average quality, but is still recommended by the manufacturer for installation on a car. The average cost is 500 rubles.
In addition to the silent block itself, there are a number of consumables:
- 2108-2904045 – thrust washer for securing the silent block.
- 2108-2904225 – silent block adjusting washer.
These two parts can be included with the spare part, but as practice shows, they must be purchased separately.
Analogues of silent blocks
In addition to the original part, there is a list of analogues that can be installed on the VAZ-2114.
Chamomile produced by Stellox
Let's consider which spare parts are suitable from which manufacturers:
| Ruville | 987201 | 120 |
| TRACK | SBST-104 | 400 |
| Patron | PSE1434 | 400 |
| Trialli | SB 108 | 420 |
| Fulcrum | 17-06-1986 | 450 |
| LYNXauto | C8854 | 500 |
| Herzog | HL8 4046 | 600 |
| VTR | LADA0105RP | 750 |
| SS20 | 70104 | 1300 |
conclusions
Replacing daisies on a VAZ-2114 car is a fairly simple and not complicated process that every motorist can handle. Of course, if the operation seems too difficult, it is recommended to contact a car service, but you should not waste money and time when you can do everything yourself.
Particular attention should be paid to the process of selecting spare parts, which are not always of high quality
Silent blocks: purpose and condition diagnosis
Silent blocks are vibration-isolating parts used in the suspension structure of any modern car . Such vibration isolators consist of metal and rubber (elastomer). Thanks to the use of vulcanized processing technology, silent blocks are excellent dampers and insulators from external vibrations received by the machine when moving.
These parts, familiar to every car enthusiast, need to be changed from time to time. Therefore, our resource decided to highlight in today’s material the question of how to replace VAZ-2112 silent blocks with your own hands. Having familiarized yourself with it, the repair process itself and preparation for it will become a fairly simple task for you.
The main function of these parts is to connect the suspension units in which torsional, radial and axial vibrations are the strongest, and subsequently dampen them.
Thus, silent blocks provide not only comfort when driving a car, but also increase the service life of some other suspension parts for a considerable period.
Unusual sounds when moving
If there are certain malfunctions, the front suspension of the VAZ-2109 may make noise or knock. Below are the main causes of problems and recommendations for resolving them.
- If the racks have become unusable, they need to be replaced or repaired.
- The fixing bolts of the stabilizer bar are loose. If the tension pads wear out, the bolts should be tightened and the worn pads replaced.
- Poor quality fastening of the upper support - the problem can be solved by tightening the fixing nuts.
- There is settlement and destruction of the supporting rubber element - it is advisable to replace the problematic part.
- If the lever silent blocks, braces or stabilizer rod struts are worn out, new blocks should be installed.
- The ball joint will need to be replaced if it becomes excessively worn.
- If there is a significant imbalance of the wheels, it is necessary to carry out balancing.
- If a spring or compression buffer breaks, it requires immediate replacement.
How to change daisies on a VAZ 2114, watch the video, study the instructions
Are you planning to implement a solution to the question of how to change daisies on a VAZ 2114, you’ve already watched the video, now are you preparing a sequential instruction for yourself? Then you can pay attention to the following workflow structure
- The machine is installed on a lift or driven onto an overpass to provide access to the front suspension, the elements of which will be used for repair work. Usually, the approach to the silent block is also made difficult by the crankcase protection, which must first be dismantled.
- Next, work with fasteners is provided, but due to the fact that the car has mileage and has been used in different weather conditions, a situation may arise that all the nuts have soured, or the threads are covered with a layer of dirt. What to do? Take a rag or a wire brush with stiff bristles and clean all existing fasteners. If some nut does not give in, then you should use special lubricant WD 40. And start unscrewing the suspension nuts again.
- First, we unscrew the bolts on the wheels, put the car on a jack and stoppers, and then think about how to change the daisies on a VAZ 2114, having previously pressed them out.
- We continue to work with the support and its dismantling. Sometimes it can be difficult to remove the support from the steering knuckle.
- Using a chisel, we begin to press out the silent block itself. Sometimes even fire is used, but in this situation you need to be very careful.
- We thoroughly clean the freed bushing, and immerse the new silent block in water for several minutes and wash it several times with a soap solution. If you use a regular detergent, for example, for dishes, it’s okay, it will also help treat the new silent block. All that remains is to prepare for the climax, deciding confidently how to change the daisies on a VAZ 2114, and recording a video report if necessary.
- We install a vice - this is a good basis for pressing the chamomile. The process comes with a number of difficulties, because the part does not always quickly fit into its seat and force has to be used. A hammer will not hurt in this procedure. We make several precise and sharp blows, making the correct pressing of the part.
- We work carefully with the fasteners, which should be tightened gradually and consistently. We check the tightness of the nuts and make sure that the installation is correct.
- The rack is mounted in place and all final testing is done once the car is on its wheels.
Thus, the question of how to change daisies on a VAZ 2114 is relevant, and its solution is in demand among car enthusiasts. But, as they say: “it was smooth on paper, but they forgot about the ravines...”. So with car repairs, you can count on half a day of fussing in the garage, but it turns out that even a day is not enough to solve the problem of how to change daisies on a VAZ 2114, unforeseen difficulties and financial expenses will arise.
What you need to prepare for self-repair of silent blocks
Replacing silent blocks or daisies is simply necessary, because this part is responsible for the operation of the car’s suspension. To carry out independent repairs, it is worth preparing a set of spanner wrenches, reliable socket wrenches, a standard vice (if you are used to working with them when pressing out small components), a chisel and a hammer, but this is in case the fasteners have soured and you will have to use force.
Set of tools
You will have a special silent block puller at the beginning of the repair, good, this will certainly make the work easier and speed up the replacement process. You will also have to purchase a new set of silent blocks for replacement in advance and decide how to change the daisies on a VAZ 2114.
The gearshift lever and the rocker on the VAZ-2114 are rattling, what to do?
As you know, the gearbox is the main, and most importantly, irreplaceable link between the engine and the wheels of the car, because it is only because of it that the nature of the torque changes.
What gearbox is installed on the VAZ-2114?
Since the VAZ-2114 is equipped with a mechanical gearbox, the driver personally selects which gear to engage at what point in time (by changing the position of the driven gear relative to the driving gear - approx.), thereby ensuring the correct position of the lever in the cabin. However, during operation it happens that the handle begins to rattle, causing only discomfort to the car owner.
Below, in our article, we will look at the main causes of this problem, as well as ways to fix them.
Gearbox device
Diagram of the gear selection mechanism with decoding
First of all, before we undertake the repair or alteration of the gearshift knob, we need to learn more about its design (to figure out where the vibration comes from and how dangerous it is for the operation of the car as a whole - approx.), and also become familiar with its main elements.
It’s no secret that the VAZ-2114 is a front-wheel drive car, with front drive wheels; accordingly, the gearbox itself is perpendicular to the direction of movement of the car (this means that the “box” lever does not enter the cabin directly from its body, but through the rocker – approx.) . The same cannot be said about representatives of the “classic” AvtoVAZ family, where the rattling of the gearbox lever may indicate problems with the transmission itself.
Causes of gearbox bouncing
- The connection bushing is the wrong size.
- The handle gasket is missing.
- Inconsistency of parts that border each other.
All of the above problems can be caused by one small metal bushing that connects the rods under the lever. Therefore, the rattling of the handle may appear due to the appearance of a gap in it, or poor contact between two connections. All this leads to impacts of the bushing against the metal of the body, which contributes to the appearance of noise and rattling of the handle.
This is what the old bushing looks like.
On some VAZ-2114 models, such connections were wrapped with a rubber gasket to avoid such malfunctions.
Removing the gearshift lever
Before you begin dismantling the handle, you need to carefully examine the entire space next to it and understand how it comes apart. There is nothing complicated about this, the main thing is to follow our instructions exactly:
- If there are additional armrests and other elements installed independently, we dismantle them so as not to damage them during the work.
- Carefully remove the casing (plastic or leather - approx.) so as not to tear or break it.
Dismantling should be carried out carefully so as not to break anything. - Now that all the interior decoration is visible, let's move directly to the backstage.
To do this, using a key set to “13”, unscrew the nut securing the lever. If the lever does not budge, you can treat the surface with WD-40. - After this, you can dismantle the lever with the same bushing, and carry out work to eliminate rattling and vibration.
The old bushing is marked with a red marker.
Vibration Elimination Process
After you have the bushing with the lever in your hands, carefully inspect it visually for visible damage and signs of wear. Because if they are available, you may have to buy the same spare element, so that a little later you won’t have to do the work of dismantling, repairing and adjusting it.
The new bushing looks much better
The procedure for repair work with the bushing
- First of all, we dismantle the plastic cover on the bushing in such a way as to free its metal base.
Disassembled gear lever bushing - We inspect it for traces of friction, which will indicate a discrepancy in its size (when the bushing is several millimeters longer, usually 2-3 mm - approx.).
We went to the store and measured the new bushing there and compared it with ours! - If the above facts are confirmed, then this reason can be corrected by simply grinding off the excess by hand using a file.
- Next, we move on to repairing the lever itself, and if there is any damage, friction, etc. on its body, we simply wrap this area with ordinary electrical tape in order to fix it more tightly in place and provide it with the tightest contact.
Thanks to such simple and simple procedures, vibrations and rattling of the gearbox lever can be eliminated in no more than half an hour of your time, and the result of the work performed will please you for a much longer time.
Selection of racks
Set of spare parts from SS20
Before you start replacing the stabilizer struts on a VAZ 2114, you need to decide what exactly you will replace the failed units with. Today the range is quite extensive, but we offer you five of the most optimal solutions.
- Standard factory racks. The option is not bad only because of its accessibility. They are installed from the factory, but reliable service lasts literally the first 20 thousand kilometers, and if you try, all 30 thousand. After this you definitely need to change it.
- Racks installed on Priora. These are more modern devices that make the behavior of the fourteenth model more rigid compared to the sensations of driving a Priora with similar struts. Quite reliable, efficient, but do not have sound insulation. Because of this, problems arise with the bump stop.
- SS20. Modernized Priora oil struts, which have lost their main disadvantages. The only drawback is the lack of a support in the kit, so you will have to buy it separately. Moreover, take a support only from the same manufacturer.
- Plaza. Such racks are divided into Sport, Comfort and Super Sport. Good for everyone except sensitivity to frost. To eliminate this drawback, manufacturers began to use winter low. But this created another problem - the oil leaks after 20-25 thousand kilometers. If you live in a region without harsh winters, these elements are ideal for you. More precisely, your VAZ 2114.
- Kayaba. The best that exists today for the VAZ 2114. Unfortunately, their popularity became the main problem, as many underground companies began to counterfeit spare parts. Available in several types, suitable for drivers with different driving styles. They do not leak, serve for a long time and reliably.
https://youtube.com/watch?v=TSX57KO-Y1s
It should be understood that even the best racks will fail over time. Buying new ones is quite expensive these days. Therefore, think about which racks to choose for your car. Don’t forget, in addition to them, you will have to purchase various consumables, support bearings for the front struts, springs, rubber bands, and so on.
Symptoms of a problem
There are several main signs of failure of the rear beam silent blocks, including:
- Unstable behavior of the car on the roads;
- Tires wear unevenly, which is not difficult to notice from the tread pattern;
- When driving on a bad road (that is, 95% of all our roads), unpleasant squeaks and impacts on the car body are observed.
These signs are indirect, since they may be associated with other failures of the vehicle’s chassis. For example, dull knocks are also a sign of a faulty rear pillar. Therefore, in order to make sure that there is a particular problem, you will need to fully diagnose the chassis.
Malfunctions
Often, replacing the rear beam bushings is due to the fact that defects arise in the design of the element. They are like this:
- The elasticity of the rubber element deteriorates;
- The rubber breaks;
- The central bushing is displaced;
- Rotations occur in the seat.
If problems are detected with the silent block of the rear beam, you will need to drive the car into the garage in the near future and replace the damaged components. Unlike foreign cars, changing the silent seal on a VAZ 2109 is quite simple and without outside help. Plus it costs almost pennies.
Silent blocks VAZ 2107
The Internet often discusses the features of replacing the suspension mufflers of the VAZ 2107 and other cars of the domestic and foreign automobile industry. The problem is really urgent and is associated with the poor quality of our roads. Since the silent block is one of the important elements of the vehicle suspension design, special attention should be paid to its selection and replacement.
how to replace the silent blocks of the lower control arms of a VAZ 2101–07
The same puller is used to remove and install silent blocks. You only need to change the position of the parts depending on what operation is expected (press or squeeze).
Rear suspension
Sometimes it is also necessary to replace the silent blocks on the rear suspension of a VAZ 2114 car. They are not as susceptible to wear as in the case of the front control arms, but the fact remains.
The sequence of your work in this situation will be as follows:
If there is no lift, slightly loosen the bolts on the wheels, install a jack, raise the car and completely remove the wheel. It is advisable to place some supports under the beam. Both simple bricks and a second jack will do. It all depends on what you have at your disposal. Now you need to remove the bolts that are attached to the shock absorber and the car body. Proceed carefully to avoid damaging the threads. The bolts are knocked out, the beam moves down or slightly back. This will allow you to get to the desired silent blocks. They are dismantled with a puller. New suspension elements are installed in a similar way to the front control arm silent blocks.
To help them sit in their nests better, use a soapy solution. Reassemble the entire disassembled structure in reverse order. During the disassembly and assembly process, pay attention to the remaining components to which you gain full or partial access. As practice shows, performing certain repairs allows you to study the condition of related components, assemblies and parts of the car, identify emerging problems in a timely manner and eliminate these breakdowns or what may lead to this.
Changing silent blocks on a VAZ 2114 is far from the most difficult type of car repair. Therefore, many car owners cope with this task with some ease with their own hands.
Should you try it if you have no experience at all? Most likely not. But this experience must come from somewhere, right?!
A few more tips
It will also be useful for owners of cars of this model to know how to replace the silent blocks of the rear beam on a VAZ 2114. These rear suspension parts are more durable, but also need to be replaced after a certain period. It is best to position the car above the inspection hole, this will make it most convenient to perform the replacement. To perform the replacement, the beam must be moved down and slightly back.
To do this, they also lift the car with a jack, place it on a stand and dismantle the beam. It needs to be supported with a stand or a second jack. Worn silent blocks are removed and new ones are installed using a puller, but in some cases, the intervention of “brute” force and other auxiliary tools may be necessary. The installation of new VAZ 2114 parts is preceded by cleaning the eyes from rust and oxides, as well as treating them together with the hinge with soapy water.
After pressing them into the beam, it should be installed in its place. Taking this moment, inspect the remaining components and parts of the rear suspension, and if necessary, replace the elements that have become unusable. As you can see, the operation of replacing the rear silent blocks of a VAZ 2114 can be performed in your garage.
You should not be afraid even if you have no experience in carrying out such work; you need to acquire it at some point. If anything else is not clear, watch the video:
Front arm
Replace the silent blocks on the front suspension arm of a VAZ 2114 with your own hands. To do this, try to strictly adhere to the instructions we offer.
- Place the car on the inspection hole.
- Remove the engine protection, if equipped.
- Unscrew the bolt nuts from the front arms.
- Using a 17 key, remove the fasteners of the front stabilizer strut, which secures it with the lever.
- Knock out the bolt.
- Loosen the wheel bolts, jack up the car and remove the wheels.
- Use a 24mm wrench to remove the brace nut. To avoid having to exert enormous force, first clean the fastener with a wire brush and treat it with WD40. This should help completely unscrew this nut.
- Then remove the two ball joint bolts from the steering knuckle to remove the arm.
- Problems often arise with this nut. It is rarely possible to remove it easily. A good way out of the situation is to remove the lever with a crab and a stretcher. To do this, slightly loosen the extension nut near the crab and remove the three bolts securing the crab and the body. Now remove the entire assembly and, in a more comfortable position, begin to unscrew the problematic nut. The most extreme method is heating or using a chisel.
- You managed to remove the lever. First of all, replace the silent block of the extension. Dismantling the old element is carried out using the most ordinary chisel. Be sure to clean the lugs and take a new suitable silent block.
- It's up to the vice. The silent blocks are pressed one by one into your lever. It is usually not possible to seat the element completely, so the lever should be placed on a flat floor or a sturdy table. The silent block must be installed using a hammer. A few accurate and fairly strong blows should be enough.
- Using the method without using a vice is very risky. Such measures are resorted to either by self-confident specialists or by those who do not mind experimenting with their car.
- Now we change it on the front lever. The first priority is to get rid of the old silent block. If it was completely broken, you just need to remove the bushing and remove the remaining rubber elements of the silent block from the eyes.
- If this method is not relevant, the silent tape will have to be pressed out. You already have a puller.
- The new element is pre-treated with water diluted with any soap, dish gel or simple liquid soap.
- Use the press-in tool to place the new part in its rightful place.
- The fastening bolts should be tightened gradually. The silent block can be twisted at the same time, so try to hold it with a screwdriver.
- Alas, the process of replacing silent blocks on the front lever is much more complicated than in the case of a stretcher.
conclusions
Replacing daisies on a VAZ-2114 car is a fairly simple and not complicated process that every motorist can handle. Of course, if the operation seems too difficult, it is recommended to contact a car service, but you should not waste money and time when you can do everything yourself.
Particular attention should be paid to the process of selecting spare parts, which are not always of high quality.
So, we need: - a car; - a garage, preferably with a vice and a pit; - new silents and daisies; - a gas burner or blowtorch; - soap and water; - a small piece of pipe so that the silent block fits into it along the length and diameter; - hammer, chisel; - various keys. If there is a hole, good. If not, it’s worse, but not fatal. We unscrew the lower arm - the nut securing it to the body, the extension nut and the stabilizer link, two ball bolts.
To unscrew it is better to use larger heads and a lever.
You will have to puff, but everything can be solved. If the extension nut does not unscrew in this place, you can unscrew the crab. Then clamp it in a vice and unscrew it.
We clamp the removed lever in a vice and burn out the old silent block with fire. You can, of course, try to squeeze it out, but it’s easier with fire.
We uproot the old unnecessary rubber band and throw it away
You should get a hole like this. If there is anything left there, clean it.
Now we press in the new silent block. We soap both it and the hole. Don't skimp on soap! It's cheap. We load it all into a vice, press it a little and fill the collar in a circle with a screwdriver. It won't work the first time, but don't despair. The silent should go in about halfway.
We recharge the whole thing with the pipe and push it to the end. You can periodically add soap, it makes things easier. They pressed it, turned it over, pressed it in the other direction so that the rubber stuck out equally on both sides.
This is how it should turn out
Next we change the daisies. It's easier with them. We cut off the old ones with a chisel.
We insert the new ones into place, load them into a vice, and press them in. We use a hammer to tap through the 3 windows in the rubber.
Daisies in place
That's it, the lever is ready, you can assemble it
We change the other side in the same way.
Tighten the nuts in the “vehicle on wheels” position. After replacement, do not forget to visit the wheel alignment.
Thanks for the detailed instructions lexxx43
Self-replacement of front arm silent blocks on VAZ 2108, 2109, 2110, 2111, 2112, 2113, 2114, 2115 cars.
Two types of silent blocks are installed on the design of the levers of these cars; the first is located inside the lever and wears out less often. The second is the silent block for fastening the brace, it consists of two halves, and is popularly called a daisy. They very often peel off from the body and cease to perform their function. If such silent blocks are faulty, the car becomes less stable on the road. The replacement process is not particularly complicated, and almost any driver who likes to repair a car with his own hands can handle it.
1. If the car has a crankcase protection installed, it must be removed.2. We thoroughly clean the threads in front of the extension nut with a wire brush and spray 40 wd on it, this can make unscrewing the nut much easier.
3. Using a wrench or socket with a 24 mm wrench, unscrew the extension nut from the lever side.4. We unscrew the two 17 mm bolts from the brace bracket and remove it together with the brace.
5. Now, using a chisel and a hammer, we knock out the silent blocks or just the clips, as happened in my case.
6. Using a hammer, carefully hammer in the new ones and put everything back in the reverse order, and do not forget that the final tightening of the silent block (chamomile) must be done under load.
Price information contained on the website is for informational purposes only. The indicated prices may differ from the actual prices of authorized official dealers and other car dealerships, different cities and regions of Moscow St. Petersburg, Astrakhan, Barnaul, Volgograd, Voronezh, Ekaterinburg, Izhevsk, Irkutsk, Kazan, Kaliningrad, Krasnodar, Krasnoyarsk, Naberezhnye Chelny, Nizhny Novgorod, Novosibirsk , Omsk, Orenburg, Perm, Rostov-on-Don, Samara, Saratov, Stavropol, Tolyatti, Tula, Tyumen, Ulyanovsk, Ufa, Chelyabinsk, Yaroslavl, etc.