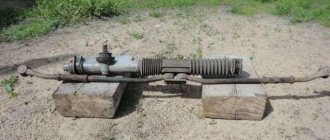
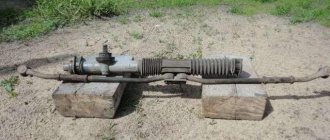
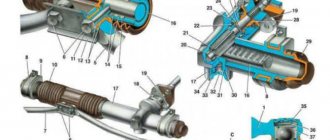
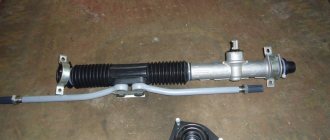
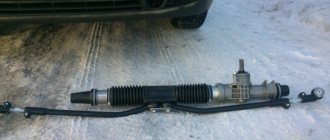
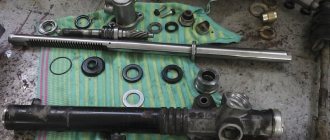
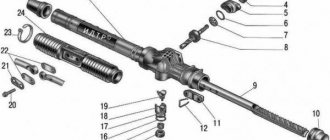
The VAZ 2110 steering rack is one of the most important parts of the car’s chassis. It connects the wheels and steering wheel through a special mechanism into a single whole. The vehicle's controllability, people's lives and traffic safety depend on its serviceability. Therefore, it is important to maintain the functionality of this unit and be able to quickly diagnose problems, given that rack faults can easily be confused with other faults. Knowing the structure of the mechanism and signs of malfunctions will help to simplify their identification.
In today's article we will talk to you about the main faults of the VAZ 2110 steering rack and how to repair them yourself.
Main faults of the VAZ 2110 steering rack
In modern VAZ 2110 cars, breakdowns of the steering rack and power steering are a very common occurrence. The reasons may be the following:
- Frequent driving on uneven roads, getting the car into potholes at high speed, active (uneconomical) driving style. In such a situation, the steering rack and power steering will quickly fail, an annoying knock will appear, and controllability will deteriorate. The result is failure of the unit;
- sudden acceleration when the steering wheel is in the extreme right or left position. This driving practice negatively affects the life expectancy of the steering rack;
- Regular trips to curbs are a big load for such an important mechanism.
Fans of such “obstacle driving” will very soon have to spend money on repairing the steering rack.
We have identified the main reasons. But how to determine whether a steering rack is faulty in practice? For what symptoms? We will look at this issue in more detail.
Replacing the VAZ clutch cable
VAZ-produced cars come in both front-wheel drive and rear-wheel drive, and they also have different clutch drives. If all VAZ classic cars have a hydraulic drive, then in many front-wheel drive cars (2108-2115) the release is controlled by mechanics, and the control element is a cable. Like all parts, the clutch cable (TC) wears out over time and therefore needs to be replaced periodically. The reasons for vehicle failure are:
- jamming of the cable itself in the “jacket”;
- breakage of the remaining threads of the vehicle;
- break of the cable itself.
If the vehicle itself is intact, but the clutch has become difficult to squeeze out, you can try to lubricate the cable. Litol or other grease is suitable as a lubricant, but it should be noted that this is a temporary measure, and you still need to prepare to replace the VAZ clutch cable. Changing the vehicle on a Zhiguli 2108-2115 is very simple:
- We disconnect one end of it from the pedal;
- unscrew the cable fastening nuts on the gearbox bracket (in Figures 1 and 2);
- disconnect the vehicle from the plug on the gearbox.
In order to remove the vehicle, we pull it out into the engine compartment, then install a new part, and use the nuts on the bracket to adjust the cable tension.
How to tighten the steering rack on a VAZ 2110 with your own hands
In order to tighten the steering rack on a VAZ 2110, you must perform the following procedure
- Unscrew the nuts inside the passenger compartment and remove the fastening bolts of the lower universal joint to the steering rack gear shaft. To do this, you will need a 13mm socket. The bolt can turn, so hold it with an open-end wrench.
- In the engine compartment itself, remove the nut of the upper fastening of the rack boot.
- At the bottom of the car, remove two more nuts that secure the rack boot.
- Remove the boot.
- Raise the front of the car and remove the front wheels.
If you are going to remove the steering, but not dismantle the rods, follow these instructions:
- Remove the locking plate from the rod mount by prying it off with a screwdriver. Then unscrew the two bolts that secure the rods and rack;
- Using a 13mm socket, remove the nuts from the steering gear brackets connecting to the front panel;
- Move the rack forward a little to remove the gear shaft from the shield hole;
- Remove the rack together with the rods.
If you want to remove the steering rods, unscrew the rod end from the swing arm of the shock absorber struts. To do this you will have to do the following:
- Remove the cotter pin using pliers;
- Using a 19mm spanner, unscrew the ball pin fastening nut, but not all the way;
- Use a 17 socket to loosen the tension bolt of the rod end;
- Now press out the ball pin. To do this, insert a mounting blade between the swing arm and the tip. Press the tip away from the lever, and apply several blows with a hammer to the end of the rotary lever;
- Unscrew the ball stud nut completely;
- Remove the ball pin from the lever hole;
- Use a screwdriver to open the groove of the tie rod end;
- Remove the tip, holding the threaded adjusting sleeve with a 27mm wrench. Count the number of turns so that during reassembly you can tighten it by the same number of turns;
- On the tie rod, try to maintain the position of the threaded bushing. This way the toe angle of the wheels will remain as correct as possible.
Video: How to tighten the steering rack on a VAZ 2110 in a garage
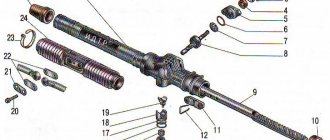
Steering elements
This includes:
- Steering rod ends (internal and external);
- The bracket that holds the steering mechanism;
- Support;
- Anther;
- Carter;
- Tie bolt;
- Flange for flexible coupling;
- Adjustment rod;
- Turn lever;
- Ball joint tip;
- Bolt for holding the inner rod ends.
The drive gear is mounted on the crankcase bearings. It engages with the rail. The metal-ceramic stop is sealed in the crankcase using a rubber ring and presses the rack with a special spring to the gear.
Steering rack diagram
Due to the work of the locking ring, the unwinding nut is fixed. There are marks on the boot and crankcase that make it easy and quick to assemble the entire assembly.
What kind of steering rack is on the VAZ 2110 - interchangeability of parts
To restore the functionality of the steering rack, as a rule, it is repaired, but sometimes it is necessary to replace the rack assembly. Do you know what steering racks were used on the VAZ of the tenth family, and what racks can be installed instead of the old one?
On the “ten”, the manufacturer installed steering racks of the old model (from VAZ 2108) and the new model with the index 2110. All the racks indicated in the table below are interchangeable, so that there are no installation difficulties, it is recommended to buy the rack together with the rods. Steering racks with power steering are replaced only with similar ones.
By the way, it is not necessary to change the steering mechanism assembly, you can try it
Steering column repair
Due to constant friction in the steering mechanism, elements wear out, which indicates the need not only for adjustment of the unit, but also for possible repairs.
How to remove the gearbox
To dismantle the steering column on the “seven”, you will need the following tools:
- a set of keys;
- knob;
- heads;
- steering rod puller.
After preparing everything you need, perform the following step-by-step actions:
- The car is placed on a lift or inspection hole.
- Clean the steering rod fingers from dirt.
- The rods are disconnected from the gearbox bipod, for which the cotter pins are removed, the nuts are unscrewed and the pin is squeezed out of the steering gear bipod using a puller.
- The steering column is connected to the steering wheel using an intermediate shaft. Unscrew the fastener of the latter from the gearbox shaft.
- The gearbox is fastened to the body with three bolts. Unscrew the 3 fastening nuts, remove the fasteners and dismantle the steering mechanism from the car. To make it easier to remove the assembly, it is better to turn the bipod all the way into the column body.
Video: replacing the steering column using the example of a VAZ 2106
How to disassemble the gearbox
When the mechanism is removed from the vehicle, you can begin to disassemble it.
Parts of the steering gear housing: 1 - housing; 2 - bipod; 3 — lower crankcase cover; 4 — adjusting shims; 5 — outer ring of the worm shaft bearing; 6 — separator with balls; 7 — bipod shaft; 8 - adjusting screw; 9 — adjusting plate; 10 — lock washer; 11 - worm shaft; 12 — upper crankcase cover; 13 - sealing gasket; 14 — bipod shaft sleeve; 15 — worm shaft seal; 16 — bipod shaft seal
Tools you need to prepare:
- standard set of keys;
- head at 30;
- bipod puller;
- vice.
The work is carried out in the following order:
- Unscrew the bipod nut and use a puller to press the rod off the shaft.
- Unscrew the oil filler plug, drain the lubricant from the crankcase, then unscrew the adjusting nut and remove the lock washer.
- The top cover is secured with 4 bolts - unscrew them.
- Remove the adjustment screw from the engagement of the bipod shaft, then remove the cover.
- Remove the thrust shaft with the roller from the gearbox.
- Unscrew the fasteners of the worm mechanism cover and dismantle it along with the adjusting shims.
- Use a hammer to lightly strike the worm shaft and knock it and the bearing out of the steering column housing. The end surface of the worm shaft has special grooves for the bearing.
- Remove the worm shaft oil seal by prying it off with a screwdriver. In the same way, remove the bipod shaft seal.
- Using the adapter, knock out the outer race of the second bearing.
After disassembling the steering gear, it is troubleshooting. All elements are pre-cleaned by washing in diesel fuel. Each part is carefully inspected for damage, scuffing, and wear.
Particular attention is paid to the rubbing surfaces of the worm shaft and roller. The bearings must rotate without jamming. There should be no damage or signs of wear on the outer races, separators and balls.
The gearbox housing itself should not have cracks. All parts that show visible wear must be replaced
There should be no damage or signs of wear on the outer races, separators and balls. The gearbox housing itself should not have cracks. All parts that show visible wear must be replaced.
Assembly and installation of the gearbox
When the faulty elements have been replaced, you can begin assembling the unit. The parts that are installed inside the crankcase are lubricated with transmission oil. Assembly is performed in the following order:
- Using a hammer and a socket or other suitable device, press the inner bearing race into the steering assembly housing.
- A separator with balls, as well as a worm shaft, are placed in the cage. The outer bearing separator is placed on it and the outer race is pressed into place.
- Mount the cover with gaskets and press in the oil seals of the worm shaft and bipod. A small amount of lubricant is first applied to the working edges of the cuffs.
- Place the worm shaft in the mechanism body. Using adjusting shims, the rotation torque is set from 2 to 5 kgf*cm.
- Install the short rod shaft.
- At the end of the work, lubricant is poured into the steering column and the plug is screwed in.
Installation of the unit on the machine is carried out in the reverse order.
How to replace the steering rack of a VAZ 2110 step by step instructions + photo report
In order to independently replace the steering rack of a VAZ 2110, you must perform the following procedure:
- Before you start work, unscrew the wheels so that they are directed towards the front, then hang the front part and remove both front wheels from the car, but before that, carefully secure your car so that it does not fall to the ground, and for this You will need to put it on the handbrake, put wheel chocks under the rear wheels just in case, and most importantly, the area on which you are going to do the work must be flat and must be asphalt, in case the car does fall, place the wheels under it in advance (So that it fell on them).
- Let's go to the salon, while there, you will have to use two keys (one bolt must be kept from turning) to unscrew the nut of the bolt, which compresses the clamp clamp, with the help of which the propeller shaft is held on the splines of the steering rack, after the nut is unscrewed and the bolt removed (see small photo), insert a powerful screwdriver into the slot (where the bolt was located, indicated by a blue arrow) and with its help, unclench the clamp so that the driveshaft can easily come off the steering rack splines.
- Now, on both sides, pull out the steering tips from the holes into which they go, we will briefly explain how to pull out the tip using the example of the right side, in general, take pliers and use them to pull out the key (This is a kind of metal wire), as soon as it is pulled out, unscrew the nut and using a puller, press the tip out of the hole and that’s it, if you need pictures and you have no idea what a steering tip is, then in this case read the article: “Replacing steering tips”, it says everything in detail.
- When both steering tips are removed from the holes, start turning out the bolts that secure the rods themselves (the steering rods are located on these rods), they are directly screwed to the steering rack in the central part (To remove the bolts, pry up the locking plate with a screwdriver, it does not allow the bolts spontaneously unscrew) by unscrewing one bolt at a time, completely remove the rods from the car (you need to pull them out through the wheel arches) and as you already noticed in the small photo, when removing the rod, the person still holds the connecting plate, do not lose this plate, when turning out the last bolt, this Always hold the plate with your other hand.
- And finally, unscrew two nuts on each side that secure the steering rack to the dashboard, remove the metal clamps and through the arch, remove the rack completely from the car, you can get acquainted with all this in more detail by looking at the photos below:
Before buying a rack, you should know something, firstly, before you buy a new rack, look at the markings on the old one and buy according to it, racks are generally interchangeable, but to avoid problems, buy everything according to the index and by the way, if If you have power steering installed, then take the new rack from the power steering!
Video: How to replace the steering rack on a VAZ 2110
Checking the condition of the tie rod ends
You will need an assistant to perform this test. Take 2 jacks and lift the front of the car. Secure the machine to support stands. If you have a lift at your disposal, use it. Ask an assistant to grab the wheel and jerk it sharply in a horizontal plane, i.e. pull the rear part of the wheel toward you and the front part away from you. During this, you place your hand on the body of the ball joint of the steering tip and the swing arm and evaluate their mutual movement relative to each other. If you feel the ball joint move freely, replace the tie rod end immediately. In addition, change the steering tip if, during the inspection, you notice that the ball joint boot is torn.
Price and features of the VAZ 2110 steering rack
On VAZ 2110 cars, the very first rack with straight teeth was installed, and on the latest versions of the car and on the first Kalinas, exactly the same rack was installed, but with helical gearing. Simple device, easy repair. The main thing is to correctly diagnose the malfunction. Then the location of the breakdown will be localized and this will significantly simplify the repair of the steering mechanism.
A new rack for a VAZ 2110 costs 4,230 rubles complete with rods. This is a VAZ unit. If you are not satisfied with this quality, you can add 700 rubles and buy a rack for a VAZ 2110 from Fenox. Frankly speaking, there is no particular point in overpaying, since the rack itself, the gear bar, runs for quite a long time under normal conditions.
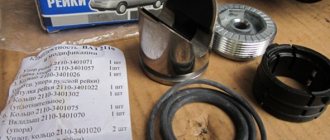
Repair kit for rack 2110
The whole problem is in the repair kits. Here you need to keep your ears open, since the repair kit may be either incomplete or of poor quality. It is inexpensive, but the very fact of buying a low-quality spare part that you are counting on is unpleasant. Small repair kit includes:
- rack bushing;
- emphasis;
- o-ring, three pieces;
- thrust nut.
This set costs about 300 rubles. But it’s best to pay another 250 and take the full set, which includes boots and bellows. No matter what condition the old ones are in, it is better to replace them, and here's why.
The fact is that on average, at 120 thousand, depending on operating conditions, subtle cracks and breaks may appear on the stockings and corrugations. It is quite difficult to notice them, and water inevitably gets through them. It will not escape from the rack body and will do its wet job - rust cannot be avoided. Any source of corrosion on the rack is a minus to the service life of both the rack itself and the seal. The chain reaction causes the rack to eventually wear too much and repair may not be possible. Don't skimp on a good repair kit.
Removal and replacement
So, you have made the right decision - to replace the steering rack on your car with a new one. You will have to go to a car store or market and purchase the rail itself.
The replacement procedure is not too complicated and does not require any specialized skills or professional tools. You need to do the following:
- remove the plastic fender liner from the left front side of the car (it will interfere when dismantling the steering rack);
- open the clutch bolt using a 13 mm wrench (the bolt is located in the car interior above the pedals);
- release the steering linkages by opening them on the left and right sides;
- open the bolts securing the steering rack to the car body (this procedure is carried out in the engine compartment, there are only two fastening bolts);
- hold the rail while opening so as not to damage any other components of the car;
- After this, you need to push the rack forward, make sure that it is not secured with any bolts, and remove it through the left wheel arch.
Next, you should inspect the rail. If the rubber boot is not torn, remove it. To do this, you need to open the tips and cut off the tape clamps holding the boot. If under the boot the rack looks as if it had just come from the factory, it can be restored. You should be careful at this stage - do not secure the rack in a vice with hard plates. This may damage the mechanism body.
If the rail under the boot is dirty or has traces of rust, it just needs to be replaced.
Symptoms of steering failure 2110
The adjustment of the steering rack of the VAZ 2110 begins at the first sign of a malfunction. And these signs are quite deceptive. Very often, knocking inside the rack is attributed to ball joints or bearings, but once you correctly diagnose the steering, everything will fall into place. This is not difficult to do.
While driving, you can hear sharp pounding sounds that do not actually come from the suspension. The supports will not knock like that when they are under load. Silent blocks will not knock either, so such a relaxed knock is characteristic only of the rack itself. These are the first signs that the rack needs at least adjustment. Maximum - dismantling and repair. But it’s too early to talk about this.
Tools and materials for work:
- Socket head for fifteen, nineteen, twenty-four;
- Power driver;
- Two jacks;
- Ratchet driver;
- Wheel bolt wrench;
- Wheel chocks;
- Socket wrench for ten, thirteen;
- Pliers;
- Wire cutters;
- Extension;
- Hammer;
- Five hexagon;
- Steering wheel pin remover;
- Key for adjusting the steering rack;
- Wire brush;
- Rubber hammer;
- Mounting lever;
- Crosshead screwdriver;
- FIOL lubricant;
- Slotted screwdriver;
- Penetrating lubricant.
Steering rack with power steering for VAZ 2110
The second, more serious sign that the rack needs attention will be the steering wheel biting when the car changes course abruptly or when the steering wheel is turned all the way. How many times has it happened that the rack with its knocking confused and forced the entire front suspension to fall apart. Therefore, in addition to knocking noises, one can add lubricant leakage and play in the plane of rotation of the steering wheel to the list of suspected malfunctions.
But if the steering column is loose, if you pull the steering wheel away from you or towards you, adjustment is simply necessary. Another important point that concerns tens with power steering. Such a rack will never show any play while moving. To determine the amount of play, you need to swing the steering wheel or the steering rod from under the hood with the engine off to eliminate the influence of the hydraulic booster.
Checking the steering play
To perform a play test, place the front wheels of your vehicle in a straight-ahead (straight-ahead) position. Take a long-blade slotted screwdriver and tape it to the dashboard with the blade facing the steering wheel. Now carefully turn the steering wheel in one direction and the other until the wheels begin to turn. When the wheels begin to turn, use chalk or thread to mark the limits of its free play on the steering wheel rim. Measure the distance between the marks and determine the free play of the steering wheel, which should not exceed 15 mm. If the free play of the steering wheel exceeds 15 mm, you need to check the condition of the steering rack, tie rods and ends, front wheel hub bearings and strut swing arms. After this, sharply jerk the steering wheel from side to side at a small angle. Make sure there is no knocking noise in the steering column universal joints or steering gear. If necessary, tighten loose fasteners or replace faulty parts with new ones.
How to tighten the rack of a VAZ 2110
The adjustment is quite simple. The main problem with tightening the nut is its inaccessibility. It is much easier to tighten it when the rail is clamped in a vice. But this only makes sense when the repair kit is being repaired or replaced. If you are sure that everything is in order with the condition of the rack, then it is not at all necessary to dismantle it, but you need a special key. About the same as in the photo below.
You can make it yourself, but it’s hardly in such short supply. This is, in principle, an ordinary 17-mm spanner, but with such an unusual configuration. Using the device, you can not remove the rail at all, then the adjustment will take a few minutes. To adjust the rack, you simply remove the plastic cap, loosen the lock nut and tighten the adjusting sleeve. The factory gives its recommendations in this regard, but they do not always work, since we are dealing with slats of varying degrees of wear. You need to tighten the adjusting nut slowly, first by 10-15 degrees, and then check the play on the steering wheel. It is quite possible that this is enough. You shouldn’t overtighten the bushing either, the steering wheel will be tight and this will increase wear on the rack and bushing itself.
To avoid removing the rack, try adjusting it on the machine first. If the adjustment gap is not enough, then you will have to disassemble the unit and replace parts from the repair kit. In any case, service stations are very reluctant to undertake rack adjustment, since there is a lot of work, and the fee is so-so.
A dozen will not teach us this yet, so we need to love a car not only with our eyes, but also with high-quality repairs and timely prevention. Smooth roads and precise control, everything will be fine!
Sources
- ladamaster.com/regulirovka-rulevoy-reyki-vaz-2110
- remont-inomarki.ru/rulevaja-rejka-vaz-2110.html
- vazweb.ru/desyatka/upravlenie/zamena-rulevoy-reyki-vaz-2110-samomu-ili-v-servise.html
- ladaprofi.ru/vaz-2110/kak-provesti-regulirovku-rulevoj-rejki-na-vaz-2110.html
- zen.yandex.ru/media/romaretsky/remont-rulevoi-reiki-vaz-2110-sniatie-i-ustanovka—foto-5d36ac27f8ea6700ad7c62dd
- drive2.ru/l/6383723/
Replacement
If you decide to replace the rail yourself, invite someone you know to help you. You will definitely need an assistant in this process. Also prepare the following tools and supplies:
- set of wrenches;
- hex key 17;
- jack;
- wheel wrench;
- bricks or logs to install the raised front part of the car without wheels;
- steering rod puller (if equipped);
- rust preventative (WD-40);
- Litol lubricant or equivalent;
- rag.
Work order:
- Place the car on a level surface.
- Secure it with the parking brake.
- Use a jack, wheel wrench and logs (bricks) to lift the front of the car and remove the front wheels.
- Disconnect the negative terminal from the battery.
- In the passenger compartment, on the driver's side, in the area of the pedal block, unscrew the locking bolt of the steering shaft cardan.
- Remove the adsorber from the engine compartment and move it to the side.
- Unscrew the steering end nuts, first pulling out the cotter pins.
- Using a rod puller, remove the ends from the posts. If there is no puller, tap the tips from below with light blows, being careful not to damage the threads on them.
- Spray the steering rack clamp nuts with rust remover and let it soak in.
- Unscrew the clamp nuts with a wrench (4 pcs).
- Remove the steering rack by pushing it to the right (passenger) side.
- Remove the tips from the rack and determine the approximate number of turns by which the nuts were tightened, so that you can then tighten them more or less accurately, and go to the nearest service station to adjust the wheel alignment.
- Remove the plugs on the sides of the new rail and fill the body with Litol as much as possible.
- Screw the ends to the rods (do not mix them up - they are different).
- Install the new rail into place by attaching the nuts to the studs of the clamps.
- Call an assistant and ask him to help you guide the steering shaft drive gear into the seat on the rack housing. Check the precise alignment of the splines.
- Tighten the locking bolt on the steering cardan.
- Carry out the rest of the installation work in reverse order. Don’t forget to lubricate all threaded connections with Lithol - it will be easier to disassemble next time.
