Good day to all! Today we will talk about such a device as an electric trunk lid or simply a rear door. Here you can call it whatever you like. The essence remains the same.
Many modern cars have a function that allows you to remotely and automatically open the luggage compartment. Everyone imagines what it is like when you don’t have to lift the lid manually. Therefore, many decide to install a similar element on a sedan, hatchback or other car body with a similar device.
The presence of an electric drive will significantly simplify closing and opening the trunk. Now there is a real opportunity to buy a universal set, connect it to your car and use it with pleasure and excellent comfort. I propose to study this issue in more detail and decide whether an electric drive is right for you.
Luxury or necessity
The automatic trunk opening feature is found in many new cars. Drivers like this feature, because you quickly get used to good things. To open the luggage compartment in a car, just press a button in the cabin. The lock comes into operation as a result of the operation of the electric drive.
This feature may seem like a small thing and an insignificant addition until the cold weather arrives. In cold weather, the lock on the trunk often freezes, making opening the compartment a difficult task. You have to spend time defrosting the mechanism. In the case of an electric drive, such problems will not arise. Also, such a mechanism makes car hacking more difficult, which is also an important advantage.
Mostly imported cars are equipped with this function, and not all of them. Domestic manufacturers have only recently begun to equip their models with such functionality. Every car owner can equip his car with an electric drive for the trunk. This will not be difficult to do, but you will still have to tinker.
Connecting an electric lock to an alarm system
It is recommended to install an electric locking device on the car yourself according to the following scheme:
- Carefully read the installation diagram in the attached documentation. Perform marking work on the trunk lid. Prepare mounting holes.
- Install and secure the electric lock drive to the trunk lid of the car. Fit and adjust the electric lock drive rods to the locking device. Connect the rod to the closing mechanism and secure it.
- Disconnect the battery terminals. Lay out the electrical wiring according to the connection diagram and connect. Use a multimeter to check the correctness and reliability of the electrical connections. Connect the corresponding connectors of the car alarm control unit and the electric lock.
- Replace the car battery terminals and secure them. Check the operation of the trunk lock, installed by yourself, for correct operation. If necessary, make adjustments and repeat the installation.
Reliable operation of the electric lock is ensured by duplicating the activation of the opening and closing functions. To duplicate the functioning of the trunk lock, experts recommend installing buttons in the cabin that are responsible for the operation of the locking device. The button is located in the cabin in a place convenient for the driver, in which it does not have much significance. The main thing is the correct connection, which is monitored with a multimeter.
Device Features
To open the trunk remotely, automakers use two main methods. The first involves installing an electric drive in the cover, and the second involves the use of pneumatic drives. The latter option is considered more reliable, but also more expensive.
The lid can also be controlled using an electric drive in various ways. This can involve buttons on the dashboard, buttons on the doors, handles on the trunk itself, and remote controls. Each option, in principle, looks attractive and potentially convenient. Therefore, the motorist needs to decide for himself what kind of result he wants to get. It is important to understand that the remote control is convenient, but it can be easily lost. Plus, the installation involves a very complex set of works. Because of this, the most optimal option is to locate the button inside the car interior.
The electric drive device includes several main components. The drive with an electric motor is quite practical, reliable, durable and hardy under active conditions. Less commonly, you can find drives that use magnetic plates. The design is more complex and can create a number of additional problems. It's better not to use them.
The undeniable advantage of the device is that it is quite possible to install it yourself, and on almost any car. If you read various forums, study the work of various craftsmen, of which Moscow alone includes several hundred, as well as the whole of Ukraine, you can see clear examples of the implementation of electric drives on a wide range of car models and brands.
For clarity, I will give several examples where such a system is available from the factory or can be installed on your own:
- Audi Q5;
- Kia Optima;
- Mercedes W211;
- Volkswagen Touareg;
- Chevrolet Niva;
- VAZ 2170 (Priora sedan);
- Lada Vesta SV;
- Ford Kuga 2nd generation;
- VAZ 2114;
- VAZ 2115;
- VAZ 2104;
- Lada Granta;
- Skoda Superb, etc.
There really are a lot of options. It is almost impossible to list everything. That is, you understand that you can install an electric trunk lid on any car.
Electric trunk drive: do-it-yourself installation
Installation of this device can be considered a luxury - many car owners can do without it for years. But it is obvious that such tuning ensures ease of opening, making life easier. Automatic opening by pressing a button in winter - there are no problems with the lock icing. The second advantage is that in this case it is much more difficult to break into the trunk door.
Today, more and more foreign cars have this convenient functionality; our manufacturers relatively recently began to equip luggage lids of cars in this way. If there is no electric drive in your car, this can be fixed.
Don't waste your time - use the Uremont search and get offers from nearby services with specific prices!
The operating principle of the electric trunk
There are devices with an electric motor and on magnetic plates that interact with a relay. The first option is durable and practical; in the second case, significant modernization of the car may be necessary due to a more complex design.
If the drive will be controlled from the interior, self-installation is more realistic (compared to linking to an alarm remote control - this requires an experienced auto electrician).
Models of these devices come with side mounts and standard ones. Reinforced specimens are more reliable and of better quality, but this is reflected in the price.
Experienced car enthusiasts recommend giving preference to inertial options in order to unload the engine (the rod rests - the internal combustion engine turns off, durable due to the lack of overheating).
How to install an electric trunk?
First you need to prepare the following list: screwdrivers, drill, pliers, screwdriver, spare wires, multimeter, corrugated tubes, insulating tape and clips. Read the car's repair manual (in particular, what is responsible for the power supply).
Electric trunk installation:
dismantle the plastic cover;
secure the device to the lid;
configure the mechanical connection of the unit with the lock;
attach a metal stick;
route the wiring using standard “paths” (if you need to “go around” bypass, use corrugated tubes);
the wires are routed to the cigarette lighter (often this is advisable);
dismantle the front part of this element and install the fuse;
the button is placed in a place convenient for the user;
pull the wires to the driver's door (bottom/top - at your discretion);
the connections are soldered and wrapped with electrical tape;
one “minus” is connected to the electric drive, the second to the control relay, the third to the alarm system;
connect the battery and test the result.
Selecting a power tailgate kit
For installation you need to buy a special kit. This may be a factory option, which immediately includes everything you need. A more economical solution would be to assemble an “amateur” set, but acquiring it requires knowledge and experience. Experienced car owners advise not to save money by buying a low-quality device. By spending a little more, you will save time and effort on fixing frequent breakdowns. Another bonus is that a high-quality drive increases the market value of the car (in the long term you will even win if you decide to sell the car).
Experienced car enthusiasts recommend choosing an inertial mechanism that “unwinds” before work. The traction force increases and goes to the pushing rod (the device does not overheat). Another advantage is that the mechanism can be turned off if there is an obstacle to the trajectory of the opening element. Your hands and head are protected from unexpectedly closing parts.
The standard package looks like this:
two lifting mechanisms;
a pair of electric lift modules;
Is it convenient to turn on the electric trunk lid remotely?
The remote control or alarm control is convenient, but requires batteries. Enabling is convenient because it saves time (for example, if you have shopping bags in your hands, having a remote option makes life much easier). A system with such functionality and an actuator is more difficult to install - it requires special skills and knowledge in the field of automotive electronics. A stationary button is more reliable and easier to use (another advantage is that you can do everything yourself). If you still choose the first option, contact a car service.
Installing an electric trunk
First, they debug the operation of the lock (disassemble and bend one of its teeth - this will make opening/closing easier). When purchasing a device, it is better to choose the option with a stem.
The next step is to disconnect the battery terminals and lay the wiring (it will take about 3.5 meters), powering it to the cigarette lighter. Remove the casing and place the wires up to the front of the car interior.
Disassemble the central shaft of the machine and place the fuse away from the mechanism and the cigarette lighter (safety measure). In the process, try not to make unnecessary holes, but if necessary, drill in a convenient place.
At the final stage, the unit is directly installed. When working independently, we recommend that you read the manufacturers’ recommendations and find detailed video instructions to avoid mistakes.
Advantages of the system in winter
The operation of opening a frozen lock can take a lot of effort from the car owner. You can use boiling water, a lighter, or just wait in a warm garage. Such “dances with tambourines” take up time, and access to the trunk is sometimes needed urgently. If you are not mentally prepared for such tests, take care of yourself and install an electric trunk drive.
Criteria for choosing an electric lock
When buying an electric trunk lid, you need to take the choice seriously. Our market offers customers many different devices in different price categories, but it is better to immediately exclude cheap options. Such a unit will not be able to work for a long time, because the low price, as a rule, is due to the same quality of production of the device. Therefore, immediately exclude Chinese options - in this case it is better to give preference to Russian or imported devices.
Principle of operation
Typically, the operating principle of the fifth door electric drive is quite simple. To understand it, it is highly advisable to arm yourself with the diagram that is included in the kit and be able to personally observe the operation of all moving components.
The rod is connected to the electric motor using a worm gear. This allows you to avoid several problems at once: firstly, the metal worm, unlike a rubber belt, practically does not wear out even with prolonged use. Secondly, the use of a metal component makes it possible to withstand the weight of the lid, which sometimes exceeds a hundred kilograms.
The motor, depending on the polarity applied to it, can also work for closing. To do this, using the relay included in the kit, you can change the direction of the electrical pulse that is applied to the system.
The mechanism is necessarily supplemented with a control unit. Schematically, this block consists of two parts. The first part receives a signal from the key fob: it is understood that when you press a button on the key fob, the control signal reaches the computing circuit through a diode, where it is processed and converted into a pulse for the electric motor.
The second part of the mechanism is the computing center, whose task is to distinguish between drive movement signals in both directions and filter them from extraneous signals and interference. If we are talking about a button installed in the cabin, then it does not have a wireless principle of operation, and it is connected directly to the drive. This makes it much easier to install such a lock on a car and reduce its cost.
How to install a power lock on the tailgate
Before installation, you should prepare a set of necessary tools and additional materials. So, we will need:
- Connecting wires.
- Terminals.
- Insulating tape.
- Safety fastenings.
- Set of wrenches.
- Several screwdrivers (flat and figured).
- Wire cutters.
- Pliers.
To begin self-installation of the electric trunk lid drive, you must dismantle the plastic lining located on its inner side, which blocks access to the lock. Almost always, when purchasing this device, sellers offer to additionally purchase a lock that has already been modified for it. You should not ignore this offer, since purchasing it will allow you to avoid a number of trivial problems when installing the entire mechanism and will additionally save a lot of time and nerves. The next stage of installation will be laying the wiring to the lock from the cigarette lighter power supply. The choice of a cigarette lighter is justified if this element is almost never used. In addition, if necessary, the device can withstand increased loads. In order to power the electric lock, it is necessary to disassemble the cigarette lighter input to install a fuse between it and the drive start button.
The drive button can be installed in any convenient location. After this, we move on to laying the power wires along the thresholds of the car. This will require about 3.5 meters of cable. The final stage of installation will be the installation of a modified trunk lock, followed by its connection to the network and configuration
When connecting the electric drive, it is important not to reverse the polarity, otherwise the armature of the electric motor will rotate in the opposite direction, as a result of which the mechanism will not function. It would also be advisable to install a fuse in the circuit directly in front of the electric motor in order to avoid its possible failure
I'll be honest. Well, I thought that this modification would cause some excitement. I won’t bore you... so I’ll start.
DRIVES
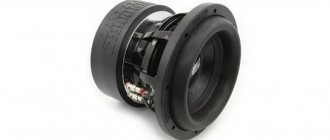
Forward rack-and-pinion electric window lifts were used as drives (they do not rattle). An analogue from Granat is also suitable (cheaper, better adaptable). Suitable models for classic and Niva vases.
INSTALLATION OF DRIVES
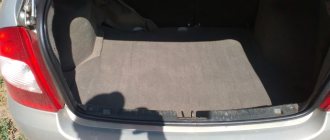
I think words are unnecessary. everything can be seen from the photographs
A few words about the installation: we had to re-adjust the lock and limiters - everything is done locally so that the drives can correctly close the trunk lid. The trunk can also be raised and lowered by one drive... but, unfortunately, due to the distortion when closing, it cannot slam shut until the lock is fully latched. At the same time, two drives are not enough to completely abandon torsion bars... there is not enough strength to open. In open and closed positions, the actuators do not take up much space. The drive mounts are factory-made; I didn’t remake them so that they could be resold later.
ELECTRICAL
At the moment, the following scheme is used to control the drives:
A little explanation. So, a group of relays R1-R4 are used as a trigger to control any device using a non-latching button. that is, when the button is pressed for the first time, output R4 will be +12, when pressed again, there will be no voltage. Relay R5 is needed only to supply a control “minus” to the input of the closer during its operation. its presence is determined only by the operating mode of the closer, i.e. in my case, the closer I use requires a controlled “minus” feed throughout its operation. but there are closers that only need a short-term supply of controlled “minus” - in this case the R5 switch can be eliminated. Relays R6 and R7 are used to reverse the power supply poles of the drives.
The cheapest door closer was used - two-channel Mystery PWM-2 with simultaneous operation of both channels
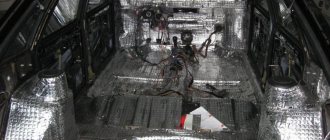
All this equipment was placed in a plastic box and thrown into the niche of the rear arch. The main power is decoupled directly from the battery through a 10A pre.
What’s good about this scheme is that it doesn’t require the use of any extra sensors like limit switches or the like.
CONTROL
At the moment, control is implemented from the trunk opening button of the standard key fob, the alarm key fob, and using a button on the trunk itself. Most likely, another button will be introduced into the interior. but I’m still in the process of thinking because I’m confused about where it’s best to implement the button.
First installation option
In order to implement the design, you can use two methods. And the very first is the purchase of standard products designed for electric trunk drive. It's best to take extra. The components of the system must be reinforced, the materials used for their manufacture must be of only high quality. Of course, the cost of such a set will be rather high, but you will be sure that it will serve you for many years and will not break at the most inopportune moment. The presence of an inertial mechanism is welcome, since it is with its help that the drive will be turned off if there is an obstacle in the path of the trunk lid movement.
What external “symptoms” indicate that the damper is dirty?
Problems in the operation of the throttle assembly do not always arise only due to the formation of deposits on the valve. These can be caused by failure of the position sensor, malfunctions of the drive and other malfunctions.
Even if you are not sure that the cause of the malfunction lies in the throttle valve, it is worth checking this unit and cleaning it in order to delay as much as possible the moment of formation of deposits, which sooner or later destabilize the operation of the engine.
If a problem arises with the electronic throttle, it is better to contact a service center - specialists will help you figure out its causes without the risk of damaging the mechanism.
Features of the AAALine SMARTLIFT electric lift:
- Intelligent anti-pinch technology;
- Programming the height of the rear door extreme position;
- Sound and light warning.
System Features:
- Designed individually for each specified model.
- The Pin-TO-Pin method of connecting to the vehicle's electrical system eliminates installation errors.
- Adapted for control from a standard remote control key fob (if technically possible).
The system includes:
- Control block
- Electric drive (2 pcs.)
- Soft closing device (optional)
- CAN module
- Sound emitter
- Connection cable kit
- Control button (2 pcs.)
- Set of brackets for electric drives
- Milling cutter
- Set of plastic ties
- User's Guide and Installation Instructions
Preparation for installation
We purchase a lock kit. There are a lot of manufacturers of auto parts on the market now, but there are no special differences between the sets. It is important that the device has a warranty card and instructions for use and connection. Also in the box you will find:
- Activator;
- terminal;
- Wires;
- Relay.
Additionally, you need to stock up on a set of standard tools: pliers, screwdriver, screwdrivers, multimeter, drill with carbide drill bit. In addition to the standard accessories, immediately buy additional wires; it is quite possible that the length of those you find in the box will not be enough for you. Black heat-resistant insulating tape, corrugated tubes, and clips for fastening the trim will also be useful, since very often the trim of car elements is attached to disposable ones.
Important! Be sure to check that the warranty card for the purchased device is available and filled out correctly. Regardless of who performed the installation, you or the service, you have the right to free repairs within a year.
Device set
Electric trunk drive: which is more reliable, factory or self-assembly?
Before implementing any idea, you should think carefully and prepare everything you need. In a situation with an electric trunk drive, first of all, you need to purchase the mechanism itself. Today, this is not a problem, because it is easy to find in virtually any auto parts store. Very often, all such electrical mechanisms, depending on the manufacturer or other minor design features, differ from each other, but the operating principle remains the same.
Therefore, some car enthusiasts assemble the required mechanism at home, but for the greatest confidence that the end result will be positive, it is advisable to purchase a ready-made device.
Additional modernization of locks
If you dream of your car doors opening and closing as smoothly as in foreign cars, try installing silent locks. Such a device can be installed on any model of Zhiguli. For representatives of the retro era, such modernization is also possible, but the locks themselves will have to be filed a little. By the way, you can also put it on the trunk. In general, there is no limit to perfection.
Silent locks
And the installation is, in truth, very simple and transparent. It is enough to dismantle the old locks, try not to drop the necessary elements inside the door, or remove the trim in advance. And then install new analogues on two bolts. There are situations when, after installation, the door does not close tightly or warps slightly, causing cracks to form. Solving the problem is also very simple by adjusting the location of the device. In general, initially try to secure it exactly where the old one was.
Let's figure out why the throttle gets clogged
Like any vehicle component, the throttle valve must be serviced periodically. A common problem with this unit is blockage.
The throttle can become clogged for several reasons:
- Dust on the roads. Despite the location of the damper after the air filter, dust particles still enter the throttle air duct. If the filter itself is already dirty, then larger dust fractions enter the choke.
- Crankcase ventilation. On many modern cars, crankcase gases are cleared of oil in the oil separator and enter through the throttle into the intake system along with ordinary air. This principle is being implemented to comply with environmental standards.
- Exhaust gas recirculation. This system began to be used relatively recently, but has already become popular among automakers. The exhaust gases from the exhaust manifold again flow through the throttle into the intake for afterburning.
Now imagine that oil particles from the crankcase gases combine with dust and/or carbon particles from the exhaust gases. A dirty, oily film is formed, which constantly settles on the damper. After tens of thousands of kilometers, a layer of this dirt will disrupt the operation or completely disable the throttle assembly. Therefore, periodic cleaning of the throttle body is important for proper engine operation.
Trunk lid electric drive device
As already mentioned, depending on the type of electric drive, the mechanism will also differ. For example, let's look at the simplest and most complex kit, as well as their main differences. After all, it is precisely because of the differences and configuration that the price of the mechanism will differ.
The simplest is considered to be an electric trunk lid, which opens and closes only with a button in the car interior. The kit of such a system includes a control unit, a button, trunk lid closers and two movable rods. If we talk about top-end electric drive options, then in addition to the basic set (the simplest mechanism), the manufacturer added sensors under the rear bumper. The ability to open from a button on the control panel, and the software of the control unit has also been improved for access from a smartphone.
If the button and control unit are clear, then how the trunk lid electric drive mechanism itself works, which, in fact, performs physical actions. Externally, the movable rod, or as manufacturers sometimes label it, a telescopic rod, at first glance is not particularly different from a gas rod, which can also be installed by the factory, unless, of course, you compare the thickness of the rod itself. There are a lot more differences inside.
For symmetry and reliability, it is customary to install two telescopic rods on the tailgate. On the one hand, it is beautiful, but most importantly it is reliable, since the door hinges will not warp or break due to uneven load. The rod itself (telescopic rod) consists of:
- Two-stage gearbox;
- Spring based brake;
- Movable screw nut;
- Spring;
- Drive motor;
- Lead screw;
- External body of the telescopic rod;
- Hall Sensor.
It is this mechanism of the telescopic rod that is considered the main or central one in the entire scheme. The size of the parts may vary depending on the brand, make and model of the car, but the basic principle of operation is unchanged, and for the most part the same for all cars.
Installation of a standard electric drive on a Lada
Frets of the “tenth” family of recent years of production are equipped with an electric drive for opening/closing the trunk directly at the factory. Earlier series of cars do not have such equipment, so owners will have to install the electric trunk drive themselves.
Our example involves the operation of the electric trunk drive through a separate button in the cabin. Some alarm systems have an additional ability - to open the luggage compartment, so it is to this system that we will connect the electric drive. For installation you will need the mechanism itself and a mounting plate.
If you have an electric drive in a universal configuration, you will need to make the mounting brackets yourself.
In addition, you will need four meters of electrical wire and a switch button.
Before installing the electric drive, be sure to disconnect the negative terminal of the battery. Then we attach the lock drive and remove the protective casing, first removing the fastening clips. Using pliers, we straighten the rear end of the electric drive, unscrew the screw securing the rod, but not completely. The lock drive rod has been disassembled. Now the compartment cannot be opened from the outside, since the lock unlocking mechanism is disconnected from the lock cylinder.
Next, on the trunk lid amplifier, you should mark the locations for drilling the mounting holes for the electric drive attached to the lock. Using an electric drill, we drill holes with a diameter of 3 mm according to the marks. Then it is necessary to bend the rod and make a U-shaped bracket from 4 mm steel wire of such a width that its edges fit effortlessly into the exit points of the drive shell bosses.
An M4 thread should be pre-cut at each end of the bracket. Finally, we fix the electric drive using the prepared bracket and connect the traction lock to it.
We recommend: Advantages of ordering a car battery from a local company rather than from network companies
Through the green wire on the electric drive, current flows to the button due to the retraction of the rod. This wire is laid next to the original cable harness. We connect ground to the blue wire, which is negative. You can get power from any exposed area of the car body. The interior button is installed on the dashboard in the left corner of the mounting block.
The operating voltage will be connected to it from block Ш1 (pin 2). After assembly, you can check the functionality of the system by pressing the interior button. Everything should work smoothly.
Electric drive connection features
Now that all the wires are in place, you can connect them to the control unit. Try to maintain polarity so that the semiconductor elements do not fail. Experts recommend using a separate cable for connection, which must be connected to the battery through a fuse.
The wire cross-section and fuse rating depend on the power of the drive. If you are using a universal electric trunk drive or for a specific car brand, it is best to install the control buttons at the bottom of the dashboard. But only in such a way that when driving you would not be able to accidentally catch it.
System TIDA-01424
The block diagram of the TIDA-01424 reference project is shown in Figure 3. The main elements of the board are two PGA460-Q1 ultrasonic rangefinder microcircuits, which perform all the main work associated with analog signals.
Rice. 3. Block diagram of TIDA-01424
The measurement results, which are essentially the distance to each object detected by the sensor, are compared to user-defined optimized threshold levels and used to make subsequent decisions. The flexibility of the system is due to the ability to receive digital data directly from the PGA460-Q1 rangefinders via the USART serial interface and use them as input data for the gesture recognition algorithm.
The main components of the analog part of the system, including two rangefinder chips PGA460-Q1 with matching ultrasonic transformers and other necessary wiring, a 3.3-volt LDO stabilizer TPS7B6933-Q1 and a TPS3700-Q1 monitor with a power intelligent power switch TPS1HA100-Q1 are mounted on a compact double-sided BoosterPack format board. A special feature of this form factor is the presence of a 20-pin connector, which carries USART signals and several standard input/output ports (GPIO). This connector is fully compatible with LaunchPad microcontroller boards manufactured by Texas Instruments. It is on such a board, running the MSP430F5529 microcontroller, that the rangefinder signal processing algorithms are implemented, the source code of which is available for free download on the Texas Instruments website.
The system is powered by a standard 12-volt battery. At the same time, the system has protection against polarity reversal, undervoltage and overvoltage, and can easily withstand overvoltages of up to 40 V, which arise, for example, during problems in the vehicle’s on-board network.
In passive mode, with the ultrasonic emitters turned off, the current consumption of the system is less than 100 μA, which allows it to be connected directly to the battery without the risk of significant discharge of the latter.
All system components are designed for use in automotive applications and have a corresponding temperature range of -40...105°C.
The overall system consists of two boards (analog signals and a microcontroller), indicated in blue in Figure 3, and requires the connection of only three external components: two ultrasonic sensors and a power supply. The main technical characteristics of the system are given in Table 1.
Table 1. Main technical characteristics of TIDA-01424
| Parameter | Meaning |
| Number of ultrasonic transceivers | 2 |
| Type of ultrasonic emitters | Sealed with transformer control |
| Operating supply voltage range, V | 6…18 |
| Permissible supply voltage range, V | -20 (reversal of polarity)…40 (sharp loss of battery load) |
| Current consumption in operating mode, mA | no more than 40 |
| Current consumption in off mode, µA | no more than 50 |
| Object detection range, mm | 200…500 |
| Gesture duration, s | 1…4 |
| Sampling rate, samples/s | 5…40 |
| Printed circuit board | Double-sided, BoosterPack form factor |
Second implementation method
And the second method is the most interesting - you assemble and install all the components of the electric trunk lock drive yourself. In this case, you use partially finished elements. As a rule, many car enthusiasts install electric drives made on the basis of some standard mechanism. It is imperative to use inertial mechanisms so that if there is an obstacle in the path of the trunk, the electric motor does not fail.
When using a simple motor, it will fail if there is an obstacle - voltage will continue to be supplied to the windings, and the rotor will stand still. As a result, the windings simply burn out.
Connection Tips
Before doing any wiring or electrical work, you must first remove the battery from the vehicle. It is advisable to prepare the required connection diagram for the electric trunk lock in advance before starting installation work. In factory kits, it should already be available or included in the car’s operating instructions. On the Internet you can now also find many similar schemes with detailed recommendations for their implementation. Most car models have a 12-volt power supply, but it is better to clarify this nuance.
Much attention should be paid to wiring. The correct operation of not only the electric trunk drive, but also the entire electrical system of the car as a whole largely depends on this. If you treat this issue negligently, then at best there will be malfunctions, and at worst a short circuit may occur, after which it will be difficult and expensive to restore the vehicle’s functionality. For already proven routes, try to use the standard places for laying wires provided by the manufacturer. For additional protection, you can use corrugated tubes and plastic cable ducts of the required size.
The principle of operation of the trunk opening and closing mechanism
Such a mechanism consists of a small number of parts:
- motor;
- a pair of four-pin relays;
- push rod;
- fuse;
- button to control the mechanism.
Installed tailgate servo
The drive responsible for the operation of the rod is available in two varieties. A more common option is a mechanism with a motor. It is highly practical and durable, which explains its popularity. The magnetic platter drive has not received such wide demand because it is complex and problematic. Its operation is based on the interaction of a relay with magnetic plates.
As a result of power supply to the relay, the rod is pulled back, which leads to the opening of the trunk lid. Old VAZ models are not designed for such a mechanism. On such cars, such mechanisms turn out to be impractical. During the installation process, you will have to carry out complex modernization, which often turns out to be irrational.
Roof rack VAZ 2107
If the “seven” is often used to transport various cargoes, then, as a rule, the standard trunk is not enough. In this case, it is convenient to use a special roof rack. Oversized cargo can be secured on this structure. Before choosing a product, you need to find out the dimensions of the elements that can be placed on the trunk. Long materials such as boards, sticks, pipes, if their length is up to 4.5 meters, may not be marked with red flags. If the cargo exceeds the dimensions of the vehicle, i.e. protrudes beyond the front and rear bumpers, it must be marked with special red flags that inform other road users about the transportation of oversized cargo.
What types of luggage racks are there?
On the roof of the VAZ 2107 you can install a roof rack of both the old type and the modern type. The standard “Zhigulevsky” trunk has dimensions of 1300*1050*215 mm, and its load capacity is up to 50 kg. This structure is fastened to the roof gutters using bolts. In general, roof racks can be divided into 3 groups:
The first option is universal. The product consists of transversely and longitudinally directed metal beams with a square or round profile.
The closed trunk is a trunk (box). The main advantage of this design is the protection of the transported cargo from bad weather.
The product, made in the form of racks, is used for transporting bicycles and other equipment. This design is used less frequently, but the load can be fixed on it easily and reliably.
Kit selection
Installation will not be possible if you do not have at your disposal a set of equipment necessary for installation. Buying it is not difficult, but you need to think about which specific option is best for you.
In total, 2 solutions to the current situation are being considered. Namely.
- Factory set. Purchased from trusted and reputable manufacturers. The kit contains almost everything you need, so you don’t have to assemble different elements. But the price is naturally higher;
- Amateur kit. Here we are talking about independently preparing all the necessary components. The motorist is faced with the question of where exactly to get them and how to choose a set so that everything fits. It is difficult to do this without relevant experience and certain knowledge. But you can save a lot of money financially.
I don’t know what exactly you will choose, but I want to give one piece of advice. Buy an electric drive equipped with an inertia mechanism. This will allow you to turn off the drive when an obstacle appears in the path of the luggage compartment lid. Roughly speaking, the drive will not pinch your hand or head when you poke around in the trunk.
So the inertial mechanism is a very useful thing.
If we talk about assembling a homemade kit, then it is important to collect several basic elements. These include:
see also
- power window module 2 pieces;
- 2 mechanisms for lifting glass;
- wires;
- diodes;
- electromagnetic relay;
- five-pin relays;
- four-pin relays;
- Relay connection block;
- springs for the lid lock;
- power tools;
- wiring;
- nuts, bolts;
- Bulgarian, etc.
As you can see, the set is quite impressive. Therefore, consider whether it is worth trying to assemble the kit yourself. Sometimes it is much easier and even more economical to purchase a ready-made factory kit with a guarantee and all the associated benefits. Price does not always play a key role.
Central locking: what is it and how does it work
- It is necessary to modify the purchased mechanism, remove the motor and rotate it so that it can function along the rack. Using a grinder removes all excess;
- Using a perforated metal blank, a fastening strip is made from it;
- The rack and drive motors are fixed to the bar. This design is mounted on body panels;
- One end of the window regulator mechanism, which was not used, is mounted on the trunk lid holder;
- Then everything is adjusted together and brought to the desired position;
- Think in advance about how you will lay out the wiring harness so that the wiring does not fray or become damaged;
- The connection diagram is selected based on the selected set. Ready-made kits have a special scheme, that is, you need to act strictly according to it;
- Connection to the power source is carried out with a separate cable, which is connected to the battery;
- A separate fuse is used for the power circuit;
- A button is mounted in the cabin in a place convenient for the driver.
In terms of ease of installation, it is much more convenient to work with ready-made factory kits. The manufacturer includes detailed instructions, following which you can do everything in just a couple of hours and enjoy the result.
Whether the financial and time costs are worth it, everyone decides for themselves. After all, before we somehow managed without an electric drive on the trunk. You can continue to live without him. And if you want, then no one forbids or prevents you from installing the kit.
Do you think a car needs an electric drive for the trunk lid and what benefits does it bring? Share your opinion, experience in operating such equipment and ask pressing questions.
Thanks everyone for your attention! Subscribe, leave comments and don't forget to tell your friends about us!