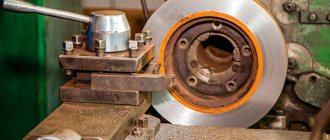
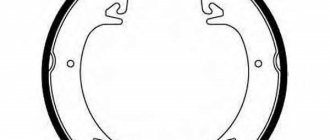
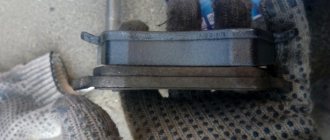
Brake pads, like car tires, wear out as you drive and require periodic replacement. The peculiarity of the car’s braking system is that the load during braking is unevenly distributed on the front and rear axles. The front wheels, and, accordingly, the brake pads, experience greater loads than the rear ones. This means that they also have to be changed much more often. The front brake pads on Kalina are replaced two to three times more often than the rear ones. To do this, you can contact specialists or do the work yourself. In the latter case, you must have a set of standard tools and new front brake pads. The procedure for replacing front pads on a Kalina equipped with and without ABS is the same.
Selection of pads and part numbers
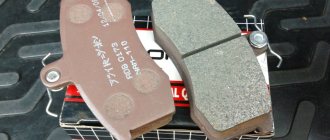
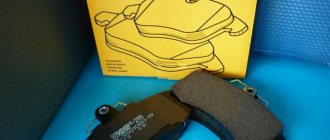
Every Kalina car owner faces a difficult choice of spare part. What is better, original or analogue? After all, pads are the first link in traffic and braking safety. The answer lies on the surface. Both of them are quite good in quality and effect. But modern analogues are becoming even better, since the friction material of the majority is much better and more durable.
So, let's look at what front pads are suitable for the Lada Kalina.
Original pads
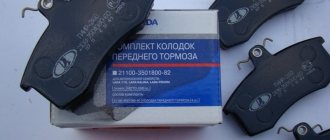
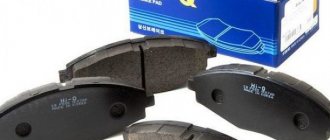
Let's start with the original part from AVTOVAZ. The catalog number of the part by which the search is performed looks like this - 2110-3501080. These are the same pads that are installed on the VAZ 2110 and Priora. The factory decided not to change the structure of the front brakes. Their cost is 400 rubles per set.
Analogs
Red Ferodos brake better, but it is believed that they eat up the brake disc a lot
Now, let's look at possible analogues that can be installed instead of the original brake pads on the Lada Kalina.
A table of analogues, as well as their catalog numbers and prices.
| Manufacturer's name | vendor code | Average price in the Russian Federation in rubles |
| Dafmi | D140IE | 390-450 |
| Master-Sport | 13-046D-2965-2-E-SET/4/-MS | 590-630 |
| Tomex | 10-361 | 600 |
| Mapco | 6502 | 620 |
| Pilenga | FD-P2003 | 850 |
| Trialli | PF965 | 850 |
| Fenox | BP40006O7 | 865 |
| Finwhale | V210 | 910 |
| Hola | BD811 | 950 |
| Optimal | 12075 | 978 |
| ABS | 37079 | 1070 |
| EGT | 322107EGT | 1150 |
| Denckermann | B111048 | 1165 |
| LRP | 05P988 | 1165 |
| Samko | 5SP988 | 1185 |
| LINXauto | BD-4601 | 1200 |
| FiT | FP0289 | 1320 |
| TRW | GDB1446 | 1350 |
| Road House | 2221.02 | 1350 |
| Icer | 181308 | 1360 |
| Brembo | P41003 | 1700 |
| Delphi | LP551 | 1765 |
| Girling | 6114461 | 2400 |
| Feredo "Premium" | FDB1325 | 3000 |
As you can see from the table, the choice of front brake pads for the Lada Kalina is quite wide and the owner will have plenty to choose from. Of course, the pricing policy for many analogues is too high, since compared to the originals at 400 rubles and the analogue at 2000 rubles. many people choose the original.
Non-original pads for Kalina, Nippon brand, very popular among Kalinovods
But, if you take Brembo, then the quality and service life of the pads is 2-3 times better, and the level of braking is 50% higher (according to the results of independent tests). At the same time, they wear out 3-4 times slower, since they are made from higher quality material.
Which ones to choose
Today in auto shops and at the car market you can find pads for Kalina from dozens of manufacturers, some of which are either uncertified products or even fakes made in the nearest gateway.
It is better to buy brake pads in specialized stores, requiring a quality certificate for the purchased product. As for the manufacturer, it is better to give preference to original spare parts.
Front VAZ brake pads for Lada Kalina have catalog number 2110-3501080, and cost between 320-400 rubles. A good alternative for them are analogues from foreign companies such as Pilenga, ABS, Bosch, Ferodo, Master-Sport, Hella, Delphi and others.
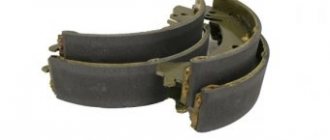
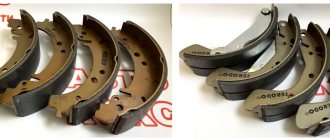
The original rear pads for Kalina are numbered 11180-3502090-55. Their cost is 500-650 rubles.
Reasons why pads may need to be replaced
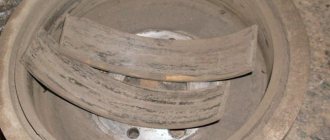
Old and new pads. The wear of the old ones is not yet catastrophic, but according to the regulations, replacement is necessary, otherwise they will “eat up” the brake discs
There are a number of reasons why it is recommended to change the front brake pads on the Lada Kalina. Namely:
- The front wheels squeak when you press the brake pedal.
- When the pad scatters inside the caliper, it begins to “rumble.”
- When buying a used car at a car market or in a showroom.
- When the pad wear has reached its maximum. This is usually a friction thickness of less than 1.5 mm.
- Once a year, after the winter riding season.
- When the brakes apply unevenly when braking.
All of these factors become fundamental for replacing the front brake pads on the Lada Kalina.
Pad life
According to technical and regulatory documents, the service life of the front brake pads of the Lada Kalina manufactured by AVTOVAZ is 20,000 km. At the same time, the same parts from Fenox, Brembo or Girling last up to 30-35 thousand km.
An important aspect of the service life of front brake pads is driving style. If you press the brake pedal sharply often, the pads will fail faster. The same thing happens in urban operating conditions, if the car only drives around the city. The pads wear out less on the extra-urban cycle, provided that traffic rules are followed.
Step-by-step instruction
Repairs are best done in a pit or on a lifting mechanism . This will be the most convenient way to work. As a last resort, you can use a jack, but the car must be installed on the handbrake and additionally secured with wheel stands.
Tools
- key to 7;
- flat screwdriver;
- hammer;
- pliers;
- knob with 30mm head;
- mounting blades.
Description of procedures with photos
To gain access to the disk, jack up the car and remove the wheel.
- Unscrew the guide pins.
Use a wrench to unscrew the spacers on the brake disc.
- We knock the drum off the hub using a hammer with a wooden backing.
Tap the disc with a hammer to remove it from the hub
- Using a flat-head screwdriver, remove the upper and lower springs from their engagement.
Use a screwdriver to pry the hook of the spring and disengage it.
- Remove the clamping mechanism and pull out the block.
After removing the clamping mechanism, the brake pad can be easily removed
- Remove the spacer bar.
We take out the spacer bar
- To dismantle the second part, disconnect the pressure spring and disengage the lever.
Pull the spring towards you and remove the lever from engagement
- We take out the cotter pin with pliers and remove the washer.
Using pliers, pull out the brake pad cotter pin.
- We pull out the “finger”.
Remove the rear brake pad pin
Before installing new parts, the brake disc must be thoroughly wiped. Assembly is carried out in reverse order. To tighten the springs, use a regular screwdriver. Make sure the hooks on the edges are fully seated in the holes.
Tip: After completing the repair, press the brake pedal several times so that the pads come close to the disc.
General information
First of all, it should be said that all work on organizing a sewage system in a house comes down to the following work:
- Arrangement of external sewerage - this includes everything that is located outside the house. This is a pipeline and a septic tank or cesspool. If there is a centralized sewerage system, the work is greatly simplified.
- Installation of internal sewerage - this work includes the installation of a riser, a drain pipe and wiring to the bathrooms. First of all, you should deal with the arrangement of the internal system.
Of course, to build the system, you can turn to specialists for help, however, if you do this work yourself, you can save a lot of money. There is nothing overly complicated about this, the only thing is that you must strictly adhere to certain rules and requirements that apply to such installation work.
Vertical elements of internal sewerage
The layout of the sewer system must correspond to the layout of the house. True, even when planning it, it is desirable to compactly arrange the premises to which water will be supplied and drainage will be carried out.
Such premises include:
- Kitchens;
- Bathrooms;
- Bathrooms;
- Laundries, etc.
The compact arrangement of these rooms will simplify the installation of the system. The best layout option is when all plumbing fixtures can be connected to one collector, through which the wastewater will flow into a septic tank, cesspool or central sewer.
Horizontal sewerage elements
If the house is large and there are several rooms with a water supply and drainage located in different parts of the building, experts recommend using a sewer system with several septic tanks or cesspools. In addition, if the house has two or more floors, it is necessary to install risers.
How do you know when it's time to change your brake discs?
It will tell you the behavior of the car. The braking distance increases, the pedal becomes less informative, the car may pull strongly in one direction, and the steering wheel will shake. All this indicates critical wear, it is worth thinking about and checking the brake system.
With a lot of wear, more than 50% of the surface, the cylinders in the calipers extend to their maximum height (too far) - this can lead to warping, jamming, and even a caliper leak (when some of the brake fluid leaks out). Also, a thin, worn-out pad disc will heat up very quickly, literally red-hot - the braking efficiency will drop significantly, and if it cools quickly (driving into a puddle), it may even crack, and this is very dangerous when driving.
You can determine the thickness yourself. Just take the operating instructions for your car, or download it on the Internet. Then we simply remove the wheel and check the wear. This can be done even without special tools, just look at the top “edge”, it usually protrudes (a kind of maximum mark) and gives you an idea of wear. It is enough to simply measure the depth with a ruler; if it is more than 2 mm, replacement is definitely needed.
If you want to accurately measure wear, you need to take a caliper and measure it on the sides. Then compare with the recommendations for operating your car.
Both need to be changed at once (on the same axis), you cannot replace one and leave the other, so you will unbalance the car when braking.
If you need to replace the roller or brushes?
When, during operation of the engine, the owner of a Lada Kalina hears a distinct “rustle” coming from the rotating roller of the tension unit, then a detailed inspection of this element will be required and, if necessary, replaced.
To carry out this repair operation, it is recommended to stock up with ordinary keys and a screwdriver with a flat-tipped tip. All replacement procedures do not cause any difficulties, so we act with confidence.
- First, we resort to loosening the degree of belt tension. To do this, unscrew the stem.
- Using the designated screwdriver, carefully pry up the protective cap of the roller and unscrew the bolt holding the bearing.
- From the worn-out roller we remove the bushing together with the washer (they are necessary for installation in conjunction with a new product).
- The entire assembly is mounted in its proper place and secured with a bolt.
- We tighten the belt and start the engine. We make sure that the new product functions correctly.
One of the factors characterizing weak battery charging is wear on the brushes of the generator set. In order to eliminate this negative aspect, the generator brushes will need to be replaced. To monitor their condition, they will need to be dismantled. Replacing generator brushes is available both on a removed generator set and on one installed on a Lada Kalina car.
In order to achieve safety of work and eliminate the risk of a short circuit in the circuit, before repair work it will be necessary to disconnect the network from the battery (remove the terminals). Now you need to dismantle the protective cover and remove the plug. This can be done conveniently using the previously designated screwdriver.
At the final stage of the process, unscrew the bolts, after which we remove the regulator itself with the brushes present on it. Replacement of generator brushes is complete. Brush wear is assessed by measuring their height. This parameter should not be less than 5 mm. If the brushes are worn out, then replace them and the regulator included.
Necessary tool
The key is 17/14. Will need another 13.
To carry out dismantling, you will need 2 keys (13 and 17). If ABS is available - TORX (1/4″; E8).
Replacement algorithm
- Raise the car on a jack, having first removed the bolts from the wheel.
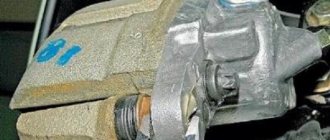
- Remove the wheels themselves and use a pry bar and a screwdriver to press out the brake cylinder. To make the process easier, it is recommended to immediately turn the steering wheel to the left or right, depending on the side.
- On the other side of the caliper, remove or press out the locking plate.
- Use a 17 wrench to hold the nut and unscrew the guide bolt with a 13 horn.
- Open the brake caliper to remove the old pads.
- Bring the cylinder to the very end and insert new parts, then close it and assemble everything in the reverse order, go to the other side of the car.
If you have an ABS system, you need to take this feature into account. Before starting work, you should unscrew the sensor so that it remains intact during dismantling. It is secured with 1 screw, which is unscrewed with an E8 star-head. If the bolts do not unscrew, you must first spray them with WD-40 lubricant, and after 15 minutes try to unscrew the parts. It can also be used for a new pad to make it easier to insert them.
Car with ABS.
Immediately after installation, you need to bleed the brakes by pressing the pedal several times. Over the course of 500-700 km, the plates will grind in, so braking will be worse.
It is recommended to remove the brake fluid to a minimum before starting work. This is necessary so that it does not leak out during replacement, since new parts are always thicker than old elements. In this case, when replacing, you will need to “bring the caliper together.”
If the brake fluid is under the cap, pump out a small amount with a syringe so that the fluid does not flow when the brake cylinder is compressed.
