A complete set of VAZ 2114 chassis elements
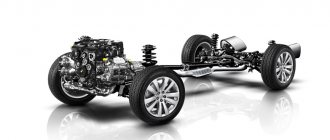
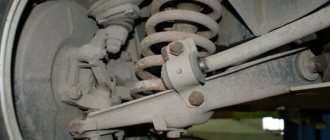
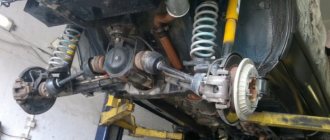
The chassis of the car includes two suspensions - front and rear. During operation of the machine, most of the load falls on the chassis. The quality and comfort of the ride, as well as the safety of the driver and passengers, depend on the condition of the front and rear suspensions. The main function of each suspension is to eliminate vibrations and soften the ride. Also, the tasks of the chassis include reducing roll when turning, ensuring a smooth ride, and providing high information content for the driver in the city and on the highway.
On the roads of the CIS countries, the chassis is subject to excessive load, since the condition of the road surface leaves much to be desired. As a result, motorists often turn to car service centers. Things are better with the VAZ 2114, since it has more modern systems compared to previous Lada models. Many motorists choose to solve the problem on their own. But in order to understand what has gone wrong, you need to know the suspension structure.
What's included in the rear suspension?
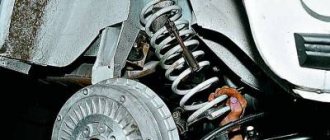
The image below shows all the main elements of the rear suspension that can fail.
Rear suspension diagram of VAZ 2114
- The first part is a rubber-metal hinge, which is the main attachment to the car body.
- A bracket used to secure the rear suspension arm to the body.
- Shock absorber housing.
- A buffer that takes the load from the compression stroke.
- Casing cover.
- Main support washer.
- Shock-absorbing cushion.
- Spacer sleeve.
- Strut (shock absorber).
- Insulation gasket.
- Solid spring.
- Connecting element for levers.
- Beam lever.
- Bracket for fastening the rack structure.
- Flange.
- Lever bushing.
The beam structure includes a connector and two trailing arms; these elements are indicated in the diagram as numbers “12” and “13”. The parts are fastened together by welding. In the rear part, flanges (number “15”) and brackets for attaching struts (shock absorbers) are attached to the levers. The axles of the rear pair of wheels along with the brake elements are screwed to the flanges. Bushings (16) are installed on the rear suspension arms at the front. They are fastened using rubber-metal hinges - number “1”. One end of the spring rests on the support through a rubber gasket, and the other on the shock-absorbing cup.
Practical aspects of the VAZ 2109 body
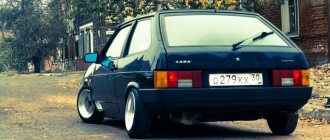
The body of the VAZ 2109 was designed as a hatchback; a revolutionary innovation was the luggage compartment, which made it possible to almost double the capacity. At the same time, the fuel consumption of the “nine” is comparatively lower than that of any SUV. On the one hand, the VAZ 2109, if necessary, can have the spaciousness of an SUV, on the other hand, low fuel consumption. All this increases the practical profitability of using this vehicle.
Of course, many owners of the VAZ 2109 regularly highlight the problem of the reliability of body fastenings: periodic squeaking, certain fastenings quickly become loose, etc. However, it is important to remember that the cost of repairing a body or replacing an individual functional fastener has an extremely low market value. If the body of modern hatchbacks is divided into large design elements, then the cost of replacing or repairing them is several orders of magnitude higher.
Despite all the shortcomings of the VAZ 2109 body, we can say with confidence that its practical reliability is at the proper quality level, despite certain “cosmetic” defects that appear during operation. If you hear a squeak somewhere, it can be quickly eliminated by inexpensively replacing a separate functional element or by basic straightening, which is carried out by each service station.
Note. Straightening can be successfully carried out with your own hands if you know the specifics of its implementation.
Watch an interesting video review of the VAZ 2109 2008
In general, the simplicity of the body structure of the VAZ 2109, small dimensions and price directly affected the degree of popularity of this car model. If we take into account today's calendar year and 1988, when the first production car was released, and the fact that the VAZ 2109 is successfully used by many motorists to this day, the question of quality immediately disappears.
The body of the VAZ 2109 is simple in structure, practical and easy to repair if necessary. You can do this, again, with your own hands according to the instructions or entrust the operation to specialists. High-quality photos and materials and a video review given in the article will help consolidate technical knowledge of the body of the Nine.
Forget about fines from cameras! An absolutely legal new product - Traffic Police Camera Jammer, hides your license plates from the cameras that are installed in all cities. More details at the link.
- Absolutely legal (Article 12.2);
- Hides from photo and video recording;
- Suitable for all cars;
- Works through the cigarette lighter connector;
- Does not cause interference to radios and cell phones.
Disassembling and replacing the rear suspension: instructions
The main parts of the rear suspension are highlighted in color
A complete disassembly of the rear suspension is required if the motorist decides to lubricate all the parts or change them. Most often you need to get to a specific element and replace it. The parsing proceeds as follows:
- The VAZ 2114 is installed under an inspection hole, or, as an option, on a lift. In the luggage compartment, the rear and side trims and the seat belt retractor are disconnected. Also in the luggage compartment there are fastenings for the racks to the car body. They need to be loosened; there is no need to unscrew them completely.
- Next, the fastenings of the rear wheel pair are loosened. To do this, you need to remove the hubcaps and then completely dismantle the wheels. Reliable jacks should hold the car at this time; they are usually installed on each side.
- Now it is necessary to dismantle the brake system cables. You need to get them assembled. To do this, the cable fastenings to the suspension arms and the body of the VAZ 2114 are disconnected. Afterwards, the brake drums are dismantled. The cable ends should be removed from the manual drive levers. You also need to disconnect the flanges from the brake flaps.
- Before dismantling the hoses and pipes of the brake system, care must be taken to prevent leakage. Next, you need to dismantle the elastic drive lever, which is used to operate the brake pressure regulator. To remove the lever, you need to disconnect it from the bracket by removing the lock washer, then remove the shackle from the wheel axle.
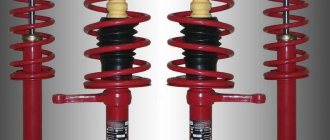
- The next step is to disconnect the struts (shock absorbers). To do this, remove the rubber cushions, nuts attaching to the body part and the washer. After this, you need to install additional stops for the front wheelset. The rear part should be raised. After this, you can remove the compression stroke buffers, springs and shock absorber covers.
- If you disconnect the body mounting brackets, the entire beam can be detached. The rear suspension along with the struts will lie in front of the motorist. If necessary, you can disassemble the shock absorbers, which is no longer difficult.
Components of the rear pillar of the VAZ 2114
IMPORTANT. The shock-absorbing spring must be removed using special ties. If they are not used, serious injury may occur as the iron spring is under high pressure.
VAZ 2109 body: introduction
ATTENTION! A completely simple way to reduce fuel consumption has been found! Don't believe me? An auto mechanic with 15 years of experience also didn’t believe it until he tried it. And now he saves 35,000 rubles a year on gasoline! Read more"
Inside, the car body practically does not cause any complaints from car owners, despite its small, compact dimensions. However, there is enough space for a trip of five people of average build. The low-mounted dashboard is quite easy to operate; if necessary, you can build in modern electronic components, but this will require you to spend a significant amount of money.
There is a slight drawback in terms of the material construction of the interior, which is made of plastic. This is a significant drawback, since such a building periodically rattles and needs technical modernization to strengthen it. However, this is quite easy to do and you don’t have to spend a lot of money.
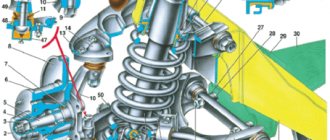
Front suspension device
The main element of the front chassis of the VAZ 2114 is the shock absorber strut, which is designated as number “9”. It is attached to the steering knuckle with two bolts. Compared to the rear system, the front suspension has a more complex design, which can be understood by the number of parts. Number “11” indicates a bolt that passes through the holes of the rack bracket; it has an eccentric washer and an eccentric collar. When the steering gear turns, the top bolt turns. The result is that the car turns. Most often, shock absorber struts fail, since they do the main job.
Diagram and explanations for it
Approximate prices
A new original rear beam can be purchased in specialized stores for 4500-5000 rubles . The assembled part is sold for 5800-6000 rubles . A non-original new spare part can be purchased for 4000-7000 rubles .
A used rear beam manufactured by AvtoVAZ is sold through private advertisements for 1000-1500 rubles . The assembled part can be purchased for 2000-2490 rubles .
Disassembling and replacing the front suspension: instructions
- The VAZ 2114 is installed on a viewing hole or raised on a lift. The car must be set to the parking brake. It is necessary to remove the wheel caps, loosen the mounting bolts and unscrew the hub nut. Having secured the front of the car, you can remove the front wheels.
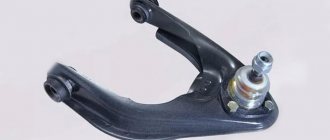
- Next, you need to remove the ball joint pin, which is located in the swing arm of the front strut. The next step is to remove the front stabilizer link (number “24”) from the front suspension arm (number “22”). Next, the stretch marks from the body (30) are removed. Next, you need to completely disconnect the ball joint that is attached to the steering knuckle.
- Now you can remove the front suspension arm. To do this, you need to disconnect it from the body bracket (28). Afterwards the lever is removed along with the bracket and the extension (29, 30). It is also necessary to remove the bolts that secure the pads to the steering knuckle.
- In front of the driver there will be a caliper assembly. To avoid problems with it, you do not need to completely remove it; you need to hang the caliper on a hook in such a way that there is no load on the main hose. The next step is to press the spline shank out of the front wheel hub.
- From the side of the engine compartment, you need to remove the protective fist (“41”). To do this, unscrew the telescopic strut nuts and then remove the solid front suspension strut. It should be together with the wheel hub and steering knuckle. The other front suspension strut is removed in the same way. Next, the racks are removed from the rod.
Removing springs using zip ties
When removing the bolts that secure the ball joint to the steering knuckle, you must use a socket wrench. Otherwise, the protective cover of the hinge may be seriously damaged, resulting in additional costs.
In the case of the front suspension, its assembly proceeds in the reverse order, with the exception of a few features. When installing the mounting bracket to the VAZ 2114 body, you need to make sure that the threads of the bushings are not damaged. To do this, you must perform operations carefully. Also, longitudinal displacement of the cushions on the bar must not be allowed. This can happen during installation of the anti-roll bar.
Control dimensions of the VAZ 2109 body
The body has a rather short length - 4006 mm, which is an obvious advantage of the car, since compactness is important in urban environments. If we compare the manufacturer’s previous models, the body length of the VAZ 21099 was reduced by 120 mm, while there was 60 mm more space inside thanks to rational and correct design solutions.
The first production VAZ 2109 cars had a body width of 1650 mm, however, after a few months, the developers managed to reduce it by 30 mm to 1620 mm, this further increased the compactness of the body.
The body height is approximately 1402, which is 30 mm comparatively less than the body of its predecessor models. But the designers were able to compensate for the free space by creating car windows in a convex shape. On the one hand, this made it possible to increase the amount of free space, on the other, it made the vehicle more presentable.
The luggage compartment of the VAZ 2109 deserves special attention, which at one time made a real splash on the passenger car market. Even today, this almost revolutionary design feature has not lost its practical relevance.
The standard trunk capacity of the Nine is 330 liters, but if necessary, it can be expanded to 640 liters by folding the rear seats. All this can be done in a couple of minutes and does not require much effort.
The front wheel track is 1400 mm, and the rear wheel track is 1370 mm. The compact dimensions of the VAZ 2109 body make it possible to efficiently transport small-sized cargo around the city, even during rush hour when there are a lot of traffic jams.
How to determine if a shock absorber is faulty
The first thing to do is conduct a visual inspection. Oil stains on the shock absorber itself, boot or rebound buffer warn that it needs to be replaced. Also, uneven tire wear may be an indication of problems with the rear suspension strut.
When driving at a speed of more than 80 kilometers, the car's handling noticeably deteriorates, the steering reacts late to road irregularities, and the car's swaying does not subside.
But the most reliable way is to inspect it at a specialized service station stand.
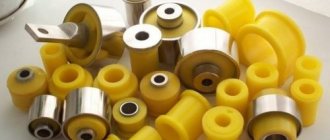
The benefits of replacing silent blocks in your garage
Here are the benefits you can get:
- Firstly, such a procedure will cost much less than at a car dealership.
- Secondly, it is not known how well the master will complete everything. After all, it’s no secret that very often they do everything badly, so that they will soon be turned to for help again. Of course, there are also conscientious car mechanics, but this is rare.
- In any case, you will need to purchase a silent block yourself and give it to the master. At the car dealership he will only install it. That is, payment will only be made for work that you can do yourself.
- And finally, no one knows whether the master will install a new silent block or will make do with some old one that still functions.
Note: there is one BUT. Good car repair shops provide a guarantee for repairs, so if the car breaks down, the second repair will be carried out free of charge. Therefore, the main thing is to find such a car dealership, and everything will be fine.
