02/28/2022 18,980 VAZ 2106
Author: Ivan Baranov
A car is a place where a person is often in danger. Therefore, modern cars are equipped with various systems and means that increase the safety of the driver and passengers. These devices include seat belts. In early versions of VAZ 2106 cars, rear belts were not installed at the factory, although fastenings were provided for them. The article describes: the purpose of rear seat belts, how to install them yourself on a VAZ 2106.
[Hide]
Installing seat belts on a VAZ 2106
If you are involved in an accident, then after it you will not only have to carry out body repairs, but also change the deployed airbags along with the belts, or only the latter, since your car may not have airbags.
But even if you have never been in an accident in your entire driving experience, seat belts (SB) can become unusable, simply wearing out and losing strength over many years of service, after which they need to be replaced with new ones. Below you will learn how to do this on a VAZ-2106 car. You will need a minimum of tools: a flat-head screwdriver and a 17mm wrench or socket wrench. Well, a new belt and its lock, of course.
Replacing front seat belts on a VAZ 2106
The diagram shows the location of the belt: number 1 is the reel, number 2 is the belt itself, 3 is the latch, and 4 is the loop.
1) Take a screwdriver and use it to carefully pry the cover on the hinge mounting bolt.
2) Remove the trim, being careful not to damage its clips.
3) Take the key and unscrew the bolt that secures the RB hinge.
4) After removing the loop, try to put it somewhere in a visible place so that the small parts associated with it do not get lost.
5) Arm yourself with a screwdriver again and remove the cover, but this time on the coil.
6) Unscrew its mounting bolt, being careful not to lose the washer and spacer.
7) Remove the coil.
Take the new belt and install it in place of the old one.
After installation, it is important to check the smooth movement of the belt so that it can be pulled out and retracted without hindrance. If there are problems with this, you need to adjust the position of the reel so that the slot in it is horizontal in relation to the belt, and not at an angle
You also need to check whether the reel is defective: normally, when jerking, the belt should not move, but when pulling smoothly, on the contrary, it should. If the coil does not work normally, it should be exchanged for another one at the store.
Usually, along with the belt, its lock, located between the front seats, also changes.
To replace it you should:
Remove the cover on the mounting bolt.
- Unscrew the bolt, removing the sleeve and washer, after which the lock will be removed.
- Install a new lock.
How to change rear belts and their locks on a VAZ 2106
Rear belts usually last longer than front ones, but they don’t last forever. The tools are the same, but to replace it you will first have to remove the back of the rear sofa. Further:
1) Use a screwdriver to pry up the cover and then remove it.
2) Unscrew the mounting bolt located at the bottom.
3) Repeat step 1 for the top fastening, exactly like step 3.
6) Then unscrew the bolt securing the hinge, and then remove it with its associated small parts.
7) Now it’s the turn of the coil bolt.
Next you need to pry up and remove the RB guide.
9) Pass the belt assembly with guide and loop through the slot in the rear pillar facing panel.
10) Dismantle it, after which you can install a new RB.
Replacing locks is done as follows:
- The back row of the back row is removed (if you have not done this earlier).
- The mounting bolts are unscrewed
After which the locks can be easily removed and replaced with new ones.
In conclusion, it should be noted that if you also want to change all the bolts securing the hinges, locks and coils, then you should buy new ones only at a car dealership, since these are specialized parts that can withstand high loads. It is strictly forbidden to install ordinary bolts, since in the event of an accident they will be cut off, which will lead to a sad outcome.
VAZ 2106 threshold replacement – Auto repair
“Thanks to” the low quality of the metal from which the body is made, VAZ cars in the domestic market are the clear leaders among cars for which thresholds are replaced. Moreover, the statistics include only those cars for which this operation is carried out at a service station, and how many are illegal craftsmen and car owners who do this on their own.
The reasons for the rapidly spreading corrosion on thresholds are the poor quality of the road surface, aggressive winter chemicals used to treat the roads, as well as insufficient anti-corrosion treatment at the enterprise itself.
During the heyday of VAZ, such a concept as anti-corrosion treatment belonged, if not to the realm of science fiction, then, in any case, to luxury, however, even today the “traditions” in this direction at the enterprise are still very strong.
Not to mention the fact that we more often deal with cars produced back then.
Tools required for work:
- Bulgarian;
- electric drill;
- welding machine (preferably a semi-automatic one that cooks in a carbon dioxide environment).
Of course, new thresholds are needed. And so that the next replacement of thresholds does not overtake you too quickly, take care of high-quality primer and paint. To clean the elements you will also need sandpaper or a metal brush.
Before starting work, you should make sure that the door hinges of your car are in order. What is the connection between door hinges and thresholds? Firstly, sagging doors prevent them from closing tightly and can cause chips and scratches, which only accelerate corrosion. Secondly, it is important to correctly determine the gap between the threshold (new) and the door in order to eliminate such problems in the future.
The work on replacing the thresholds of the VAZ 2106 takes place in several stages:
- Dismantling rotten parts of the thresholds. To eliminate possible troubles with the doors, they can be removed during the work. This is much more convenient, especially if the work is carried out in a garage. To remove rotten threshold elements, you can use a grinder or a metal file. In a pinch, a chisel will do.
We remove the outer parts of the threshold, then we also remove the threshold amplifier.However, if the car was used (and the thresholds were replaced at least once), it is most likely that the threshold amplifier - a wide perforated metal plate covering the entire perimeter of the car - is no longer there.
Having removed all rusted parts and their elements at the seams, we clean the surface for welding work.
This should be done as carefully as possible, since the result of the work and the anti-corrosion properties of the new thresholds directly depend on this.
- Installation of the threshold amplifier (welding). At this stage, we try on the new threshold amplifier and, if necessary, adjust its size and shape. Using a welding machine we install threshold amplifiers.
In this case, we use the holes in the amplifier (they are located every 5-7 millimeters and with a diameter of four to seven millimeters). To prevent the installed amplifier from moving during the welding process, you can use special clamps, which are usually available to craftsmen at service stations and some craftsmen in garages. If you can borrow such clamps for a while, the work will become easier.The most productive method is considered to be parallel welding (grabbing both the upper and lower parts at the same time), and it is more convenient to go from the central pillar. The amplifier is also welded to the middle, front pillars and beyond. After welding, the treated areas are cleaned to obtain a perfectly flat and smooth surface.
- Installation of external parts of thresholds.
Before installation, we try it on, and don’t hesitate to discard anything unnecessary (bend it or cut it off altogether). We remind you: the surface must be prepared: ideal cleanliness, no paint or traces of dirt. Preliminary fastening of the outer part of the threshold is carried out using self-tapping screws. Preliminary - because after it we hang the door and see if the design really matches perfectly.The gap should be ideal around the entire perimeter of the door - the same, even. Between the threshold and the door nothing should “fall through” or “stick out”.
If everything is in order, the door can be removed and welding can begin. We start welding the outer sills from the B pillar - towards the front fender, and then towards the rear fender (or vice versa). Be sure to weld the sills to the middle A-pillar - this forms additional rigidity of the body.
Upon completion of the welding work, we again begin grinding and cleaning the surface. After which you can carefully prime and paint the freshly welded elements.
Also read with this article:
Source: https://555-shop.ru/remont/vaz-2106-zamena-porogov.html
Installation of 4-point belts.
How to properly install four-point seat belts.
The correct driving position is what is taught in extreme driving schools first of all. But maintaining it is not so easy if you use a standard seat and a regular three-point seat belt - with large lateral g-forces, you end up sliding out of the seat, holding the steering wheel with your hands and resting your feet on the door panels or the center console. To use the steering wheel for its intended purpose and keep your feet on the pedals, you can try installing a “racing” seat, but first you should take a simpler route - install other seat belts.
There are several types of belts for amateur skating - three-point with a width of 2 inches, which have different attachment points from the “stock” ones, which can be installed right before the competition and then removed, and four-point with a width of 3 inches, but for installation of which you will need to work with a welding machine
While installing the first ones is unlikely to cause any problems, few people know how to install the second ones correctly.
The recommendations of the FIA (International Federation of Motor Sports) and belt manufacturers are completely consistent and are not at all difficult to remember.
The upper straps should “extend” from the back of the seat at an angle of no more than 20 degrees to the horizontal and, in no case, should they be attached directly behind the seat! The attachment points for these straps can be the technical holes under the rear seat, which are usually used to “fasten” standard belts. For better load distribution, the straps should be fastened crosswise.
The lower straps should also be at a certain angle to the horizontal plane, but the angle in this case is greater - from 50 to 80 degrees. The attachment points should also be located on the body, not on the seat itself or on its slide. Usually there are simply no threaded holes in the required places, so you have to play with your imagination... and welding.
This modification can easily be placed as item number one on the Must Have list. And it is better to spend the time and money to install good three-inch belts than to install belts that are 2 inches wide. Not only do they hold you in your seat better, but they also distribute the load better during unexpected troubles on the track.
race2day.ru
Question: Rear belts are not included in the design
According to the old traffic rules, you cannot carry children in front, there are no seat belts in the back, so earlier I would have been right, there is nothing to fine you for!
But according to the new clause 22.9, it is now also possible to carry a child in front, accordingly, in a special vehicle. hold device After reading this paragraph, I only read that I can carry a child in the front seat with special equipment. hold device, but I still haven’t found what I have to do, and what if I don’t want to.
Nissan Sunny - 1997 Nissan Bluebird Sylphy - 2001 FF2 - 2010.
Skoda Yeti. FV Tiguan.
I agree, childhood memories, my father bought a 2106 in 1978, the belts were on the back.
There are no belts in the back, this is 100% and never happened, this is not the first car enthusiast who came up and looked, no and never was, maybe he would even put belts there, but it seems like you can’t make changes to the design of the car
+1. There was a VAZ 21063 1989 Guards, there were belts from the beginning.
What year was VAZ born? Previously, it was “fashionable” to unscrew the belts from the back so as not to wear them, as if they didn’t exist.
Correct answer. Or do you think that it happens to everyone, but you are somehow special and the laws of physics do not apply to you and your child? If your child doesn’t care, take him in the trunk; in the VAZ-2106 there is plenty of space, and no one will write you fines!
Brad, I had a VAZ-2106 2000. There were no belts and they were not provided for in the design. Want to check it out? Find a fresher VAZ, something like the one I had, remove the back seat, fortunately it can be removed in a couple of minutes, and look - THERE ARE NO AND ARE NOT THERE, no holes for fastenings, no fastenings at all, and I worked in an auto body shop for a year, and 200 % am sure that newer VAZs do not have belts, because... I have never seen them there, just like the holes for attaching them. On the old ones they were 100%, on the more recent ones they are not, never were and never will be =)
The holes in the rear roof pillars are hard to miss. Has VAZ really begun to save money in the 21st century? on belts.
Unbelted in the back is more dangerous than fastened in the front.
Some of the cars were assembled at IZh and Syzran. I admit that they saved on everything.
And it is an axiom that an unbelted child in the back is worse than in the front seat.
Nissan Sunny - 1997 Nissan Bluebird Sylphy - 2001 FF2 - 2010.
Skoda Yeti. FV Tiguan.
I was driving here as usual in my VAZ 2106, with my wife and child in the back seat, the child is 5 years old, there are no seat belts in the back, well, they are not provided for by the design of my car, as a result of which I drive the child without a seat. Here I was fined 500 rubles. for an unfastened child. I tell them there are no seat belts, they say there are ones in front!
According to the old traffic rules, you cannot carry children in front, there are no seat belts in the back, so earlier I would have been right, there is nothing to fine you for!
But according to the new clause 22.9, it is now also possible to carry a child in front, accordingly, in a special vehicle. hold device After reading this paragraph, I only read that I can carry a child in the front seat with special equipment. hold device, but I still haven’t found what I have to do, and what if I don’t want to.
Who is right? and why?
In general, let's start thinking logically: 1) all children must be transported in a special chair, which in turn must be secured. No one cares how to secure it - even with self-tapping screws right through the back sofa and then into a sheet of plywood. 2) where you place this sofa does not matter to anyone 3) what is missing from the rear
(and not behind) the belts do not cancel the effect of paragraph 1.
Three passengers and only two seat belts. What should I do?
The back seat of the car can accommodate three passengers, both physically and in terms of traffic regulations. However, the rear seats of most cars are equipped with only two seat belts. Is it punishable or not, from the point of view of traffic rules and the Code of Administrative Offenses, for an unbelted passenger to be in a vehicle if there is no means to fasten his seat belt?
The Code of Administrative Offenses in this regard has Article 12.6, which reads: “driving a vehicle by a driver who is not wearing a seat belt, transporting passengers who are not wearing seat belts, if the design of the vehicle provides for seat belts... entails the imposition of an administrative fine...”. From the text of the article it is obvious that in order to apply a penalty in such a situation, seat belts must be provided, and if there are three passengers in the back seat, and there are only two belts, then according to the Rules only two must be fastened. The same instructions appear in paragraph 2.1.2 of the traffic rules.
The law does not provide any other guidance regarding this situation, therefore, if the traffic police officer insists that you and your passengers have committed an offense in this way, ask him to refer to any regulatory document on the basis of which he has such an opinion. He obviously cannot do this. In addition, at the moment there is objectively no service for installing additional seat belts, and this makes it impossible to fasten all passengers in the back seat even if you wish.
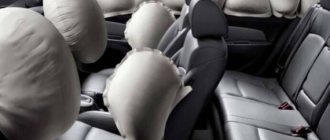
However, the lack of a belt for the third rear seat passenger is not only a cause for concern, but also a serious threat to the safety of vehicle occupants. When conducting crash tests to check the effectiveness of rear seat belts, the following results were obtained. The tests involved cars weighing about 1,500 tons. Dummies of an adult woman and a small child were used as models. The child's dummy was placed in a child's seat. The effects on mannequins seated in the rear seat during a frontal collision at 55 km/h were assessed. In the case where the “passengers” were not wearing seat belts, they were seriously injured as a result of the impact. The mannequins, which were properly secured with belts, were not harmed at all.
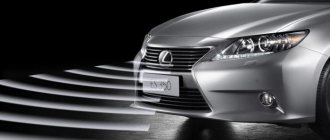
With the modern development of safety systems, rear seat belts are no less, and sometimes even more important, than the front ones, since most cars are equipped with airbags, which in the event of an accident save the driver and passenger sitting in the front seat. Passengers in the rear seat receive significant damage when they hit the front seats, and in collisions of sufficient force, even against hard parts of the car body.
Thus, you cannot be punished for not wearing an unauthorized seat belt in the back seat, but the life of an unbelted passenger is at much greater risk than if a belt was present.
We also recommend reading
Unfastened seat belt
Rules for placing a child in a chair
Long trips can quickly get boring for your little one. In this case, he will unfasten his seat belts, twist, jump, or jerk the chair. To avoid such situations, you need to stock up on interesting toys and ensure proper seating.
You can achieve the latter by following a few simple rules:
- The distance between the fastening straps and the body is at least 2 fingers. This will provide the child with comfort while moving and minimize the jerk upon impact.
- Adjust the height of the headrest and padding so as to position the protection as close as possible to the shoulders of the small passenger.
- If the chair has a footrest or table, you must use these elements.
Before directly placing the child in the chair, each time check the reliability of its fastening. This manipulation will take a couple of minutes, but will provide confidence in the protection of the baby.
You can read about other recreational vehicles in the article: TOP-5 children's three-wheeled strollers
Installation of seat belts.
Did you think you were in a fairy tale? Nope. you got yourself into trouble. And so, I have no hearing, no voice - just talent!
Megatheronosaurus
- Group: Users
- Posts: 14,452
Local
- Group: Users
- Posts: 156
| QUOTE (Diselist @ Jan 29 2007, 13:06) |
| Look under the back seat. If there are any on the racks, then they should be there even more so. |
Did you think you were in a fairy tale? Nope. you got yourself into trouble. And so, I have no hearing, no voice - just talent!
ordinary user
- Group: Users
- Posts: 590
ordinary user
- Group: Users
- Posts: 590
General arrangement of belts on the left side
Local
- Group: Users
- Posts: 156
| QUOTE (Hrus @ Jan 29 2007, 13:30) |
| General arrangement of belts on the left side |
Post edited by vvserg: 01/29/2007 - 13:40
Did you think you were in a fairy tale? Nope. you got yourself into trouble. And so, I have no hearing, no voice - just talent!
ordinary user
- Group: Users
- Posts: 590
ordinary user
- Group: Users
- Posts: 590
| QUOTE (vvserg @ Jan 29 2007, 14:35) |
| On the right in the photo, the end of the belt runs along the arch of the wing, does that mean it is attached somewhere on the arch? |
Post edited by Hrus: 01/29/2007 - 14:04
Local
- Group: Users
- Posts: 156
Did you think you were in a fairy tale? Nope. you got yourself into trouble. And so, I have no hearing, no voice - just talent!
ordinary user
- Group: Users
- Posts: 590
| QUOTE (vvserg @ Jan 29 2007, 15:06) |
| the inertial block is simply screwed to the shelf, and where is the safety, it will vomit in the event of a serious impact, another small question is where the other end of the belt is screwed, sorry for the trouble. |
The inertial block is not just screwed to the shelf, there is some kind of reinforced plate under the shelf, but this fastening is located closer to the side arch.
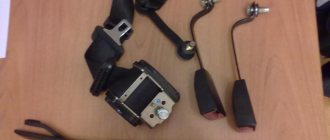
The second end of the inertial coil is attached as in photo 4
The latch (third point) is attached under the seat in photo 1.2 (right strap), the left strap is for the middle passenger (two-point belt)
Local
- Group: Users
- Posts: 156
Did you think you were in a fairy tale? Nope. you got yourself into trouble. And so, I have no hearing, no voice - just talent!
recently on the forum
- Group: Beginners
- Posts: 36
Idea?! Where I am.
- Group: Moderators
- Posts: 32,885
venerable theronosaurus
- Group: Users
- Posts: 3,583
recently on the forum
- Group: Beginners
- Posts: 36
| QUOTE (znk @ Aug 14 2007, 23:24) |
| The question is, why were they filmed at all? |
Online
- Group: Disabled
- Posts: 231
| QUOTE (Dagger @ Aug 14 2007, 22:55) |
| in the rear seats, VAZ 2110 car. |
In the garage there are such write in PM.
BUYING VAZ CARS
ICQ 442782650 - always online
At work
- Group: Users
- Messages: 22,061
| QUOTE (gdv1969 @ Aug 14 2007, 23:10) |
| If the belts and reels themselves are available, then you can do it yourself with straight hands. Well, or to Yu.P. apply - I think he’ll handle it |
083
- Group: Users
- Posts: 2,218
| QUOTE (Yuri Petrovich @ Aug 15 2007, 19:04) |
| You have to install it yourself. At one time I took it off and threw it away. And now there are such fines for wearing belts. You have to look for it somewhere and install it. |
Idea?! Where I am.
- Group: Moderators
- Posts: 32,885
I suspect that the nines were all completed.
I remember something. Does your rear seat go up?
What will be required for repairs?
For the reasons mentioned above, sometimes the seat belt does not extend. What to do? Advice from experienced auto mechanics will help. First of all, you will have to disassemble the casing and remove the coil. In some models, you will have to dismantle the seats in the place where the breakdown occurred.
Repairs can be simple or more complex. In some cases, you have to completely change the coil. For some machine models, you will need to prepare special tools. But repairing a seat belt yourself will help save quite a lot of money in the family budget.
How to replace the rear seat belt?
Removal: 1) Before starting work, perform a small operation to fold out the back of the rear seat. (see "Rear seat layout")
2) Now that the backrest is completely unfolded, use a screwdriver and use it to remove the plug from the main belt bracket mounting bolt.
3) Next, when the plug is removed from the head of the main bolt, take a wrench in your hands and use it to unscrew this very bolt securing the lower part of the belt, and then remove the bolt from the bracket.
Note! When unscrewing the bolts, try not to confuse them with each other, because all the bolts that secure the seat belt are of different lengths, for example, the longest bolt is the bolt that secures the seat belt at the bottom of the car!
4) Next, using a screwdriver, remove the plastic cover that sits on the top bolt securing the belt bracket to the car.
5) Then use a wrench to unscrew the single bolt that holds the seat belt bracket to the car body, and then remove the bolt from the bracket.
6) Now climb into the trunk, and by hand push the plastic lining through which part of the seat belt passes to the top.
7) Next, having found the belt reel in the luggage compartment, unscrew the bolt that holds it.
9) Next, if you need to remove the seat belt buckle, then to do this, unscrew the bolt that holds the seat belt buckle to the car body, and then remove it.
Note! In the photo, one of the locks has already been removed, so the arrow points to the place where it was previously attached!
Installation: 1) Firstly, if you previously removed the seat belt buckle from the body, now install it back by tightening the bolt that holds it.
2) Next, approaching the trunk of the car, insert the upper part of the belt, as well as its trim, through the hole that is located in the speaker shelf.
Note! The cover will most likely not be installed on the new seat belt, so in this case, remove it from the old belt and put it on the new one!
3) Then install the seat belt reel in its place, and then tighten the bolt holding it until it stops.
4) Now smoothly move into the car interior, and while in it, take the seat belt trim with your hand and install it in its place.
5) Next, move the tip of the seat belt through the hole in the bracket, and then install the bracket in its place, and then screw the seat belt bracket with its fastening bolt until it stops.
Note! After tightening the bolt, place a plastic cover over the belt bracket!
6) And at the end of the operation, tighten the bolt that secures the lower part of the belt.
Note! After screwing, install a small plug on top of the bolt, which was also removed earlier!
source
The three most common methods for repairing a seat belt
The problem lies in the spring, provided that the tape has been tensioned, but is not going to return to its original position. It is recommended to do this:
- Having disassembled the lining, you need to try to get to the drum and adjust the spring, or change the strap drum.
- Dirt is a common cause of strap difficulties. This applies in particular to older cars. It is necessary to rinse the device and dry thoroughly.
- In a situation where the belt does not pull out of the socket at all, the reason may lie in accumulated dirt in the mechanism itself.
You can buy it at a car dealership and spray a specially formulated product onto the seat belt mount. Then move the device back and forth. Sometimes it helps. It didn’t help - it’s time to change the part.
The instructions below show removal on a domestic car. First you need to use a screwdriver to pry off the plug on the bottom bolt that holds the belt in place. This bolt is located near the door, next to the threshold.
The coil is mounted at the rear, on the trunk side. The other two points are attached to the interior. First, unscrew the coil.
Remove the plug from above the chair and unscrew the bolt. This is the top attachment point.
Unscrew the bottom bolt located near the door. After this, you can remove the element that will be cleaned.
Installation of inertial seat belts on a VAZ 2106
I decided to install normal inertial belts instead of the misunderstandings that played the role of seat belts in the car. Like a very large number of happy owners of the VAZ classic of the sixth model, there was a discrepancy with the location of the belt reel mount. I couldn’t find “correct” belts with an L-shaped fastening on sale, so I bought regular ones. I wanted to install it right away, so the first installation option “so that the coil does not interfere with the passenger” looked like this:
But at the same time, the belt still protrudes slightly from behind the stand and when fastened, the lower part of the belt clings to the reel in a completely unaesthetic way. The only advantages of this installation option are that it takes a minimum of time, is carried out with a standard kit and does not require any manipulations with metal.
But still I wanted to change something. In the village I came across a piece of metal and there were conditions for working with it, so I decided to sculpt it from what was available. I decided not to waste time with the L-shaped fastening and reduced the metalworking procedures to a minimum by adding another bolted connection. I think you can see everything from the pictures:
The rear and front seat belts of the VAZ 2106 require replacement if their condition deteriorates due to abrasions, tears, malfunction of the locking elements and after testing a serious load during an accident. You can replace them yourself without turning to specialists.
Belt device
Belt device
What does a jammed belt mean?
What will be required for repairs? Tools
Effect of frost
How to install the rear belts
If the belt does not come out of its slot, it is most likely jammed. To fix the problem, you need to understand the principle of this element of the car. With such a breakdown, there is a high probability that it is the locking mechanism that is not working correctly. Sometimes the belt may not stretch after an accident. There is a special technology for eliminating such breakdowns.
The first step is to understand the seat belt design. There is a special element inside the locking mechanism that is responsible for fixation. It looks like a ball that moves through levers. At the same time, it clings to the gears of the coils.
The seat belt latch reacts when it is pulled out too quickly, blocking the ball. It is in this system that problems may appear over time. In this case, the belt may not stretch or, conversely, may remain locked in the fastened position.
Procedure for dismantling and installing rear elements
Rear seat belts are generally more durable than front seat belts. But from time to time you have to replace them too.
When dismantling and installing these mechanisms at the rear, use the tools mentioned above. The procedure for dismantling them is as follows:
- First, the rear seat backrest is removed.
- Using a flat-head screwdriver, remove the decorative covers of the mounting bolts at the top and bottom.
- Then the bolts themselves are unscrewed along with the lower and upper fasteners.
- Carefully remove the coil and guide.
- To completely dismantle the old device, you need to insert it together with the hinge and guide into the slot in the rear pillar trim panel.
Then you can replace the old lock with a new one. To do this, you need to unscrew the mounting bolts and easily remove the old locks. Please note that this work is performed with the rear seat backrest removed. New rear security devices and locks are installed in exactly the reverse order.
An important stage in carrying out this type of work is checking the correct installation of the mechanisms. When moving smoothly, the belt should move freely, be easily secured in the lock, and when jerked, it should be sharply fixed in a certain position.
Thus, having the necessary tools at hand and following the detailed instructions, you can easily replace the safety mechanisms on your VAZ 2106 yourself.
Starter device for VAZ-2106 and VAZ-2107
On VAZ-2106, VAZ-2107 and other classic Zhiguli models, a starter 35.3708 (ST 221) is installed, which is a 4-pole mixed-excitation DC electric motor with four brushes. The starter is controlled remotely by a special electromagnetic retractable relay. The starter is connected and disconnected from the engine flywheel by a device through a ring gear.
The starter is located in the engine compartment to the right of the engine. Attached to the clutch housing with 3 bolts. A thermally insulating protective screen is installed between the hot exhaust pipe of the engine and the starter.
1 – generator; 2 – rechargeable battery; 3 – starter; 4 – ignition switch; P1 – pull-in winding of the traction relay; P2 – holding winding of the traction relay.
The starter covers are secured to the housing with 2 bolts. Both covers (back and front) have bronze-graphite bushings that act as rotation bearings. In them, a starter armature rotates on a shaft, from which rotation is transmitted through a drive to a flywheel mounted on the crankshaft.
Traction relay
When voltage is applied to the starter motor, the solenoid relay engages the gears of the drive reducer and the flywheel ring gear. By turning the car's ignition key to the "starter" position, voltage is applied to the pull-in and holding windings of the traction relay. When the contacts of the traction relay are closed, the power to the pull-in winding is turned off.
1.8. Rear seat belts
| GENERAL INFORMATION |
The car is equipped with two types of seat belts:
– hip-shoulder belts for outer seats; – the middle rear seat belt, which has only a thigh portion.
REAR SHOULDER SEAT BELT
Fastening
| EXECUTION ORDER |
| 1. Take the buckle in one hand and the belt buckle in the other. |
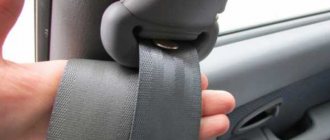
| 2. Pull the belt out gradually. |
| 3. Place the belt buckle in the lock. If you hear a click, the buckle is fastened correctly. |
| 4. Place the thigh portion of the belt around your hips AS LOW AS POSSIBLE to prevent you from slipping under the belt in the event of an accident. |
| 5. ADJUST THE BELT ACCORDING TO YOUR HEIGHT. The tension mechanism winds up the excess part of the belt and constantly maintains the belt in a taut state. For maximum safety, do not unnecessarily stretch the belt or create excessive slack. |
Unfastening the belt
| Press the release button on the belt buckle. |
Rear seat belts
Never fasten a seat belt with the shoulder portion of the seat belt behind your back or behind your outside shoulder. Never fasten a seat belt with the shoulder portion of the belt going over your neck or across your face. Place the hip portion of the belt as low as possible. Make sure the belt fits snugly around your hips. The thigh portion of the belt is not allowed to go around the waist. Never drive with a kinked or dented seat belt. Never use the same seat belt for more than one person at a time. Failure to follow these warnings increases the risk of injury during an accident.
REAR HIP SEAT BELT (REAR MIDDLE SEAT)
Fastening the rear seat hip belt
| EXECUTION ORDER |
| 1. Take the belt buckle in your hand and pull the belt as low as possible around your hips. |
| 2. Place the belt buckle in the lock. If you hear a click, the buckle is fastened correctly. Make sure the belt is not twisted. |
| 3. If you want to lengthen the belt, then turn the buckle tongue perpendicular to the seat belt waist. By stretching the belt, you will increase its length. |
| 4. If you want to shorten the belt, turn the buckle tongue perpendicular to the belt waist and pull the free end of the belt waist until you reach the desired length. |
| 5. Take the loose end of the belt and pull the belt as low as possible around your hips. |
| 6. Make sure the belt is pulled AS LOW AS POSSIBLE AROUND YOUR HIPS. |
Unfastening the rear seat hip belt
| Press the release button on the belt buckle. Make sure the rear thigh strap fits snugly around your hips. The thigh portion of the belt must not go around the waist. Failure to follow these warnings increases the risk of injury during an accident. |
CORRECT CARE AND USE OF SEAT BELTS
To ensure that your seat belts provide maximum protection, follow these rules: – Always wear your seat belts – even when traveling short distances. – if the seat belt is twisted, be sure to straighten it before fastening it; – keep sharp and other objects that could damage the belts away from the belts; – regularly check the fabric, fasteners, buckles and all other parts of the belts to determine their wear and damage. Replace all worn and damaged parts, as well as parts whose quality is in doubt, immediately; – to clean the fabric of the belts, use a soap solution used for cleaning upholstered furniture and carpets. Follow the instructions for using the cleaning product. Do not bleach or dye belt fabric; – when unfastening the seat belts, make sure that the belt has completely returned to its original position; – do not slam or pinch the belt on doors.
When is it okay not to wear a seat belt?
According to traffic rules, you can not wear a seat belt only in a few cases:
- If you are an instructor teaching a student how to drive. In this case, the student must be wearing a seat belt.
- If the passenger seats are not equipped with seat belts.
- A child can be transported unrestrained only in a special seat and exclusively on the back seat of a car.
- Passengers of emergency services vehicles may also not wear seat belts. In this case, their cars must be marked with special color schemes.
As we see, the law allows only in rare and exceptional cases to refrain from using seat belts.
Installing rear seat belts on a VAZ 2107
Video “Design of an inertial seat belt”
The main purpose of seat belts (SB) is to provide reliable protection for the driver and passengers in the event of an accident. You should fasten your seat belt before you start driving, including when moving around the city. Not only the driver, but also the passengers must buckle up.
There are rules for using RB:
- You cannot fasten several passengers with one seat belt;
- It is prohibited to restrain a child sitting in the arms of a rear passenger;
- There should be no objects between the human body and the belt that could injure the body in emergency situations;
- The RBs should be smooth, without twisted places, and well tensioned.
Large amounts of clothing create bulk, which reduces protection.
For the rear seats, as well as for the front ones, three-point, self-winding RBs are installed. They are mounted on the side of the body. In the middle of the rear seat there is only a two-point lap belt, the length of which can be set manually. You can install rear non-inertial RBs, but they are inconvenient to use, since they have to be wound up manually each time.
We change it ourselves
If the RBs experienced a shock load during an accident, they must be replaced along with the winding device. The service life of these products on the VAZ 2106 is 10 years. During operation, belts rub, fray and stretch, so it is necessary to monitor their condition. They must be clean, elastic, without damage or abrasions. If defects are found, parts should be replaced.
To install the RB on a VAZ 2106, you need to prepare:
- a set of keys:
- screwdriver;
- inertial RB;
- fastenings;
- fasteners.
You should buy RB in a vertical version. True, you will have to suffer a little with their installation.
Installing rear seat belts on a VAZ 2106 consists of the following steps:
- First you need to open the trunk of the car.
Open car trunk - Next, we find a suitable hole in the side wall of the VAZ 2106 body, which is provided from the factory.
We drill the hole to the bolt with a “10” thread. Enlarged hole for bolt thread - Next, you need to insert the bolt into the hole and screw it as tightly as possible with a nut. In this case, a large washer should be placed on the cab side so that the bolt head does not cut into it.
- We put the RB coil on the bolt and secure it with two nuts: internal and external.
We attach the coil to the bolt - If everything is done correctly, then the factory technological hole will be located above the coil.
The strap should be threaded through this hole. RB freely exits their technical holes - We check the functionality of the device. The strap should move freely.
- Next you need to install the rear shelf.
After installation, the belt will be a little pinched and difficult to move. To release the strap, you need to make the appropriate cutouts. Slots in the shelf for RB - The second seat belt is installed in the same way.
After installing the rear boosters, you should check their correct operation. To fasten the RB, it should be pulled out smoothly without jerking. It is necessary to ensure that it does not twist anywhere. Next, you need to insert the tongue located at the end of the strap into the lock until it clicks. Then you need to tug on the latch to make sure it is securely fastened in the lock.
How to install the rear belts
To do this, you need to remove the back and rear seat, remove the rear parcel shelf by bending the clips. On the side there is a threaded connection for the seat belt reel bracket bolt.
This is where the coil with bracket is installed.
After this, the rear shelf is installed in place and the straps are threaded through the holes.
Then a loop is installed in place of the bolt with a plug in the side wall.
Seat belt buckles are installed in the corresponding threaded connections under the rear seat.
All that remains is to install the rear seat and backrest.
Installation
1. Remove the rear headrests
2. Pull the right hinge of the rear seat cushion lock drive and fold back the right cushion. Pull the left hinge of the rear seat cushion lock drive and fold back the left cushion.
3. Press the lock drive handle of the right backrest of the rear seat and tilt the backrest.
4. Unscrew the four nuts of the hinges securing the right backrest of the rear seat, remove the right backrest (socket wrench 10). Repeat steps 3 and 4 with the left back. Remove the trunk shelf and trunk mat.
5. Unscrew the eight screws securing the trunk trim on the right and left (a Phillips screwdriver).
6. For VAZ-2112: unscrew the shelf lock.
7. For VAZ-2112: unscrew the lower screw securing the shelf.
8. Release the rear suspension spring support cups and rear seat backrest mounting brackets from the trunk lining.
9. Unscrew the rear seat back lock latches (spanner 19).
10. Unscrew the bolts securing the rear seat belt buckle brackets (replaceable head 17, knob).
11. Place the body reinforcement into the passenger compartment, align the holes in the amplifier with the holes on the seat back mounting brackets and with the holes for attaching the seat belt buckles.
12. Attach the retainers (included in delivery) of the rear seat backrest locks with a spring lock washer and a standard washer.
13. Tighten the bolts securing the rear seat belt buckle brackets in the assembly with the brackets (including the two bolts included in the delivery kit).
14. Install the rear seat backs. Tighten the nuts securing the bracket from the trunk side (socket wrench 10).
15. Tighten the bracket fastening nuts on the interior side (socket wrench 10).
16. Tighten the 4 bolts securing the amplifier cross member (spanner 17).
17. Adjust the position of the rear seat back locks so that the backrests easily lock and recline.
18. If necessary, loosen the two locknuts and adjust the amplifier cross member using the adjusting coupling (wrenches 27 and 24).
19. Tighten the rear seat back lock clamps and attach the lock nut from the delivery kit (spanner 19).
20. Tighten the locknut of the seat back clamp (replaceable head 17, knob).
21. Tighten the bolts securing the rear seat belts and the lower brackets of the 3rd amplifier (replaceable head 17, knob).
22. Through the holes in the side brackets of the amplifier, drill (in place) holes in the body brackets (drill, drill bit with a diameter of 8 mm).
23. Install bolts with spring washers into the resulting holes and attach nuts (bolts, washers and nuts from the delivery kit)
24. Tighten the control bolts (spanner 13, interchangeable head 13, knob).
25. Tighten the locknuts of the adjusting coupling (spanners 24 and 27).
Repair process
Now that we have dealt with the signals and reasons for blocking a fastened and unfastened seat belt, let’s move on to the repair process. Cleaning seat belts is one of the main tasks in this process, so we will consider this procedure separately. So, what should you do if you receive a signal that the lock is jammed? How can I clean it or turn it off? You will learn more about this below.
Tools
To disable the lock if a corresponding signal appears, the entire mechanism will need to be cleaned. To do this, you need to thoroughly prepare in advance and collect all the necessary tools. so what to prepare:
- a Phillips screwdriver, preferably a short one;
- flat head screwdriver;
- a wrench set to “17”, it will be more convenient to use a socket wrench;
- stationery pin;
- syringe with tube;
- some gasoline (lighter fuel is ideal).
Step by step instructions
When the entire list of tools is ready, you can begin repairing and cleaning.
Using a Phillips screwdriver, unscrew the screws that secure the strap protection. If the lock is not working, pull the strap out to its full length and secure it with a clothespin. Take a wrench and remove the screw that secures the element coil. The screw must be removed from its installation location. To prevent the element from starting to unwind, you can attach it directly to the same spool using the same clothespin. In any case, in order to disable and clean the lock, it must be locked to make further actions easier. Put the reel aside and sit in the next seat. To disable and clean the lock, you will need to find the lid behind which the inertial device is hidden. As a rule, it is slightly thicker in design. Shake the coil - under which cover you hear the noise - under that one it is located. Now to dismantle the protective cover you will need to remove four plastic pistons. This can be done using a slotted screwdriver or a thin knitting needle. The pistons should be supported by hand so that they do not fly out and you do not have to look for them and collect them throughout the cabin. Then pry up the cover with a screwdriver and remove it. Set the lid aside. Your view will now be presented with the first mechanism of the component. It is a kind of box with a cylinder and thus a locking ball and a so-called rocker inside, which jams the lock. This mechanism can be dismantled freely from the installation site. Check the functionality of this rocker - ideally it should move freely along the axis of rotation. This device should be positioned vertically with the top angled toward the locking ball. One way or another, the rocker arm must be positioned vertically so that it does not jam. If you feel that the so-called rocker arm does not move freely, then you need to clean its rotation axis. Pour some gasoline and rinse the device until it rotates freely on the axis, without the slightest jamming. Now let's move on to the second, inertial device. It is located under the gear, made of plastic and in most cases made of steel
The gear comes off freely, so remove it
Note the center of the serrated hole. It contains an eccentric with teeth
It is these teeth that jam the strap when it is suddenly pulled out. The space under this very eccentric needs to be cleaned. Pour a little prepared gasoline around the entire perimeter of the hole, add a little fuel to the center. At the same time, hold the strap, preventing it from winding up, for which you can temporarily remove the clothespin. Make sure that the liquid gets into all parts of the element, otherwise cleaning it will be useless. Take the dismantled spool with one hand so that the plastic guide along with the spring can be supported with one finger. Using your other hand, pull and wrap the safety element several times. Also pull it a few times until the device itself engages. Next, hook it on the reel one more time. These steps should be repeated several times.
At this point, the cleaning process of the mechanism can be considered complete. You should carry out all further assembly in reverse order. Do everything correctly, because an incorrectly assembled mechanism will cause breakdowns in the near future with regular use of the straps.
DIY repair
When this part of the car is subject to restoration, and not complete replacement, then almost every person, even those who have not previously had experience working with automotive equipment, is able to complete the task according to the instructions described below. In any case, it is unlikely that the car will be seriously damaged - this is not one of the key devices without which it becomes unusable. So if there are no or minimal doubts about your strength, then you can restore the belt yourself.
What you need
Remove the casing and disassemble the coil. In almost any malfunction this will need to be done. The following tools are prepared:
- various screwdrivers - Phillips-shaped, with flat tips;
- keys of different sizes (you will almost certainly need 17);
- lubricant;
- preferably wire or thin knitting needle;
- a clothespin, specifically a stationery one;
- syringe with tube;
- a little gasoline (an option is the fuel that is poured into lighters);
- seat covers to prevent careless drops of oil from getting there.
Once you have these tools together, you can repair the belt.
VAZ 2106 generator belt size. Types of generator belts
Belts may differ in:
- profile,
- length,
- width,
- thickness.
Belts are made of fiber-reinforced rubber in the following types of designs:
- toothed,
- wedge,
- polycline.
Alternator belt dimensions:
- length - 944mm;
- width -10 mm;
- slope angle - 39 degrees.
It is recommended to replace the alternator belt after the car has driven 15,000 kilometers or after defects such as severe stretching or excessive wear of the working surfaces are discovered.