Symptoms of a problem
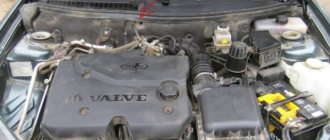
The Lada 2170 model received a liquid heater, which is connected to the engine cooling system. The radiator is a heat exchange device; due to this component, the air entering the Priora’s cabin is heated. Coolant constantly circulates through the radiator; this part of the heater is subject to wear.
It is worth checking the radiator in the following cases:
- The stove stopped heating properly.
- The coolant level drops.
Once you disassemble part of the heater system, you will see a rusty and most likely leaking radiator. There may also be leaks in hoses, pipes and the junctions of these elements. You should check the heat exchanger of the stove only after you have made sure that there are no defects in the operation of the gearmotor and damper.
Diagnostics of climate control equipment "luxury"
Like all electronic control units (ECUs), the heater/air conditioning computer is diagnosed either with a portable scanner or with a full-fledged motor tester. It should be borne in mind that this system is controlled through a separate ECU called the comfort unit.
Just like standard diagnostics, the climate control system scan is connected via the OBD-2 diagnostic connector under the glove box. In general, these tests are carried out in a similar way to diagnosing an automatic heating system. With air conditioning features. That is, checking the actuators and sensors of this device.
Causes of heater failure
There can be a huge number of reasons, but there are several main ones. These include leaks and clogged heater radiators. Let's take a closer look at each.
The radiator is clogged on the outside
When the radiator honeycomb becomes clogged with various debris, its throughput is significantly reduced and it cannot give off heat in the amount necessary for effective heating of the interior.
This happens due to prolonged use of the cabin filter or even neglect of its use.
The radiator is clogged inside
With such a problem, which arises as a result of using low-quality antifreeze or using it for a long time without replacing it, the inside of the radiator becomes clogged. It is for this reason that the coolant does not circulate effectively or does not circulate through the heater radiator at all, which leads to insufficient heating of the heater, thereby complicating the heating of the interior.
Radiator leak
Radiator leaks occur due to many different reasons.
These include:
- Aging;
- Poor quality coolant;
- Corrosion, etc.;
This problem is fraught with the fact that when the radiator leaks profusely, a large amount of coolant is lost, which can lead to engine overheating and, as a result, expensive repairs of the internal combustion engine.
All of the above described causes of radiator malfunction can be eliminated by replacing or flushing it.
Yamaha diversion 600 reviews
Pros Excellent ergonomics. Acceptable acceleration dynamics. Good brakes. Excellent handling at all speeds. Small price. Cons Noisy clutch operation. The motorcycle was produced only for European and…
A failed stove in winter is a very serious problem for the owner of any car, including the Lada Priora. It should immediately be noted that there can be many reasons why a breakdown occurred. Sometimes it will take very little time to eliminate them, but in some cases you will have to tinker. However, often there is nothing particularly complicated in such work, and it is quite possible to do it yourself, even if you have never done anything like this before.
Radiator replacement
To work, you will need a standard set of tools, which includes socket wrenches 10 and 13, side cutters, a Phillips screwdriver, and a wrench 8. In both cases, you will have to disconnect the heating system hoses; the remaining coolant will pour out of them, so immediately place containers under the pipes heater Then the liquid can be returned to the system.
With air conditioning
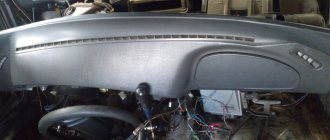
- First of all, we need to remove the rubber seal of the windshield to gain access to the parts; Remove the windshield trim to gain access to the heater system parts
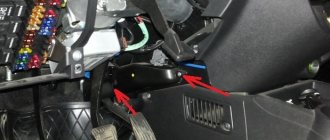
- Let's move on to soundproofing the engine shield. We need to dismantle its middle part, having previously removed the hoses from the mounts. The sound insulation is secured at the bottom with 3 screws, 2 nuts and a washer, and at the top with 3 self-tapping screws. It is recommended to use a tool extension as some fasteners may be difficult to reach; Removing the fastenings
- After dismantling the protection, you will see a foam seal that covers the heater radiator; Remove the trim and move on to soundproofing the engine
- To remove the cover, we need to unscrew 3 screws - 1 you will find in the middle, and 2 others - along the edges; Unscrew the fasteners and gain access to the radiator
- We reached the pipes. To remove them, we need to loosen the clamps and lift the pipes up. Be careful not to tilt the hoses down;
- Pull the heater core towards you until it comes out of the fastenings.
As you can see, dismantling the radiator in a Priora with air conditioning does not require draining the antifreeze. Coolant will only come out of the expansion tank and the heat exchanger itself. Removing the radiator in a VAZ 2170 with Panasonic air conditioning follows the same scheme, only a few fasteners may differ. Now you can replace your worn-out heater with a new one!
Without air conditioning
- Work begins by disconnecting the negative terminal of the battery. We remove the windshield trim along with the windshield wiper arms, as these elements will interfere with operation;
- The next step is to remove the coolant supply pipes to the engine injectors;
- The windshield trim is held in place by seven screws. Unscrew it to completely remove the element;
- Now we move on to the hood seal, in its center you will find a tightening screw - unscrew it;
- The engine noise insulation closes the passage to the heater system - pry up the plugs with a flat screwdriver and unscrew the plugs;
- We unscrew the screws and dismantle the sound insulation. Remove both covers; We remove both parts and go to the interior to dismantle the radiator
- Let's move on to the radiator pipes. We loosen the clamps and dismantle them, having prepared a container for antifreeze in advance. Plug the pipes so as not to drain all the antifreeze;
- You need to remove all the wiring that goes to the stove;
- Next, remove the wire holder and take it to the side, now we go to the Priora’s interior;
- Armed with a 13mm wrench, unscrew the bracket fastenings along with the brake pedal. We move the details to the side;
- We unscrew 3 screws and gain access to the radiator;
- Replacement is carried out in reverse order.
Clean the heat exchanger and inspect it for damage. If cracks are found on the plastic elements, then you will no longer be able to repair the part - only replacing the stove radiator on a Priora, which is done in the reverse order, will help here.
How to replace a stove radiator yourself without an air conditioner
What will be needed for replacement? First of all, the following tools:
- Screwdrivers, figured and flat.
- Wrenches for 8 and 10. (preferably heads with a wrench.)
- Thin pliers for removing clamps.
And, of course, some materials and devices:
- Container for coolant from the system.
- New radiator.
- Foam rubber adhesive strips for the radiator of the Priora stove.
- 2 liters of coolant. (same brand as in the system.)
- Rags.
Having prepared such an arsenal, you can begin this interesting operation of replacing the heat exchanger.
Process description
Place the car level. This is necessary to completely drain the coolant from the radiator of the Priora stove. Place a container for liquid under the bottom of the car. It must be installed in the area of the radiator drain hole of the cooling system. On the right side (along the direction of the car, or on the left, if you stand near the hood). Next you need:
- Unscrew the screw cap and allow the liquid to drain. When the pressure weakens, open the cap of the expansion tank. Wait for the drain to drain and tighten the plug. Disconnect the negative battery terminal. You can begin dismantling the protection. It's called frill.
- First, the windshield wipers are removed. Using a 13mm wrench, unscrew the fastening nuts and remove the brush holders. After this, remove the rubber seal.
- Unscrew the fastening screws. There are 6 of them on top and 7 along the bottom edge. Now remove both halves of the plastic frill. After unscrewing the fasteners, remove the fabric protection of the glass niche in which the stove is installed.
Now comes the most crucial moment. Most craftsmen, when replacing this part, immediately disconnect the pipes going to the radiator of the Priora stove. However, there is a risk of dousing the heater parts with coolant. There is a more interesting and safer option.
Removing the stove
Now that the frill and protection have been removed, access to the heater is completely open. First of all, you need to disconnect the electrical connectors:
- Micromotor gearbox for damper drive. 2 connectors.
- Electric fan. 1 connector.
- Resistor. 1 connector.
Now unscrew the fastening of the heater body to the car body.
One 10mm nut secures the eye on the stove body to the right wing. 8 secures the top to the stud at the top. And two nuts at the bottom. Once the fasteners are removed, the fun begins. Using a flat screwdriver, remove the 3 screws securing the radiator to the body. You need to act carefully so as not to break off the side, thin pressure relief pipe. After that, remove the screws holding the 2 parts of the heater housing. Move the left part with the fan motor a little to the left, disconnecting them, and pull it out.
After this, you can begin to remove the second half with the radiator. Hold the pipes with your hand and begin to remove the body to the left. When it comes off, set it aside. After releasing the clamps from the pipes, remove them from the radiator.
Installation (replacement) of a new radiator
There are two options here. You can simply replace it by putting the part in place of the old one, before installing the housing. But it is better to install the radiator in the removed half before attaching the pipes.
Having decorated the heat exchanger of the stove with foam, install it in the niche of the housing and secure it with screws. Place the half in place and secure all 3 pipes in place. Tighten the clamps.
Carefully reassemble the heater in reverse order. Add coolant to normal level. Start the engine and wait for the cooling fan to operate. Press the accelerator pedal and hold the speed at about 2,000 rpm for a couple of minutes. This is necessary to eliminate a possible air lock. Turn on the heater and check its operation in all modes. All! Well, the necessary work has been done.
Video on the topic of replacing the heater radiator on a Priora without air conditioning.
Replacing the engine cooling radiator on a Lada Priora
Normal operation of a car heater provides the driver and passengers with a comfortable ride in the cold season. But sometimes the car’s heating fails, for example, the heater radiator may leak, and the freezing driver takes longer to react to sudden changes in road conditions.
Using the Lada Priora as an example, we will consider a way to independently solve this problem. Such repairs can be done in the garage yourself, although at first it may scare away less experienced car enthusiasts.
Difficulty of choice
If it has become noticeably cold inside the car, it is worth checking the car's heating system. Most likely, the problem will be detected in the heater radiator and you will soon have to buy a new one.
The Internet is full of advertisements for the sale of heater radiators for Lada Priora, but how to choose a quality product and not “run into” a fake?
The first thing that should indicate the originality of a part is its price. High-quality spare parts cannot be cheap; manufacturers of original radiators will not allow this.
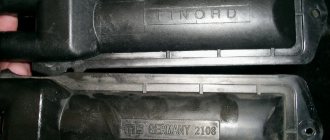
Second. The original radiator of the car heating system has small cells, i.e. the distance between the vertical slats is minimal, only factory equipment can provide this. Factory equipment “works” only with high-quality metal; the honeycombs should not be too soft.
Manufacturers of counterfeit products save on small things; they do not install “liquid swirlers” in counterfeit radiators, plastic parts that increase the heat transfer of the coolant in the radiator of the heating system. To check their presence, you should shake the part; a specific sound will indicate their presence or absence. If they are made of soft material, this method is useless.
Once the radiator has been selected, it is time to change it. Replacing an old one or installing a new radiator in a Priora requires certain actions.
Replacing a heater radiator in a Priora without air conditioning
The layout of the Priora heating system is traditional for domestic cars, its main components are:
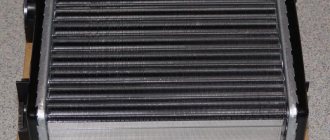
- radiator (heat exchanger) of the heater, in which the liquid is heated;
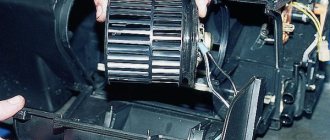
- fan - it disperses air heated from the radiator throughout the cabin;
- regulators - with their help, the intensity of the fan operation is changed and the flow of warm air is regulated by zones.
Before the main work, turn off the power to the car, i.e., remove the negative terminal from the battery.
After turning off the power to the car, you can begin to remove the windshield trim. If you are too lazy to dismantle the wiper arms before doing this, certain difficulties will arise in the future. Next, disconnect the tubes (plastic) for supplying washer fluid to the injectors. Now the decorative trim of the windshield can be easily removed, just unscrew the 7 screws that hold it in place. Although this may still be prevented by the hood seal.
Then the next step is to remove the hood seal. At the front, the two sides of the seal are connected together and secured with a screw; it must be unscrewed. Using a flat tool (screwdriver or knife), remove the plugs and unscrew the screws. We remove the seal that may interfere with the removal of the decorative trim, after which it should come off easily.
Everything worked out - we move on and remove the sound insulation of the engine compartment. We unscrew the screws securing it, remove the covers one by one (the order does not matter). Before releasing the clamps that hold the pipes, place a container to drain the coolant; this will save you some money.
The wiring can be removed using keys 8 and 10. Unscrew the 4 nuts and put the harness aside. Using a 13 key, remove the bracket from the brake pedal and move it to the side - the road to the radiator is open. Use a Phillips screwdriver to unscrew the 3 screws and remove the radiator.
Install the heat exchanger, following the completed cycle, but starting from the end. It’s up to you to decide which Lada Priora heater radiator to install, repaired or new.
Alternative option
There is an alternative option to remove the heater radiator; some prefer it. The vacuum booster (brake) is removed, along with the brake pedal. This will allow you to get to the heater (its left side) and to the heater radiator on the Priora.
Replacing the cooling radiator Priora with air conditioning
After a certain period of time after the release of the Lada Priora, the manufacturer began to equip them with climate control units (air conditioners) Panasonic and HALLA. The new heater has become structurally different from the old one, and getting to it has become much easier. To replace the radiator, you no longer need to remove the frill (windshield trim), VUK, wiper holders or heater.
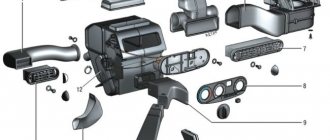
Priora stove diagram
Before changing the stove on a Priora, buy new heater elements using the catalog numbers:
Priora heater 2111-8101012: 1 — heater inlet/outlet hoses 2170-8101200/208; 2 — additional resistor 2123-8118022; 3 — electric fan 2111-8118020; 4 — heater 2111-8101012; 5 — nut 1/07259/11; 6 - screw 1/51873/01
Priora heater parts: 1 - screw 1/76691/01; 2 — heater radiator 2110-8101060; 3 — left heater casing 2111-8101025; 4 — heater control damper 2110-8101538; 5 — right heater casing 2111-8101024; 6 — air duct housing 2111-8119124 intermediate; 7 — screw 1/76692/01; 8 — lower air intake housing 2111-8119026; 9 — bracket 2108-8101110; 10 — bracket 2111-8119102 right; 11 — screw 2114-5325388; 12 — air filter 2111-8122020; 13 — upper air intake housing 2111-8119025; 14 — filter cover 2111-8119116; 15 — screw 1/76702/01; 16 — screw 1/76691/01; 17 — additional resistor 2123-8118022; 18 — screw 2123-6302332; 19 — screw 2114-5325388; 20 — air supply pipe 2123-8118096; 21 — electric fan 2111-8118020 of the heater; 22 — bracket 2108-8101110; 23 — gear motor 2110-8127200 for the heater damper; 24 - screw 1/76691/01
By the way, do you know that the Lada Priora is also equipped with air conditioners (HALLA and Panasonic), so the process of replacing the Priora heater may be slightly different. For example, in order to replace the heater radiator on a Priora with HALLA air conditioning, it is not at all necessary to dismantle the heater assembly.
How to replace a Lada Priora radiator heater without air conditioning
First of all, let's look at the main elements of the VAZ-2170 heating system. They are, in particular:
- heater radiator (heat exchanger) – this is where the coolant is heated;
- fan - with its help warm air is supplied to the car interior;
- regulators – heating intensity and heat distribution zones.
The scheme is, in principle, traditional, and there are no particularly complex technical delights here. If you notice that warm air is not flowing into the cabin while the heater is on, you should inspect the entire system. If a radiator leak is detected, the latter will have to be removed either in order to be soldered, or to be replaced with a new one. Let's look at how this procedure can be done with your own hands on a Priora without air conditioning.
The first thing that is recommended to do before starting the main work is to remove the negative terminal from the battery.
Do not neglect this advice, because it is, firstly, about your safety, and secondly, it is additional insurance against a number of different unpleasant surprises with wiring and electrical equipment.
After the car is de-energized, you can remove the windshield trim.
It will also be necessary to dismantle the wiper arms, since they will create additional inconvenience during operation. Together with them, we also disconnect the plastic tubes through which liquid from the windshield washer reservoir is supplied to the nozzles. Now you can proceed to removing the decorative trim of the windshield. This is not difficult to do - it is attached using 7 self-tapping screws, respectively, they should be unscrewed. First you will need to remove the hood seal. Please note that in the middle of the pad there is a screw with which the halves are pulled together. After this, use a screwdriver or knife to carefully pry up the plugs covering the screws and unscrew them. That's it - the cover can be removed.
If everything went well, then you can move on. At this stage, you should remove the sound insulation from the engine compartment. To do this, unscrew the screws with which it is actually attached, and then remove the lining, left and right (the order does not matter). After this, you can move on to the pipes leading directly to the radiator. In order to remove them, you will first need to loosen the retaining clamps. Place a container to drain the coolant first.
Now you can remove all the wires that lead to the heater from the connectors. Having disconnected them, take two keys - 10 and 8 - and unscrew the 4 nuts. The wiring harness should be moved to the side so that it does not interfere, after first removing the holder. After this, we move into the car interior and take a socket wrench size 13. With its help, remove the bracket from the brake pedal, and
move it to the side. That's all - you have free access to the heater radiator. In order to remove it, you need to unscrew 3 screws using a Phillips screwdriver, after which the unit can be easily removed. All work on installing the radiator is carried out in reverse order.
As you can see, there is really nothing particularly difficult here. In order to remove the heater radiator on a Priora without air conditioning yourself, you will need some time (it all depends on your skills) and a minimum set of tools. On the other hand, you save money because you do all the work yourself, rather than turning to specialists at a car service center. Even if you have never encountered this before, figuring out how to remove the Priora radiator will not be difficult. The eyes, as you know, are afraid, while the hands do. It’s probably worth listening to folk wisdom.
Product delivery options
Note! Below are the shipping methods available specifically for this product. Payment options may vary depending on the shipping method. Detailed information can be found on the “Delivery and Payment” page.
Parcel by Russian Post
Available payment methods:
- Cash on delivery (payment upon receipt)
- Using cards Sberbank, VTB, Post Bank, Tinkoff
- Yandex money
- QIWI
- ROBOKASSA
Shipping throughout Russia. Delivery time is from 5 to 12 days.
Parcel by Russian Post 1st class
Available payment methods:
- Cash on delivery (payment upon receipt)
- Using cards Sberbank, VTB, Post Bank, Tinkoff
- Yandex money
- QIWI
- ROBOKASSA
Shipping throughout Russia. Delivery time – from 2 to 5 days. More expensive than regular delivery by Russian Post, approximately 50%. Parcel weight up to 2.5 kg
Express Parcel EMS
Available payment methods:
- Cash on delivery (payment upon receipt)
- Using cards Sberbank, VTB, Post Bank, Tinkoff
- Yandex money
- QIWI
- ROBOKASSA
Shipping throughout Russia. Delivery time – from 3 to 7 days. More expensive than regular delivery by Russian Post, approximately 100%.
Transport companies
Available payment methods:
- Using cards Sberbank, VTB, Post Bank, Tinkoff
- Yandex money
- QIWI
- ROBOKASSA
Delivery is possible to any locality where there is a representative office of the transport company. Delivery time – from 2 to 10 days. Sending large parcels is approximately 50% more profitable than by Russian Post.
Courier delivery in Togliatti
Available payment methods:
- Cash upon receipt
- Using cards Sberbank, VTB, Post Bank, Tinkoff
- Yandex money
- QIWI
- ROBOKASSA
Delivery time from 1 to 12 hours.
Replacing the radiator of a heating unit in a Priora that is not equipped with air conditioning
Replacing the heater radiator on a Priora without air conditioning may make sense if warm air has stopped flowing into the cabin, while the heater itself is working. If, in addition to the above problem, there is also a water leak from under the Priora stove, the motorist will have to remove the poorly functioning unit in order to solder the latter. Sometimes repairs are impractical and you have to replace the old device with a new one.
So, first of all, you need to start by removing the negative terminal from the battery. The fact is that the issue here is not only about the safety of the master himself, but also about additional insurance, which allows him to avoid several unpleasant surprises that, if handled carelessly, can arise not only with wiring, but also with electrical equipment.
If you are replacing the heater radiator on a Priora without air conditioning, after de-energizing the system, you can begin to dismantle the windshield trim. At the same time, the wiper levers, which can cause future discomfort during operation, should also be removed. After this, you should rid the unit of all plastic tubes through which the liquid located in the windshield washer reservoir goes directly to the nozzles. Only after all the above steps have been completed will it be possible to remove the decorative trim located along the edges of the windshield. In fact, it’s easy to carry out such a manipulation - just get rid of seven self-tapping screws.
Replacing the heater radiator on a Priora can only be done after removing the hood seal. Before dismantling, it should be noted that in the middle of the lining there is a screw that tightens both halves of the structure. Using a screwdriver or any knife, you can gently lift the plugs (this element serves as the “cover” of the screw) and unscrew them.
After this, you can begin to remove the sound insulation, which is located in the power unit compartment. To do everything correctly, you will have to unscrew the screws and remove the pads (there is no clear rule about which of them to remove first: left or right). Then you should get rid of the pipes that go directly to the radiator. A person who wants to understand how to get to the heater radiator on a Priora must loosen the clamps holding the structure itself.
After this, you can remove all the wires going directly to the stove from the connectors. You can remove them using two keys, in particular, one “10” and the other “8”. After unscrewing all four nuts, move the wiring harness to the side, which is held by the holder. The “13” key will help to dismantle the bracket located on the brake pedal. Only after this can you begin to remove the heater radiator on a Priora that does not have air conditioning. A regular Phillips screwdriver will help you dismantle the device, allowing you to remove 3 screws. All the rest of the work consists of installing a new unit and reassembling the system in the reverse order of the described actions.
In fact, there is another way to replace the system element of interest. To open free access to this element, dismantling not the stove body, but the vacuum brake booster will help. It is worth noting that this procedure will only be successful if the brake pedal is removed along with it. Such actions help to get closer directly to the left side of the stove and the desired device.
Main aspects of repair
If the fan does not work or the stove generally stops working, then you need to understand that the repair process is a rather labor-intensive procedure. Before you remove the heater radiator on a Priora or how to remove the fan, you need to do diagnostics. First, the functionality of the thermostat is checked. If the lines connected to the device are warm, then the part is working.
If the fan does not work, first of all you need to check its contacts. Replacing the stove fan does not always solve the problem, especially if it involves oxidation of the contacts. Sometimes simply cleaning the connector from the device is enough to solve the problem. You can always remove the heater fan, but the heater fan does not fail very often. If the stove blows only at maximum speed, the stove rotation speed resistor has burned out.
Installation of a new radiator in a Lada Priora with air conditioning
Replacing the heater radiator in a Priora car with air conditioning is a fairly simple process. The latter unit appeared only in newer cars, in particular, Priors began to be equipped with a HALLA or Panasonic climate control system. Thanks to the new component, you can replace any part of a non-working stove only by dismantling the frill, getting rid of the windshield wipers, the stove itself or the vacuum brake booster.
If a motorist wants to understand how to remove the heater radiator on a Priora with air conditioning, he must start by removing the sound insulation located in the engine panel. After this, you should dismantle the power unit air filter hose and remove the seal, which is located near the radiator hoses. Then you should drain the coolant and lift the radiator up towards the mechanic.
Changing the cabin filter
There are Lada Priora configurations that include air conditioning. It could be HALLA or Panasonic. Owners of such cars are also concerned about replacing the stove on a Priora with air conditioning. But first, it’s worth understanding the air conditioners themselves, which differ not only in the country of manufacture.
HALLA is made in Korea and Panasonic is made in Taiwan. You can find out which air conditioner is installed in your car by visual inspection. Attention should be paid to the button, which is located in the center of the air conditioner control panel. Panasonic system has a button to turn it on, but HALLA does not have such a button.
Car owners should change the filter regularly. so that there are no foreign odors from the street in the cabin, and the air is clean. Before you find out how to change the heater filter on a Priora, you need to know the type of system that is installed in your vehicle. After all, each cooling system model has different filter elements.
The filter changes differently depending on whether the car has air conditioning or not. If the car is not equipped with an air conditioning mechanism, then proceed as follows:
- Open the hood.
- We dismantle the grill installed under the glass on the left. There are screws on it, closed with plugs. They need to be unscrewed. After completing this step, access to the filter will be freed.
- The cleaning component cover is held in place by four bolts that must be removed.
- We remove the cover, which will allow us to get the filter. We clean the vacated area from possible contamination and debris.
- We install a new filter element and assemble the car in the reverse order.
If the car has a cooling mechanism, the actions will be slightly different.
- Open the hood and find the required part.
- We bend the upholstery material.
- If Panasonic is installed, then the latch on the filter element must be unscrewed. With a Hull cooler, you will need to press the latch, which will open the lid.
- We take out a filter that has already served its purpose and in its place we put a new one, which will need to be twisted using the slots in the housing.
- We install the cover and all parts in their place.
Repairing the Priora stove may be associated with a number of problems that initially need to be correctly diagnosed. We will write several more articles on this topic and consider the main problems in detail. In any case, you need to know how to disassemble the stove on a Priora, because this is the basis.
Difficulty of choice
If it has become noticeably cold inside the car, it is worth checking the car's heating system. Most likely, the problem will be detected in the heater radiator and you will soon have to buy a new one.
The Internet is full of advertisements for the sale of heater radiators for Lada Priora, but how to choose a quality product and not “run into” a fake?
The first thing that should indicate the originality of a part is its price. High-quality spare parts cannot be cheap; manufacturers of original radiators will not allow this.
Second. The original radiator of the car heating system has small cells, i.e. the distance between the vertical slats is minimal, only factory equipment can provide this. Factory equipment “works” only with high-quality metal; the honeycombs should not be too soft.
Manufacturers of counterfeit products save on small things; they do not install “liquid swirlers” in counterfeit radiators, plastic parts that increase the heat transfer of the coolant in the radiator of the heating system. To check their presence, you should shake the part; a specific sound will indicate their presence or absence. If they are made of soft material, this method is useless.