Print this article Font size 16
If the thermostat fails, the engine will take a very long time to heat up to the required operating temperature, and while driving, the engine temperature will drop sharply. This is especially felt in winter due to a poorly heating stove.
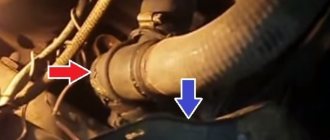
To quickly check the condition of the thermostat, it is not necessary to remove it. To do this, start the cold engine and touch the lower radiator hose. In the normal state of the element, it will first be cold for a short time, but then quickly begin to heat up. This indicates that the coolant is moving along a large contour.
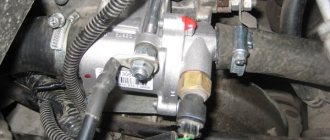
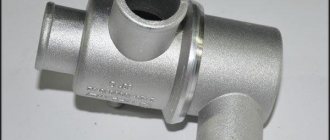
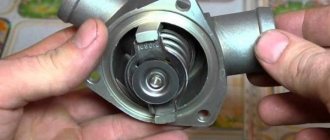
Appearance of the device
↑ Replacing the thermostat VAZ 2109
- Unscrew the bolts securing the crankcase protection and remove it.
- Unscrew the expansion tank cap.
- Place a container under the drain hole, unscrew the cylinder block drain plug and drain the coolant from the cylinder block.
- Place a container under the drain hole, unscrew the radiator drain plug and drain the coolant from the radiator.
- Loosen the clamps.
- Disconnect the three hoses from the thermostat housing.
- Loosen the clamp and remove the thermostat with the hose. Then disconnect the short hose from the thermostat.
Features of removing and replacing the thermostat on VAZ 2108, 2109, 21099 cars
The service life of the thermostat for the engine cooling system of VAZ 2108, 2109, 21099 cars is 50-60 thousand kilometers.
This is the best case scenario. It happens that it has to be changed much more often. Let's look at how to quickly and cost-effectively replace a thermostat. Necessary spare parts, tools and accessories
For the cooling system of engines 2108, 21081, 21083 (thermostat 2108-1306010-10 or 2112-1306010).
— Four clamps for pipes
In case the old ones are no longer suitable or there are doubts about their ability to properly compress the pipes.
— Phillips screwdriver or 7 mm wrench
Preparatory work
On engines of VAZ 2108, 2109, 21099 cars, access to the thermostat for replacing it is quite good. The only problem is that it is necessary to drain the coolant, which is a labor-intensive task in the presence of engine mudguards and a sump protection sheet.
Therefore, we will drain the liquid from the Solex carburetor heating block.
We remove the long hose from it (by loosening the clamp) and drain the liquid into a container with a volume of at least four liters (or several plastic bottles). The coolant level in the engine cooling system will drop well below the thermostat and it can be quickly removed and replaced with a new one.
Remove the long hose from the carburetor heating block
Replacing the thermostat of the engine cooling system of VAZ 2108, 2109, 21099 cars
— Loosen the four thermostat clamps
We do this using a Phillips screwdriver or a wrench.
— Remove the old thermostat
We pull it out of the pipes, rotating it left and right.
— Installing a new thermostat
Before installation, wipe the pipes going to the thermostat dry. If there is old sealant, carefully remove it. We install the new thermostat without sealant. Since its pieces that come off can clog the channels of the cooling system (and this impairs the coolant circulation and overheats the engine). If necessary, change the clamps on the pipes.
No. 5 thermostat PRAMO with Polish thermoelement Russia, Vladimir 300 rub.
pramovlad
I use it to this day, the flight is normal. Regulates temperature well. Even in traffic jams and in courtyards, the ventel is silent, only after a whole day of driving it occasionally reminds itself of itself. The engine warms up quite quickly. Bottom line: Good thermostat, for the money. I recommend.
I'm adding
The PRAMO thermostat bent at the end of winter. After the positive feedback, it started not working so well. Probably jinxed it. What was it? In winter, it warmed for a long time, and when the temperature reached operating temperature, I kept the fan at the limit of turning on the fan. But in the end it jammed into a small circle. Plus it was still leaking along the flaring. Bottom line: don’t take X and G!
How did these thermostats get me, maybe I’m the only one unlucky?
Removing and replacing the thermostat on VAZ 2108, 2109, 21099
Hello, from this article you will learn how to determine whether the thermostat is working and how to independently replace the thermostat on VAZ 2108, 2109, 21099 cars . The thermostat must open when the engine warms up, so that the coolant flows in the so-called “great circle” through the radiator, thereby better cooling the engine. The first sign of thermostat failure is the engine boiling. That is, if your antifreeze level in the expansion tank is normal, but the engine still heats up more than 90 degrees, then most likely the thermostat has failed. You can also feel the lower radiator hose; at first it should be cold, and then it should heat up sharply when the thermostat opens; if the hose does not heat up even when the engine is heated to operating temperature, then it is jammed and needs to be replaced. It is also possible that the thermostat is stuck in the open position, then the engine, on the contrary, will not heat up, or will do so very, very slowly. Before you start changing the thermostat, drain the coolant from the system. Now use a screwdriver to unscrew the clamps on the hoses that are connected to the thermostat (it is located to the left of the engine) and then remove all the hoses one by one
Next, remove the thermostat itself
We install a new thermostat, connect all the hoses to it, fill in coolant and check the functionality of the new thermostat. Also watch the video on removing and replacing the thermostat on a VAZ 2108, 2109, 21099:
Source
Refilling the cooling system
It will take you a few minutes to add fluid and bleed the cooling system. First of all, check that all pipes are securely installed and that all clamps are tightened. Then look to see if the engine block and radiator plugs are in place. If not, then install them. Now you can open the stove tap and pour liquid into the expansion tank. The gurgling stopped - they closed the plug and started the engine. Wait until it warms up to operating temperature - about 90 degrees. If necessary, add fluid to the reservoir. It is necessary that its level is between the lower and upper marks.
Self-replacement of the VAZ-2109 thermostat
How to check and replace the VAZ-2109 thermostat (8 or 16 valves)?
This procedure is not very complicated, and even a less experienced car owner can handle it without much difficulty. What needs to be done is described in this article. The thermostat itself is a mechanical device whose operation is based on purely physical principles. Inside it is wax that is sensitive to temperature changes. When the coolant heats up, the substance melts and, as a result, the damper opens, allowing it to enter the cooling system.
From the VAZ-2109 to the relatively new Granta, thermostats work exactly the same, and moreover, they are interchangeable. True, the new units are somewhat shorter than the old ones, but this in no way prevents them from being installed.
Often, from the above-mentioned more modern model, a thermostat is installed if the stove does not “fry” too much.
Signs of breakdown
What could be the first sign that the VAZ-2109 thermostat is faulty? Of course, the engine overheats even when driving at a high constant speed. The reason is that the liquid continues to circulate in a small circle, not a drop gets into the radiator. And even turning on the electric fan won’t help, because doing so is simply useless. The only thing that can slightly correct the situation is opening the heater tap and turning on the interior airflow at maximum speed.
But such an action will not bring comfort in hot weather. The most common thermostat breakdown is the sensing element jamming in its original position (the liquid moves in a small circle). If this suddenly happens, then you need to try all methods of elimination. Even a few light blows to the body can open the valve. If such an emergency occurs on the road, you will have to drain the liquid and break all the insides of the thermostat so that the liquid circulates only in a large circle. But it won’t boil, and you can get to the repair site.
How is the check carried out?
First of all, it is worth pointing out that on a VAZ-2109 (with an 8-valve engine, as well as a 16-valve engine) you do not need to drain the coolant to check. The procedure is:
- start the engine;
- check the temperature of the lower pipe leaving the radiator.
Normally, it should remain cold, since the liquid circulates only in a small circuit. It heats up gradually. As the coolant reaches a temperature ranging from 87 to 92 degrees and the wax in the thermostat melts, the damper opens and a large circle begins to operate. If this does not happen, then the thermostat will have to be changed.
Before buying a new one, check whether the old one is really damaged. This is not difficult to do, just put the device in a pan of water (on a rag) and heat it to 87-90 degrees. A working device will open the main valve.
see also
The difference between the cylinder head of a VAZ 2109 is an injector and a carburetor- Dut vaz 2109 injector
- How to remove the ignition switch on a VAZ 2106
- How to disassemble the ignition switch on a VAZ 2106
- VAZ 2106 how to remove the ignition switch without a key
- Flushing the injector VAZ 2109
- Installation of steering rods on a VAZ 2107
- Installing an oil pressure sensor on a VAZ 2107
- Installing electronic ignition on a VAZ 2101
- Installation of timing chain VAZ 2107
- Installation of a compressor on a VAZ 2107
Dismantling
If it becomes necessary to remove the thermostat, then it will not be possible to do without draining the coolant. Some craftsmen claim that they were able to avoid the above procedure, but in reality it turns out that this option requires much more labor and still leads to the loss of 3 out of 5 liters of liquid. Therefore, it is better not to suffer and do everything as it should be. To do this, unscrew the plug located at the bottom of the radiator and drain the coolant into a suitable container. Then:
- remove the air filter;
- loosen the clamps holding the hoses;
- disconnect the mass from the thermostat;
- Unscrew the nut and pin holding the device.
Installing a New Thermostat
Before installing a working device, it is necessary to clean its location from dirt and rust. Apply a thin, even layer of any neutral sealant to the degreased surface. You should wait at least 10 minutes for it to dry slightly. After this, a new node is installed.
In the end, all that remains is to pour the required amount of coolant into the system, making sure that no air pockets form.
To make sure that everything is functioning normally, you need to start the power plant and inspect all connections for leaks. If detected, the latter are eliminated by tightening the fastening clamps.
In the vast majority of cases, after replacing the old thermostat, all unpleasant symptoms disappear for a long time.
The video below shows the replacement process in detail:
Source
Symptoms of malfunction
The following indicates that the thermostat is not working properly:
- the long period required for the motor to reach operating temperature;
- rapid overheating of the power plant;
- high coolant temperature.
It is the systemic excess of temperature standards that, as a rule, leads to breakdown of the entire engine. For this reason, it is necessary to replace it at the first sign of a thermostat malfunction.
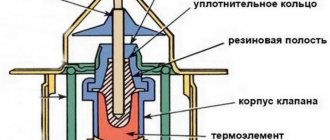
Scheme and design
In order to promptly determine the malfunction, check or replace the thermostat, you must first understand its circuit and design elements.
The scheme presented above is deciphered as follows.
Item number
| 1. | Inlet pipe coming from the radiator |
| 2. | Rubber insert |
| 3. | Heat sensitive solid filler |
| 4. | Bypass valve spring |
| 5. | Inlet pipe coming from the engine |
| 6. | Bypass valve |
| 7. | Outlet pipe going to the pump |
| 8. | Main valve spring |
| 9. | Main valve |
| 10. | Pipe coming from the expansion tank |
| 11. | Piston |
