09.10.2013
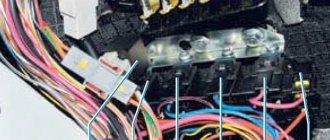
Starter-battery-ignition circuit diagram
Probably the most unpleasant thing that can happen is when you get into the car with thoughts of a good trip, turn the ignition key, and in response there is deep silence. And at this moment you remember all the swear words and pour them on your car. And it’s even worse when it’s -30 ºС outside and you’re already frozen to the bone. But let’s not talk about sad things, let’s just break down the main reasons for a non-working starter.
But! Before doing this, be sure to pay attention to other possible causes of the malfunction! Since in 90% of cases the problem of a non-working starter lies in completely different faulty elements.
Characteristic
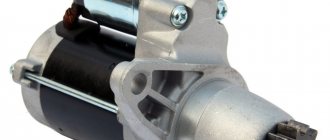
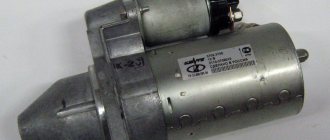
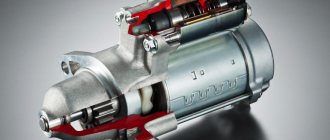
Every car has an ignition system. However, it's not just spark plugs, a coil and armored wires. This system also includes a starter. The VAZ-2115 is also equipped with it. On Samara-2 cars it is of a gear type. The element is assembled with a traction relay and a drive mechanism.
The starter interacts with the ignition switch and the engine, being a kind of intermediate link. The main purpose of the element is to create the necessary torque for the engine, which will give the internal combustion engine the ability to work independently.
Starter operating principle
The whole process proceeds cyclically, the time period of passage is 3-4 seconds.
The actions of one cycle can be divided into three stages:
- Connecting the gear to the flywheel;
- Direct start of the motor;
- Uncoupling the gear from the flywheel.
Immediately after turning the key in the ignition, electric current from the battery flows to the relay, setting the Bendix in motion. It engages the flywheel, which closes the circuit. As a result, voltage is supplied to the motor, increasing the rotor torque. Its transmission to the shaft of a car engine, through coupling with the flywheel, gradually increasing due to the ignition of several portions of the fuel mixture, leads to the final start of the engine. After this, the starter is turned off and will not be used for anything else.
Starters in cars with diesel and powerful engines are reinforced with gearboxes. This is an element with several gears that increases the voltage many times over.
The use of gearboxes provides a number of advantages:
- increased efficiency;
- consumption of weak electric current;
- works even at very low battery levels.
Recently, hybrid starters with generators have gained widespread popularity.
Device
The VAZ-2115 starter itself consists of the following elements:
- Stator.
- Rotor (armature).
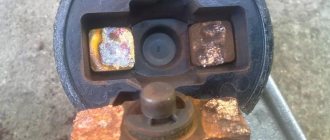
- Contact plate.
- Brushes with holder.
- Traction relay.
- Drive mechanism.
Power is supplied to the starter windings through a traction relay. So, when you turn the ignition key, a starting current (about 500 amperes) flows from the battery to the relay. Next, this mechanism moves the drive element.
The engagement includes the starter drive gear and the flywheel ring gear. A few revolutions are enough for the unit to start successfully (of course, if you have a working starter). VAZ-2115 has a simple design of this element. However, malfunctions with it should not be ruled out. So, let's look at why the starter on a VAZ-2115 car does not start and what to do about it.
Causes
Most often, starter failure is a slow, gradual process. To prevent damage, when the starter slows down, pay attention to the condition of the electrical circuit or battery.
The most common causes of poor starter performance or failure, which is the first thing you should pay attention to if there is a problem:
- Battery.
- Fixing contacts.
- Integrity of wires leading to terminals.
- Damage to the circuit between the battery and starter.
- Not working contact group.
- Winding short circuit, relay failure
- It is also not uncommon for bearings to wear out, but the starter does not turn off after ignition.
If engine operation is accompanied by a strange noise, pay attention to the mountings and drive gear.
Let’s immediately make a reservation about the case when the breakdown can be eliminated only by repairing the starter or starting the car with a push - when you turn it on, there will be a sound of the armature rotating at idle, or the Bendix overrunning clutch slipping, this means that the breakdown of the unit is mechanical. This means failure of the fork, overrunning clutch or planetary gearbox (if such is provided for in the design of the car).
Slow rotation of the flywheel is a sign of armature contact with the stator. In the jargon of motorists - “shoes”. The reason for this is wear of the bushings. With further operation of the starter with obsolete plate bushings, the armature winding clinging to the stator will shift, damaging the winding wires, thereby causing a short circuit.
If there is a problem with the power supply, auto electricians use the method of turning on the starter by shorting the terminals of the “positive” wires connected to the solenoid relay. If such diagnostics do not produce results, then the cause is sought inside the stator.
Doesn't turn at all
If, when you turn on the ignition, the armature does not rotate and the traction relay does not operate, check the voltage in the battery. A minimum of 12 volts is required to start successfully. The starter takes a lot of energy from the battery. That's why it's so important to keep it in good condition. There are several ways to check the voltage on the battery. The best method is a multimeter. When the contacts are closed, the device will display the result. But if there is no such device, and there is no voltage indicator on the panel, you can use the old-fashioned method. To do this, take a 12-volt car light bulb and a pair of wires. With bare contacts it is closed to the terminals. If the voltage is 12 volts, it will light up properly. Anything less will burn very dimly.
The next reason why the traction relay does not turn on is loosely tightened wire tips (both on the battery side and on the starter side). Perhaps the contacts have oxidized there. Use a special cleaner or sandpaper. Experts do not rule out a break in the pull-in winding. If cleaning the contacts does not help and the starter does not turn, the VAZ-2115 requires replacing the traction relay. We'll look at how to do this at the end of the article.
DTOZh replacement procedure and timing
The procedure for replacing the DTOZh may differ depending on the car model. At the VAZ, to carry out the process, you need to prepare several tools, including the obligatory set of wrenches.
According to the classic scenario, the coolant will have to be drained, otherwise replacing the DTOZH cannot be called correct. Although there are several replacement options that do not involve draining.
As mentioned above, one of the DTOZH is located in the thermostat. It screws in from the side. The second is located a little lower, wrapped in the cylinder head.
A little about the timing of replacement of DTOZH. If we are talking about a regulator that goes to the pointer, then it must be replaced at the very moment when the temperature values go astray. This is easy to check: for example, when the engine is cold, the coolant needle tends to the red zone or simply wanders. This is an error and requires correction, i.e., replacement of the sensor.
In some cases, it also happens that it is not the regulator itself that is to blame, but the wiring or contact. You need to check everything, and only then decide whether to change it or not. Testing the wiring is also easy: the wires are disconnected from the DTOZH, the ignition is turned on and a short to ground is made. If the arrow jumps up, then everything is in order with the wiring.
The second DTOZH changes if the machine itself is not working properly. For example, the speed of a cold engine does not increase, but when it is hot it reaches a value of 1500 rpm. Fault number 2 can also be judged by the cooling fan, which turns on too early or does not do so at all.
Temperature controllers that have been removed are easiest to check. They must be immersed in boiled water heated to certain values, then connect an ohmmeter to measure the resistance coming from the DTOZH.
Noise when rotating armature
In this case, check the condition of the drive shaft and armature bearing liners. Replace worn elements. The starter may have become loose or its cover at one end may be broken. Because of this, the mechanism works incorrectly. Inspect the flywheel itself. There should be no wear on its teeth. If present, the flywheel needs to be replaced. It happens that the gear does not disengage with it. In this case, the cause of the malfunction is in the clutch. It jams on the shaft splines. The VAZ-2115 starter relay can work normally. Clean the splines and treat them with oil. This helps eliminate jamming.
Ignition module
Another problem is the ignition module. This malfunction was more common on cars of the Samara-1 generation. In the case of Samara-2, the quality of the part itself has improved, but the root of the problem remains. The module is attached to the cylinder block, which causes it to get very hot and burn out the windings. As a result, when hot, it is possible to lose spark in one, several or all cylinders at once.
If the car does not start when hot, check the spark. If it doesn't, that's almost certainly the problem. You can usually resolve the issue by replacing the module, but if the problem returns, consider moving the bracket to another location. Most often it is installed in the front part of the engine compartment, near the radiator.
Most problems with poor engine starting when hot are solved using these methods. But less probable ones are also possible: broken wiring, ECU malfunction, etc.
We recommend: Why won't my car start on autostart? Review of reasons
How to change a relay with your own hands?
To do this, we need to de-energize the on-board network - remove the terminals from the battery. Next, clean the surface of the starter from dust and dirt. Unscrew the nut from the relay and remove its contact. Unscrew the bolts securing the relay to the starter body. After this, remove the nuts from the end.
Next, you need to dismantle the old core and put a new one in its place. All elements are assembled in reverse order. It is important to check the operation of the new device immediately after repair. We install the starter in place, pump up the terminals and start the engine. The engine should start with half a turn (provided the battery is normally charged).
Candles
Unscrew the spark plug, place it against ground and crank the starter. If there is a spark, then there is probably a problem in the fuel system. We will tell you about it later.
It is necessary to do otherwise when the unscrewed spark plug works properly, but it turns out to be wet. Here you should check the timing belt. The latter sometimes jumps off, which disrupts the correct gas distribution and, accordingly, the VAZ engine does not want to start.
If you see that the spark plugs are filled with fuel, then perhaps this very circumstance is preventing you from starting the engine. Dry them with a burner or on a gas stove burner. When they turn out to be wet again during the next attempt, you will have to find out why this happened.
If there is no spark, the cause is sought further. It often lies in problems:
- crankshaft pulley or sensor that controls its position (DCPV);
- computer.
In most cases, the VAZ model 2109 injector does not want to start precisely because of the failure of the DPKV. Failure of other sensors does not prevent the engine from starting, it will simply not work correctly.
What else do you need to know about relays?
Since the starter consumes quite a powerful current, the integrity of its elements should be checked every 100 thousand kilometers or every 3 years. During this time, slight fluctuations in voltage may occur in the mechanism, which can cause the relay to fail.
You can check its functionality by a characteristic click. It happens that when starting, the starter continues to work. In this case, you will hear a sharp squeal. This indicates that the retractor has failed. The mechanism cannot return to its reverse position.
Why is the VAZ 2114 8-valve injector difficult to start?
For some reason, it seems that many drivers of this model will be interested in the question of why the VAZ 2114 8-valve injector does not start well. Finding the cause of this phenomenon is not as easy as it might seem at first. This is due to certain difficulties in troubleshooting in this model, since injection systems differ from carburetor systems. The algorithm for identifying possible problems will be built differently, adapting to the design features of the machine.
Why is the VAZ 2114 8-valve injector difficult to start?
, we will try to consider in this work. In a short article it is impossible to consider absolutely all possible problems; there are some that can only be identified with the help of diagnostic equipment. But, nevertheless, we will try to analyze as many such situations as possible in order to help all VAZ 2114 owners decide what to do in such a situation.
Why might the engine be difficult to start?
You can look for the culprit in such a situation in several directions. Among them, the most important problems are:
- Malfunctions in the ignition of a VAZ 2114 car
- There is no pressure in the fuel rail of the 8-cl VAZ engine
- Air leak into the VAZ intake manifold
- Timing belt marks are misaligned
Engine diagnostics using spark plugs
Let's look at the first option, why the VAZ 2114 doesn't start well. To do this, unscrew the candles and look at their color. If there is black dry carbon on the candles, we can say that the engine has been running for a long time on a rich mixture, which covers the candles with black carbon.
Why does black carbon appear on the spark plugs of an injection car:
- Malfunction of the mass air flow sensor
- The first oxygen sensor has failed
- Fuel pressure regulator is faulty
- Malfunction of fuel injectors
White carbon deposits on the spark plugs of an injection car appear due to a lean mixture, the reasons for the appearance:
- Everything is the same as with black soot
- Malfunction of the fuel pump or clogged fuel filter (check the mesh and fine filter)
- Air leaks through the air flow sensor pipe, the place where the regulator is attached to the XX joints of the manifold.
Checking the spark plug spark
The lack of a spark on one 8-cl spark plug of a VAZ engine will not affect the engine starting, it will be noticeable when idling, tripping and jumping revs. But if the ignition module of the VAZ 2114 is faulty, then the spark disappears in two cylinders 1-4 or 2-3. To check the spark plug spark, take out the fuel pump fuse, unscrew one spark plug or take a spare one, remove the high-voltage wires one by one, put them on the spark plug, then put the whole thing on ground (in this case, the valve cover) and ask a friend to crank the engine with the starter, so we check each spark plug. If there is no spark on one spark plug, most likely there is a defect in the explosive wires; if there is a spark in two or all spark plugs, it is highly likely that the problem is in the ignition module or the wiring to it.
The timing marks on the VAZ are not set correctly
Another reason why the VAZ 2114 does not start may be a mismatch of the timing marks. The reason for the mismatch of the marks may be weak timing belt tension, cut teeth, or the crooked hands of a mechanic at a service station.
A discrepancy of more than two teeth will noticeably affect the operation of the engine of the fourteenth. With a slight deviation, the engine starts up a little worse, does not hold idle, and stalls when switching to neutral gear. If the deviation exceeds 4-5 teeth, the sound of the engine changes, air escaping under pressure through the valves that are not opened in time becomes audible, thrust noticeably disappears, and starting the engine is extremely problematic.
- To check, we need a “10” key; use it to unscrew the three bolts securing the timing case.
- Next, put the car in 5th gear and push it until the mark on the camshaft pulley and the rear cover match, you can also turn the pulley with the key to “17”
- We remove the protective plug from the clutch housing and see if the mark on the flywheel matches the mark; if not, then you need to loosen the tension roller and align the belt according to the marks.
Testing Bendix
If you are subscribers to my site, then you already know from the starter device that the bendix can only rotate in one direction. If you try to turn it the other way, it will jam. Thanks to this feature, you can check the bendix with the starter removed.
We remove it from the armature shaft and release it from the retractor relay plug. We hold the lower base with one hand and try to turn the gear in one direction. If it rotates freely in both directions, then it is faulty and needs to be replaced. Although there are craftsmen who restore its functionality.
If this test was successful and the bendix only spins in one direction, then we inspect it. Its gear must be intact, each of its teeth must not show signs of damage or deformation. If so, then the part needs to be replaced.
Video on how to check Bendix in a garage:
Simple check on the car
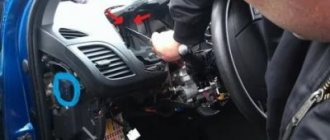
Initially, it is important to find the unit itself among the elements of the engine compartment. In most cases, the starter housing can be easily accessed from above by opening the hood. Before the procedure, you need to check the condition of the battery.
The voltage of a fully charged battery that is not under load is 12.6-12.9 Volts. After this, you can go directly to checking the starter. To do this you will need a voltmeter and a long screwdriver with a rubberized handle.
This can be done in two ways.
Method No. 1
Here we need a voltmeter and an assistant.
The check must be carried out in the following order:
- Locate the positive terminal of the solenoid relay on the starter unit. It looks like a large bolt with a thick braided wire attached to it.
- Connect the red wire of the voltmeter to it.
- Attach the black cable of the device to the ground of the car.
- After this, ask an assistant to turn the ignition key. At this time, the voltmeter should show 12 volts, and the starter should make characteristic knocking noises. If the voltage is lower, then the problem is most likely in the battery or ignition switch.
Method No. 2
To check in another way, you will need a long screwdriver.
Here you need to follow the following algorithm:
- Disconnect the wire that comes from the ignition switch from the solenoid relay bolt.
- Using the metal part of a screwdriver, connect this point to the positive terminal of the relay. This will open a direct path for current from the battery.
- If after this the engine starts, this will indicate a malfunction of the solenoid relay or ignition switch.
The methods described above allow you to diagnose the starter without any problems without removing it from the car. Periodic monitoring of the unit allows you to prevent the occurrence of unpleasant situations right on the road under the most unfavorable circumstances. It should be remembered that if several parts fail at once, it is better to purchase a completely new device.
Source
