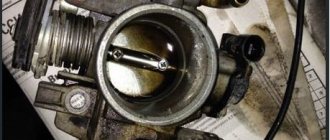
- The VAZ 2114 throttle is removed. To do this, the air filter and corrugation are dismantled, and then the remote control pipes are disconnected. Then the “trick” from the throttle itself is disconnected.
To unscrew all the bolts you will need a long hex wrench No. 5 (short ones cannot reach the lower far bolt).
It is important not to try to forcefully move the flap with your finger or put pressure on it.
- The throttle is installed in its original place.
Useful video
VAZ 2110 | Removing and installing the throttle valve pipe
Removing and installing the throttle valve pipe
The throttle pipe consists of a front part for ASC+T adjustment and a main pipe. ASC+T, refer to Section Anti-lock braking system.
1. Disconnect plug connections (1) and (2). At the same time, squeeze the wire stopper. 2. Close the ASC+T throttle lever (3) to relieve the cable nipple. Remove the nipple from the segment. 3. Remove the crankcase ventilation hose at the bottom of the suction hose. 4. Open the clamp (4) at the suction hose and remove the hose.
5. Unscrew the screws at points (2) and remove the pipe. Refer to accompanying illustration. 6 Unscrew the screws (1) and remove the spacer.
If damaged, replace seal (3) and lubricate with petroleum jelly or acid-free lubricant before installation.
6. Close the throttle lever to relieve the cable nipple. Remove the nipple (2) from the segment. Remove the cable sheath from the support (1).
6. Remove the throttle valve heating coolant hoses at the nozzle. To do this, open the clamps.
Place a container to collect the leaking liquid. Coolant must be disposed of in a special manner.
6. Unscrew the bolts and remove the pipe with the gasket. The gasket is always replaced with a new one. Refer to accompanying illustration.
1. Secure the pipe with a new gasket. 2. Secure the coolant hoses with clamps. Fill the system with liquid, refer to the Section Replacing Cooling System Fluid. Checking the frost resistance of the cooler. Visual check of the cooling system. 3. Attach the cable and adjust it, refer to the Section Adjusting the gas drive. 4. Attach the spacer and throttle body ASC+T. Don't forget the gasket (1), see illustration. in the “Removal” subsection. Attach the suction hose. 5. Connect the ASC+T cable. The cable in its initial position should have a play of 0.5 - 1.0 mm. Otherwise, adjust the support. 6. Connect the plug connections. Check that they are locked. 7. Read the information from the fault memory block. After troubleshooting, clear the memory.
Throttle valve heating: what is it, what is it for and is there any point in turning it off?
The throttle valve (throttle assembly (DZ and DU, respectively)) is necessary to regulate the air flow, which is necessary for preparing the fuel-air mixture (FA) entering the cylinders. During operation of the remote control, its excessive cooling occurs, resulting in interruptions in engine operation.
In order to prevent such a scenario, the manufacturer modified the throttle assembly, equipping it with heating, which is carried out using coolant. In the summer, according to many car owners, heating the ignition sensor negatively affects engine performance and leads to loss of power and unstable operation of the power unit. As a result, many turn off the heating of the remote control for the summer period, noting an improvement in engine performance and a significant increase in dynamics. However, this is all in the opinion of some motorists, but what are things really like and what could such a modification mean for the engine? Let's figure it out.
Why turn off the throttle valve heating?
According to supporters of turning off the throttle body heating, the coolant heats the air excessively, which affects engine efficiency. The bottom line is that heated air contains less oxygen, therefore, the fuel assembly will be less productive and the combustion of the combustible mixture will be less efficient. Most of all, in their opinion, this is observed in hot weather, when the air temperature is already high. Disabling the throttle valve heating allows you to increase the stability of the power unit, as well as get a small increase in power in hot weather.
This is all clear, but what is it really like?
In fact, driving without heating the remote control is not advisable, and in winter, turning off the throttle valve can lead to freezing of the remote control. Due to high air humidity and negative temperatures, freezing of the damper, as well as channels, including idle channels, occurs.
How about summer? In the summer, heating the remote control has virtually no effect on the temperature of the air that passes through the throttle valve, since the powerful air flow (approximately 40 l/sec and 2400 l/min) simply does not have time to warm up in such a short period of time passing through the throttle assembly. In addition, the coolant temperature is regulated by the cooling system regardless of the season and ambient temperature.
If the above arguments do not seem convincing enough to you, you can personally check whether it makes sense to turn off the heating of the throttle assembly. How to do it right?
Turn off the throttle valve heating
This activity is usually carried out in the spring-summer period; in winter, the heating of the remote control is switched back on. The implementation of the plan occurs in the following way: a special fitting, clamps and a small piece of rubber hose are bought in the store. The coolant inlet and outlet hoses are disconnected and connected to each other using a special adapter fitting, bypassing the throttle assembly. To ensure that nothing gets inside the coolant inlet and outlet on the throttle assembly, it is necessary to plug the holes using a hose that fits onto the corresponding fittings.
After this modification, you will be able to see for yourself whether it makes sense to turn off the heated throttle valve. If you are not satisfied with such tuning, you can easily return everything to its previous state; for this, the hoses are connected according to the old scheme.
That's all for me, write in the comments what do you think makes sense to turn off the heating of the throttle assembly and what consequences, in your opinion, this may have. If the article was useful to you and you want to say “thank you to the author,” you can share this article with your friends on social media as a thank you. networks using the appropriate buttons located below. Thank you for your attention and see you again at VAZ Repair. Bye!
Cleaning the throttle valve of a VAZ 2110.
Timely replacement, prevention and repair are the main points of extending the service life of automotive components, by observing which you can protect yourself from a number of unpleasant and costly consequences. As for the throttle assembly, it requires mandatory periodic maintenance with partial disassembly and cleaning after 50-60 thousand kilometers traveled; I have previously written on this topic here. How is the throttle valve cleaned on a VAZ 2110? Let's figure it out.
To begin with, I will draw your attention to the so-called “symptoms of the disease” that require immediate response.
So, in what cases does the damper need to be cleaned?
- You have noticed that when you suddenly release the accelerator pedal, it is quite difficult for your engine to switch to idle speeds from high speeds. This applies, for example, to those cases when you release the car to “neutral” at 500-600 rpm instead of the standard smooth return. After which the engine stalls, accompanied by shaking, or is restored to the required speed, but with considerable difficulty.
- You notice difficulty in “cold” (in more severe cases, “hot”) starting the engine. In order for the car to start, you have to turn the starter for a long time and feel the “exhaust” smell of gasoline. At the same time, you note that the engine can be “revived” by jerky pressing movements on the gas pedal.
Why does the throttle valve become dirty?
Microscopic dust particles passing through the air filter from the crankcase gas system, a mixture of oil and air, slowly but surely cover the internal surfaces of the car. Places with strong air turbulence are more susceptible to fouling than others. This is the idle air control rod (IAC) and the place behind the throttle valve. With long-term operation and exposure to “overgrowth,” the throughput of the IAC bypass channel in the throttle is reduced.
Step-by-step instructions for cleaning the throttle valve of a VAZ 2110 with your own hands.
Attention: carry out work with a “cold” engine to avoid burns and other troubles.
1. Buy a set of screwdrivers + a special liquid that washes diesel fuel (for example, Abro - a reliable and inexpensive cleaner for carburetors) and a socket head for “13”.
2. Armed with the above, get down to business. Remove the decorative plastic motor cover. Unscrew the expansion tank cap. This will reduce the pressure in the cooling system.
3. Loosen the clamps.
4. Then proceed to remove the forced ventilation hose of the air pipe. Take a closer look. If you find traces of oil in the air pipe, you can assume that the narrow forced ventilation channel is already clogged. If suspicions are justified, then oil particles and crankcase gases will flow through the large ventilation branch.
5. Loosen the two clamps using a screwdriver.
6. Remove and temporarily plug (you can use unsuitable spark plugs) the throttle valve heating hoses. Unscrew the clamp. Next, remove the fuel tank ventilation system hose.
7. Remove the cable and unscrew the nuts securing the throttle assembly (2 pcs.).
8. Now you will need the previously purchased cleaner. Use it to clean the throttle valve along with all its channels. In extremely difficult places (calibrated forced crankcase ventilation duct), you can use a needle or a steel knitting needle to clean heavily coked areas.
9. Proceed to remove the IAC by unscrewing two bolts. Very carefully rinse the latter channel in the throttle body. If a “wedge” of the IAC rod is detected, it is heavily contaminated and is accompanied by large play or wear, it is better to replace it with a new one.
10. Reassemble the parts in reverse order.
Video.
Tags: 2110., VAZ, throttle, damper, Cleaning
Checking the internal combustion engine for air leaks
To make sure there is an air leak in the engine, there is no need to go to a service station and pay a tidy sum. You can check the presence of air leaks yourself.
- To do this, unscrew the mass air flow sensor from the air filter box and remove it.
- Next, start the car and close the inlet with your hand or some other object.
- With a sealed system, the engine should stall and the intake corrugation should compress and remain in a compressed position for several seconds.
If the car does not stall or stalls, but the corrugation does not compress, then most likely there is an air leak in the car and you need to start looking for it.
How to clean the throttle valve assembly of a VAZ 2110
If your VAZ 2110 began to lose power and idle began to disappear, then it is time to clean the throttle assembly. Sometimes the question arises as to whether the throttle pipe needs cleaning, since it does not affect the operation of the engine in any way. The throttle is able to provide air flow into the engine, and this allows the fuel to burn. The throttle should work when you press the gas pedal.
Some air enters the engine even when the gas pedal is not pressed, which ensures idle operation. After the throttle valve is installed, it needs to be adjusted, but do not forget to leave a small gap between the valve and the wall of the throttle pipe. This gap is called thermal.
The gap is adjusted using a screw; its thread must be treated with sealant so that it does not rotate spontaneously. The gap is also needed to prevent the damper from biting on the wall of the pipe. If these conditions are violated, the engine will operate intermittently, and this will lead to undesirable breakdowns because the engine requires great effort to maintain speed and this affects when driving in neutral or braking.
The speed drops, the engine stalls or shakes violently. It is also difficult to perform a hot start; if repairs are not made, even a cold engine will be difficult to start. You will have to crank the starter for a long time, the exhaust system will smell of fuel, but the engine will not start soon. In this case, you need to open the throttle slightly and then press the gas.
To clean, you first need to open the top cap on the expansion tank - this allows you to relieve system pressure. The clamps are removed from the air flow sensor and remote control hoses, as well as from the crankcase purge hose. If there is a high oil emission, you will have to change the oil separating mesh.
Next you need to disconnect the contact between the throttle sensor and the regulator. You need to be very careful not to lose the O-ring as it cannot be found separately. You also need a carburetor cleaner, preferably a spray. It is used to remove dirt from the surface.
This is especially necessary for the starter purge channel, since this is where the most dirt accumulates. Assembly is carried out in reverse order.
If the car has an engine with a volume of 1.5 liters, then the remote control gasket will need to be changed. The robot will require a minimum of investment and time, so it is best to do it yourself. Dirt is only one reason for a rough running engine, but cleaning it never hurts because sooner or later it can cause your car to break down. After this, check the operation of the engine at maximum load and in idle mode.
How to find the leak location
Air leaks can be found in several ways. The most popular method is a smoke generator, but if this is not available, then you can use a regular soap solution.
Using a smoke generator
A smoke generator is a device that produces a large amount of smoke. It is connected to the intake system, smoke spreads throughout the system and begins to seep out in places where there is no tightness.
Video
With pump and soap
Finding the place where air leaks occur without a smoke generator can be done using a soap solution.
To do this, prepare soapy water.
- Next, we close the mass air flow sensor with a plastic bag, namely, we put the bag on the sensor, then we put a clamp with corrugation on top.
- We connect a compressor or pump through the absorber fitting and pump pressure into the system.
- Then we water all suspicious areas with soapy water.
- In those places where there is air leakage, soap bubbles will begin to inflate.
Correction of a factory miscalculation
It is quite common for a throttle assembly to come out of the factory with something that cannot even be called a defect, but can still be attributed to design errors. In theory, air should flow into the space behind the throttle, for which a channel of approximately 2.5 mm is specially made.
But the whole problem is that this channel was pressed against the wall of the receiver, thus blocking the possibility of air flow. A slight modification of the throttle assembly can help in this case.
Bored channel for air flow in the throttle
To do this, just take a file and use it to make a small groove in the indicated place. 2 - 3 mm will be enough. But before doing this, it is necessary to remove the throttle.
On a VAZ 2110, the throttle assembly is removed in the following sequence:
- Disconnect the connectors of the sensor that regulates the position of the throttle valve, its drive cable and the XX regulator;
- We partially drain the coolant;
- Next is the removal of the air hose located on the body of the mass air flow sensor. Why do you just need to loosen the clamp;
- We also loosen the clamps: where the throttle pipe is attached to the air hose; where the hose of the 2nd crankcase exhaust circuit is attached to the cylinder head cover pipe. We remove the connected hoses - the air and 2nd crankcase ventilation circuits;
- Having loosened the clamp, remove the hose of the 1st crankcase gas exhaust circuit from the throttle assembly fitting;
- Having loosened the clamps, we remove the hoses supplying and discharging coolant;
- You will need a wrench with a 13mm head, with which you need to unscrew the nuts securing the throttle assembly to the receiver on a VAZ 2110;
- It is now possible to remove the throttle assembly from the studs;
- It remains to remove the sealing gasket and, if your VAZ 2110 has a system that traps gasoline vapors, disconnect the hose for purging the adsorber.
Even if the purpose of removing the throttle was to modify it, still do not forget that for stable operation it also needs periodic cleaning. To be honest, there is nothing complicated in this procedure, but it will help the engine run better, which is quite important.
For cleaning you will need:
- short and long screwdrivers;
- toothbrush (soft, or just old);
- cotton buds;
- cleaning agent;
- rubber or cotton gloves.
For cleaning to give the desired result, it must be carried out very carefully. First, you can go through all the cavities with a toothbrush, at the same time cleaning the idle speed control (it must also be removed). Further, more delicate, cleaning is done with cotton swabs. Pay special attention to the area where the throttle valve is located and the place where the XX regulator fits.
Please note that cleaning the crankcase ventilation duct with conventional means is not possible, but it can be easily done using the foot pump available in each trunk. The diameter of the fitting is similar to the wheel one, you just need to add cleaning agent and pump your foot several times.
If you have problems mentioned at the beginning that started recently, cleaning should fix them. If there were problems from the beginning, do not forget about improvements. Sometimes only replacing the throttle assembly helps.
2″ Flushing the throttle “tens”
Often, VAZ 2110 owners confuse a malfunction of the throttle assembly with an ordinary clogged valve. The main symptoms of the latter include:
- when you release the gas pedal, the engine does not immediately switch to low speed;
- the engine is difficult to start in severe frost;
- after starting, the engine vibrates for a few minutes;
- The engine jerks regularly at low crankshaft speeds.
To clean the throttle valve, carefully remove the plastic decorative trim that covers the top of the engine. Next, disconnect the ventilation system hose and drain the oil from the air pipe. After this, unscrew the cap from the expansion tank and disconnect the fuel tank ventilation hose. Having done this work, we get free access to the throttle valve of the “tens”.
The part itself must be cleaned using aerosol products such as Wynn's or WD-40. The procedure for washing the part should be repeated with a short pause of 15 minutes. At the first stage, we treat the part with an aerosol and wipe it with a damp cloth. The second time, an aerosol is also needed, only you need to wipe the part with a dry piece of cloth. During the cleaning process, it is strictly forbidden to use brushes for working with metal, as they severely damage the surface of the throttle assembly.
When cleaning the throttle valve, you should also pay great attention to the crankcase ventilation duct. This part of the assembly is most susceptible to contamination.
To wash the internal channels of the damper itself, unscrew the idle speed sensor. If during the process of dismantling the sensor you find play, the part should be replaced. You also need to pay attention to the condition of the gasket in the throttle assembly. It's best if you replace that too.
Useful video
You can get additional information on cleaning the throttle valve from the video below: After installing the remote control, you do not need to start the car right away. You should turn on the ignition, wait at least 40-60 seconds and only then start the engine.
ATTENTION!
The electronic catalog of spare parts intended for reference purposes only!
Our company does not sell all spare parts presented in this list. If there is a “Cost” link in the right column, these spare parts are on active sale. Availability in warehouses for details and prices, see the product card. If there is no “Cost” link in the right column, we do not sell such parts and do not accept orders for them.
