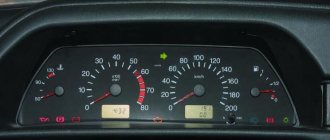
In the process of driving a car, the VAZ 2114 dashboard plays a very important role. It is a set of instruments that display many vehicle parameters. Among them: speed, number of crankshaft revolutions, coolant temperature, remaining amount of gasoline. Many panels are equipped with voltmeters, oil pressure gauges and even an electronic thermometer. In addition, the dashboard contains a large number of controls for the electrical part of the car. In this article we will tell you how to remove the dashboard of a VAZ 2114, replace it and tune it, as well as how to replace the backlight bulbs.
Why is the dashboard replaced?
Most often, the reason why the driver takes this step is an accident. After it, the dashboard becomes unusable: it cracks and loses its original appearance. There are situations when the shape of the product has not changed, but rather ugly cracks have appeared on it, which violates the overall aesthetics of the car.
There are many difficulties in this operation. The first of these is connecting electrical receivers. The fact is that many drivers forget to insert a plug and the device simply refuses to work. In this regard, everything has to start all over again. The second difficulty is dismantling. Most often, during disassembly, drivers accidentally break some fastener or device. All this forces the driver to turn to the services of auto repairmen and pay considerable sums for the work performed.
In fact, everything is much simpler than it seems. It is enough to strictly follow the instructions and be especially careful. Then you will save a lot of nerves and effort.
How to select a new element and where to look for it on the car
The sensor itself is not repairable, so if problems arise in its operation, it is simply replaced.
But we note that since this model uses several types of sensors, for replacement it is necessary to select exactly the same one as was installed on the car, since different types are not interchangeable.
It is better to do this using the catalog number (2111-3843010), or according to the markings applied to the DS itself. But for this it must first be removed.
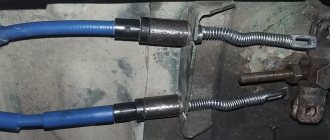
Since the sensor operates from the drive rod, its location is at the gearbox. You can find it on the upper plane of the gearbox housing near the differential.
You can also see it from above, looking down at the box in the area of the brake fluid reservoir.
But it is difficult to reach it by hand from the engine compartment, since other elements will interfere. And yet you can reach it, but only to disconnect the chip with the wiring.
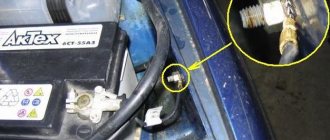
If problems arise with the speed sensor, first of all you need to check the wiring for broken or oxidized contacts.
Since the wiring is not secured by anything, interruptions in the operation of the DS are often associated with the wires. If inspection shows that the wiring is normal, then it is necessary to diagnose the sensor itself.
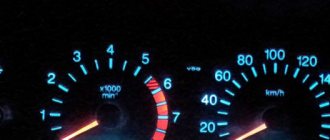
You can check it using a multimeter turned on in voltage measurement mode. To do this, you don’t have to remove it from the car, but simply jack up the wheel and engage 4th gear.
The sensor itself has three terminals: the side ones are ground and the “positive” terminal for supplying voltage to the element. And the central one is pulse, through which signals are sent to the speedometer and ECU.
We connect the multimeter probes to the mass and pulse terminals. Then we ask the assistant to spin the wheel, and we ourselves look at the readings.
How to remove the dashboard of a VAZ 2114
First of all, turn off the power to the electrical circuit. To do this, remove the “positive” terminal of the battery. So, the procedure for removing it looks like this:
- On the driver's side, on the left side of the console, the side trim must be removed. To do this, unscrew the five screws and dismantle the part. The same steps must be done on the passenger side. After this, disconnect the plugs leading to the radio, cigarette lighter, ashtray and their backlight.
- Now you need to pull out the heater switch handle. To do this, pry up its screwdriver and pull it towards you. The same is done with the damper control handles. It is best to put all small elements in some container so as not to lose them.
- Next, unscrew the screws on the instrument panel. Two of them are located on top, and the other two are located on the bottom. It is more convenient to perform this procedure with a figured screwdriver. Pull out the plug next to the heated rear window button and unscrew another screw. After this, the pad is lifted and moved towards the seats. You will immediately see a large number of plugs and chips. All of them must be removed and marked so as not to be confused during assembly. It is best to remove the steering wheel.
- Unscrew the steering column fasteners from the bottom and lower it down. This is done so that it does not interfere with further disassembly. On the heater control unit, unscrew all the screws and push the last one into the panel.
- Locate the metal brackets (from the floor to the panel) and remove all the screws that secure them. Don't forget to unscrew the cross member.
- Grasp the hydraulic headlight adjustment handle and pull it towards you. Remove it and the instrument panel backlight brightness adjustment knob. Now pull out the cover and remove the LED insert. After this, unscrew the nuts that appear.
- Pull out the remaining immobilizer plugs and the glove compartment lighting chip.
After this, unscrew the remaining large screws securing the panel and pull it towards you. With a final upward movement, pull it out of its seat. Installation of the new part is carried out in the reverse order along the pre-marked plugs.
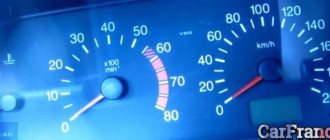
Speedometer drive: types and differences
A speedometer is an important element in cars, as well as several other vehicles, as it is necessary to monitor speed in order not to violate traffic rules. But this is not the last function of this device.
All possible speedometers have a high-speed magnetic unit; due to the rotation of the magnets, a flow is formed, it moves through the coil, thereby facilitating the induction of eddy currents. They thereby begin to create more magnetic fields. They interact with each other, the needle of the device moves along the frequency scale, with the help of this the magnet rotates.
All speedometers are divided into three categories.
- Mechanical speedometers.
- Electromechanical speedometers.
- Electronic speedometers.
Mechanical speedometers. In this type of speedometer, the process of speed measurement and indication occurs thanks to a mechanical device. A gear is used as sensors, which is connected to the secondary shaft of the gearbox; this is the speed unit with an arrow indicator and the drum counter. Previously, speedometers were used in the form of a drum and tape. But they stopped using them quite a long time ago.
Electromechanical speedometers. In these devices, speed is measured using various electronic or electromechanical sensors that are connected to the gearbox. The speed is indicated by a milliammeter or the speed unit of a mechanical speedometer, and the distance is indicated by a counting drum, which drives a stepper motor.
Electronic speedometers. This is a development of new electromechanical speedometers; the main difference is the replacement of the odometer - in an electronic device it is completely digital.
Replacing backlight lamps in the dashboard of a VAZ 2114 + Video
The operation of the dashboard lamps provides illumination of controls and information about vehicle parameters in the dark. If they burn out, they must be replaced, since trying to find a button in the dark can end quite sadly.
All replacement work is carried out on a disassembled panel. How to remove the panel is described above. All you need to do is buy a set of new light bulbs. Why the kit? Because it will be more convenient to replace all the lamps at once than to change one, assemble them all and wait for the other one to burn out. All this is labor-intensive and can consume a lot of effort, so it is best to do everything in advance.
To change the lamps in the panel, just make a few simple movements. Unscrew the socket of the burnt out lamp and pull it out. You should twist it counterclockwise. After this, remove the old lamp and install a new one in its place. The cartridge is installed in the reverse order.
Is it allowed to install a dashboard on a VAZ 2115 from another car?
In short, no. The dashboard on the VAZ 2115, 2114 and 2113 has a number of design features that are not found on other cars. Its cross members, mounting brackets and console sides are too long. There is nothing like this even on other VAZ models, not to mention foreign cars. But it should be noted that car owners often practice reverse replacement. In particular, a dashboard from a VAZ 2114 can be successfully installed on a VAZ 2109. But in this case, you have to trim the sides of the console and drill new mounting holes on the brackets.
Dashboard tuning
If you want to somehow improve the appearance of the dashboard or make it functional, you can tune it.
The most common type of dashboard tuning is installing new lamps in the instrument lighting or installing additional lighting. Most often, lamps are replaced with lamps with a different color of luminous flux (for example, green or blue). The color selection should be such that it does not irritate the eyes, especially in the dark. Additional lighting is used mainly for the lower part of the panel at the feet. To do this, you can buy a ready-made set of LEDs and connect them to the car’s on-board network.
Another tuning method involves changing the appearance of the instrument scale. To do this, you can print ready-made solutions on a color printer, glue them to hard cardboard and install them instead of the old scale. It is worth considering that the lighting of the new scale may differ slightly from the factory one. Therefore, important criteria will be the color of the scale and the material to which it will be glued.
A more serious modernization involves changing the appearance of the panel itself. To do this, it can be painted or covered with new material. If you decide to cover the panel, then use only approved materials. Ordinary fabric and fur are prohibited, as they are flammable. The color of the upholstery should be chosen in accordance with the general background of the interior. A combination of two colors at once (for example, beige and brown) looks great.
If you decide to paint the panel a different color, it must be removed. After this, it is cleaned with sandpaper and degreased. First of all, a special sealant is applied, and then car paint. Do not use paint materials that are highly sensitive to high temperatures. If you paint the plastic with any other paint, then when the car is left in the sun for a long time, the paint will melt and simply come off. Another trouble may await you when washing the panel - ordinary paint tends to be washed off with ordinary water, or even better - with soap. Be prepared for the fact that at first the salon will smell like paint.
Speedometer drive: types and differences
A speedometer is an important element in cars, as well as several other vehicles, as it is necessary to monitor speed in order not to violate traffic rules.
But this is not the last function of this device. All possible speedometers have a high-speed magnetic unit; due to the rotation of the magnets, a flow is formed, it moves through the coil, thereby facilitating the induction of eddy currents. They thereby begin to create more magnetic fields. They interact with each other, the needle of the device moves along the frequency scale, with the help of this the magnet rotates.
All speedometers are divided into three categories.
- Mechanical speedometers.
- Electromechanical speedometers.
- Electronic speedometers.
Mechanical speedometers. In this type of speedometer, the process of speed measurement and indication occurs thanks to a mechanical device. A gear is used as sensors, which is connected to the secondary shaft of the gearbox; this is the speed unit with an arrow indicator and the drum counter. Previously, speedometers were used in the form of a drum and tape. But they stopped using them quite a long time ago.
Electromechanical speedometers. In these devices, speed is measured using various electronic or electromechanical sensors that are connected to the gearbox. The speed is indicated by a milliammeter or the speed unit of a mechanical speedometer, and the distance is indicated by a counting drum, which drives a stepper motor.
Source
Wires
The number of wires is amazing. It would seem that the VAZ 2110 is far from the most modern car, which does not have a huge amount of electronics. However, there is wiring in abundance.
Disconnect only those wires that relate to the instrument panel. Label them, label them with self-adhesive labels, write down all the designations on a piece of paper. This will allow you to understand where which wiring is connected during the reassembly process.
The easiest way to disassemble the instrument panel is to contact professionals from a service station. After all, you planned to remove it for a reason, but in order to make some adjustments, replace dashboard elements, install LED backlighting, and so on. Therefore, it is not necessary to carry out dismantling yourself in order to go disassembled to a service station. Entrust the entire range of work to specialists.
Source
Preparatory work
Some are satisfied with dismantling without removing the remaining components of the interior, but this takes extra time and complicates the process as a whole. In order not to add more work to yourself, it is recommended to clear the interior for free movement.
Strictly observing the sequence, you need to remove:
- armchairs;
- glove box;
- steering wheel;
- disassemble the floor tunnel. To do this, you need to unscrew the screws and move the part back a little.
We dismantle the lower part in the same way. The next step is to remove the glove compartment, after which you should remove the relay and mounting block. As you disassemble, you need to mark all the wires. Particular attention should be paid to the speedometer.
Lada 2112 Dvin4ik › Logbook › Removing the VAZ 2110 2111 2112 torpedo.
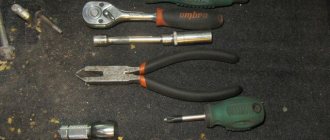
Good day! I couldn’t post the material for a long time for personal reasons) But the time has come, iii) Let’s go, Unfortunately, part of the material was lost forever, so the photo shows a general view, except for the gearbox tannel! for the first time in one mask) I myself relied on the disassembly manuals) Not everything is written there, I want to say. And if it is written, then a lot complicates the work as a whole. Therefore, if possible, rely on my report. The hardest part was removing the torpedo! What we need for this: A 10mm head, preferably with a small ratchet! 24mm socket (socket) or ratchet with extension! Crosshead screwdriver! Flathead screwdriver! Well sharpened! For those who are afraid to disassemble and not reassemble the connectors correctly, Adhesive Band-Aid and Marker! A box is desirable for bolts, screws, etc. Pliers! Scissors!
First, we remove the gearbox panel, otherwise removing the torpedo will turn into a puzzle. Removing the gearbox panel is easy. We unscrew the fastening bolts on the sides (difficulties will arise with the bolts next to the seats, we climb under the saddle or look for a way to get to the bolts) We remove the cover from the handbrake, if it is not clear what I mean, lower the handbrake and the cover will be right under your fist. There we unscrew the bolt. + Remove the gearshift lever cover and unscrew the 3 bolts + Remove the buttons for the beet lifters and other tunnel options. We take hold of the ashtray of the rear passengers (tunnel) and lift the cover of the tunnel to the top and with small jerks we pull it towards the rear sofa. Having gained access to the bottom of the tunnel, unscrew all the bolts securing it to the floor. TUNNEL HAS BEEN REMOVED!