Conventional mechanical window regulators are a rarity on modern cars, but there are still a huge number of old cars on the streets that have a handle, not a button. In order to make life easier for owners of VAZ cars, I will say that the markets sell the necessary standard electric window lifters, so you can easily replace old mechanical devices with them.
Articulating electric windows are the most convenient and durable choice for VAZ owners. The only thing you will need to pay attention to when purchasing is the configuration. It happens that the kit is missing wiring, plugs and buttons, and there is no diagram of the mechanism itself.
Installation and connection of electric windows on a VAZ 2109
During the period of popularity of the “nines”, the installation of electric windows was not carried out on all VAZ 2109 cars. The presence of such devices in the car was more of a luxury than a regular attribute of the car. Over time, the tastes of car owners have changed, and the option itself has become more accessible.
At the present stage, electric windows are an invariable component of cars. This is also facilitated by domestic manufacturers who produce mechanisms for various models, including the VAZ 2109. And if the car was not initially equipped with such a useful device, then you can install it yourself. How are window regulators installed and connected? What to consider when doing work? Let's look at these points below.
Types of electric windows, and what is best for the “nine”?
Today, three types of electric windows are installed:
- Rack and pinion. Their peculiarity lies in their weak design and the need for periodic lubrication.
- Wire rope. These mechanisms do not differ in reliability and speed of glass movement. The advantages are the low price and the ability to replace the motor if it is damaged.
- Articulated-lever. Such devices are distinguished by fast glass movement, low noise, sufficient power and the ability to move even a frozen glass sheet.
In our article we will look at the process of installing and connecting window lifters of the “Granat” model. The model comes with everything needed for installation - buttons, wires, plugs, the necessary fasteners, as well as cuffs for pulling wires from the rack into the door cavity. The Berkut and Katran models have good reviews, but installing window lifters of this type is a little more complicated.
Power windows Garnet on VAZ 2109
Start installation
You need to start installing window lifts by choosing the mechanism itself. Today we have three versions of this device. Everyone has their pros and cons.
For those who have already installed modifications on cars, it will be no secret that without the correct circuit it is difficult to do this. When installing any electrical device, first of all you need to correctly connect all its contacts and power supply in order to avoid possible disconnection and broken connections in the future.
Basic malfunctions of window regulators
The main principle of operation of electric windows is that they cannot be used if there is no key in the ignition switch, which must also be in the “ON” position. When this condition is met, but when you press the window button the windows do not go up (or, if they were closed, they do not go down), this indicates that there is some kind of malfunction. Diagnostics of the mechanism, aimed at finding a breakdown in order to eliminate it, is performed in the following order:
- First, you should check the functionality of the circuit breaker and the integrity of the fuse - often it simply blows due to excessive load;
- if the mechanisms located only on the rear doors refuse to rise/lower, while the main unit shows signs of life (window lifter door buttons do not work), you need to check with a tester whether there is voltage at the input terminals of the mechanism;
- if the diagnosis of the window lifting mechanism does not produce results, you should carefully check the electrical wiring - if damage is detected, the integrity of the wire must be restored;
- if there is a problem with controlling one of the four windows using commands sent from the main control unit, perform the same operation by pressing directly on the door buttons. The glass began to move, which means it’s all about a faulty or faulty ECU;
- Very often the window lifter mechanism does not work due to a breakdown of the electric motor. Testing should begin with the terminals, which are checked for the presence/absence of voltage; you will also need to check the electrical wiring, which will require a detailed diagram of the electrical equipment of the car;
- It is likely that the window moves jerkily or even stops due to the appearance of mechanical defects on the guides that are used to move the glass. It is possible that a large amount of dirt and dust has simply stuck to the guides, which over time have hardened so much that they do not allow the actuator to move freely.
Note that the most common causes of ESP failure are breaks in the wiring connecting the units and window lift systems, as well as breakdowns of the drive motor itself. These malfunctions usually appear when the mechanism is used excessively. Please note that if you have never dealt with window lifters before, troubleshooting on your own may take a lot of time. Therefore, if possible, entrust this work to a professional who specializes in electrical parts
This will cost more, but if you take into account the time factor, the losses may not be significant
Strictly speaking, problems with the electrical part of these components occur much less frequently than mechanical breakdowns. The obvious weak point of the joint venture is the plastic parts that are used in gears, racks and other elements of the mechanism. The gear wheel is subject to increased wear, and its inoperability is easy to determine - if the motor is running, but the glass is rooted to the spot (twitching may occur). In such cases, the wheel will need to be replaced, which will require removing the door panels. If the wheel has fallen apart, you need to find and remove all its fragments, then remove the old part and install a new part. In a joint venture with a cable mechanism, a frequent breakdown is the cable breaking due to its wear, as well as with frequent exposure to large temperature changes (for example, in winter). If the cable breaks, the problem is solved by replacing it. Relatively rarely, the inoperability of the window lifter occurs due to breakage of the levers, which should also be replaced with new ones.
Types of electric windows and which ones are better for the VAZ 2109
ESPs come in various types.
- cable-type (weak and very slow, with the advantage of being cheap and being able to replace the motor separately if it suddenly burns out);
- rack and pinion (a bit weak, based on operating experience - require regular lubrication);
- articulated-lever (work quickly, make little noise, are quite powerful: they can easily cope with frozen glass).
We opt for the latter, called “Pomegranate”. Moreover, the kit of these ESPs includes everything necessary for installation - electrical wiring, buttons, plugs, all the necessary fasteners, rubber cuffs for pulling the wiring from the rack into the door.
There are also “Katran” and “Berkut”, they have a slightly different device and installation is a little more complicated, but according to reviews they are also not bad.
Types of electric windows for VAZ-2109
Before you begin installing ESP in a car, you need to familiarize yourself with the mechanisms available on the market, evaluate their design and find out which type is most suitable for installation on the VAZ-2109.
There are the following types of electric windows:
- Wire rope. This type of ESP compares favorably with its competitors due to its low price and the ability to separately change the electric motor if it fails. However, in reality they manifest themselves as a weak mechanism. Plus, these power windows are slow.
- Rack ESP. As in the previous version, it is a weak mechanism that requires careful maintenance, that is, frequent lubrication of parts.
- Articulated-lever. During operation, they show their best side: they quickly raise and lower the windows, while making little noise and do not experience problems in operation in winter, when the windows freeze to the body elements.
The obvious choice, if you want to get comfort when using ESP, is precisely the hinged lever mechanisms. We suggest using an ESP called “Garnet” in your car. Another big advantage of this model is that in the kit you get all the components necessary for connection: buttons, plugs, a full set of fasteners, wiring, as well as cuffs necessary for laying wires inside the door.
Of course, there are other ESPs of this kind to choose from: “Katran”, “Berkut”, but they have a slightly different structure and you will have to put in more effort to install them. However, it is not entirely correct to reject them only based on these criteria, since car owners speak well of their use.
Video review of installing electric windows on a VAZ 2109:
Replacing mechanics with electrical devices for glass lifting
VAZ 2108 owners often improve their car, fortunately there are many opportunities for this. In particular, mechanical basic windows are being replaced with electric ones. Electric windows are operated by a reversible electric motor. To raise/lower the glass, you need to press the button, which starts the mechanism. Their design is more complex, allowing you to simultaneously close or open all the windows in the car, which can be very convenient. But they require uninterrupted power supply, and certain types of mechanisms can be triggered by accidental pressing.
Built-in electric windows are conventionally divided into two groups:
- the first includes simpler ones, they consist of a motor with transition elements that, through electricity, drive the basic mechanism of an ordinary lift;
- The second category includes autonomous mechanisms that are installed instead of basic ones.
Depending on the types of mechanisms, the scheme of their operation may be different for different models: lever, cable or worm types are distinguished. Also, lifting mechanisms are universal (suitable for any model). Installation of the latter is recommended for inexperienced drivers to gain repair experience.
The first stage is the purchase of an electric lift for the VAZ 2108 either in a car store or at a car market. In addition, you will need brackets, adjustment buttons, plugs, and mounting material. They disassemble the door and pull out the basic mechanism, as described above. Next, the new lift is “folded” a little for convenience and brought into the door. Carefully put the mechanism in place of the previous one and begin to secure it. The bar is raised to the bracket on the glass, then the structure is connected with bolts. To do this, you can connect the lift motor to the battery.
Missing mass
Weight can also be the cause of a power window not working. Its connection location is not the best; it is located at the driver’s feet on the left near the door. Oxidation often occurs there, causing contact to be lost and the mechanism to stop working.
One contact receives both the mass of the central locking and the window regulator. Therefore, the problem can be diagnosed by the failure of the security system, but it is better to visually evaluate the contact for the formation of oxidation and rust.
If you find that the mass is not in good condition, you should clean the contact area and the terminals themselves with sandpaper, then assemble them and treat them with a special compound that will prevent the appearance of various impurities and protect the metal.
Glass closer Pandora DWM
Connection diagram for the passenger door button in series through a duplicate button on the driver's door. Contacts 1-6 and 7-3 are always normally closed. When you press the up button, contacts 1-6 open and 1-2 close (window rises). When you press the down button, contacts 7-3 open and 7-2 closes (window down). The 30th contact of a 5-pin relay, without supplying voltage to the winding contacts, is constantly shorted to contact 88, which gives us the necessary negative contact (works like a switch). If voltage is applied to the winding, then contact 30 is disconnected from contact 88 and connected to contact 87. Contact 86 of the winding is connected to ground.
Window lifter design
Drive types
Let's start with the drive mechanism, as already noted, it comes in two types - mechanical (also known as manual) and electric.
- The mechanical one is a small gear reducer. With this type of drive, a cable actuator is usually used. Therefore, such a gearbox consists of two gears that mesh with each other. The drive gear is small in size, and it is the one that the driver rotates using a handle mounted on the door. The driven one is much larger in size; it is a drum for winding the cable. Due to the different sizes of these gears, relative ease of opening and closing the glass is achieved.
- An electric drive also uses a gearbox, but of the “worm-gear” type. There is a worm on the electric motor shaft, which is engaged by a gear. The drive motor itself is of a reversible type, that is, when the polarity is changed, its direction of rotation changes, which allows the use of just one element to both lower and raise the glass. This drive is used with all types of actuators.
Lada 2114 › Logbook › The problem with the passenger window not working has been solved
Good day to all.
Almost immediately after I switched to 2114, I encountered the problem of the window regulator on the passenger side not working at times.
It looked something like this:
Due to the fact that this happened mainly after washing.
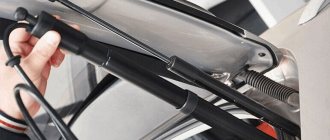
I began to sin because the door was somehow miraculously flooding. I start the car, the power window doesn’t work, I drive it, I press it... it’s just miracles. A Google/drive search revealed several possible reasons: 1. Wire break or short to ground at the point where the wires pass from the passenger compartment to the door, 2. Failure of the window lift motor/gear wear on the mechanism.3. Malfunction of the button The blown fuse was dismissed immediately - everything is fine on the driver’s side. Yesterday I had a free evening, I began to disassemble the trim. I examined all the possible wires in the door and was ready to look further, in the corrugation, but... There are two wires in the door connected through a white connector (the wires themselves are white and blue, the photo shows what they look like.
It was discovered that one of the wires on one side had come out of the chip, so, apparently, while jumping on bumps, the contact appeared and disappeared. Therefore, if you encounter a problem of this kind, first check all connections, this way you can get by with little damage)
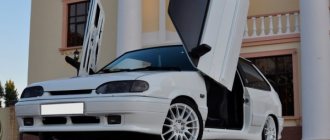
__________________The 2113 had a tuned radiator grille.
It so happened that before selling it, I installed the factory one I had bought at a disassembly, but this one was left gathering dust + was not in excellent condition, with broken fasteners. I began to make a blind grille out of it (and possibly with holes, and possibly with a mesh). Stretched vertically. to give it a more even shape. I covered it with fabric and doused it with epoxy. Let's see what happens. Peace for everyone.
Priora window lift diagram
Priora window lift diagram, connection features
Despite the fact that the window lifters are controlled in the same way as on previous models, the design of the Priora's window lifters is somewhat different. There is no power window unit on the Priora. The power windows are controlled by the electrical package controller. This was done for ease of control of electric windows.
To completely open and close the glass, you no longer need to hold down the key, but simply press it briefly. If you hold the button for a while, the window lifter will work until the button is released. The buttons in this case do not switch the circuit, as on previous models, but are a kind of sensors for the electronic unit.
Connecting the driver's door power windows is somewhat different from the connection in the passenger doors. This is due to the use of an all control module in the driver's door.
When you turn on any button on the block, a corresponding signal is generated from it, which is transmitted to the electrical package control controller via the wire connecting pin 5 of the driver's door block with pin 5 of block 3 of the double-glazed window control unit.
When troubleshooting without using diagnostic equipment, you can check the integrity or short to ground of the wire through which the signal passes and the presence of power on the driver's door module unit.
In addition to the use of electronic units in the Priora window lifter circuit, there is a feature of supplying power to the electric drive. One of the wires is multifunctional and is involved in supplying power to the heating and mirror control, as well as to the door lock solenoid.
Therefore, this wire can have either a plus or a minus, depending on which consumer is turned on. The value is controlled by the electrical package controller. On the right and left sides of the wire, pins 4 and 6 are connected separately to connector X1, respectively.
This property can be used to troubleshoot a circuit.
What to do if the VAZ-2114 window lifter does not work
Priora power window diagram troubleshooting
How to find a fault in the Priora power window diagram if the passenger door power windows do not work? A malfunction of the power windows of all doors is unlikely and the reason for this will most likely be a malfunction of the electronic control unit for the power accessories.
A malfunction of the electric lifter in one of the doors is a very common breakdown, especially on early cars. And it is again associated with a malfunction of the unit, and in particular the burnout of the microcircuits that control the operation of the electric drive. The reason was a flaw in the circuit design by the manufacturer.
For the same reason, the window lifts could work jerkily. Subsequently, the block manufacturer corrected the defect, but failure of the block is still the main malfunction at the moment.
It is best to start troubleshooting by checking the functionality of the door lock on which the lift does not work. If the lock also does not work, then you need to check the presence of power or negative on the wire from the glass unit control unit, connector X1, pin 4 or 6, depending on which side you are looking for the fault.
To do this, connect the test lamp to the car body and turn on the power window in one direction or the other. Then connect the test lamp to the positive wire and repeat the operation. It is also worth checking conclusions 1, 5, 11, 13.
If the control lamp lights up in all cases, then the control unit is working properly and most likely there is a broken wire on the door or a malfunction of the electric drive. To check, you need to remove the door trim and connect a test lamp between the wires going to the electric drive.
If the foot lights up when you turn on the lift, then the electric drive is faulty, otherwise the wire is broken. If the unit malfunctions, it is necessary to find out the cause. This could be not only a manufacturing defect, but also a short circuit between the wires or to the housing.
Features of the new model
The electrical wiring of the VAZ 2114 has a different design than its predecessor:
- Inside the car;
- In the engine compartment;
- In the rear of the body.
The new engines were equipped with a more powerful ignition system, as a result of which the wiring diagram of the VAZ 2114 to the injector had some peculiarities.
- A wiring harness was added to connect to the terminal of the ignition module, which supplied impulses to the spark plugs;
- A wiring harness has been added for connecting to the electronic switch;
- Wiring has been added to connect the adsorber valve to the injection system controller.
Photo of the ignition module pinout
For reference: there is a misconception that the ignition module replaces the coil. In fact, the ignition module has 2 coils and 2 switches at once. The first coil supplies an impulse to the 1st and 4th cylinders, and the second - to the 2nd and 3rd cylinders.
The wiring for the VAZ 2114 has undergone changes not only due to the addition of new electronic devices, but also due to the automaker's further plans to modernize the functionality of the car.
- It is possible to connect heated exterior mirrors;
- It is possible to install heated front seats;
- It is possible to install front fog lights, etc.
Connection diagram for fog lights: instructions for VAZ 2114
Engine compartment
The first thing that owners of a carburetor power system pay attention to is the modified wiring diagram of the VAZ 2114 to the injector. To operate on a lean mixture, the vehicle is equipped with:
To operate on a lean mixture, the vehicle is equipped with:
- Forced fuel injection system directly into each cylinder;
- Installation of an increased power ignition system on the vehicle;
- Self-learning ECM - electronic engine control system.
The ignition module on the VAZ 2114 allows you to increase spark generation power
For reference: a feature of EURO 3 standards is the low content of unburned fuel components in the exhaust gases. To this end, the car's fuel system reduces the amount of gasoline in the air-fuel mixture, compensating for this by better filling the cylinders due to forced fuel injection.
To ignite a lean air-fuel mixture in the engine cylinders, it is necessary to provide a more powerful spark at the moment when the piston is at TDC (top dead center).
This is realized by installing an ignition module, the operating principle of which is implemented:
- The generator produces alternating electric current;
- It is supplied to the ECU, which converts it to direct current;
- From the control unit, current is supplied to the windings of the ignition module coils;
- High voltage is generated in the secondary winding (according to the law of induction) of the coils;
- It is supplied to the spark plugs at the start of the ignition phase.
Advice: if you want to understand the operation of a car’s ignition and power system, it would be a good idea to watch video materials from a school physics course. Or find videos on automotive websites.
Removing old window regulators
- Disconnect the negative connection to the battery or use the ground disconnect button.
- Next, carefully remove the door trim. It is fastened with plastic pistons, so there should be no problems: we pry the edge near the piston and pull. As a last resort, replace the broken fasteners with new ones (they cost pennies).
- Before removing the window lifting mechanism, place the glass in a position in which there is free access to the mounting bolts through the technical hole in the door, and secure it with regular tape.
- Unscrew the bolts that secure the glass.
- At the bottom of the door, unscrew the guide nut.
- Near the window lifter handle, unscrew 3 more nuts. After this, you can remove the mechanism from the door cavity through the largest opening (pull it up).
How to replace the window regulator on a VAZ 2108-VAZ 21099?
Removal: 1) First, remove the trim from the car door on which you are going to work. (You can find how to remove the trim in the article: “Replacing the door trim with a new one”)
2) Now remove the side glass from the car door, using the article on “Replacing glass on the side door of a car”.
3) Then, using an extension with a socket head, unscrew the two nuts that secure the middle part of the mechanism guide.
4) Next, unscrew another nut of the lower fastening.
5) And then unscrew the upper fastening nut.
6) Now, using the same extension cord with a union head, completely unscrew the three nuts that secure the window lift mechanism itself.
7) And to complete the operation, remove the window regulator through the hole in the inside of the door.
Installation: 1) First install the new window regulator in its place. And after installation, tighten all the bolts and all the nuts that secure it.
Note! The power window mounting bolts and nuts include: 1. Three power window mechanism mounting nuts. 2. And also the nut for the upper fastening of the guide. 3. Lower fastening nut. 4. And two nuts for the middle fastening of the mechanism guide. 5. And the last bolts that secure the glass to the mechanism.
2) Once the window regulator is installed, proceed to the final installation of the glass and door trim in place.
Additional video materials: More detailed instructions for replacing the window regulator can be found in the video clip located just below:
Note! From the video clip you will learn: How to remove and install trim from a car door, and it will also include detailed removal and installation of glass, and in addition to all this, the window regulator itself will be replaced with a new one!
Mechanical glass lifting devices
Structurally, VAZ mechanical lifts are made simply, their parts are inexpensive, installation is simple, and they do not require power. The operating principle of such a mechanism eliminates the possibility of involuntary raising or lowering of the glass. The downside is the need to spend time and effort adjusting the glass height and the inability to close all windows at the same time - you will have to turn the handle on each one.
When raising and lowering the windows of a VAZ 2108 becomes a problem - the handle turns with difficulty, the window moves heavily, or even gets stuck in one position - you should check the condition of the window regulators. To do this, they are disassembled.
- The window is lowered all the way down, the upholstery on the doors and the rear view mirror located outside are carefully removed.
- Afterwards, the external and internal glass seals are removed from below and, after removing the holders, the protective door film is removed.
- Remove the seal from above.
- By turning the handles, the glass is positioned in such a way that you can reach the bolts securing the glass to the lift slide in the VAZ 2108.
- After unscrewing the bolts, lower the window down.
- Unscrew the fasteners of the VAZ 2108 glass lifting device guide.
- After unscrewing the nuts of the upper and lower guides, supporting the glass lift, pull it out of the door.
When purchasing a new mechanical window regulator, you should be sure to pay close attention to the markings: the bracket should be marked “2108”. Different VAZ models have different window lifting mechanisms. In the marking of the part, the sides are encrypted before the dash: 10 - installed on the right, 11 - on the left.
After repair or replacement, the window regulators are installed in place, the cable and mechanism are lubricated with a special penetrating compound. Subsequent door assembly occurs in the reverse order.
Mechanics most often break down due to worn parts or mechanical damage. These include breaking the cables or getting a foreign object into the guides. As practice and reviews from experienced VAZ 2108 car owners show, gears most often become unusable - their teeth wear out or break. Since these parts are inexpensive and sold everywhere, replacing them is quite easy.
Step-by-step instruction
The cable is being replaced
Let's consider the procedure in detail. Initially, turn off the power from the battery. Otherwise, it is recommended to remove the fuses for the cigarette lighter and vehicle lighting circuits. Then the door trim is dismantled. This process is easy. For beginners, it is recommended to use a universal pin remover. To remove the standard glass raising mechanism, you will need to fix the glass in a certain position.
To do this, use available materials, including tape. The next step involves removing the rubber plugs from the holes for the cable outlets and the side trims under the panel instruments. If necessary, the side upholstery cannot be removed. You can also gain access through special openings. In this case, broaching is used. It is inserted into the channel of the stand.
Then the adjustment plate is attached to the glass bracket using M6 bolts. You will first need to install it in the inclined groove. Before connecting the window regulators to the VAZ 21099, you will need to insert the folded mechanism into the upper hole. It is secured with 3 M6 nuts and lock washers. The screw is installed in the middle hole.
Then you will need to remove 2 decorative plugs located on the front panel. To do this, disconnect the wire from the cigarette lighter. The cable is pulled through the holes in the doors and their pillars. It must be taken into account that these wires and those that go to the electric motor should not come into contact with moving parts of the system. The wiring is secured with electrical tape or tape.
Unit connection
When connecting the device, you must first turn off the power to the car. This can be done by disconnecting the battery or turning off the cigarette lighter and instrument panel lights. It is from here that the lifting mechanisms will be powered during the process.
Then you need to remove the door trim. It can be easily dismantled, but it is still better to stock up on fasteners. The entire analogue lift mechanism must be removed, after first fixing the glass so that it does not move. You need to take out almost everything except the glass mounting rail. We install the mechanical part of the electric lifting mechanism on it and lubricate the stroke groove.
The next installation stage is the installation of the electronic switch. After you have figured out the route for installing the wiring, starting from the location of the buttons and ending with the cigarette lighter contacts, from which the mechanism will be powered as a result, you can begin the process itself. But be careful: you won’t be able to simply pull the wiring from the doors to the counter. In some places you will need to use a probe, since the wiring needs to be released in places where special grooves are located. Also, the wiring should not touch either the doors or any parts of the ESP mechanism.
After everything is connected, the established connections need to be checked for functionality. An experienced installer does this every time he installs the mechanism and connects the circuit. The check should be performed several times, knocking a little on the door and on the panel.
The glass should move smoothly, without any jerking or getting stuck. If this still occurs, you can lubricate the seal around the glass with silicone or other hermetic lubricant. Such actions partially eliminate the movement problem. Afterwards, you can install the casing in place and enjoy the work done.
Instructions for replacing the electric motor
Repairing a window regulator may include different stages depending on the breakdown. In this case, we will tell you how to repair a window regulator by replacing its electric motor; as mentioned above, this problem is one of the most common.
The replacement process is considered using the example of a Lada Kalina car:
- First you need to buy a new electric motor, which is sold in a housing with a gearbox. The door trim is dismantled - this operation cannot be performed in the cold, since the trim is fixed using plastic pistons, which will quickly break.
- Unscrew all screws and other fasteners securing the inner handle.
- All wires must be disconnected; for greater convenience, you can remove the speakers. After these steps, the glass, which is fixed in the guides, is unscrewed. In order for the glass to sink to the bottom, you need to unscrew four more screws; to do this, use a 10 key. There is a curtain at the bottom of the glass unit, which must be removed.
- The window regulator itself is mounted on nuts and guides, the electric motor itself is secured with three more nuts. The block can be pulled out through the technological holes in the door. If you disassemble the gearbox, the electric motor will fall apart into two parts. In general, the gearbox must be dismantled and replaced with a new one, further reassembling in the reverse order. The gear cable should be lubricated before use.
1. First remove the door trim.
2. Disconnect all wires.
3. Disconnect the gearbox and replace it with a new one.
Step-by-step instruction
The cable is being replaced
Let's consider the procedure in detail. Initially, turn off the power from the battery. Otherwise, it is recommended to remove the fuses for the cigarette lighter and vehicle lighting circuits. Then the door trim is dismantled. This process is easy. For beginners, it is recommended to use a universal pin remover. To remove the standard glass raising mechanism, you will need to fix the glass in a certain position.
To do this, use available materials, including tape. The next step involves removing the rubber plugs from the holes for the cable outlets and the side trims under the panel instruments. If necessary, the side upholstery cannot be removed. You can also gain access through special openings. In this case, broaching is used. It is inserted into the channel of the stand.
Then the adjustment plate is attached to the glass bracket using M6 bolts. You will first need to install it in the inclined groove. Before connecting the window regulators to the VAZ 21099, you will need to insert the folded mechanism into the upper hole. It is secured with 3 M6 nuts and lock washers. The screw is installed in the middle hole.
Then you will need to remove 2 decorative plugs located on the front panel. To do this, disconnect the wire from the cigarette lighter. The cable is pulled through the holes in the doors and their pillars. It must be taken into account that these wires and those that go to the electric motor should not come into contact with moving parts of the system. The wiring is secured with electrical tape or tape.
Detailed replacement of window regulators
- From the interior side, you need to remove the handle and remove the “soap dish” located under the door handle itself.
- Carefully unscrew the mounting bolts and dismantle them. Do not damage the plastic latches.
Note! If several latches are broken, they must be replaced with new ones. Otherwise, rattling will be observed in the cabin.
- Now, one by one, remove the plugs, the handle and its lock. You should also unscrew the bolts from the handle and remove the “pipe”.
- As a rule, manual window lifters are secured with 7 nuts and a pair of bolts that secure the device to the glass. In this case, you need to remove all the bolts and remove the device from the door. Since there is a risk of glass breaking during the change process, it is recommended to secure it with a cable.
- The guide bolt of the old window lifter is removed, as well as the bolts of the bracket for raising the glass through the door hole. The same applies to the lower mounting bolt of the SP slide.
- After unscrewing all the necessary fasteners, you can safely remove the mechanical device.
- Now you need to pay attention to preparing the new window lifter, as well as installing the correct brackets.
- Temporary wiring from the battery is currently being installed to the door. It may be required to regulate the ESP in order to prevent sticking and biting of the glass when lifting and when fixing the device to the glass.
Note! You need to be extremely careful not to allow short circuits in the wires.
- To get inside the door, you first need to install it in the folded state, since there is a risk that it will not fit.
Note! At the time of purchase, the device is in an unfolded state. In this case, you need to connect it with temporary wires, only after that, changing the polarity, the rail is brought into the middle.
- The ESP is mounted in place of the old lift, the SP studs are inserted into the door holes and secured with several nuts.
Note! The studs are not driven in, but attached, since then you will need to screw the lift to the glass, which requires some adjustment.
- The lift rail is raised, so it becomes possible to align the holes with all the glass mounting holes, only then the joint is screwed into place.
- The glass is lifted and the smoothness of the work is monitored; even the smallest distortions and jams are not allowed. If this cannot be done, most likely you need to loosen the fastening of the joint venture directly to the door. Turn the fasteners left or right, re-tighten the nuts and check the operation of the installed window lifter.
Note! In some situations, such actions make the joint venture work worse, then you will need to turn the mechanism in the opposite direction.
Determining the location of control buttons
For these actions you will need a ruler, pencil, file and hand drill:
- First, drill a hole in the casing. You can’t rush in this matter, it’s better to make the hole smaller, sharpen it and try on the button. If it doesn't fit, you need to sharpen it again.
Note! The wires must not be short-circuited; it is advisable to disconnect the “-” terminal of the battery at the time of work.
- The plastic of the front pillar is dismantled and the interior trim is folded back.
- Several meters of two-core wire are passed through this stand directly into the door. It is also required to conduct a single-core wire according to this principle.
- Since the wires rot and break after a while, you need to install casings between the door and the stand. As a rule, when the ignition is turned off on the “nine”, only the cigarette lighter and side lights work.
- Once the wiring is all the way through, it's time to connect it. To do this, you need to have an appropriate diagram available.
- At the end of the work, you need to check the functionality of the entire mechanism. Place the terminal on the battery, press the button, evaluate the efficiency of the new ESP and the lighting of the backlight on the button.
Note! If the joint venture is working too slowly, you need to try switching the “+” wires.
All resulting connections are wrapped with electrical tape, while the wires themselves are hidden in a niche in the cabin. This must be done in order to prevent them from being pinched by the ESP rail. You can install a button in the door trim of a VAZ 2109, connect the block and mount the trim in place. All removed elements are installed in the opposite order of removal and the functionality of the power windows is re-checked. Of course, ESP is an important part of the machine, but it is not necessary to turn to professionals to install them, since videos and photos on the Internet reveal all the intricacies of installing the mechanism with your own hands. For a better understanding of the replacement process, detailed instructions are provided with a description of each stage. To obtain the desired result, it is important to purchase a high-quality mechanism, the price of which may vary depending on the manufacturer.
Every car owner of this car should know how to connect power windows to a VAZ 21099. Initially, you will need to dismantle the old mechanism. As for choosing a power window, auto mechanics recommend buying a Berkut brand device.