Basic adjustment work
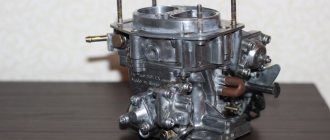
Carburetor and its components
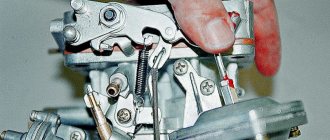
Experienced mechanics know how to adjust the carburetor on a VAZ. When turning the damper lever counterclockwise, the last element closes. If this does not happen, it is necessary to find out and eliminate the cause of the spring jamming.
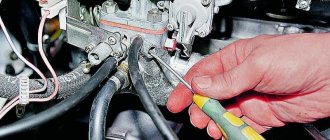
To do this, you will have to press the VAZ 2105 carburetor rod all the way. The shock absorber will open 3 mm. The distance is adjusted with a screw. If the valve is open, a similar element of the throttle valve of the 1st chamber should be slightly open by 1.1 mm.
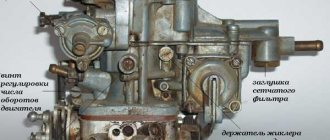
The idle speed of the VAZ 21053 carburetor is adjusted with screws. The first is related to the amount of the mixture, the second - to its composition. The last element is closed with a cap. The carburetor VAZ 2105 1107010 20 can be adjusted to an engine heated to a temperature of 90-95 ° C. Also checked:
- correct setting of the gas distribution unit,
- degree of opening of the air damper,
- ignition system advance angle.
It is necessary to start adjusting the VAZ 21053 carburetor by setting the engine crankshaft speed, taking into account the speedometer readings at 750-800 rpm. Using the second screw, which is responsible for the composition of the mixture, it is necessary to obtain an appropriate concentration of carbon monoxide in the exhaust gases, equal to 0.05 Jy, 2%.
Installing a custom carburetor
Owners of “classics” in some cases resort to installing non-standard carburetor models on their cars. Such an installation will require certain modifications and subsequent configuration. We are talking about the Solex 21073 and Solex 21083 carburetor models.
Model Solex 21073
This model was developed for a 1.7-liter engine and was standardly installed on the power unit of a Niva car. The Solex 21073 carburetor differs from others in its large channels and jets. Installing this model on other VAZ cars with a carburetor allows you to achieve an increase in dynamics, but fuel consumption rises to 9-12 liters per hundred.
Model Solex 21083
Solex 21083 was installed on the VAZ 2108-09. If you install it on “classic” engines, then modifications will be required. The gas distribution systems of engines 01-07 and 08-09 have a number of differences. Installing such a carburetor without modifications will lead to the fact that at speeds of about 4000 the speed of the supplied air can reach the sound speed, and the engine will not be able to spin up further. To install this model of carburetor, it is necessary to drill out the diffusers of the primary and secondary chambers to expand them. You also need to install large jets. The refinement process is labor-intensive, but the result allows you to obtain gasoline consumption lower than model 21053, and dynamics exceed those of 21073.
Setting up the Ozone carburetor
Often the “seven” is equipped with an “Ozone” carburetor. This unit is configured according to a certain scheme. It should be noted that replacing a needle valve involves adjusting the level of the substance in the corresponding chamber.
Having disassembled the VAZ 2105 carburetor cover, you need to make sure that the float is in a free position and can easily rotate on its axis. There are no holes or dents and the bedroom wall is not touching. The tightness of the needle valve seat is checked, including the free movement of the ball in the corresponding hole.
We are rebuilding the minimum
When adjusting the Ozone carburetor, it is necessary to keep the cover in a vertical position with the fitting facing up. Please note that the gap between the float and the gasket should be 6.5 mm. The important point in this matter is the contact of the float tongue and the ball. If necessary, the gap is adjustable. To do this, the tongue is bent, and the area in contact with the ball must be located perpendicular to the axis of the valve. If the above conditions are met, the roof is mounted in its original position.
Adjusting the Ozone carburetor for models 2107-1107010-20 involves adjusting the pneumatic actuation of the throttle valve of the 2nd chamber. This procedure is performed when replacing a rod or diaphragm actuator. The lock washer is removed and the rod is disconnected. After turning the 2nd chamber throttle to a vertical position, it will need to be pressed all the way down. Then the locknut on the rod is loosened. The bushing is held in place with a wrench. In this position, the rod is rotated or rotated until the lever pin aligns with the hole in the rod. The last block is put on the pin and secured with a lock washer. The lock nut is then tightened.
When adjusting the Ozone carburetor (as well as the 2105 carburetor), you must sharply press the accelerator pedal and then release it smoothly. If this process is performed correctly, the engine will be able to increase the crankshaft speed without failure. If the speed decreases, the engine should not stop. In this case, the crankshaft rotation speed is increased by a screw. The last step in the process is installing the end cap. Having figured out how to adjust the 2105 carburetor, you can get to work.
Adjustment and Maintenance
For stable operation of all systems, there are maintenance regulations that must be followed. Before adjusting the ozone carburetor on cars of brand 2107, you need to identify the faulty unit; there is no need to rinse or disassemble working units. Flushing the system can be done easily at home; it is important to follow the sequence of steps.
- Repair and adjustment of the ozone 2107 carburetor begins with its dismantling and disconnecting all supply systems. It is necessary to disconnect the throttle valve actuator, the coolant supply, and the fuel hose.
- Clean and rinse the VAZ carburetor, modify the outside with ozone, and inspect for mechanical damage.
- Clean the strainer and starter with compressed air under low pressure.
- The float system is cleaned of obvious carbon and deposits. It is important to understand that old scale will be difficult to clean, and it can also get into the nozzle holes and disrupt the operation of the system.
- Wash and adjust the trigger mechanism, air jets, and exhaust system.
- We adjust the carburetor components, assemble and install the device before regulation, which is subsequently adjusted to a hot engine.
Adjustment and tuning are carried out according to the assigned sequence of screws, for the desired fuel consumption and dynamic performance of the car. The technical condition fully corresponds to the driving characteristics and comfort when moving the vehicle.
Ozone carburetor jets table
| Carburetor markings | Main system fuel jet | Main system air jet | Idle fuel jet | Idle air jet | Accelerator pump jet | |||||
| I Kam. | II Kam. | I Kam. | II Kam. | I Kam. | II Kam. | I Kam. | II Kam. | fuel | bypass | |
| 2101-1107010 | 135 | 135 | 170 | 190 | 45 | 60 | 180 | 70 | 40 | 40 |
| 2101-1107010-02 | 130 | 130 | 150 | 190 | 50 | 45 | 170 | 170 | 40 | 40 |
| 2101-1107010-03: 2101-1107010-30 | 130 | 130 | 150 | 200 | 45 | 60 | 170 | 70 | 40 | 40 |
| 2103-1107010 | 135 | 140 | 170 | 190 | 50 | 80 | 170 | 70 | 50 | 40 |
| 2103-1107010-01: 2106-1107010 | 130 | 140 | 150 | 150 | 45 | 60 | 170 | 70 | 40 | 40 |
| 2105-1107010-10 | 109 | 162 | 170 | 170 | 50 | 60 | 170 | 70 | 40 | 40 |
| 2105-1107010: 2105-1107010; 2105-1107010-20 | 107 | 162 | 170 | 170 | 50 | 60 | 170 | 70 | 40 | 40 |
| 2107-1107010: 2107-1107010-20 | 112 | 150 | 150 | 150 | 50 | 60 | 170 | 70 | 40 | 40 |
| 2107-1107010-10 | 125 | 150 | 190 | 150 | 50 | 60 | 170 | 70 | 40 | 40 |
| 2108-1107010 | 97,5 | 97,5 | 165 | 125 | 42=3 | 50 | 170 | 120 | 35/40 | — |
↑
Nuances of the work
The Ozone carburetor is adjusted when replacing elements of the device. If the guide handle is extended, the choke must be closed. In case of deviations from the norm, it will be necessary to lubricate the cable with engine oil. After this, rearrange the end of the cable in the damper block and unscrew the screw. The lever is completely lowered. At the same time, the air damper closes and the VAZ 2105 carburetor rod is located at the bottom of the rod groove. If the last element moves, it will be necessary to straighten the deformed parts by adjusting the length of the link.
How to disassemble a carburetor
If the air damper is completely closed, the throttle analogue of the 1st chamber should be slightly open by 0.8-0.9 mm. This indicator may change due to fluctuations in the bending of the rod. When the rod is moved inside the VAZ 2105 carburetor body all the way, the air damper opens slightly by 5.5 mm. The distance can be adjusted by unscrewing the cover screw. A similar block is installed under it, the rotation of which sets the gap. Once the cap is installed, the ozone carburetor adjustment is complete.
The carburetor needs to be adjusted only when the engine is warm. In this case, the suction button must be completely recessed.
At the factory, the procedure is performed at a minimum crankshaft speed of 850 rpm. In this case, the carbon monoxide content should be 0.05 g 2%. The bushings are pressed onto the screw heads. If you turn the bushings there is no way to restore the factory settings, the screws come loose and the bushings are broken. This will make the appropriate settings.
Repairing a VAZ 2105 carburetor: how to set up the injection system?
The fifth Lada model was produced from 1980 to 1995 and was in great demand. The main engine installed on these cars was a four-cylinder internal combustion engine with a displacement of 1.29, 1.45 or 1.57 liters. To prepare the combustible mixture for engine operation, domestic ozone carburetors and their modifications were installed. We will tell you how to adjust and repair a VAZ 2105 carburetor with your own hands.
First, let's take a closer look at the device itself, which mixes fuel with air in certain proportions. After mixing, the working mixture enters the engine cylinders and determines the normal operation of the unit in different modes. A carburetor is a rather complex and very precise unit, so the accurate implementation of the main functions depends on strict adherence to the parameters set at the factory and their subsequent adjustment.
How to make settings for the “classics”
First, let's figure out how to adjust the VAZ 2105 carburetor. On these models, the DAAZ-2107-1107010 unit was installed. However, it was also used by the “sevens”. Therefore, adjusting the VAZ 2107 carburetor is done identically.
For manipulations we use:
- screwdrivers;
- tweezers;
- ruler or caliper.
We start with the float chamber.
- Consider the position of the float. If necessary, we trim the bracket that serves as a holder.
- The needle valve is closed. Open the chamber cover, then remove the float and pull the bracket tongue with tweezers or your fingers. We carry out the work in such a way as to obtain a distance from the float to the cover gasket of strictly 6 - 7 mm.
This operation can be performed both on a removed and on an installed unit, after dismantling the filter and cover. Although it is further implied that the adjustment of the carburetor of the VAZ 2105 and others like them is done on the car.
The next stage is setting up the starting system.
- Having dismantled the air filter, start the engine and immediately pull out the choke.
- After warming up a little, use a screwdriver to open the damper a third.
- We bend the damper rod so that the crankshaft speed reaches 3300 rpm.
- We tighten the adjusting screw for automatic opening of the damper so that the speed drops by 300 units.
The final stage for the VAZ 2107, or the fifth VAZ model, is setting the idle speed. It is produced like this. On a warm running engine.
- We unscrew the mixture composition screw, reaching the maximum crankshaft speed.
- Tighten the mixture quantity screw to reduce the speed to 1100 rpm.
- We tighten the mixture screw until the crankshaft speed drops to 800 rpm.
Adjusting the idle speed of the VAZ 2105 carburetor is done in a similar way. As for the “six”, almost the same DAAZ 2107-1107010-20 unit was installed there. Setting up this VAZ 2106 carburetor is carried out according to the instructions given above.
The principles for setting up the Solex carburetor of the VAZ 2109 differ little from those described earlier. The work requires the same tools; in fact, the main thing is to have:
- screwdriver;
- calipers.
Let's say all the preparatory manipulations have already been done. Let's proceed directly to setting up the device. We start with the float chamber.
- After unscrewing the five screws, remove the assembly cover.
- Using a caliper, measure the distance between the edge of the body of the float chambers and the gasoline level of the chamber. The value should be 25.5 mm. If the size is not met, it is necessary to bend the tongue of the float bracket.
- Turn the drive and close the air damper.
- Having sunk the rod of the device with a screwdriver, we measure the gap between the chamber wall and the slightly open damper. We check compliance with the passport data of the assembly unit.
- If necessary, change the gap using the adjusting screw on the accelerator pump housing.
- Finally, with the choke closed, we measure the clearance of the throttle valve of the first chamber. If it does not correspond to the norm, rotate the throttle adjusting screw. This gap, for example, on a unit brand 2108 is 1 mm, and for a unit brand 21083 – 1.1 mm. Here we need to say, let’s say, the 2108 model was installed on the “eight” and “nine”, and the Solex 21083 was installed on the VAZ 21083 and VAZ 21093 cars. That is, everything depended on the engine size. Consequently, the adjustment of the VAZ 2108 carburetor is initially the same for both the Lada of the eighth model and the Lada of the ninth model.
However, based on the fact just noticed, for example, the carburetor adjustment on a VAZ 21083 will differ from the settings on a VAZ 2108 only in the nameplate clearance values. They can be found in the technical documents of the units.
The final operation when setting up a type 2108 carburetor will be setting the idle speed.
- Turn the mixture quality screw all the way.
- Then turn this regulator back 5 turns.
- The engine must be started, it must be at operating temperature with the choke off.
- By rotating the large black screw for the mixture amount, we achieve minimum crankshaft speed with stable engine operation.
- There should be a minimum vacuum inside the vacuum advance tube that can be felt by the tip of the tongue.
- Then we tighten the quality screw so that the engine begins to operate unstably. Then unscrew the screw one and a half turns until stable operation appears.
- Using the mixture quantity screw, we reach a crankshaft speed of 850 – 900 rpm.
- If the engine starts to stall, then slightly unscrew the mixture quality regulator.
On a 21083 carburetor, the idle speed adjustment is completely identical.
The main nuances of the procedure on UAZ
In order to get a complete understanding of the intricacies of tuning carburetor units, let’s also consider adjustments on the UAZ. Most of the units used with these machines were marked as K-151.
For this procedure you need to take:
- screwdriver;
- spanners;
- rubber bulb;
- ruler or caliper.
We perform the following actions.
- Set the required float chamber parameter. To do this, dismantle the cover and pump out a quarter of the fuel with a pear. Having pumped up gasoline, fill the chamber to the maximum level. When it stops filling, we take a measurement. The depth of the float chamber should be 21.5 mm.
- To set up the starting system, turn it on with the lever, start the engine, lightly press the gas pedal, and then use a screwdriver to open the choke. In this case, the crankshaft frequency should be equal to 2500 rpm according to the tachometer. If not, then it is adjusted with an adjusting screw.
- To adjust the idle speed of a hot engine, use the quality screw to bring the speed up to the most suitable speed - 950 rpm. Then use the quantity screw to add another 100 rpm. Then, on the contrary, we reduce the quality screw back to 900 rpm.
In general, it should be noted that it is no more difficult to repair and adjust this carburetor than to do the same with VAZ units.
Main parts
To perform its tasks, the VAZ 2105 carburetor consists of the following mechanisms and systems:
- Engine starting and heating system.
- Fuel level maintenance system.
- System XX (inactive);
- Econostat system.
- Acceleration pump.
- Basic dosing system.
There are three systems you can configure: these are the first on the list. The VAZ 2105 carburetor can be adjusted without disassembling the self-regulating device of the DaAZ 1111 carburetor Video! -. Due to the fact that the carburetors of the fifth and seventh models are identical in design and differ only in the diameter of the air and fuel jet holes, the carburetor on the VAZ 2107 can be adjusted in the same way.
The carburetor on any vehicle is one of the components of the fuel system of an internal combustion engine. It mixes air with a flammable liquid, and this mixture is supplied to the cylinders of the internal combustion engine. As you can see, this part of the car plays a very important role in the operation of the car as a whole. Therefore, the carburetor must be adjusted periodically. You will learn how to do this correctly on a VAZ-2105 from this article.
Preparatory activities
If a motorist is interested in adjusting the Solex VAZ-2107 carburetor with his own hands, he must first carry out a number of preparatory steps.
Initially, you need to warm up the power unit to operating condition (temperature 85–90 degrees).
In the next step, you need to squeeze the handle of the air damper drive mechanism all the way; people simply call it “choke.” After this, the damper should be in a position in which the air channel is completely free, i.e., located in the direction of air movement.
This video tells you how to install it
Today Nail Poroshin will tell and show the main nuances of the installation
53rd Carburetor
to the Classics! Everyone...
If there is a tachometer, the device must be connected to the engine being turned off. Otherwise, if there is no unit, the item should be skipped. The positive side of the device should go to the ignition coil, and the negative side should go to the “ground” of the vehicle (body, engine or battery negative). Before connecting the device, you should read the operating instructions.
The last action should be to start the engine, turn on the high beam optics and the heating device.
Nuances of the VAZ-2105 carburetor adjustment process
Experts immediately warn inexperienced motorists: if you don’t know where the carburetor is located in the car and what it consists of, you shouldn’t even start making adjustments. You can disable the entire car by incorrectly changing the parameters of the fuel system. It is best to entrust this procedure to qualified mechanics from the workshop.
So, to begin adjusting the carburetor of a specific car model, you need to study its structure. So, the VAZ-2105 carburetor contains several important systems:
- dosage;
- starting and warming up the engine;
- maintain an optimal fuel fluid level;
- idle start;
- economist's system;
- accelerator pump.
Three of all listed systems are subject to standard settings:
- Starting and warming up the internal combustion engine (the starter is configured).
- Maintaining the fuel fluid level (adjustable float mechanism).
- Minimum (the number of revolutions is calibrated using a special screw).
To install them, it is absolutely not necessary to remove the carburetor device from the car.
How to adjust the carburetor on a VAZ 2101
What is needed for adjustment
First you need to prepare the appropriate repair kit for the VAZ 2101 carburetor. You will also need new cuffs, carburetor jets and other spare parts. To adjust the carburetor, you will need, which includes the following tools:
- Spanners.
- Rags.
- Screwdrivers (phillips, flat).
- Protective gloves.
- Solvent.
- Toothpicks.
- Compressed air can or pump.
After appropriate preparation of the repair kit, you can begin adjusting the VAZ-2101 carburetor. This does not require much effort. All actions must be careful and precise.
You also need to inspect the components on which the operation of the motor may depend. You need to inspect the spark plugs. By their appearance you can tell in what proportions the fuel is mixed with air.
The carburetor needs to be cleaned. To do this, dismantle its top cover. The float and vacuum valve are removed. The interior of the chambers needs to be cleaned. Soot and dirt accumulate here. Cleaning is carried out using an air can or a pump.
Another mandatory action is to check the gap between the distributor electrodes, as well as the high-voltage coil and wires. The adjustment is carried out only after the engine has warmed up to 90ºС. Cars are put on handbrake.
Throttle valve adjustment
Adjusting the VAZ-2101 carburetor begins with adjusting the throttle valve. This is a simple procedure. It can be done in three stages. Manually turn the damper control lever counterclockwise. It opens completely.
The distance to the primary chamber is measured. The carburetor design suggests that this figure is 12.5-13.5 mm. If the result is different, you need to bend the rod antennae. Throttle adjustment involves determining the opening value of the throttle valve. It should be 14.5-15.5 mm. Otherwise, you will need to tighten the pneumatic drive rod.
Starter battery correction
At the second stage, you will need to adjust the operation of the starting device. The throttle lever on the secondary chamber is manually turned counterclockwise. It will close. The tip of the thrust lever should fit snugly against the axis of the primary chamber throttle valve.
At the very end there should be a starter rod. Otherwise, you will need to adjust its position. To do this, the rod is bent. This device in carburetor engines is fragile. If you apply too much force to it, the rod will break off.
Checking the pump accelerator and repairing it
You need to start checking by testing the functionality of the system. You need to collect in a beaker the fuel that will be generated during 10 cycles of operation of the throttle lever. From 5.2 to 8.7 cm³ of fuel should accumulate. If this is not the case, you need to clean the VAZ 2101 carburetor jets. To do this, bleed the pump. This will help clear clogged injectors. This procedure is performed about 10 times. Then the fuel is measured again.
If the purging procedure does not give the desired result, the accelerator will need to be completely replaced.
If the engine malfunctions at high speeds, you need to check the pump diaphragm. It could wear out. The fuel pump rod often wears out.
Idle speed adjustment
Adjusting the fuel system involves adjusting the idle speed at the final stage. You will need to warm up the engine for 15 minutes. Then the engine must be turned off. The quantity and quality screws are tightened until they stop. The first of them needs to be released 3 turns. The quality screw is unscrewed 5 turns.
The motor starts. The quantity screw sets the speed, which is about 800 per minute. Then the quality screw is slowly tightened. This way you can reduce the enrichment of the fuel mixture. This procedure is carried out until the speed begins to drop. After this, the quality screw must be unscrewed another half turn and fixed in this position.
Knowing how the carburetor adjustment procedure is carried out, you can do the job well yourself. The engine will operate stably, and the VAZ 2101 will operate in normal mode.
The first stage is setting up the float mechanism of the VAZ-2105 carburetor
The first step in adjusting the carburetor float mechanism is to allow the vehicle to idle. And only after that proceed to the setup procedure.
- The carburetor cover is removed.
- The current level of fuel fluid in the chamber of the float mechanism is checked (its digital indicator should ideally be 28 mm).
If the digital fuel level indicator in the float chamber is OK, there is no need to adjust anything. Otherwise, follow these steps:
- check the distance from the cover gasket and from the float itself (this is done at the moment the needle valve ball comes into contact with it) - the norm is 6.5 mm (+ - 0.25 mm);
- fold your tongue;
- check the maximum stroke of the valve needle - the norm is 8 mm;
- check the distance between the cover gasket and the maximum retracted float - the norm is 14 mm (+ - 0.5 mm).
If the indicators do not meet standard standards, they can be adjusted using a bracket. If after adjustment it is not possible to achieve the optimal level of fuel fluid in the reservoir, the needle valve must be replaced.
Why does the cylinders flood?
Also look carefully at the spark plugs; if they have heavy carbon deposits on them, the engine will run unstably. But if a lot of gasoline enters the combustion chambers, then most likely it is necessary to adjust the level in the float chamber. How to adjust the level will be discussed a little below. The saddest thing is if the reason that the cylinders are flooded is a burnt out valve.
In this case, the cylinder head will have to be repaired. If the engine runs unstable, as well as stops at high speeds, look for a fault first of all not in the carburetor, but in the fuel pump and its drive. But you need to look at the carburetor of the VAZ 2105; adjustment will not hurt it.
The second stage - we adjust the starting device of the VAZ-2105 carburetor
At this stage, in the garage, the motorist can configure the carburetor system, which starts and warms up the engine:
- close the air damper (this is done using the handle located inside the car);
- check the position of the end of the rod, which must be at the end of the groove in the carburetor rod to start the system;
- measure the gap level from the edge of the damper to the chamber wall (measurements are taken when the rod is recessed) - the norm is 5-5.5 mm.
If the digital indicators differ from the established standards, they are adjusted by turning a special adjusting screw (located on the carburetor starter).
How to adjust the carburetor on a VAZ 2101
What is needed for adjustment
First you need to prepare the appropriate repair kit for the VAZ 2101 carburetor. You will also need new cuffs, carburetor jets and other spare parts. To adjust the carburetor, you will need a repair kit, which includes the following tools:
- Spanners.
- Rags.
- Screwdrivers (phillips, flat).
- Protective gloves.
- Solvent.
- Toothpicks.
- Compressed air can or pump.
After appropriate preparation of the repair kit, you can begin adjusting the VAZ-2101 carburetor. This does not require much effort. All actions must be careful and precise.
You also need to inspect the components on which the operation of the motor may depend. You need to inspect the spark plugs. By their appearance you can tell in what proportions the fuel is mixed with air.
The carburetor needs to be cleaned. To do this, dismantle its top cover. The float and vacuum valve are removed. The interior of the chambers needs to be cleaned. Soot and dirt accumulate here. Cleaning is carried out using an air can or a pump.
Another mandatory action is to check the gap between the distributor electrodes, as well as the high-voltage coil and wires. The adjustment is carried out only after the engine has warmed up to 90ºС. Cars are put on handbrake.
Throttle valve adjustment
Adjusting the VAZ-2101 carburetor begins with adjusting the throttle valve. This is a simple procedure. It can be done in three stages. Manually turn the damper control lever counterclockwise. It opens completely.
The distance to the primary chamber is measured. The carburetor design suggests that this figure is 12.5-13.5 mm. If the result is different, you need to bend the rod antennae. Throttle adjustment involves determining the opening value of the throttle valve. It should be 14.5-15.5 mm. Otherwise, you will need to tighten the pneumatic drive rod.
Starter battery correction
At the second stage, you will need to adjust the operation of the starting device. The throttle lever on the secondary chamber is manually turned counterclockwise. It will close. The tip of the thrust lever should fit snugly against the axis of the primary chamber throttle valve.
At the very end there should be a starter rod. Otherwise, you will need to adjust its position. To do this, the rod is bent. This device in carburetor engines is fragile. If you apply too much force to it, the rod will break off.
Checking the pump accelerator and repairing it
You need to start checking by testing the functionality of the system. You need to collect in a beaker the fuel that will be generated during 10 cycles of operation of the throttle lever. From 5.2 to 8.7 cm³ of fuel should accumulate. If this is not the case, you need to clean the VAZ 2101 carburetor jets. To do this, bleed the pump. This will help clear clogged injectors. This procedure is performed about 10 times. Then the fuel is measured again.
If the purging procedure does not give the desired result, the accelerator will need to be completely replaced.
If the engine malfunctions at high speeds, you need to check the pump diaphragm. It could wear out. The fuel pump rod often wears out.
Third stage - idle speed adjustment
This stage is no less important than the previous two. To do this, the internal combustion engine is pre-started and warmed up. Only after this can the idle speed be adjusted.
- The engine is pulled out by rotational movements of the screw, the amount of mixture is a rotation speed of 850 rpm:
- to increase the speed, you need to turn the mixture quality screw (to maximum);
- to reduce the speed you need to turn the screw to the number (to the desired level 850).
- Tighten the quality screw to the maximum (rotational movements are carried out until the motor stops shaking).
- Unscrew the same screw in the opposite direction three turns.
In this way, the VAZ-2105 carburetor is adjusted to idle. All of the above actions by a mechanic are called idle speed calibration.
Device
The DAAZ carburetor, developed by analogy with the product of the Italian brand Weber, is designed to dose the gas-air mixture in all engine operating modes without the participation of electronics. It consists of three main parts:
- covers with semi-automatic starting system;
- main or middle block with camera;
- additional or lower block with throttle valves.
The device cover includes important parts of the carburetor: flaps, a fitting for connecting a gasoline supply hose, a filter mesh, a needle float, an econostat tube, and an accelerator pump. The upper part of the carb is connected to the main block using several screws (M5).
The middle block consists of the main chamber, diffusers, jets, and a sprayer (helicopter). All the necessary channels responsible for certain engine operating modes are installed here.
The lower or additional block is equipped with throttles and adjusting screws, thanks to which it is possible to adjust the quality and quantity of the sprayed combustible mixture. There are also many different output channels available here. Like the upper part, it is connected to the main unit via screws.
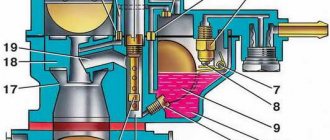
It is easier to consider the carburetor design by looking at the operation of individual subsystems:
- A special place in the carburetor is occupied by the starting device system or SPU. It comes into operation when the engine starts. It is activated due to the vacuum created as a result of the movement of the cable when the diffuser opens. The SPU closely interacts with the gas pedal;
- Idle system. Its functions are clear by its name. On Weber it is of the classic type, on Ozone it is autonomous and works independently of the carburetor. On standard systems there is a special calibration screw that adjusts the throttle or air. It makes it possible to increase or decrease the number of idle speeds. There is also a mixture quality screw located in a different place, in a recess. By rotating it, you can supply the engine with exactly the amount of gasoline it needs;
- A transition system responsible for a smooth transition from idle to operation of the main jets. There is also a separate jet, which can also be attributed to this system. It stabilizes engine operation at high speeds;
- Main metering system based on the operation of the emulsion tube, fuel nozzle and chokes. It is in this mode that it is possible to open both throttles and the maximum speed of the car;
- Accelerator pump system. It controls the mixture, preventing air from entering more than normal. This makes it possible to avoid throttle failures during sudden car starts from a standstill and other maneuvers;
- Econostat that increases engine thrust at maximum speed. Consists of three jets: fuel, emulsion and air;
- A float mechanism system that maintains a constant fuel level in the chamber. Equipped with an adjustable needle valve. When the fuel in the chamber decreases, the float moves down, the valve opens and gasoline from the tank begins to flow through the fitting.
Expert advice
In the area of the procedure for adjusting the VAZ-2105 carburetor device, experienced mechanics recommend paying attention to the following critical points:
- The valve seat is in the retracted position and the idle jet is touching the seat in the carburetor body.
- Lubricate the rubber seal with special engine oil.
- The position of the air damper intended for cold passage is in a vertical plane, while the air handle is lowered.
- The condition of the solenoid valve - damage and malfunctions is checked as follows:
- turn on the ignition;
- remove and put the connector on the valve;
- listen for sounds coming from the solenoid valve.
If clicks are heard during inspection, it means the part is in good condition.
Replacement instructions
For the procedure, you should use an overpass or inspection hole. To raise the car, you can use a jack, lifting the front end and placing it on supports. Replacement is carried out only on a cold machine.
Required Tools
Replacing a timing belt and chain is a complex and lengthy procedure. To complete it as quickly as possible, you need to properly prepare for it and prepare in advance:
- a set of keys;
- set of heads;
- knob;
- screwdriver
To make consumables last longer, you should buy originals.
Stages
- First, turn off the power to the car by removing the negative terminal from the battery.
- If protection is installed, it must be removed.
- Then you need to drain the coolant from the system.
- At the next stage, you need to dismantle the radiator, cooling system fan, and pump pulley.
- Then you need to remove the drive belts for the power steering, air conditioning compressor, and generator.
- Next, unscrew the spark plugs.
- Then we remove the distributor protection screen and disconnect the tube connecting it to the timing belt from the air collector sleeve.
- By turning the crankshaft by the bolt securing its pulley, you should set the marks. The mark on the timing belt pulley must coincide with the casting on the camshaft; accordingly, the installation mark on the crankshaft gear must align with the mark on the oil pump housing. In the video you can see how to set the tags correctly.
- Using a special tool, you need to unscrew the mounting bolt and remove the crankshaft pulley.
- Then you need to remove the lower and middle timing protection covers.
- By unscrewing the tensioner mounting bolt and turning it counterclockwise, we loosen the tension on the timing belt and remove the latter.
- Now you should change the roller and start tightening the VAZ 2105 timing belt.
Changing the tension roller
Before doing this, all parts should be cleaned of dirt.
- The belt should first be pulled onto the crankshaft pulley, then onto the oil pump drive pulley, and lastly onto the camshaft pulley.
Pulling the belt onto the camshaft pulley
- Having put the belt on the tensioner, you need to tighten the bracket and install the spring.
When installing the timing belt, do not rotate the camshaft and crankshaft so as not to knock off the marks.
- After turning the crankshaft two turns, you need to check that all installation marks match, tension the belt and tighten the tensioner bracket mounting bolts.
- Next, assembly is carried out in reverse order.
After the procedure for changing the timing belt or chain of the VAZ 2105, you should start the car and check the performance of the engine.
How to reinstall the carburetor
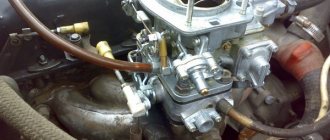
After the device has been washed and repaired, you will need to reinstall the carburetor. To do this, first a new seal is applied to the installation site, and the carburetor itself is installed on it. Nuts are screwed onto the four mounting studs, ensuring a tight fit of the carburetor body to the engine manifold:
- Then you will need to connect two thin hoses for vacuum and ventilation to two fittings that are located in the upper part of the carburetor.
- A fuel supply hose is connected to the inlet valve; it is recommended to replace the clamp with a new product.
- The return hose is screwed on the reverse side.
- Next, the EPHH wire is connected to the solenoid valve.
- It is better to install the throttle return spring before connecting the throttle and air valves.
Installation and connection of the DAAZ carburetor is considered complete.
Basic operations for removing/reinstalling, flushing and adjusting the carburetor are available to drivers with any level of training and experience. It should be borne in mind that the mechanisms are considered to be quite capricious, so all stages of the procedures you perform will require increased concentration.
