While operating the vehicle, the driver may notice an oil leak between the engine and gearbox. Let us immediately note that a similar malfunction appears on different cars, regardless of what type of engine (diesel, gasoline) and gearbox are installed.
In other words, oil leaks at the junction of the transmission and internal combustion engine on different cars, when the car has a manual transmission, a robotic gearbox with one or two manual transmission clutch discs, an automatic transmission with an automatic transmission torque converter, a continuously variable transmission, etc.
In any case, if oil drips between the engine and gearbox, then this is a sign of serious damage. Faults of this kind require immediate diagnosis and quick elimination.
Next, we will talk about why an oil leak may appear between the power unit and the gearbox, as well as what the driver should do if there are visible leaks of fresh lubricant between the engine and gearbox, oil is actively running, or the lubricant on the parts is covered with dust (the leak is insignificant, there is fogging).
Technical features of engine and gearbox lubrication systems
The design features of the engine and gearbox and their operating conditions determined the use of specific lubricants for each of these units.
For technical reasons, it is impossible to fill the engine and gearbox with the same oil. For each unit, the use of liquids of different chemical compositions is provided. The rubbing parts of internal combustion engines are lubricated thanks to a forced oil supply system to the right places. In gearboxes, mechanically contacting parts are enveloped in transmission fluid. This happens through self-spraying of oil by rotating parts.
Therefore, situations are quite predictable when, when using mineral water, there was no oil leak between the engine and the gearbox, but after switching to another type of oil, it appeared. Practicing repairmen and experienced car enthusiasts tend to attribute such cases to different oil viscosities. Semi-synthetic and synthetic fluids have better fluidity compared to mineral water.
Peculiarities
Oil stains as a result of fluid leakage
Lubricants poured into the engine compartment and transmission of a car, first of all, must provide structural parts with a reliable degree of protection against premature wear. But due to the fact that the operating conditions of these systems differ significantly, it is impossible to use a liquid with the same viscosity and chemical composition in both cases.
Both lubricants - transmission and motor - are classified according to the international SAE system and can have mineral, semi-synthetic and synthetic bases. This is probably where their similarities end.
The vehicle's engine system operates under conditions of high temperature and operational overloads. That is why it requires a liquid that is resistant to climatic changes and prevents the formation of oxidative reactions inside the working area. In addition, it should wash out carbon particles formed during the operation of the car from the engine compartment, making it easier for the parts to “freely move.” Motor fluid circulates inside the system under high pressure, so its viscosity should not be excessively high.
As for gearbox oil, excessive fluidity cannot occur here. It is supplied to parts by spraying, is not subjected to critical overloads and does not require a large amount of additives.
Such differences in the use of lubricants determine their useful life in a vehicle: for motor fluid it varies between 5-10 thousand kilometers, for transmission fluid - 60-80.
Front
It is much easier to change than the rear one. The element is located at the end of the crankshaft (on cars with a transverse engine - near the right pillar). To replace, we need to remove the timing belt cover and place the piston of the first cylinder at TDC. We loosen the tensioners and remove the timing belt from the outside, as well as the generator, having first removed the pulley.
Drain the engine oil. Remove the crankshaft pulley. Unscrew the oil pump. An oil seal will be pressed inside it. You can remove it using a minus screwdriver. The new one is pressed in using a large head (27 and above) or on a special machine. Further assembly is in reverse order.
Operating principle and types of seals
Conventionally, the following tasks of seals can be distinguished:
- reducing the friction force of metal parts;
- protection against overheating and wear;
- preventing the entry of foreign substances into the working environment (for this purpose, there are special recesses on the surface of the products - anthers).
The principle of operation is the same for all, but the type and location depend on the drive and type of car. Let's look at each option in more detail:
- Main oil seals on front-wheel drive
cars are installed in the cylinder block itself. Shields on these units are not provided for by their design. The oil seal holds in part due to the high pressure inside the crankcase. The seals press well against the surface of the rod and do not seal the assembly. - Most rear-wheel drive cars
are designed with a crankshaft shield, and an oil seal is installed in it on the front of the support bearing.
Many car enthusiasts often try to replace oil seals themselves, saving money. After reading various instructions on the forums, they take action. However, it is important to understand that each error is minus 50–70% of the oil seal life. If, with proper installation, it will last 200 thousand km, with a makeshift installation method, you should be prepared for wear after 70–100 thousand.
To replace
the main oil seal on a front-wheel drive car
yourself, you will need a number of actions:
- lift the car with a jack (or drive into the inspection hole);
- remove the engine protection and timing case;
- remove oil from the engine;
- remove the timing belt;
- remove the right front axle wheel;
- engage a lower gear;
- remove the pulley mount and remove the pulley itself;
- change up gear;
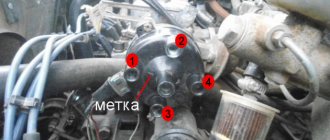
- set the piston of the first cylinder to TDC (marks will help for this);
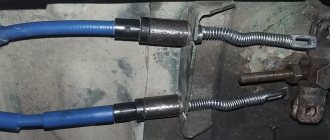
Fixing the piston of the first cylinder in the BMT
Fixing the piston of the first cylinder in the BMT
- loosen the tension roller and remove the belt;
- unscrew the fastening of the clutch housing cover located at the bottom and remove it with the gasket (it is better to replace it before reassembling);
- disconnect the oil pump and oil receiver from the main bearing;
- remove the toothed pulley using 2 screwdrivers of equal size;
Removing the toothed pulley using two screwdrivers of the same size
Removing the toothed pulley using two screwdrivers of the same size
- unscrew the oil pump fastening bolts;
- separate the unit and remove the oil seal from it;
- lubricate the new product and install it in place;
- reassemble.
Guided by logic and accuracy, you can make the replacement yourself.
However, if in doubt, you should contact a service station. It is important to buy only factory-made
oil seals Such elements are manufactured according to certain standards and serve the entire specified service life. If this article helped you, please give it a thumbs up
? “, leave comments and subscribe to our channel!
What causes a leak?
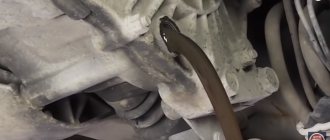
Practice shows that an oil leak at the junction of the engine and gearbox is a consequence of a malfunction of one of these units. Rarely, but there are still cases when leakage channels appear simultaneously in both nodes. A clear sign that lubricant is leaking out is oil stains under the front of the underbody of the car.
The first clue to determining where the oil is coming from is checking the lubricant level in the engine crankcase. If the dipstick shows a sharp drop in the oil level in the engine, then we can assume that the cause of the leak lies in engine malfunctions. The amount of lubricant lost will be indicated by the size of the oil stain.
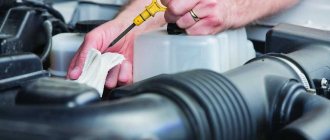
The next step is to try to determine the quality of the leaking liquid. Engine and transmission oils differ in smell and consistency. The composition (degree of viscosity) and the aroma emitted will tell you what kind of fluid - engine or transmission - the car is losing. There is a simple way to determine.
An accurate determination of the causes of lubricant leakage is hampered by limited access to inspect the areas between the engine and gearbox. Then you can take advantage of the results of operational practice and the advice of experienced drivers. Among the reasons that lead to oil leakage between the engine and gearbox are:
- unsuitability or wear of oil seals;
- wear of shafts and sealing elements;
- increased play in the input shaft of the automatic transmission;
- loss of functionality of the sealing layer and the need to replace it;
- unsuitability of the seal;
- loosening of the connecting and protective elements of the engine and gearbox.
If the signs are accurately identified, the possible causes of leaks can be analyzed in detail. Then it is much easier to eliminate defects or causes of malfunctions. It is risky to take any action to eliminate an oil leak without determining where it is leaking from.
Signs of an oil leak
Oil leakage from a car’s power unit is a common phenomenon that is well known to many drivers. The engine design itself contributes to the occurrence of this problem - it uses many sealing elements (gaskets or seals), through which lubricant flows. Signs of a fluid leak, in addition to a decrease in its level, which can be determined using a dipstick, appear in the form of oily drops, streaks and stains on parts or under the bottom of the car. Problems in the lubrication system are also indicated by the appearance of gray (blue) smoke from the exhaust pipe or from under the hood of the car.
Photo examples
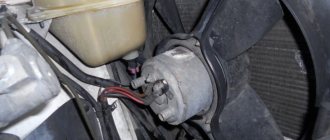
The engine becomes covered with a black oil coating
Drops of oil appear at the bottom of the engine
Gearbox parts become covered with oil stains
Oil stains appear on the engine housing
The lower part of the engine becomes oily
A leak is indicated by oil stains under the bottom of the car.
Engine malfunction
Often the cause of oil leakage is a leak in the rear oil seal on the engine crankshaft. Such risks especially increase in cars with high mileage. The oil seal may be squeezed out due to worn crankshaft thrust rings. Rough oil-resistant rubber edges will not stop the hot oil. It will definitely break out.
The appearance of a leak is the result of the accumulation of an increased amount of gases in the engine crankcase. This situation is very likely due to wear of the cylinder-piston group and contamination of the gas exhaust system. The ventilation ducts of worn engines and gearboxes are extremely dirty. The pressure in the crankcase increases, and the cuffs, gaskets or seals cannot withstand the lubricant rushing out.
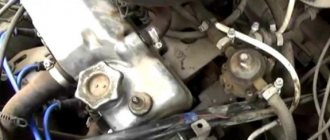
Crankcase ventilation is checked through the condition of the oil deflector valve. It is installed in the valve cover. A bluish or dark brown coating on the valve indicates problems with crankcase ventilation. To final check the functionality of the system, perform the following operation:
- remove the oil filler cap;
- cover the neck with thick cardboard;
- start the engine;
- bring the crankshaft speed to 1000 rpm.
The operation of the ventilation system is considered normal if the cardboard is tightly pulled to the neck due to the vacuum formed in the crankcase. Otherwise, the connecting rubber tubes are cleaned of internal carbon deposits. If this does not help, then the tubes must be replaced.
Oil leaks through the rear oil seal located on the engine crankshaft not only contribute to a noticeable decrease in the fluid level in the sump. Loss of lubricant through this channel often leads to it ending up on the clutch parts. This causes it to slip and prevents further normal movement of the car.
The corresponding indicator located on the instrument panel will indicate insufficient oil pressure in the engine. In case of such an alarm signal, the operation of the vehicle must be suspended.
The operation of the ventilation system is considered normal if the cardboard is tightly pulled to the neck due to the vacuum formed in the crankcase. Otherwise, the connecting rubber tubes are cleaned of internal carbon deposits. If this does not help, then the tubes must be replaced.
Oil leaks through the rear oil seal located on the engine crankshaft not only contribute to a noticeable decrease in the fluid level in the sump. Loss of lubricant through this channel often leads to it ending up on the clutch parts. This causes it to slip and prevents further normal movement of the car.
Oil seal name
Good day everyone. I changed the fluids over the weekend, the master said that the main oil seal, which is between the gearbox and the engine, was “snotty.” We need to buy a new one. So the question is: what is it called correctly? Drive seal, camshaft, crankshaft or something else? And then I went to order and got confused.
Rear crankshaft oil seal. I won’t tell you the code, you’ll find it by searching. On an existential basis it costs 800 rubles, but the work is expensive, thousands. 5.
Mazda Demio 1300 B3, 12.2001 == WAS == Kia Rio 2010 1.4 automatic transmission white
We still need to accurately determine whether the oil seal or the pan gasket is leaking. Otherwise, it may turn out to be unnecessary work.
In the heat, the dog hangs its tongue out, and the driver hangs his hand out. If you're lying, be brief (c) Some kind of mafioso
Please tell me the part number for this seal. I can't figure out from the diagram where it is located.
Sorry for the necroposting. I didn’t want to cut a new topig :)
Tru is right, start with the pan gasket, that's what I was leaking. And what about the front one? Usually the front one is more dead than the back one. This also applies to seals.
DEMIO 1999 DW5W, B5 automatic transmission4.
Posted by
StanleyPlease tell me the part number for this seal. I can't figure out from the diagram where it is located.
Hmm. Maybe that’s why you can’t find it because you yourself don’t know what kind of car and engine you’re looking for? :))))
In the heat, the dog hangs its tongue out, and the driver hangs his hand out. If you're lying, be brief (c) Some kind of mafioso
Message from
Tru-la-laHmm. Maybe that’s why you can’t find it because you yourself don’t know what kind of car and engine you’re looking for? :))))
oh sorry, I was reading too much and forgot to write. Demio 2003 dy5w
According to the diagram, I found a set of gaskets where this seal is located, but even if I really wanted a set of gaskets, I couldn’t order it anywhere.
Posted by
sibbotThank you very much!
- Address: Nizhnyaya Tura Posts 1
The front or rear crankshaft cuff is correctly called.
Last edited by Cutie Elena; 12/11/2019 at 00:09.
Message from
Cutie ElenaThe front or rear crankshaft cuff is correctly called.
In everyday life they call them “salniks”, but in universities they call professors who are out of touch with life “cuffs” and mercilessly persecute those who call them “salniks” during exams, committing genocide.:((
In the heat, the dog hangs its tongue out, and the driver hangs his hand out. If you're lying, be brief (c) Some kind of mafioso
Related topics
- Replies: 43
Last message: 03.10.2013, 19:30 - Answers: 22
Last message: 04/10/2010, 08:04
- Answers: 20
Last message: 04/18/2009, 02:37
- Replies: 3
Last message: 02.08.2007, 14:19
Current time: 08:54. Time zone GMT +3.
Tips and tricks
The appearance of malfunctions or noises clearly indicates both breakdowns and problems with the lubricant (insufficient or high level, loss of properties, non-compliance of the lubricant with tolerances and requirements, etc.).
For example, if the box hums in neutral, then the bearing on the drive shaft may fail or the transmission oil level may be low. If the problems are related to the synchronizer clutch or blocking element, then noise in the box appears when driving in a certain gear (usually in high gear, 3rd speed, 4th, etc.).
A hum from the box may also appear when the gearbox is loosened. Insufficient clutch pedal pressure or problems with this unit (especially on cars with a single-disc “robot” manual transmission) cause crunching, jerking, jolting, and difficult shifting. In this case, the parts experience increased loads, after which defects arise, and oil appears at the junction of the box and the engine.
If the situation is emergency, that is, a lubricant leak appears on the road and there is no way to send the car for repairs, then many drivers try to stop the leak with the help of special additives. As a rule, softening sealants of the “stop-leak” type contain components that allow the elasticity of the sealing elements to be restored.
Read more: Do-it-yourself automatic transmission repair without the help of a car service: what a car owner needs to know
In other words, it is possible to restore the tightness between the shafts and seals for some time. This allows you to get to the vehicle repair site on your own. So, we strongly do not recommend using such solutions both in the engine and in the gearbox.
First of all, the additive does not remove wear on parts, that is, the damage itself not only persists, but also progresses. Also, this method is not suitable for strong leaks. Moreover, the additive has a serious impact on the lubricant and on the parts themselves inside the assembly. Otherwise, adding an additive worsens the basic properties of the engine or transmission oil and clogs the engine and gearbox lubrication system.
A frequent result is that after disassembling the unit into which such additives were previously poured, it is discovered that it is completely unrepairable or there is significant wear not only on the initially problematic ones, but also on other structural elements.
What does the cap do and why does it leak?
By and large, the valve cover in any engine simply should not allow oil to splash while the engine is running, since in most cases it does not receive load from internal pressure. More precisely, it should not receive it.
Crankcase gases
In fact, the cause of an oil leak may be crankcase gases that create excess pressure above the gas distribution mechanism.
A leak from under the valve cover gasket is a problem for the Chevrolet Lacetti.
In the Chevrolet Lacetti, the crankcase ventilation valve is also responsible for the circulation of crankcase gases. If it is clogged, the pressure under the cap will increase, gases will begin to squeeze out the oil, and the first weak link in their path will be the gasket. In this case, the gasket, no matter how high-quality it is, will not last even five thousand miles. Therefore, if we notice oil leaking from under the Lacetti valve cover, it is worth unscrewing and checking the condition of the crankcase ventilation valve . This can be done in a few minutes with any aerosol carburetor cleaner.
Good and bad lids. Version two
As you know, the Chevy Lacetti has a plastic valve cover . Naturally, the engineers took this step in order to reduce the cost and lighten the engine. This affected the rigidity of the lid. In addition, plastic, even the best one, does not resist thermal deformation as actively as aluminum alloy. Once the engine is thoroughly overheated, the valve covers will begin to move, then there is no need to talk about tightness, the oil will penetrate under the gasket.
Plastic cover.
Aluminum cover.
We recommend: How to restore and repair the heated rear window if it does not work
To check this version, remove the cover and install it on a flat steel plate (or on glass in extreme cases). If there is a gap of at least a millimeter between the stove and the lid, there is a chance that the gasket will leak . Planning the lid (drawing out the mating plane) is a waste of time, because the plastic is thin and by removing some of the material we will only make it worse, the lid will become even less rigid. The best solution in this situation is to replace the cover.
Version three: gaskets and rings
If we know for sure that the surface of the lid is perfectly flat, the vent valve is clean, but the gaskets are still leaking, the problem is most likely in the gaskets themselves. In addition, some people underestimate the role of the O-rings that are installed under the bolt heads. When replacing the gasket, it is imperative to change these rings. Branded GM seals harden very quickly and begin to leak oil, while rings from Kamaz that are almost the same size (they are white and cost an order of magnitude cheaper) can withstand high temperatures and completely retain elasticity for the entire service life of the gasket.
O-rings for bolts from Kamaz fit perfectly on the Lacetti
But gaskets also come in different quality. The frequency of replacement mainly depends on their quality. Some people prefer to use expensive German ones, while others prefer cheaper domestic ones, but having saved on gaskets, we often replace them. For example, a branded gasket GM96 353 002 costs about 450 rubles, but its service life does not please many . In addition, the material profile is simple square. The Parts Mall96 353 002 gasket performs a little better , but the Victor Reinz gasket with catalog number 155345601 . It has a T-shaped profile, and due to this there is a large area of overlap of the plane of the block head.
Valve cover gasket Victor Reinz.
Valve cover gasket GM 96353002.
Fourth version: bolts, sealants and hands
The gasket, even the highest quality one, must be installed with sealant. It must withstand high temperatures and not harm the catalyst. Many companies produce similar products in huge quantities, but sealant is different from sealant - only one that says “sensor-save” and “High-Temp” on the packaging is suitable for the valve cover . If the manufacturer has indicated these two important properties, then the composition of the sealant should already interest us. If applied correctly it will work great.
The 15 bolts that hold the valve cover to the head plane can stretch over time, causing the metal to fatigue and the threads to become loose. Therefore, many advise changing the bolts with each replacement . Moreover, when tightening, old bolts have a habit of breaking. One bolt costs about 20 rubles (cat. No. 94 500 909 ), which won’t hurt your pocket too much.
Cover mounting bolts.
Another important, if not the main point is gasket replacement technology . It is imperative that you thoroughly wash and clean the surfaces of the head and the lid from any remnants of old sealant, then degrease them, apply the sealant in a thin layer and be sure to let it harden exactly as long as indicated in the instructions.
When tightening bolts, it is highly recommended to use a torque wrench and follow the correct bolt tightening order.
Therefore, we draw conclusions. To prevent the valve cover gasket on the Lacetti from leaking for as long as possible, we control and pay attention to :
- Crankcase ventilation valve.
Ventilation valve.
- Valve cover seating plane.
- Gasket quality and profile.
The original gasket looks ridiculous compared to the Reinz.
- O-rings for fastening bolts.
O-rings.
- Use new bolts and sealant when replacing the gasket.
ABRO Black sealant.
- Using a torque wrench when tightening the cover bolts.
Torque wrench.
Of course, this is not a panacea, but if you follow these tips, your valve cover gasket will last much longer. Keep the under hood clean and smooth roads for everyone!
We recommend: The principle of operation of a supercharged engine. Mechanical supercharger. Part 5
On a note
Please note! The internal cavity of the gearbox of any car is necessarily connected to the atmosphere through an ordinary small-diameter tube, called a breather. Due to clogging of the ventilation channel, the air expanded as a result of heating the oil is not removed and begins to create additional pressure on the oil, leading to its leakage through the seals, and in more advanced cases, to squeezing out the sealing elements from their seats.
Cars with automatic transmissions usually have an additional external oil cooling circuit with an aluminum radiator. Due to prolonged exposure to salt, the radiator fittings begin to rot at the point of their connection with the oil supply pipes. The malfunction can be easily eliminated either by replacing the part or by welding new fittings using argon arc welding.
If oil is leaking from a brand new gearbox, the cause is likely due to a damaged crankcase or rear cover of the unit. Cracks can form as a result of non-compliance with the technology for obtaining castings of the corresponding parts of the assembly unit. If such a manufacturing defect occurs, you should immediately contact the dealership.
A crack in the “box” housing can also form due to irreversible changes in the gear shift mechanism itself. After the teeth of one of the rings are chipped, the rear cover or gearbox housing is often damaged. In this case, almost all the oil often leaks out of the internal cavity.
If
, probably the reason lies in a damaged crankcase or rear cover of the unit. Cracks can form as a result of non-compliance with the technology for obtaining castings of the corresponding parts of the assembly unit. If such a manufacturing defect occurs, you should immediately contact the dealership.
Is there any way to prevent the problem from reoccurring?
Having discovered that oil is leaking from the junction of the gearbox housings, it should be dismantled and partially disassembled. The joint surfaces of the crankcase must be thoroughly cleaned of the previous sealing layer and degreased. Before assembly, apply sealant to the threaded connections and mating elements of the housing.
Reducing the diameter of the shafts at the point of their direct contact with the oil seal leads to the appearance of oil drips. Fixing the malfunction is quite easy: pressing in the new seal must not be done all the way, in order to ensure friction of the working edges of the oil seal along the unworn section of the shaft. When pressing in this way, care should be taken to ensure that the oil seal does not warp (for this purpose, spacers with a thickness of about 1 mm can be used).
The consequences of an oil leak can be increased wear and clogging of working units, overheating and engine jamming. If the car continues to be driven, the engine will soon require major repairs or replacement.
To avoid malfunctions, it is necessary to regularly undergo technical inspection, install original parts and gaskets, and fill in high-quality oil with a suitable viscosity level.
Stop-leak additives, which are poured into the engine along with lubricant, will help to temporarily eliminate the malfunction. The most popular products are from Xado, Step Up, Hi-Gear and Liqui Moly.
An oil leak that goes undetected in time can lead to serious damage to the power unit. To eliminate the problem and prevent further leaks, it is important to know the causes of their occurrence. So, the malfunction may be caused by:
- Insufficient ventilation of the unit crankcase. The problem is typical for heavily worn engines and gearboxes. The ventilation ducts of such units are very dirty - this creates increased pressure in the crankcase and leads to the displacement of lubricant through oil seals, cuffs or gaskets; oil can drip quite copiously.
- Excessive amount of lubricant poured into the unit. An excessive amount of oil contributes to an increase in oil pressure in the system. In this case, the seals and gaskets cannot withstand the increased operating pressure and “break through” (begin to leak).
- Incorrect choice of lubricant. Long service life of oil seals and gaskets is ensured by the type of lubricant recommended by the vehicle manufacturer. The use of another, even higher quality oil leads to the destruction of the sealing elements.
- Long-term (more than a month) vehicle downtime. Gaskets and seals can fail if the engine does not warm up for more than four weeks - all the oil drains into the crankcase, and the seals that remain without lubrication dry out and collapse.
In addition, lubricant leakage occurs due to defects:
- oil pan;
- intake manifold;
- oil filter;
- distributor;
- oil pressure sensor.
Let's take a closer look at those components and assemblies of the car, the malfunction of which can cause an oil leak.
Engine
Lubricant leaks are a serious challenge for anyone, especially a novice driver. Note that it is quite difficult to independently eliminate the causes of blue smoke from the muffler. It is no less difficult to eliminate oil leakage due to severe wear of the shaft or piston-cylinder group of the engine - with such problems it is better to immediately contact a service station, where experienced craftsmen will quickly and efficiently repair the engine. Today we will only talk about those defects that you can eliminate with your own hands.
Oil is leaking from the engine - causes of leakage, ways to fix the problem
Most automotive components and assemblies operate stably, among other things, thanks to lubricating fluids. This is of great importance for the “heart” of the car.
The tightness of the internal combustion engine is ensured by special seals (cuffs, gaskets, seals, etc.).
Due to the natural or premature wear of these elements (this is important, for example, if the quality is initially low), there is a high probability of depressurization.
It is important to fix such a malfunction immediately, but first you need to find the source of the leak. Often replacing a leaky sealing part solves the problem, but this does not always help. If timely measures are not taken, the engine will quickly wear out and will require expensive repairs or replacement. Identifying the cause of the leak will allow you to replace faulty parts, select the correct automotive chemicals and clean the ventilation.
Find out the cost of car engine diagnostics online in 3 minutes
Don't waste your time - use the Uremont search and get offers from nearby services with specific prices!
Oil leaks caused by problems with the gearbox
Lubricant leakage occurs not only from under engine parts, but also from the gearbox. In cars equipped with manual transmissions, transmission fluid rarely leaks out. In such gearboxes, the lubricant level is lower than the input shaft bearing.
It is much more common for transmission fluid to leak from automatic transmissions. In such units, the lubricant is supplied to the rubbing parts by force. An oil pump is used for this. As a result, the internal pressure in the lubrication system of the automatic transmission increases.
The main culprit in the problem of oil leakage from the automatic transmission is the torque converter. In many situations, it goes out of service at the same time as the pump. Forced replacement of the listed parts entails significant financial costs. Moreover, repairs sometimes turn out to be ineffective. Then it is easier to purchase a new automatic transmission than to repair the old one.
Determining the leak area
Oil leaks are fairly easy to detect. Puddles of grease under the car will indicate a problem better than any diagnosis. The size of the puddles will help determine the extent of the problem. Whether to resort to the services of a car service or not is up to you, but it is imperative to park the car on the overpass. Otherwise, you will not be able to accurately detect the leak area.
For prevention, look under your own car more often. A puddle of oil shouldn't be an unpleasant surprise in the middle of a trip.
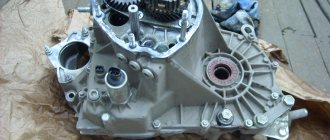
The transmission is not designed for manual repair. Its malfunctions are usually eliminated radically: by replacing it with another unit. This needs to be done in a garage, and not in the middle of the road.
An oil leak from the gearbox must be eliminated immediately after it is discovered. Delaying the resolution of this issue leads to increased wear of spare parts and deterioration of the condition of the unit.
Looking for reasons
Engine
Viscosity of motor oils at a temperature of – 20 degrees
Oil leakage from a car engine or gearbox may begin immediately after it is replaced. The presence of smudges may indicate that the fresh fluid does not meet the requirements stated by the car manufacturer. For example, instead of the usual thick mineral water, you decided to use liquid synthetics.
If the lubricants used have the required parameters, and smudges are still visible on the engine or gearbox, then the situation may be serious. Failure of one, even the smallest component, can disrupt the tightness of the systems and cause oil starvation. This is why it is so important to fix the leak in a timely manner.
Read more: How to replace a car's engine control unit
The first step is to figure out which system the oil has leaked from.
Primary diagnosis begins with studying the consistency, smell and color of the leaked liquid. Gearbox fuels and lubricants have a dark, sometimes reddish tint and a very pungent odor. The liquid is thick and does not absorb contaminants. Those. a drop of transmission oil will be covered with a layer of dust, but will not absorb it.
As for motor lubricant, it will behave differently towards contaminants: it completely absorbs them. Fuel and lubricants for internal combustion engines have a more liquid base, a reddish-amber tint and a faint odor.
If visual inspection of smudges is difficult due to the design features of the car, then the problem can be solved using an oil dipstick. Measure the fluid level in the engine compartment; deviation of this indicator from the norm will indicate a problem.
Optimal oil level
Some modern cars have a dipstick to check the oil level in the box. But it will only identify the problem if the lubricant is rapidly leaking out of the gearbox. In these cases, dark stains of technical fluid can be recognized under the front of the car. Minor leaks at the lubricant level will not be immediately noticeable; the dipstick will not be able to “notice” them.
If an inspection of the car and a study of the condition of the leaking fluid gave reason to believe that the problem lies in the engine compartment, then it is necessary to identify the weakest points of the system through which the oil could escape.
Reasons for failure:
- Overflow of liquid. No matter how trivial it may sound, oil can leak due to its overflow into the oil compartment. If you filled in lubricant “by eye” and did not check its level, a leak may form around the entire perimeter of the engine. The excess amount of material circulating under high pressure in the internal combustion engine will simply be squeezed out of the working space and flow down the outer sides of the internal combustion engine. The problem can be easily fixed: unscrew the oil plug at the bottom of the engine and allow excess fluid to drain out of the crankcase.
- Wear, incorrect installation or destruction of sealing elements. If the car has been sitting for a long time, the seals and gaskets may have failed due to insufficient moisture. After starting the car, they cannot function normally (their ability to be elastic is lost), and therefore lubricant leaks out. The solution in this case is to replace the problematic parts with new ones; You can read on the Internet how to correctly install sealing parts to eliminate oil leaks in the engine.
- Insufficient crankcase ventilation. Excessive accumulation of exhaust gases in the car crankcase can create additional pressure and squeeze consumables out. This situation occurs when the ventilation system ducts are clogged. An oil deflector valve will help diagnose this problem. Check its condition. Did you see a bluish or dark brown coating? This means that the reason for the leaks lies precisely here. If the presence of deposits still raises doubts about insufficient crankcase ventilation, cover the open oil filler neck with a small sheet of white cardboard and start the car engine (it is recommended to keep it at 900-1100 rpm). A tight fit of the cardboard to the oil fill hole indicates normal operation of the ventilation system. Otherwise, it is necessary to clean or replace the engine pipes.
- Valve cover deformation. In rare cases, when car manufacturers use low-quality metal, a violation of the valve cover geometry may occur, which will be accompanied by large oil losses. Unfortunately, installing a new gasket will not solve the problem. The only possible option is to replace this very cover.
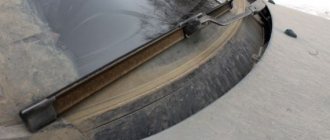
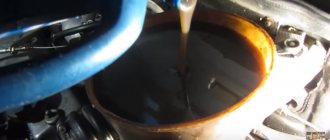
What does new and used gear oil look like?
If the oil between the engine and gearbox has an unpleasant, pungent odor, it means it is leaking from the vehicle’s transmission system. Moreover, a similar problem occurs most often on automatic transmissions: in a manual transmission, the oil level is much lower than the input shaft bearing.
The most likely cause of lubricant leaks from an automatic transmission is most often a malfunction of the torque converter and oil pump. And it is not possible to repair these units on your own: dismantling the elements is extremely labor-intensive. To restore the car to its former performance, a complete replacement of the automatic transmission or its expensive repair will be required.
The most “harmless” gearbox ailment for a car enthusiast can be banal wear of the seals. By changing them, you can continue to operate the car as usual. Incorrect installation of the dipstick (if equipped) can also cause loss of lubricant.
If you notice that one of the two systems of the car is leaking, but you could not recognize where exactly the oil is coming from, then specialists from service centers will help you deal with problems in the engine or gearbox. The main thing is not to put off the decision until later. Oil starvation can lead to complete loss of vehicle performance.
Measures to prevent oil leaks
It is impossible to completely protect your car from problems, but you can significantly reduce the likelihood of their occurrence. To do this, just follow a few simple rules:
Changing the engine oil
- Constantly check the lubricant level with a special dipstick. Make it a habit to monitor the amount of engine oil every 5-6 days. This measure will allow you to recognize the presence of a problem before it becomes critical. Yes, all modern cars have a special sensor that informs the driver in case of oil leakage from the engine. But it is activated only when more than 300-500 ml is consumed.
- Maintain your vehicle regularly. This way you can promptly notice a damaged system element and replace it with a new one. In addition, regularly changing the oil fluid will prevent the formation of soot and sludge deposits, and increase the degree of protection of motor elements from excessive wear.
- Buy only products recommended by your vehicle manufacturer. Your vehicle's owner's manual contains information about the recommended engine oil viscosity. Compliance with these requirements will allow you to extend the life of the propulsion system. When choosing an oil liquid, pay attention to the design of the product and the quality of its container so as not to run into a fake. As for choosing a brand, you should rely on intuition. Many companies have a good reputation in the world market, but it is impossible to say unequivocally which oil is better - after all, each vehicle has its own requirements for fuels and lubricants.
- Do not load the engine if it has not been properly warmed up. Did you start the car in the cold and immediately decide to drive it? Then stock up on plenty of motor oil for regular top-ups. Thickened liquid circulates unevenly in a cold system, so pressing the gas pedal can cause it to be squeezed out of the system; To prevent oil from squeezing out, it is recommended to warm up the engine for 10-15 minutes.
- Buy only original spare parts. If you find the reason why oil is leaking from the engine or gearbox, immediately begin repairing the car. But when choosing new parts for the system, try to give preference to original spare parts. Their quality (as well as price) is much higher than that of their “Chinese” counterparts, which means they can last your engine longer. By the way, non-original spare parts may differ in size from the original ones, which in turn will affect the tightness of the structure.
- If it is not possible to carry out maintenance of the vehicle yourself, entrust the work to professionals. And not to “garage technicians,” but to service centers specializing in vehicle maintenance.
About the selection of oil seals for gearboxes
When purchasing, you need to consider what kind of oil you will pour into the box in the future.
There are oil seals with different elasticity - for mineral and synthetic products. If you pour inappropriate oil into the box, such an element will begin to crack. This usually happens with “synthetics”. It has good flushing properties. Note that for automatic transmissions there is a separate range of oils with a certain viscosity. Their properties differ significantly from manual transmission fluids.
There are oil seals with different elasticity - for mineral and synthetic products. If you pour inappropriate oil into the box, such an element will begin to crack. This usually happens with “synthetics”. It has good flushing properties. Note that for automatic transmissions there is a separate range of oils with a certain viscosity. Their properties differ significantly from manual transmission fluids.
Transmission fluid foams in the gearbox
During normal operation of the engine and gearbox, there are cases when the lubricant foams. Such a defect does not create direct and tangible problems. But foaming transmission fluid creates feelings of discomfort and anxiety in car owners.
Transmission oil foams for 2 main reasons:
- incorrect transmission fluid level;
- technological inconsistencies in the production characteristics of the oil.
A low or high level of lubricant in the gearbox is the most common reason that the substance foams. If the marks on the dipstick reveal an overflow of liquid, then you must immediately remove the excess amount. German cars of the brands Audi, BMW, Mercedes, Volkswagen are the most vulnerable to problems with excess oil in automatic transmissions.
It is strictly forbidden to add new oil to the automatic transmission, which is not the same as the old one according to the manufacturer. When lubricants from different manufacturers are mixed, the formation of foaming oil is guaranteed. When switching to using a fluid from another company, you need to thoroughly rinse the automatic transmission to remove any remnants of the old substance. And then completely change the oil in the automatic transmission.
Conclusion
The main causes and methods for eliminating leaks between the gearbox and the engine have been identified. Also, it is worth noting that due to the high level of lubricating fluid in the engine and pressure, the oil can put pressure on the sealing elements, which will not withstand and depressurization will occur. The consequences of untimely repairs can also be quite severe and lead to a major overhaul of the power unit.
The engine and gearbox of any car uses oil. And it doesn’t matter whether it’s a diesel or gasoline car, automatic or manual. Often, with prolonged use, the oil loses its level. It can not only get into the combustion chamber, but also leak at the sealing points. And engine oil does not always leak. The transmission is also not immune to this. What to do if oil leaks between the engine and gearbox? In today's article we will look at this issue in detail.
Let's sum it up
As you can see, drops of transmission oil under the car or obvious oiling of any areas with transmission fluid is a reason for a detailed inspection of the car. If there is no obvious suspicion that the gearbox housing has recently been damaged, then diagnostics are necessary.
Read more: How to fix engine problems on a Renault Logan photo and video
First of all, you need to check the oil level in the gearbox to ensure it is not overfilled. At the same time, the performance and condition of the gearbox breather should be assessed in order to prevent transmission oil from being squeezed out due to an increase in pressure in the internal cavities of the box.
Finally, we note that when purchasing a new car or after repairing a gearbox with the replacement of individual elements, one should not exclude the possibility that a defective gearbox housing (with cracks) may be installed. Also, the oil seals, cuffs and seals themselves have defects and are often of poor quality.
Gears are difficult to engage or speeds on a manual transmission do not engage: the main causes of the malfunction and possible problems.
How to choose oil for a manual transmission. Changing the oil in a manual transmission, frequency and features of changing transmission oils in a manual transmission.
Simple factors
Circumstances of negligence and incompetence - both of auto mechanics and the owner of the car - can be easily eliminated. Among them:
- loose nut on the drain. He made it through - and off he went;
- The reverse sensor is loosely screwed in. The recommendations are the same;
- The dipstick for measuring the oil level is not inserted tightly (or crookedly, which is worse). Hammered it in tighter, adjusted it - job done;
- oil overflow. Generosity is not always good, and a new driver must learn this. It says “maximum”, which means stop. Excess oil will still have to be drained, and this, again, is a loss of money.
Most often this happens due to gasket wear. And this case, again, is simple and can be corrected without difficulty. You buy a new one, replace it - you don’t even need to go to a service station. It’s a little worse if chips or deep but small scratches are found. In this case, epoxy is used, with the help of which the (relatively) evenness of the surface is restored.
{banner_content}
{banner_content}
Do oils and additives eliminate noise in the gearbox?
Practice proves that noise in the operation of the gearbox appears as the car moves, both at speed and in neutral gear. In this case, the nature of the noise will be fundamentally different. But in any case, the presence of noise indicates a malfunction of the gearbox, which can lead to lubricant leakage.
A hum in the gearbox while driving in neutral is associated with damage to the drive shaft bearing or a low level of transmission fluid. The failure of the synchronizer clutch or blocking component is indicated by noise that appears while driving in a certain gear. This often happens at speed 3 and above.
Added additives, which contain special substances to restore the elasticity of seals, help prevent oil leaks for a short time and eliminate noise. This ensures the restoration of tight contacts between the oil seals and shafts. If the oil leaks insignificantly, it may stop for a while. However, the wear of parts is not preserved, and serious damage is not repaired.
Additives can have a negative effect on vehicle components. High-quality oils initially contain additives in balanced proportions. Adding new components violates the established relationships. The transmission fluid will lose some of its functional properties. But that's not so bad.
Adding an additive leads to clogging of the engine or gearbox lubrication systems. Therefore, it is better to abandon dubious experiments and use exclusively transmission fluid that is recommended by the car manufacturer. And you will have to refrain from using additives in order to avoid serious technical consequences.
Experienced technicians and car owners do not recommend using oil thickeners. These substances can stop flowing. But at the same time, lubrication of mechanical components deteriorates and wear on engine or gearbox parts increases. In extreme cases, the use of a softening sealant is allowed.
Fixing an oil leak should not be delayed. A drop in the lubricant level in the engine or gearbox leads to serious damage to these units. The released lubricant contaminates other functionally important parts and components.
loading…
Consequences of untimely repairs
Why oil leaves the engine and where it is determined. Now it’s worth considering the consequences of untimely repairs. As you know, an engine without oil cannot move, since oil not only has lubricating properties, but also has cooling properties. Therefore, the consequences of a low oil level in the engine will be fatal, especially during long-term operation of the power unit. Let's consider the main consequences:
- Increased wear on the crankshaft and piston group. Thus, an insufficient oil level can lead to significantly higher production.
- Increased wear of parts will lead to the appearance of a large amount of metal shavings in the remaining lubricant, which will further increase the degree of wear of parts. Thus, the oil seals and sealing elements are the first to wear out.
- Also, a low oil level, both in the box and in the engine, leads to the engine overheating greatly, and accordingly there is a possibility that the engine will overheat and the cylinder head will become deformed or deflected.
How to change the rear oil seal?
This procedure is quite complicated, since the element is located behind the clutch system. If it is a rear-wheel drive car, the driveshaft is removed. Next, as on front-wheel drive vehicles, there is a gearbox, a clutch assembly with a basket and discs, as well as an engine flywheel. The rear oil seal itself is installed in the housing and secured with eight bolts.
After unscrewing them, take out the housing and press in a new element. If you have difficulty installing it, you can use a rubber hammer or a regular steel hammer using a soft spacer. The latter can be made from a piece of an old car camera. Next, all the elements are assembled in reverse order.
Why does car oil leak?
- Problems with seals. High pressure in the transmission constantly affects the seals, changing their condition. Wear of the oil seal leads to the appearance of a gap through which oil fluid leaks out of the automatic transmission/manual transmission. It is possible to get rid of gearbox oil leaks by replacing the oil seal. It is recommended to find out the cause of the increased compression and eliminate it.
- The input transmission shaft is subject to wear and backlash is formed. The gearbox needs to be dismantled and we need to think about how to fix the leak. Change the shaft, install a new lining. It all depends on the size of the backlash.
- Check all connection areas along the direction of the oil movement. Leaks can be detected by stains of lubricant. Replace the sealing element.
- Check that the cover of the hole through which the oil drains into the automatic transmission is tightly screwed on. Correct the special probe.
- A clogged breather can lead to increased compression in the unit. Having discovered this fact, dismantle the gearbox and clean the breather.
The breather must be clean
This list of probable causes of oil leakage is incomplete. Only the most common reasons are listed here.
Summary
Thus, if there is a leak between the gearbox and the engine, you should not delay repairs. Whether it's a manual transmission or an automatic transmission, it doesn't matter. Driving with low oil level equally kills these boxes, not to mention the engine itself. Well, monitoring the level every day by crawling under the bottom and taking out the dipstick (if it’s a box) is simply madness.
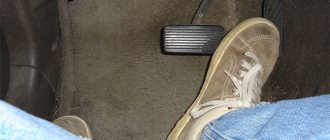
Watch for smudges from your car when it is parked. The presence of oily drops under the bottom is the first sign that you have oil leaking between the engine and gearbox.
Watch for smudges from your car when it is parked. The presence of oily drops under the bottom is the first sign that you have oil leaking between the engine and gearbox.
Serious faults
There are a number of reasons for oil leaks that require dismantling the box. The first is a breakdown of gaskets and other sealing elements. It could also be the seal. But if in the case of an engine it is the crankshaft, then the sealing element of the input shaft is leaking in the transmission. Why is oil still flowing between the engine and gearbox? This problem occurs when the geometry of the pallet is violated. This often happens when hitting a large hole or other obstacle.
As a result, the pallet hits the box and becomes deformed. If it is an automatic transmission, the reason is a broken donut (torque converter) or a faulty oil pump. The box itself goes into emergency mode. The car only runs in 3rd gear.
About additives
Nowadays, many additives have appeared in the automotive world. And some car owners, when deciding how to fix an oil leak, run to the stores to buy a “miracle” additive. They pour it into the engine or gearbox (and most often both) and wait for the effect. But as practice shows, this does not give any results.
The additive is not capable of eliminating mechanical damage to the pan, “sealing” a torn gasket and restoring a squeezed out oil seal. The problem does not leave the car owner. The only thing that can reduce the effect of leakage is oil thickeners. Thus, you deliberately change its characteristics.
Similar articles:
- Oil leak from gearbox: causes and repairs
- Engine oil leaks - causes and solutions to the problem
- How to eliminate antifreeze leaks: causes and possible solutions
- The engine does not develop power - causes and possible solutions to the problem
How to fix the problem?
We figured out why fluid leaves the engine, now let's talk about how to solve this problem. Below we will discuss solutions to the most common faults. In all these cases, you will need a set of wrenches and a quality sealant.
If there is a leak from under the valve cover
If the oil leaks for this reason, then the problem can be solved on your own. This problem is one of the most common. To solve it, you need to:
- Open the hood and remove the valve cover.
- Wash it with acetone or kerosene, thoroughly wash away all traces of drips so that you can determine the result of the work.
- Take the sealant and coat the lid gasket well so that it fits tightly.
- After this, mount the cover in place and take a test drive. Check the result.
Leakage of consumables from under the valve cover
If it is leaking from under the oil filter
- Remove the filter element if oil leaks due to it.
- Visually assess its condition. Perhaps there are visible signs of mechanical damage on it or it is broken, resulting in a leak of consumables.
- If the filter really looks bad, then you should replace it with a new one.
- If everything is in order with the filter, then dismantle it and lubricate the rubber part of the element with a drop of MM, then install it in place. Tighten it tighter - usually after this the problem disappears.
Fluid leaking from the oil filter
If there is a leak from under the distributor
- Open the hood and remove the distributor cover. Mark or remember the location of the slider so that you can set it correctly later.
- Using a wrench, unscrew the mounting screws and remove the distributor itself.
- Take the sealant and coat the installation location of the device.
- Install the distributor into the installation location by aligning the slider.
If there is a problem with the crankcase
Leaking car pan
Sometimes, if oil has leaked from the engine due to a leak from the crankcase, installing a protection will help solve this problem. To do this you will need:
- Remove the pallet by unscrewing the screws securing it with a wrench.
- If mechanical damage is visible on the pallet, then it must be eliminated.
- Take a new pan gasket and coat it with sealant just in case.
- Reinstall the tray by tightening all screws.