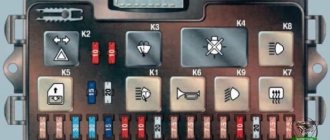
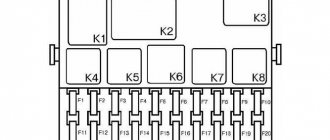
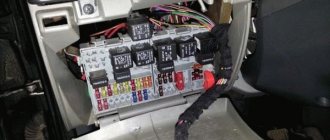
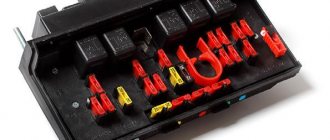
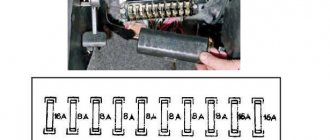
The fuse for the VAZ 2114 fog lights protects the vehicle's electrical wiring from fire when the permissible load is exceeded or a short circuit occurs. Systematic burnout of the fusible element indicates the presence of faults in the circuit. To determine where the fuse for the fog lights is located on a VAZ 2114, you need to open the cover of the mounting block. The manufacturer applied designations on its back side.
Depending on the year of manufacture of the vehicle, the location of the fuses in the mounting block differs.
How does the rear fog light relay work on the VAZ 2114?
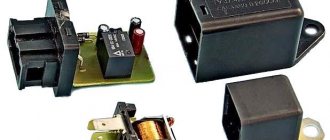
The VAZ 2114 rear fog lamp relay is an adapter with 6 contacts that simultaneously connects several electrical circuits. It is located on the left side of the steering column, at the bottom behind the block. By removing the cover you can see 3 relays. The biggest one relates to the power supply circuit for the rear fog lights. Power is supplied directly to the fog lights when there is voltage on contacts 1 and 2 (they are marked). The switch is turned on. When there is voltage on the 6th, the power supply comes from the generator (that is, through the rectifier).
Car modifications 2114
VAZ-21140 . Modification with an 8-valve injection engine VAZ-2111, 1.5 liters and 77 horsepower. Serial production from 2003 to 2007
VAZ-21144 . Modification with an 8-valve VAZ-21114 engine, 1.6 liters and 81.6 horsepower. Years of serial production: 2007-2013.
VAZ-211440 . Another modification released in 2007, it was equipped with a VAZ-11183 engine with a volume of 1.6 liters and a power of 82 horsepower. The car was discontinued in 2013.
VAZ-211440-24 . Released in 2009, a modification with an injection 16-valve VAZ-21124 engine with a volume of 1.6 liters and a power of 89.1 horsepower. Discontinued in 2013.
VAZ-211440-26 . Modification with a 16-valve injection engine VAZ-21126, which complies with the Euro-3 environmental standard, with a volume of 1.6 liters and a power of 98 hp. The car was produced from 2010 to 2013.
Relay location
So, the rear fog lamp relay is located on the driver’s side, under the steering wheel (just to the right of the fuse box, sometimes they are all covered with a plug or cover). There are only 3 pieces there. Sometimes they are covered with plugs. It should be noted that it is connected to a non-latching power button. This means that if you press it, it returns to its original state. But this is normal, since in it the contacts are paired through an electromagnet.
The PTF relay in old variations of VAZ cars was located under the hood, towards the fuse block. Now, more and more often, it is placed in the interior, under the steering wheel, in the area of the electronic unit. There is also a relay responsible for supplying power to the dashboard and a signaling device (if provided for by the design).
The rear fog light relay simultaneously combines 3 electrical circuits plus one spare line for 12 volts of static voltage. By the way, because of this, if it partially fails (meaning broken contacts due to vibration), you can fix the problem in a matter of minutes - simply transfer contacts from 1-2 to 6. The only caveat is that this procedure must be performed with the engine turned off and a disconnected battery terminal - some contacts are always energized, but without load. It can also cause a short circuit!
It is important to understand that initially the fog lamp relay does not connect this circuit, since the manufacturer by default installs conventional headlights without additional lighting. The circuit is closed after the fog lights are installed.
Replacement is easy
Having figured out where the block that controls the operation of the PTF power circuit is located, replacing it is a trifle. It is much more difficult to correctly diagnose a breakdown. Therefore, if for some reason there is no power to the rear fog lights, you should start by checking the fuse and cleaning the contacts.
For the latter, you can use regular fine-grit sandpaper. This must be done extremely carefully, because the relay block contains electromagnets, with the help of which the contacts are switched (when the light button is pressed).
If there is no power supply to the VAZ rear lights, and the fog lights do not work together with it, then this does not indicate a breakdown of the relay, but a damage to the electrical circuit or a short circuit in the system (most often, the absence of a negative contact from ground).
To accurately determine the cause, it is advisable to use a multimeter. If only the rear lights do not light up, this indicates:
- damaged fuse;
- absence of 1, 2, 6 contacts (voltage on them);
- switch closure (momentary button);
- problem with electrical wiring (break).
As practice shows, the relay on the PTF VAZ 2114 fails extremely rarely. Most often, only a break in the contacting area or mass contact occurs due to body vibrations. A faulty relay should be the last thing to blame.
Historical reference
The four-door VAZ 2110 sedan was produced by the Volzhsky Automobile Plant from 1995 to 2007. And unlike the usual Lada cars, the model was positioned as a higher-class car.
VAZ 2110 on the factory conveyor
In particular, the car was equipped with:
- electronic engine control system (ECM);
- diagnostic unit (on-board computer);
- galvanized metal was actively used in body parts;
- the body was painted using a new, more progressive technology.
Relay for rear fog lights VAZ 2114
The rear fog lamp relay (RTF) for 2110 (2115) 23.3777 (2114-3747) has been installed on VAZ-21213/214 since 2001. The relay is normally open. The block is six-pin, the contact numbers are marked both on the relay body and on the connection connector.
There should be a “+” on pin 6 or 2. When “-” appears (even briefly) on pin 5, the relay changes the state of contacts 1 and 4. Those. if the contacts were open, it closes, if they are closed, it opens. Pin 3 appears to be needed for the relay circuit to function. It should be marked with “-“.
1. The polarity of the connection to pins 6(2) and 5 is important. When the polarity is changed, the relay does not work. 2. To control the relay, “-” must be disconnected and connected; when disconnected, “+” the relay returns to the open state. When you subsequently connect “+”, with “-” previously applied to pin 5, the relay does not operate.
PTF relay connection diagram
1 - thick red wire (constant “+”, present even when the ignition is off); 2 - not activated; 3 — black wire (minus constant); 4 - two black-orange wires (actually “+” to the PTF); 5 - white-orange (or something very similar) (comes from the power button, the button shorts this white-orange wire to negative); 6 - green (“+” from the low beam switch off button).
Content
Principle of operation
The relay is designed to turn on and off the rear fog lights of the vehicle in accordance with the algorithm according to UNECE Regulation 048:
- The rear fog lights are turned on by pressing the locking button once without locking, connected between contacts 3 (“Common”) and 5 (“On/Off”) when there is supply voltage on contacts 2 (“Fog lights”) and/or 6 (“ Low beam/high beam") of connector X1 (i.e. if the low or high beam headlights and/or fog lights are on).
- The rear fog lights are turned off by pressing the same button once or when the supply voltage is removed from contacts 2 and 6, and if the voltage is reapplied to contacts 2 and/or 6, the rear fog lights do not turn on.
Operating principle and location of the relay
By its design, the PTF VAZ 2114 relay is an adapter-switch with 6-pin outputs, used to connect and turn on/off several electrical circuits at once. The presence of power at its contacts, designated numbers 1 and 2, indicates that the fog lights receive current directly from the battery. If the presence of power appears on pin 6, this will mean that the headlights are powered from the generator circuit through a rectifier.
In total, as mentioned above, the fog light relay has 6 outputs, which play the following roles:
- 1 - working positive contact (positive input);
- 2 - permissive positive contact;
- 3 — common negative contact (ground);
- 4 — working positive contact (positive output to the headlights);
- 5 — control negative contact (signal on/off);
- 6 - permissive positive contact.
You should look for the VAZ 2114 fog light relay in the car interior, on the driver’s side under the steering wheel, just to the right of the general fuse block. In total, 3 different relays are located in the indicated location, sometimes covered by a common cover. The fog light relay we need is the largest one. It is this that will need to be replaced in the event of a malfunction.
How to install a PTF: necessary materials and tools
Installation of fog lights, regardless of the chosen installation method, requires the presence of certain parts and tools, without which it is impossible.
What are the button and relay for?
A special button and relay are a must - “fog lights” are very powerful equipment for car electrical wiring. The absence of such parts can provoke high current loads on the terminals and the ignition switch, which will cause burnout of contacts, damage and overheating of the insulation protection and short circuit with failure of the electrical network.
In order to install fog lights on a VAZ, you need to assemble certain parts in advance or purchase a ready-made kit. The cost of such a set rarely exceeds one thousand rubles.
The PTF kit includes:
- wires with blocks and terminals for a specific VAZ model. There are three of them as standard: one connects the headlights, the second goes to the relay from the switch, and the third goes from the relay to the fuse box;
Set of wires with terminals and blocks for installing PTF
Fog lamp relay for VAZ 2113, 2114, 2115
Button to turn on PTF on Lada
Plastic ties and clips that secure wires
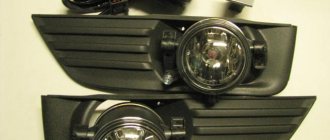
PTF for VAZ 2115
Which PTFs should you prefer? The headlights themselves are chosen by the driver to his taste, but the main thing when choosing is not to make a mistake with the power, so as not to overload the generator and the car’s electrical wiring. It is better not to purchase headlights with xenon: the generator has a certain power reserve, but is not designed for too high loads. Regular light bulbs will be sufficient.
Signs of problems with the PTF relay
The main reason why it may be necessary to replace the fog lamp relay is the malfunction of the latter. But don’t rush to conclusions and rush to buy a new relay. By itself, it is a fairly reliable design, and in combination with a small number of consumers and low current in the circuit, this device rarely fails.
Therefore, before replacing the PTF relay, you should check other elements in the fog lamp circuit, namely:
- light bulbs;
- wiring;
- power button;
- circuit breakers.
The latter should be given special attention, since two fuses are responsible for protecting the fog lights, designated in the general block as F8 and F9. In some cases, they may be serviceable, but due to oxidation of the contacts they will not pass electric current. In this situation, they should be carefully removed and their contact surfaces, as well as the contact surfaces of the sockets in the common block, should be cleaned. Very often, after this procedure, the headlights begin to work.
A sure sign that the fog light relay is working properly, and the cause of the problem should be sought in the wiring or fuses, is a situation when only one of the headlights does not light up. Checking and, especially, replacing the relay in this case is pointless.
If, after checking, all the links in the fog light chain are in good condition, but the headlights themselves still refuse to turn on, you should proceed to checking and, probably, replacing their relays.
PTF service
At the same time, many owners of the first ten cars do not know where the fog lamp fuse is located. And if it malfunctions, they don’t know how to replace it.
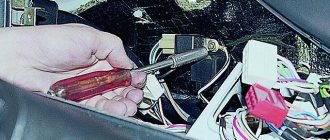
To get to the PTF fuse, you need to remove the mounting block from the instrument panel niche with your own hands
On models after 2000. fuses are grouped in a single block.
Their technical parameters are as follows:
- The rear PTF fuse is marked F20 and is designed for a current of 7.5A;
- Fuse F4 at 10A is responsible for protecting the front right fog lamp;
- Fuse F 14 at 10A is responsible for protecting the front left fog lamp.
Side of VAZ fuses of the tenth family
The algorithm for the operation of fog lights has also been changed.
- The headlights are turned on by pressing a button that supplies power to a relay type 113.3747 installed in the mounting block;
- Turning on the PTF on VAZ 2110 cars is only possible if the headlight switch is set to the exterior lighting position.
In other words, PTFs are activated only with side lights or low beam headlights. At the same time, the activation is indicated to the driver using a light indicator on the button and on the instrument panel.
There are no particular problems with replacing lamps in the headlights, since they were installed in an open position for service. But with the rear lamps we had to struggle a little, since the entire structure of the headlight unit was located in the trunk lid.
To replace a burnt-out lamp, you must remove the entire unit
Repair and replacement of fog light relays
First, you should make sure that the VAZ 2114 rear fog lamp relay is faulty.
This can be done using a multimeter - just turn it on to measure direct current with a limit of 20 volts and check the presence of voltage at the outputs:
- 1 and 3;
- 2 and 3;
- 6 and 3 (with the engine running).
If there is no voltage at these contacts, we can clearly conclude that the relay has failed.
The check can be performed in another, simpler way - just listen carefully and turn on the rear fog lights. If the relay is working properly, it will definitely make a characteristic loud click.
Repairing a failed relay should begin with a careful inspection of its contacts, because most often they are the cause of the malfunction. Thus, outlets covered with a film of oxides should be carefully cleaned using sandpaper or a cloth moistened with kerosene. You should also check the wires that go to the relay legs - sometimes they break right at the terminal due to vibration - they should be soldered in place.
If the main supply wires of the relay break along the way, you can solve the problem by reconnecting the wiring from pins 1 and 2 to pin 6. This procedure must be performed with the engine turned off and with the negative terminal removed from the battery - otherwise a short circuit can occur.
If after all the measures listed above it was still not possible to fix the fog lamp relay, then all that remains is to replace it with a new one (of a similar model). To do this, simply disconnect the wires from the outputs of the old relay and connect them to the legs of the new relay in exactly the same sequence.
Finishing the conversation about the fog light relay, let's give one more piece of advice. Sometimes the reason why this device malfunctions is due to sticking of its internal contacts. In order to return them to working condition, you just need to gently knock on the relay body (this method does not always help, but quite often).
Of course, this method should be used in extreme cases (for example, while traveling), and upon returning home the relay must still be replaced, since in the near future it may fail again.
Operating principle, design and characteristics of fuses
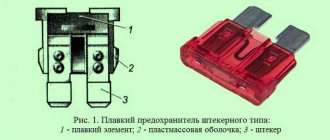
The principle of operation of fuse links is deciphered by their name. Fuses are made of low-fusible conductors that can withstand a certain amperage. Depending on the purpose and voltage of the circuit being served, fuses are divided according to the current strength they can withstand. Typically, VAZ 2114 uses inserts from 5 to 30 Amperes.
Purpose of fuses
The main purpose of the fuse is to protect devices and equipment from overloads and short circuits. If the maximum limit is exceeded (short circuit inside the wiring circuit), the part is destroyed, which leads to an open line. Consequently, the part remains undamaged.
Common faults
Among the frequent calls to the service station are:
- wiring burnout;
- water entering the contacts and, as a result, closing them;
- damage to wires;
- malfunctions of electronic units.
With rare exceptions, the fuse box itself breaks down.
Checking and replacing fuses and block
To check the fuse for serviceability, remove it from the socket and visually inspect it. If the part is intact, there will be no soot or traces of oxidation on it. Direct replacement is carried out using the pliers included in the kit. It is strictly forbidden to pull out the inserts by loosening them - you can break the legs.
Repairing the block is getting more complicated. Here you will need to perform the following sequence of actions:
- open the mounting panel cover;
- find and unscrew the 4 mounting screws;
- Carefully lift the module and disconnect the terminal blocks.
It is important to exercise extreme caution when performing the procedure - the part can be easily damaged.
Fuse box diagram and location on VAZ-2114, 2115 and 2113
Remember one important thing, before you start disassembling the stove, wiper, headlight or anything else - make sure that the fuse responsible for this circuit has not blown
