Adjusting the doors of the VAZ 2110 is required when it is necessary to correctly set the gaps of car openings. The factory setting changes over time. The imbalance leads to other disturbances: creaking appears, the sealing of the interior decreases, and incorrect operation of the lock or handles is observed. After inspecting the body, it is important to identify the part that requires adjustment.
How to remove the lock
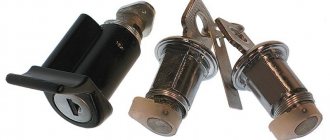
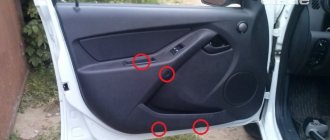
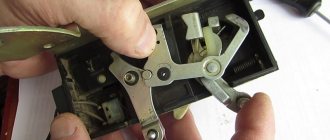
The mechanical door lock on the VAZ 2110 has a complex design. If the driver does not have repair experience, it is recommended to replace the spare part with a new one. Before replacement, the element must be removed from the car. To do this, remove the casing. The process of dismantling the door card in stages:
- Open the door, unscrew the three screws securing the bottom pocket.
- Move the lower part back slightly, slide it down, and remove it from the grooves of the casing.
- Using a thin screwdriver, pry up the cover on the closing handle and remove it.
- Unscrew the two screws located under the cover.
- Remove the handle by turning it slightly up and out of the hook with the door opening handle.
- Unscrew the locking latch.
- Use a screwdriver to unclip the plastic clips around the perimeter of the casing and remove it.
- After removing the casing, it is necessary to begin dismantling the parts of the locking mechanism.
- Disconnect the outer handle rod from the lock lever.
- Pull the cylinder rod out from the lock lever.
- Disconnect the inner handle rod by first removing it.
- Unscrew the two screws that secure the lock and remove the locking mechanism.
- Remove the internal lock. It must be removed together with the locking rod and the inner handle rod.
- Remove the lock traction blocker from the lever, first removing the plastic retainer from it.
- Using a screwdriver, pry it up and remove the locking bracket.
- Disconnect the outer handle pull cable from the lever and remove the lock completely.
After repairing or replacing the lock, the door card is installed in the reverse order. Experts recommend purchasing a set of plastic clips in advance. For VAZ 2110, the price of one mount is from 3 rubles. The latch is a consumer product, molded from durable plastic, but often breaks during installation.
For the VAZ 2110, the locking mechanisms of the left and right doors are the same, the repair of the mechanical part is carried out in the same way.
What will be needed for repairs
If the outside lock stops opening, go straight to the store. You will need to purchase:
- several new plastic tips suitable for VAZ;
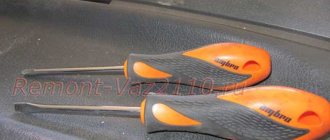
- set of screwdrivers - one flat, Phillips;
- a set of plastic rivets that secure the casing.
All parts are sold at an automotive supply store. It is better to buy spare parts with a reserve, several sets. The parts are inexpensive. They can also come in handy if the door stops opening not only from the inside, but also from the outside. Take the sheathing fasteners just in case, since the sheet may have to be removed.
Internal driver's door lock VAZ 2110, diagram, removal and adjustment
The basic VAZ door lock, in principle, is a fairly reliable system, but there may be prerequisites for its replacement. In this case, it is better to replace it with a silent door lock.
Lock mechanism design
Front door lock: 1 – external drive lever; 2 – intermediate lever; 3, 18 – lock release levers; 4 – lock drive finger; 5 – dog; 6 – ratchet; 7 – lock release rod; 8 – lock switch; 9 – bracket; 10 – outer door handle; 11 – spring of the outer handle; 12 – leash; 13 – external drive rod; 14 – lock retainer; 15 – lock release button; 16 – internal lock body; 17 – shutdown button rod; 18 – double-arm lock release lever; 19 – lever of the internal lock drive; 20 – internal drive rod; 21 – intermediate rod of the inner handle; 22 – inner handle leash; 23 – internal door handle; 24 – locking motor reducer; 25 – blocking rod; 26 – screw for fastening the gear motor
At the same time, for most drivers, updating the silent locks of the VAZ 2110 is a matter of principle, because they strive to make the lock not just quiet, but almost inaudible. But first things first.
When to change the lock
So, the need to replace the standard factory lock with a modified one arises in the following cases:
If you suspect that someone tried to steal your car. As a rule, inexperienced car thieves can only damage the lock, as evidenced by the following signs: • The front door lock began to dangle, which was not the case before; • The key turns with difficulty, naturally, the doors are not easy to open; • There is visually noticeable damage in the lock area and/or near it; • You cannot open the front door at all with your own key;
You have lost your keys. Even if you have a spare set, this fact should alert you. Maybe the keys were not lost at all, but stolen, and now car theft is a real danger. In this situation (as well as in the case of the “inexplicable” loss of house keys), for most, a replacement is an indispensable condition for sleeping peacefully. By the way, in such a situation, perhaps only the larva will be replaced, which is cheaper and less work. The cylinder is the internal door mechanism, which is actually turned with a key. It is as individual and unique as the key itself. Thus, without disassembling the entire mechanism (which is discussed below), you can carry out this small repair in order to have a completely new lock for opening the front door;
Accidentally, mechanically, you broke something in the front door lock mechanism
For example, changing the upholstery, making careless adjustments, etc. After all, the design of the lock is such that it is not limited to only the visible part, but has locking parts directly under the door trim;
You want to make the lock more reliable by increasing its protective properties, for which you carry out repairs and modifications.
Removal
Dismantling work is the beginning of your journey to replacing the door panel trim. It's nice to know that this task is quite simple. This is especially true for the front doors.
We will tell you separately about the nuances of dismantling the front and rear door trims of your VAZ 2110.
Front
Let's say right away that the likelihood of damaging the standard clips is very high. But this is not scary, since new products are cheap, and their installation is much simpler than repairing old caps.
If you are installing Euro panels, you will have to remove the lever from the window regulator.
The process is performed according to a certain algorithm:
- Using a thin screwdriver, pry the window handle trim away from the socket. Direct it in such a way that it disengages. Now remove the lining. This item is not relevant for those whose car is equipped with electric windows;
- Remove the socket now;
- Using a screwdriver, press out the latch on the plug for the inner handle of your armrest, and then remove it;
- Remove the handle mounting screws;
- Press the inner handle of the lock and turn the armrest handle up. This way you can remove the element;
- Next, unscrew the button that blocks the door lock;
- Remove the screw that secures the exterior mirror control mechanism. It must be removed from the lever;
- Remove the triangular trim. To do this, the fastening pins are removed from two holes in the door.
Rear
The rear trim is removed slightly differently. But this does not make the procedure significantly more complicated.
- Remove the three mounting screws;
- Remove the trim;
- Using a screwdriver, press out the upholstery. This will allow the pistons to pop out;
- Try to keep the screwdriver as close to the piston as possible to avoid breaking the holders;
- Don't forget to also remove the spacer sleeve from the window lift shaft.
Self-upholstery
Now we can begin to create a new look for your interior by independently reupholstering the dismantled door panels.
Before starting work, be sure to clean the cards, go over them with a vacuum cleaner, and replace the door seals if necessary. This will allow them to close better, without unnecessary noise.
The job of re-upholstering yourself is not difficult. Especially if you already have experience working with fabric or leatherette in or outside the car.
- Measure and cut the pieces from your chosen fabric or vinyl to size.
- An allowance of 5-7 centimeters must be provided for each side. This is necessary in order to avoid the use of patches when covering.
- Gradually apply adhesive to the cards, letting it dry a little. Just be sure to make sure that the glue does not dry completely.
- When you have coated the doors, use the same glue to treat the surfaces of fabric or leatherette, depending on what you choose. Let these elements sit for about 10 minutes so that the glue dries a little, but does not dry out.
- After the specified time has passed, begin gluing elements of the material onto the door cards. Vinyl is good because it stretches well and fills all the differences and depressions in the card structure.
- To ensure that the vinyl stretches and fills all the gaps, preheat the material using a hair dryer.
- Smooth the material by hand, but it is better to wear gloves for this.
- The edges with the allowance are carefully folded to the wrong side, after which they can be trimmed.
- Do the same with all the doors of your VAZ 2110. As you can see, there is nothing complicated here.
- Experienced car owners and fans of comprehensive tuning of domestic cars note that some other interior elements should be covered with the same material in order to achieve an ideal picture of the car’s interior. This could be the glove compartment lid, a triangle near the mirrors, a steering casing, etc.
- When reassembling cards with new skins, use pistons. To install them, you will need to make appropriate holes in the casing. This is where a sharp utility knife comes in handy.
Typical faults and solutions
Most often, VAZ 2110 owners encounter the following problems with the locking mechanism:
- It is impossible to close the door or a lot of force must be applied. Reasons: the latch is too moved inside the passenger compartment or the lock drives are incorrectly adjusted. Remedy: Move the lock outward slightly or adjust the drives.
- The door does not close completely and remains closed only in the first (emergency) position. Reason: The locking mechanism has failed. Remedy: repair or replace the locking mechanism.
- The door lock does not work. Causes: the locking mechanism has been adjusted incorrectly. Remedy: adjust the locking mechanism.
If the car has been converted to an electric lock, then it is necessary to diagnose the operation of the electrical signal from the key fob to the catchers, check the connection diagram and only then disassemble the door panel. The rear door lock is checked in the same way after diagnosing the central system.
Source
Adjustable front or rear doors
Checks the distance between the gaps, the condition of the hinges, the lock and the opening mechanism. Regardless of which door needs to be configured: front or rear, a universal algorithm is provided:
- Loosen the hinges with a wrench. Their internal screws can be accessed by opening the door well.
- Tapping lightly with a hammer will allow you to move the structure into position.
- Tighten the bolts once the door is in place. Opening/closing is also checked, and the mechanism is modified if necessary.
Adjusting the lock
After 3-4 years of operation, drivers note a defect: one of the doors of the VAZ 2110 car begins to close poorly. For example, it is loose when the part sticks out when closed. It also happens the other way around: when you try to slam the door hard, it doesn’t close. In such cases, adjust the latch. To work you will need good lighting and special tools:
- a large screwdriver with a socket head at the end of the handle;
- a key that will be used as a lever;
- crosshead screwdriver.
Work order:
- Using a screwdriver and a square key placed over it as a lever, partially unscrew all three locking mechanism lock screws. This is necessary to move it relative to the plane on which it is mounted.
- If a closed car door protrudes outward relative to other body elements, then it is necessary to move the latch towards the passenger compartment.
- The adjustment is carried out experimentally. There are no clear parameters for how far the latch needs to be advanced.
During work, it is necessary to check the overall geometry of the body. If the misalignment of the doors occurs due to violation of the geometry parameters, then repair of the locking mechanisms will have to be carried out constantly.
When the door does not close completely, even if a lot of force is applied to it, it is necessary to move the latch closer to the outer edge of the car body. If the gaps between the car door and the body are uneven, this can be corrected by moving the lock up or down. The defect is corrected by adjusting the door hinges, placing washers of various thicknesses.
After the lock is adjusted, the bolts are tightened as tightly as possible.
Repair or replacement of larva
Not every motorist is in a hurry to replace the cylinder; first, disassembly is carried out and the internal parts are checked. If the front pins are not broken off, lubrication will extend the life of the lock. Disassembly and repair step by step:
- The casing and internal handle are dismantled: the clips are removed, the screws are unscrewed.
- The rod is detached from the closing mechanism.
- A similar method is used to dismantle the external handle.
- The bracket is removed from the cylinder with pliers, and the plastic retainer is unfastened. To do this, it is pryed off with a screwdriver. To remove the clamp, you need to unscrew a special screw.
- The lock washer and the internal drive rod are removed. Then the core is removed.
Next comes repair or replacement, and then collection. If reassembly and lubrication of individual parts does not produce results, then the cylinder will have to be changed. A new larva is inserted into the core. Then the door part and the lock are reassembled.
Design of silent locks
The silent lock works on the latch principle, which allows you to close the car door very quietly and effortlessly. Structurally, the lock consists of the following main parts:
- internal structure;
- outer panel;
- finger.
The control rod from the door handles, the rod from the cylinder, as well as the locking buttons are connected to the inside. During installation, the structure is connected to the outdoor unit using screws. As a result, a single mechanism is formed.
When closing, the outer part engages with a locking bar, which is attached to the car body pillar. As a result, the door is held closed.
The latch pin is a part that is covered with a plastic shell.
In addition to the fact that the door no longer needs to be closed with a slam, an additional advantage of such structures is that their rubbing surfaces are covered with plastic; they do not require additional care in the form of constant cleaning and lubrication.
Removal
When you have purchased the required number of seals, you can begin to work.
The first step is to remove the old rubber elements, after which the installation of new parts begins.
Let's tell you more about the dismantling procedure.
- Remove the plastic trim panels installed on your vehicle's door sills. To do this you will need a thick screwdriver. Remove carefully, being careful not to damage the plastic caps. But it’s better to buy new ones in advance if you can’t carefully dismantle the threshold.
- Now remove the old pieces of rubber from the seats. Simply tear off the sections that are torn off by hand.
- Remaining rubber can be cleaned off with any available tool. Only be careful with sharp objects so as not to damage the metal and paint layer.
- Very small residues and traces of glue are removed using solvents. Make sure that the solvent you choose will not damage your paintwork.
- Go over the doorway with a vacuum cleaner, remove all dust and dirt. Take special care to clean the bottom part. If wet cleaning was used, wait until everything is thoroughly dry.
Upcoming work
Installation
This process cannot be called complicated. You are not required to have any special training or extensive experience. Although you should at least be able to handle glue.
Reassembly
Assembly is done in reverse order, but with one caveat. The perimeter trim is secured with plastic rivets, which are very fragile and often break when removed. Before installation, you must replace all of them with new ones. Otherwise, due to a loose fit, the casing will rattle when driving.
To replace, you only need a flathead screwdriver. It is necessary to remove the dowel from the door hole and insert a rivet into the trim. It is not recommended to leave old kits, they are disposable. When the door trim is ready for installation, first carefully press it against the door, trying to align all the rivets with the dowels. Next, apply light pressure along the perimeter to press it tightly. That's it, you can tighten the screws and put the speaker in place.
Now you know what to do if the door on a VAZ-2110 does not open from the inside. The repair budget will be about 200-300 rubles, the time cost will be no more than half an hour. Minimum effort will be required to fix this problem. The work is completely simple. This procedure is suitable if any front door on a VAZ-2110 cannot be opened from the inside. The actions in all cases are similar and do not require additional description.
To open the door of a VAZ 2112 from the passenger compartment, when you pull the opening handle, you need to pull the door towards yourself for it to open. Otherwise, if you don’t pull the door towards you, it won’t open, why?
- The front door does not close in cold weather on 2112 - 2 answers
- The passenger door of the VAZ 2112 does not open well - 2 answers
- The pneumatic-hydraulic struts of the fifth door of the VAZ 2112 work poorly - 2 answers
- The door does not close well on the VAZ 2112 - 2 answers
- Do I need to use sealant when replacing door seals? – 2 answers
Because the lock needs to be adjusted. The latch clamps, you need to move it a little. Just don’t close the door with loose screws, move it a little, tighten it, try it. And so on until you adjust it as needed. There the lock itself moves a little and the counter part is on the stand.
This is because the mechanism is worn out, there is a little wear here, a little there, but in the end we have what we have.
Even more useful tips in a convenient format
Guys, help, in general, the rear right door does not open, not from the outside or from the inside. It's as if it's jammed. How and what to do? maybe someone knows? There were frosts, the door froze, well, somehow I opened it, and then it completely closed and that’s it SO THE PROBLEM IS SOLVED I’ll try to do everything with pictures and explanations, since I’m not the only one, I hope the post won’t be deleted, as it might be useful to someone So, I removed the door card, naturally it was cramped and uncomfortable.
I had to unscrew the rear window guide (it looks like velvet glass seals) and the view became better. In order to understand what was working wrong, I opened and removed the same thing from the second door, closed it and began to study the result of what kind of thrust the lock has, we can say the total, or rather there are two thrusts (external and internal handle), then one of the locks are combined (it turns out like knee) when you open it from the street, one part of the knee moves, and when from the inside, the knee is assembled. I switch to the jammed door and observe that when opening the rod from the street, part of the knee moves like everything else (but this is just a part), I open it from the passenger compartment, the second part does not move and therefore the knee assembly also does not produce any action. Yeah, I see. I look at the working side.
When the door is closed, the center of the knee is at the top, but on my door it is at the bottom when closed, and thereby jammed and blocked this draft. Somehow I crawled up, and trying to lift this knee up, it worked, but not the first time. - I open it from the salon and the door comes loose, and says get out of here, I close the tongue on the open door, check the knee, everything is as it should be, I open it, everything works. Until I thought of this option, I tried as the guys here advised, namely, I tried to heat the castle with my mother’s hairdryer, it took a long time, it was terribly hot. If the tongue were frozen, it would thaw anyway IT DID NOT WORK FOR ME There is another option, as I understand it: we remove the back of the seat, pull out the seal, and a decent gap opens, in which you can see part of the lock and part of the bolt; if you try really hard, you can crawl there with something thin, and get into the lower part of the tongue on the lock and the door will open, I tried it on a working door, IT WORKS, but I didn’t have enough patience on a broken one, so this option DID NOT HELP me. So I think it will be useful for someone, but what if the moderators delete it? I’ll try to create an entry in the forum, only without pictures Thanks to everyone who gave advice, perhaps they will be the solution to the problem for others, but I had a slightly different problem PS leave an entry, it may be useful.
Source
Lada 2110 Chira › Logbook › adjusting door gaps, replacing all door mechanisms
Good day!
I decided to take such a wasteful step, BUT the effect surprised me! They don’t open like that on new machines)) I don’t regret spending it one bit (I regret that I didn’t do it earlier).
As a result, new door lock mechanisms
, new locks (modified) everything is greased
, everything is new, even the door handles
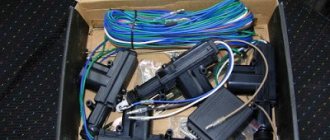
, new electric door locks
At the Shakhty car showroom, Lada costs 250 rubles each
(TIP! when buying new ones, compare them with the old ones, aligning the mounting holes and check the lock stroke, they are all different... closer to the factory ones, the Saturn manufacturer, the Starline rod stroke is too short (that is, it may under-open or under-close) there were no others, did not compare. + please contact Pay attention to the wires that go to the lock so that they are not thin.
The doors were bent, washers were placed, a slight sagging of the driver's door was eliminated, all without any special tools, just with “bare” hands)))
Somehow the car started to look fresh with them))
Tigran said how it still opened for you) the spring was standing sideways...
Total spare parts for about 3000 rubles, work too, + electric drives 500 rubles
Adjusting the lock
VAZ 2110 door lock adjustment
Detailed regulation algorithm:
- first you need to outline the contours of the lock itself, and always on the body pillar of the vase;
- Next, you should proceed to checking the door and you need to determine how freely it closes;
VAZ 2110 adjustment of trunk door locks
- if the door closes extremely tightly, the first thing you need to do is loosen the fastening screws of the latch;
- field for loosening the screws, the lock itself will need to be slightly moved outward, and then all the nuts must be screwed back in;
- if the car door on the other hand closes too loosely, then the latch must be moved not outward, but rather inward.
- sometimes it happens that when closing a car door, it lifts slightly up, in this case, the latch must be slightly lowered down;
- If the door, on the contrary, goes down slightly when closing, then the latch must be slightly lowered.
Algorithm for adjusting the luggage compartment lock of a car:
- First, it is necessary to remove the casing in order to make it practically possible to loosen all three screw fastenings of the lock by relaxing the tension of the hood;
- after which you need to slightly move the lock in the desired vector;
- then you need to tighten the fastening rod screw tightly;
- It is good to check the effectiveness of the locking function of the lock;
- if the lock does not lock well or, on the contrary, locks too well, then it must be readjusted;
VAZ 2110 lock rod adjustment
- as soon as the final adjustment is made, it will be necessary to screw the lock’s fastening nut as tightly as possible;
- carefully make sure that the latch and the latch are well connected to each other; if this is not observed, you need to slightly reduce the degree of tension of the bolt fastening, and then move the latch itself in the required direction;
- after all of the listed technical manipulations have been successfully completed, it is imperative to check how easily the tailgate door can be locked and if the result is negative, the latch adjustment will need to be repeated again;
- Now you can safely tighten all the mounting bolts.
The instructions for adjusting the doors with your own hands are extremely practical and easy to understand, however, the use of additional photos and video materials is a prerequisite. Because this will help to significantly save money. The cost of adjusting the lock in car repair shops is insignificant, however, most likely, the workshop employees will simply replace it in order to increase their own degree of material benefit.
What to do if your car door is sagging
| Sagging car doors are a “disease” of used cars. To solve this problem, you often have to resort to a radical method of replacing (digesting) the hinges, and for this you need to dismantle the doors, which takes a lot of time and effort. However, in most cases, doors can be straightened using simpler and faster methods. |
Signs of a sagging car door:
- The doors do not close well or require force to open them.
- When driving over uneven surfaces, the doors squeak (metal squeak).
- After rain, water appears in the cabin.
- There are scratches on the sills.
- Due to the skew of the door, uneven gaps appear.
You should start by tightening the door hinge bolts. If this doesn't help, then try the following tips:
How to straighten car doors
The same method can be applied using a jack. The door should also be slightly open. We place a jack under the edge of the door through a block so as not to bend the door. We lift the door in the same way, at first a little, if this is not enough, we increase the force.
Replacing pins in hinges
So, if the repair only involves replacing the fingers, then the first thing you will need to do is remove the door to gain access to the hinges (3-4 fasteners are simply unscrewed, depending on the model). Next, the fingers are knocked out. If they do not come out due to corrosion or deformation, then you should first thoroughly fill everything with WD-40 to remove the rust and repeat the operation. If this fails, you will have to drill out the pins or replace the hinges completely.
When installing new pins, be sure to lubricate them with grease or oil, and after installation, adjust the door (lower or raise it a few millimeters through a tightening rod). The door should fit accurately into the catch when closing without additional physical effort. Otherwise, the wear and tear on both doors and hinges will be much higher. After 1-2 years of such operation, you will have to completely replace the door along with the hinges.
The main difficulty in repairing VAZ door hinges is to correctly knock out the pins (the same fingers). It’s most convenient to just rivet it and then straighten the loop if necessary. The most aesthetic method is to drill out each end of the finger, after which its edges are ground off or simply squeezed. The drill is immediately taken to the minimum size, then gradually increases literally by millimeter. This will take quite a lot of time, but the loop will not be damaged.
Read more: Dual-mass to single-mass flywheel
If the finger has other deformations, it may be necessary to make a through hole through the pins. This will not prevent the use of new fingers in the future. For this purpose, either an impact screwdriver or a powerful drill with a high-quality drill bit (carbon steel is ideal) will be useful.
Adjusting the position of the door in the body opening.
10.2. Removing the tailgate of a VAZ-2111 car: 1 – bolt securing the fixed hinge link; 2 – movable link of the loop; 3 – tailgate; 4 – tailgate lock; 5 – bracket for fastening the gas-filled stop; 6 – gas-filled stop; 7 – lock retainer
To adjust the position of the door in the opening of the VAZ-2111 car body, unscrew bolts 1 (see Fig. 10.2) securing the fixed hinges and, using the enlarged holes in the body, adjust the gaps around the perimeter of the door. On VAZ-2112 cars, unscrew the nuts 1 (see Fig. 10.3) securing the fixed hinges 2 to the body. After completing the adjustment, tighten the bolts (or nuts).
10.3. Removing the tailgate of a VAZ-2112 car: 1 – nut; 2 – fixed link of the loop; 3 – bolt; 4 – tailgate; 5 – tailgate lock; 6 – gas-filled stop; 7 – lock retainer
10.4. Tailgate lock: 1 – gear motor for the electric drive of the lock; 2 – gear motor bracket; 3 – gasket; 4 – lock drive; 5 – bracket; 6 – upper links; 7 – bracket for the lock drive lever of the VAZ-2112 car; 8 – nut; 9 – lever of the lock drive of the VAZ-2111 car; 10 – lower links; 11 – electric drive thrust; 12 – lock; 13 – lock socket; 14 – nut securing the retainer socket; 15 – lock retainer; 16 – bolt; 17 – lock fastening nut
If the tailgate closes too tightly, loosen the fastening of the latch 15 (Fig. 10.4) and, using the enlarged holes in the latch, move it to the desired position. Before making adjustments, it is recommended to outline the contours of the clamp on the body. After completing the adjustment, tighten the fastening bolts of the clamp. The lock of the VAZ-2112 car differs from the lock of the VAZ-2111 car only in the length of the rods 6 and 10 and the brackets 7 of the drive levers.
Remove sagging doors using washers
You will need to prepare several washers with an outer diameter of 20mm and a hole diameter of 10mm. The washers should be of different thicknesses; the thicker the washer, the more sagging of the door it will eliminate. For a heavily sagging door, a washer with a thickness of 1.5 mm may be suitable, and for a slightly sagging door, about 1 mm.
To place the washer you will need to place a block under the door, and then:
- Unscrew the lower door mounting bolt. Please note that to unscrew this bolt you will need to use an impact screwdriver or a large lever.
- Pull the door towards you a little, and then slide the washer under the hinge.
- Install the bolt and tighten it back.
Why adjust doors?
The door of a modern car should close silently, with a slight push. Understanding that adjustment is required will come if the cause of the breakdown is identified:
- The hinges are in the wrong position - the parts are checked for mechanical damage.
- The gaps between the door and the body part have been increased - poor adjustment was previously carried out.
- The door handle or lock needs to be replaced - the fasteners are poorly secured.
- Body deformation occurs as a result of an accident, locksmith work, or improper installation of the door card.
If the driver carefully inspects the car, he will be able to replace sagging or sagging doors. When the door closes with a loud knock or this action requires force, the position of the door leaf has changed.
Door device
The design is a metal sheet with niches and holes for fastening. Internal cavities are designed for sound insulation, electrical wires, speakers, window systems, locks and handles. The door is mounted on cast hinges and the rim is lined with a rubber seal. The glass is inserted into the niche. During factory testing, the diameter of the gaps is no more than 1-2 cm. A standard car is available without additional upgrades. Vehicle modifications by inexperienced drivers may cause the door to malfunction.
How to lift a door
If the structure continues to sag, it needs to be raised. We list the main methods:
- Open the door, loosen the hinge bolts. Grasp the edge of the body with your hand. Gradually lift until the fragment is in place. Tighten the hardware.
- Use a jack to raise the blade and then lower it with a sharp movement.
- Buy washers with a diameter of 20x10 mm. The greater the sagging, the greater the width of the part should be: from 1 to 2 cm. The screw of the lower hinge is unscrewed, a washer is inserted onto its post, and the mechanism is tightened.
An integrated approach is recommended during adjustment, so you should carefully study all the information before undertaking independent repairs.
Source
Door trim repair and noise elimination.
And so my day began with a trip to distant places, and it was accompanied by melodic crackling and noise... which finally bothered me...
Armed with the article Lada2111.рф/repear/973-repair-door-obivka.html a week ago, I decided that it was time to put an end to the disgrace!
Having bought a heat gun and new-style trim pistons, I began to disassemble the door...
After washing the upholstery, I re-screwed the podium so that it would not rattle and it began...
We put it back using pistons :))
I want to say that this fastener is much more convenient and quieter than its predecessor... I liked it, absolutely no noise.
Then the second door gets more and more complicated... One fastening fell off and the second one fell apart.
What can I say, the heat gun works wonders.
The podiums are red, please advise how best to transform the door handles? Paint it? Drag? What? And what material?
Bottom line! Minus the noise and squeaks! Everything holds tightly and does not fall off when cornering! I'm happy! Thank you for your attention!
Source
General information about the operation of a car lock
VAZ 2110 door lock adjustment
In a car, the design principle of all locks is almost identical. However, the ignition system lock is rightfully considered the most reliable. From a vehicle security perspective, the ignition switch is the last line of defense against theft. Car doors are a functional element that is daily subject to mechanical influence from the outside. Few motorists actually treat the doors of their own cars with care. Main functions of car doors:
- protective, which consists of maintaining security;
- insulating, is to create a visual seal of the car, thereby significantly increasing the level of comfort of movement.
A Practical Look at a Car Door Lock
VAZ 2110 trunk lock adjustment
Cases when there is a practical need to adjust the car door lock:
- an unsuccessful attempt to steal and, as a result, mechanical damage to the lock;
- ultra-long service life;
- exposure to adverse factors;
- careless handling of a car door, etc.
