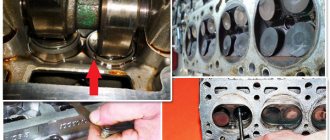
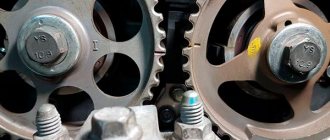
Adjusting the valves involves setting the required thermal clearance and is a mandatory procedure on engines without hydraulic compensators. If the specified gap is not adjusted, then as the mileage increases the valves begin to knock. Valve knocking can occur either due to increased clearance or as a result of pinched valves (for example, after incorrect adjustment). In both cases, if the clearance is damaged, the life of the valve mechanism is significantly reduced, the engine starts to run noisily, etc.
We also recommend reading the article about valve knocking on a cold or hot engine. From this article you will learn about the various reasons for knocking in the timing belt and the possible consequences of driving with a knocking gas distribution mechanism for the internal combustion engine.
At first glance, it may seem that the use of hydraulic compensators on modern engines should completely solve this problem, since the design ensures automatic maintenance of the required clearance. Unfortunately, the increasing complexity of the system and increased requirements for the quality of engine oil do not allow us to talk about high timing reliability on units with hydraulic valve supports compared to analogues that do not have such supports, that is, they require adjustment. In other words, hydraulic compensators make operation more comfortable, but the reliability of the mechanism is reduced. For this reason, many automakers (both domestic and foreign) have not used compensators on their engines for a long time. Next, we will look at how to adjust the valves yourself, since today there are still a lot of cars on the roads without hydraulic compensators.
Misregulation and consequences
When the thermal clearance of the valve changes during long-term operation or when individual elements of the system break down, the efficiency of the engine and the service life of the parts are significantly reduced. This is also accompanied by increased fuel consumption and a characteristic knocking noise in the engine compartment. If, for example, the gap is larger than normal, the element cannot open completely, and this contributes to a drop in power characteristics. Burning of the valve and its seat is possible if the gap is very small. In any case, these faults have a bad effect on the engine's response when you press the accelerator pedal.
Signs of a failed setup
After starting, all the components of the motor, respectively, the metal expands. It is also necessary to take into account the natural wear and tear of rubbing parts.
Signs of incorrect adjustment:
- extraneous noise in the block head;
- fuel consumption increased;
- engine power has dropped;
- the valves were not adjusted for more than 20 thousand km of the car.
All these symptoms are the basis for adjusting the gaps between the installed elements of the vehicle engine.
Gap function
There are at least 2 valves in a car engine cylinder (maybe more depending on the car model). Through the inlet valve the combustible mixture enters the cylinder, and through the outlet valve the gases are removed. The part is driven by a gas distribution mechanism.
During operation, the motor heats up, resulting in expansion of all its elements. Therefore, when the motor is not running (in a cold state), there must be a gap between some parts sufficient for thermal expansion of the metal.
How should the elements work?
The operation of a 4-stroke engine includes 4 cycles.
Each cycle has its own purpose:
- Intake - the intake valve opens and the fuel mixture is supplied to the cylinder.
- Compression - the valves are closed, the fuel mixture is compressed.
- Power stroke - the valves are closed, the burning mixture expands, its energy is directed to move the pistons.
- Exhaust - the exhaust valve opens, exhaust gases are removed.
For the motor to operate efficiently, the clearances must be properly adjusted.
The importance of adjusting engine valve clearances
After the start, the engine and all its parts begin to heat up, and therefore expand. At the same time, we should not forget about the natural wear and tear of rubbing and contacting parts. This necessitates strictly defined gaps between certain components. And the thermal valve clearances (between the camshaft cam and the valve stem) are among the most important.
If the gap is too small, the engine will not be able to fully realize its potential, which will immediately affect the dynamic and speed characteristics of the car. At the same time, the exhaust valves will overheat and their edges will melt.
If the gap is larger than required, the car owner will be alerted to the characteristic “clatter” of the engine, which can sometimes go away as the car warms up. With increased clearance, the camshaft lobe begins to "knock" against the rocker of the valve stem instead of pushing through it.
Valve mechanism in section using the example of an engine with two camshafts
The need to adjust the valves is ripe if the following signs are visible:
- there is an extraneous, slightly ringing sound in the area of the cylinder head cover;
- the gas distribution mechanism was repaired;
- the last adjustment of the valve thermal clearances was carried out more than 20 thousand km ago;
- engine output has dropped noticeably;
- As a consequence, high fuel consumption is possible.
Most modern engines use hydraulic compensators to adjust thermal clearances. It is convenient and does not require third-party intervention, although there is an opinion that components still wear out a little faster. The engines of many cars, in particular VAZ classics, require manual adjustment of thermal clearances. Some people consider this a simple matter, others, on the contrary, consider it a responsible and serious job. It all depends on experience, variations of techniques, dexterity and patience. It is recommended to carry out work after approximately 20 thousand km since the last adjustment.
Also, there is not much difference whether you have to deal with a gasoline or diesel engine. There are no significant or fundamental differences in the valve adjustment process.
It’s even better to combine adjusting the valve clearance with changing the engine oil. And exactly in this sequence. This will allow dirt, dust and sand that may get into the engine during adjustment to then leave along with the old oil and oil filter.
Gap measurement
Determining and checking which valve clearances are present should be carried out exclusively on a cold engine.
To carry out this operation, you will need to prepare a dipstick and other additional tools, the choice of which depends on the category of the valve pusher. This can be a spanner or open-end wrench, a hammer, a micrometer or a puller. The processes involved in measuring gaps are carried out in different ways.
To measure the thermal clearance on a pushrod with a special screw adjustment, the crankshaft must be rotated so that its cam is directed in the opposite direction from the pushrod. Next, you need to lightly hit the pusher with a hammer and swing it slightly to the sides with your hands. Using a feeler gauge, the gap between the valve and the pusher is measured, and then checked with the value specified in the car’s operating instructions.
To measure the thermal gap on a motor with shim adjustment, the crankshaft must be rotated so that the cam of the selected valve points upward. Using a probe, measurements are taken and also compared with the indicators in the car’s instructions.
If, as a result of the measurements taken, it becomes clear that the indicators are deviated from the norm, adjustment will be required.
Why are valve clearances necessary?
Answering the question why engine clearances are needed, it can be noted that for normal operation of the motor, the thermal gap is quite important. Due to it, the closing and opening times of the valves are observed, and the preservation of the optimal level of tightness when closed is ensured.
If the gaps are set in accordance with the rules, after warming up their parameters are reduced to minimum values. This ensures regulation of gas distribution phases and long service life of parts.
During the operation of the car, the gap changes up or down. Depending on such deviations, certain problems appear. In most cases, this leads to a decrease in the service life of the valves, a decrease in the engine power level, the filling of the cylinders with the fuel and air mixture becomes worse, the overall combustion efficiency decreases, and so on. It is for this reason that it is so important to adjust the gaps from time to time.
It is necessary to check and, if necessary, adjust the gaps every 20 - 30 thousand kilometers. You need to rely on the standards prescribed in the repair manual for a car of a particular brand.
Adjustment by rack with indicator
There is also a way to adjust the gaps using an indicator and a rod. He was very popular in the USSR. This method allows you to take into account the production of parts, therefore it is used on power units of cars with high mileage.
Work procedure
– the crankshaft is scrolled until the marks coincide; – a special rack is fixed to the cylinder head; – the indicator is attached to the rail, and its tab is installed on the cam; – a special grip catches the camshaft cam and pulls upward, while the indicator arrow at normal temperature passes fifty-two divisions; – if the arrow passage value is deviated, then it is necessary to make adjustments with a screw or washers depending on the model of the power unit.
The main task of normal operation of an internal combustion engine is to maintain the design size of the thermal clearances of the valves, create absolute tightness of the cylinders, protect parts from premature damage, and ensure high efficiency of the power unit.
All these measures are relevant both for cars and motorcycles, and for large vehicles, such as KAMAZ trucks. You just need to follow a number of rules, which include measures aimed at eliminating malfunctions leading to incomplete combustion of fuel. It is necessary to use only high-quality motor oil, change oil and fuel filters in a timely manner, monitor the condition of the timing belt, and trust engine maintenance to trusted technicians. Believe me, it is better to once again make sure that the valve clearances are normal and, if necessary, adjust them, than to get serious problems associated with major work on the engine, which requires a lot of money and time.
If you have questions related to the use of oils and other Suprotek products, please call. Our specialists will always answer them, provide professional advice and help with the choice.
Valve clearance adjuster
A more effective and efficient way to adjust the valve mechanisms of the power unit is to adjust them using a device, which is a special rail with an indicator attached to it. This adjustment is much more accurate manually, since when using the device, it detects and takes into account all defects on the surface of the adjustable parts.
For mechanical adjustment, in addition to dismantling the cylinder head cover, you will additionally have to remove the accelerator drive, the protective shield on the ignition distributor, the exhaust hose from the crankcase, and for carburetor cars, the carburetor “pan”.
Using a special wrench, you need to rotate the crankshaft until the marks on the camshaft sprocket align (this is described above). To make this process easier, you can use a bright marker to mark the camshaft sprocket every 90 degrees. After that, we install the device rail on the valve being tested and fix it in a stationary state. We put an indicator on it and place its foot on the edge of the adjustable valve. To correctly perform this procedure, you will need a special grip, with which you need to clamp the cam and pull it up (a simple wrench will do). As a result, the indicator readings should deviate by 52 divisions. If they are slightly too low or too high, the valve needs to be adjusted. And then everything is extremely simple:
- using a 17mm wrench, loosen the locknut on the adjusting screw;
- the gap is adjusted with a key of 13, and all readings are clearly reflected on the indicator scale;
- the adjustment is checked and the locknut is tightened;
- At the end of the stage, it is again necessary to check the correct settings of the valve mechanism.
As you can see, this adjustment is much more accurate and simpler. But we should not forget that a highly qualified specialist will perform it at a high level and using a standard set of probes. In conclusion, it is worth emphasizing that most sets of feeler gauges contain an adjustment diagram that contains data on the angles of rotation of the camshaft and crankshaft, indicating the numbers of cylinders and valves.
Adjustment order table:
On a carburetor engine, to more accurately determine the position of the camshaft, it is possible to use a distributor, the slider of which is directed to the socket of the high-voltage wire of the corresponding cylinder. If the distributor cover is removed, then four screws on the housing that coincide with the sockets of the high-voltage wires can serve as a guide.
You can also use the distributor with the cover removed: connect a control light to the low-voltage circuit and turn the crankshaft with the ignition on. The moment the light turns on indicates the exact position of the camshaft at which the corresponding pair of valves is adjusted.
How to ensure the required clearance
The required clearance can only be obtained through properly carried out adjustment work. When carrying out this process, the main gas distribution mechanism is adjusted, especially the gap located between the camshaft cams and the valve lever.
There are special instructions on how to make the adjustment. It is not enough to ensure that the valves are pressed more tightly, since as the temperature rises, all parts become larger in size. Such an expansion automatically leads to various negative consequences.
The intake and exhaust valves should close the seat tightly, but with a small gap. It is necessary to ensure that the valve stem does not rest rigidly on the top of the device.
In the process of self-regulating gaps, you need to strive for strictly established values. They should not be more than 0.15 mm. The maximum permissible error level is 0.05 mm. These parameters should be checked only with a cold engine.
By ensuring the correct clearances during the adjustment process, the driver will receive stable engine operation, significant fuel savings, and increased service life.
Valve timing
And even if modern valves can move much faster than their ancestors a hundred years ago, the properties of the flammable gases they control have remained virtually unchanged. They also easily compress when impacted, and also stubbornly continue to strive in all directions equally, obeying Pascal’s law, which means they are not in a hurry to move to where they are asked. And to ensure that the cylinder is filled as much as possible in such a short period of time, the intake valve begins to open before the piston completes its exhaust stroke. And the exhaust will begin to open before the power stroke is completed, so that the hot gases under pressure in the cylinder do not create excessive resistance to the movement of the piston when the exhaust stroke begins.
The moments of time when the opening begins, the duration of their stay in the open and closed states, form the engine valve timing phases. The movement of the valves is controlled by the camshaft, in the form of cams the information about the valve timing of your engine is “encrypted”. The phase values are selected when designing the engine depending on its design, purpose, and operating conditions. In the most advanced engines, these phases can change for specific operating conditions and loads at a given time. In conventional engines, the only effective way to change valve timing is to replace the camshaft. Changing the valve timing by installing an original camshaft is one of the methods of advanced engine tuning. Agreeing to such a procedure, we must understand that an increase in engine power will occur at the expense of deterioration in efficiency and a decrease in the service life of its parts. Therefore, this setting is usually used on sports cars, where the resource, efficiency and environmental friendliness of the engine are of secondary importance.
In a real engine, when the piston is near its top dead center (TDC) and bottom dead center (BDC), the intake and exhaust valves are open simultaneously
When to adjust valves
If your engine does not have devices to maintain the required clearance automatically, then you need to be prepared for the fact that every 30-35 thousand km. the indicated gaps must be checked.
Let us add that many car enthusiasts, especially owners of domestic VAZ models, determine the need for adjustment based on the appearance of noise during operation of the valve mechanism.
On foreign-made cars, the need to adjust the valves may arise after 60-80 or even 100 thousand km. mileage, since the engines have a longer service life and the set gaps on such internal combustion engines remain more stable.
Where to install the camshaft
There are different options for the location of the camshaft in the engine and the design of the mechanisms that transmit pressure from the surface of the camshaft to the valve stem. However, the increase in the speed of modern passenger engines has led to the fact that a scheme with the location of the camshaft in the engine head - an overhead design - has become established everywhere in them. The proximity of the camshaft to the valves makes it possible to increase the rigidity of the system, and therefore improve the accuracy of operation.
The prototype of the first Zhiguli VAZ-2101, the Italian Fiat-124, had a solid and reliable, but no longer modern engine design with a lower camshaft. Soviet engineers decided that the engine of our new car should keep up with the times, and together with the Italians they modernized it by moving the camshaft to the head of the block.
The lower camshaft design is easy to maintain, but lacks rigidity when operating at high speeds.
The overhead camshaft timing mechanism is much more rigid due to the absence of long pushrods
Signs and consequences of improper clearance
After starting the engine, it itself and all its parts begin to heat up significantly and automatically expand. It is also worth taking into account the natural wear and tear of the elements in contact with each other. All this is the basis for ensuring strictly established gaps between certain parts. Deviations from the norm can lead to certain problems. The list of them depends on which direction the gaps have changed - more or less.
Gap too big
If the gap is larger than the required size, the driver will begin to hear the characteristic clatter of the engine, which gradually goes away as the car warms up. With increased clearance, the camshaft fist does not push through the rocker of the valve stem, but simply begins to knock on it.
Such long-term shock load leads to such unpleasant consequences as:
- significant reduction in valve life;
- riveting;
- chipping of the end, which further increases the gap;
- increased noise during engine operation.
At the same time, engine power decreases due to serious disruption of gas distribution processes.
Gap too small
With a very small gap, the car engine will not be able to fully realize its functionality. This will automatically affect the overall speed and dynamic characteristics of the vehicle. At the same time, there will be significant overheating of all exhaust valves with melting of their edges. Among the main consequences of a reduced gap size are the following factors, based on the loss of combustion chamber tightness:
- Reducing compression due to the release of the air-fuel mixture.
- During the working stroke, exhaust and hot gases break through and lead to severe burnout of the valves.
- The plates no longer touch the seats, which disrupts heat transfer.
- The valves are heated to temperatures that significantly increase corrosion and oxidation.
- Increased load on timing belts.
Based on everything said above, we can conclude that adjusting the gaps must be done without fail. The process must be carried out if the following signs are present:
The engines of modern cars are designed in such a way that thermal clearances must be adjusted manually. For some it may seem simple, while others consider this process serious and responsible. It all depends on the driver’s experience, the availability of certain skills and tools. Moreover, there is no difference between diesel and gasoline engines. The adjustment process is carried out here according to the same scheme.
What happens if you don't adjust the valves in the engine?
Delayed adjustment leads to a change in the gap. But the engine will not thank you, both when this gap decreases and increases. This has a very bad effect on the functioning and service life of the car’s engine.
Danger of too little clearance
Reducing the gap means closing the valves not completely, which causes a number of consequences. Due to the mechanism not being completely closed, leaks in the combustion chamber provoke a decrease in compression and the breakthrough of hot gases into the exhaust or intake tract. It all depends on which valve is slightly open.
In addition, one cannot help but note the significantly increased thermal load on automotive shutters. Reliable contact of the closed valve with the seat is one of the very important conditions for its effective cooling. If the part does not fit tightly to the seat, then cooling is significantly deteriorated. This especially applies to exhaust elements.
The intake mechanisms are cooled by a mixture of gasoline particles and atmospheric air entering the cylinders. Exhaust outlets provide the exit of very hot gases that have already been used. For them, cooling at contact with the saddle is incredibly important.
In extreme cases, insufficient cooling due to too small a gap can even lead to complete overheating of the valve and its subsequent destruction. The breakthrough of a mixture of gasoline particles with atmospheric air, which burns, into the exhaust tract significantly increases the load on the catalyst. In this case, the abrasive in the form of dust during its destruction can easily damage the cylinders.
Danger of large gap
If the gap is too large, the consequences will be different. Namely, the impact of the camshaft on the shutter. This is very bad for its resource, and also leads to incomplete and incorrect opening of the shutter. At the same time, the deterioration of the normal filling of the cylinder with a special mixture of gasoline particles and atmospheric air is very bad. This situation means a violation of the gas distribution phases and a reduction in the output of the vehicle engine.
Even where setting up car shutters is quite simple, it is imperative not to deviate from the special order of work. And this implies special metalworking skills and experience in carrying out such operations. Due to this, it is important to remember this so as not to damage the car even more.
Operating principle of internal combustion engine timing valves
An ordinary ordinary driver, when it is necessary to adjust the valves, does not do it himself, but goes to a car service center. Because this requires certain skills and time. To teach yourself how to adjust valve clearances, you need to know the principle of their operation. An internal combustion engine has two shafts: the crankshaft (crankshaft) and the camshaft (camshaft). They are connected to each other through pulleys and a belt, through sprockets and a chain. The most common option is a timing belt driven engine. The crankshaft to camshaft transmission ratio is 2:1 (two to one).
The cams have a special irregular smooth shape that closes and opens the valves so that they correspond to the position of the crankshaft and camshaft, the engine stroke and valve timing.
When the internal combustion engine is running, it heats up accordingly, its parts heat up and expand due to high temperature. Because of this, the distance between the camshaft and the valve tappet changes slightly.
Question: why does the engine run differently when cold and when hot? Answer: because when the engine warms up to operating temperature, the valve tappet is pressed tightly against the valve and camshaft. This ensures efficient operation of the internal combustion engine.
And, if the valve end stops above the pusher, then a gap appears between the seat and the plate, and this leads to a decrease in compression in the cylinder.
It’s easy to check the compression: turn off the engine, unscrew the spark plug, screw in a special pressure gauge instead, turn the ignition key, get out and see what pressure the pressure gauge of a given cylinder shows.
And, if the end of a closed valve is located below the pusher, then during a certain valve timing phase, the valve will not open to the full distance it should. And this leads to a loss of power due to the slow removal of exhaust gases.
Valve clearances VAZ-2108-09-099
On front-wheel drive VAZ cars, unlike the “classic” Zhiguli, the adjustment is carried out by selecting the thickness of the adjusting washers; washers with sizes from 3.0 to 4.5 mm are available for sale. In some cases, smaller washers are required, for example, 2.5 or 2.8 mm, but they are needed mainly when the valve seats in the cylinder head wear out.
TZ 2108-09 are adjusted on a cold engine, the gap is set:
- for exhaust valves - 0.35 mm (plus or minus 0.05 mm);
- for intake – 0.20 mm (plus or minus 0.05 mm).
Practice shows that a gap of 0.35 mm or more is too large, the valves knock, so the best option is to set 0.25-0.3 mm in a circle.
According to the factory instructions of the Republic of Kazakhstan on 8-valve engines 2108 and 21083, it is carried out as follows:
- we install the shafts according to the marks of the first cylinder (crankshaft and camshaft) and scroll another clockwise 40-50 degrees, adjust the 3rd and 1st valves (counting from the front of the internal combustion engine);
- we turn the shaft 180 degrees, adjust the 5th and 2nd valves;
- after another 180 – 8th and 6th;
- after another 180 – 7th and 4th.
In practice, technical specifications do not regulate everything this way; the simpler adjustment is done as follows:
- at TDC of the first cylinder - 1, 2, 3, 5 valves;
- at TDC of the 4th cylinder (when the crankshaft is rotated 360 degrees) - 4, 6, 7 and 8 (all others).
Preparatory work
So, the engine is cooled down, and the car itself is placed on a flat surface and immobilized. You can start working:
- Remove the carburetor air filter cover and remove the filter;
- We unscrew the filter mounting bolts and remove it, having first disconnected the pipes going to it;
- We remove the cable for manual control of the air damper (choke) and disconnect the throttle linkage;
- Unscrew the bolts securing the valve cover and dismantle it;
- Check the chain tension (it must be normal, otherwise you will have to adjust the tension first);
- Remove the distributor cap.
Now you need to set the TDC of the piston in the 4th cylinder and the marks on the knees will help with this. camshaft drive shaft and cover. shaft, as well as on the camshaft gear and its cover.
To do this, you can use a key of appropriate size, which you need to rotate the knees. shaft for the drive pulley bolt. Or use one of the drive wheels. To do this, you need to hang it with a jack, engage 4th gear and slowly turn the raised wheel. In this case, the transmission will ensure rotation of the crankshaft. But with the second method, you will need an assistant, since it will be difficult to check the coincidence of the marks.
What are valve clearances for?
In order for the engine to work at its best and develop all its performance characteristics to the maximum, the valves must move clearly and synchronously. The valves should fit tightly into their seats and open to the maximum.
With correctly set valve clearances, a hot engine works almost the same as a cold one, that is, the loss of power is minimal.
When the car is used a lot, for example, working in a taxi around the clock, the valves quickly lose their settings. Many people have probably heard, they say that the valves are knocking. This is just the time to adjust the valves.
Advice from auto experts: It is necessary to check and adjust the valves every 25 thousand kilometers of actual mileage. Of course, there are many modifications and brands of engines. It would be better to read the operating manual for the specific engine. Maybe there's no need to adjust at all.
List of tools for work
- Set of wrenches.
- A pair of screwdrivers.
- Measuring probe.
- Set of adjusting washers.
- Micrometer.
- Tweezers.
- Special device for adjusting valves.
A set of tools for adjusting valves on VAZ cars
Sequence for adjusting engine valve clearances
Before making adjustments, set the cylinder piston to TDC (top dead center) on the compression stroke. In this position, both valves of the adjustable cylinder must be closed, and the rocker arms of these valves must swing freely within the clearance.
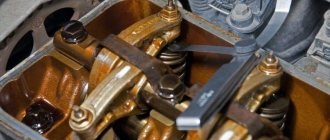
After this, slowly loosen the locknut on the adjusting screw or bolt. Use a feeler gauge and adjusting screw to adjust the required clearance, then tighten the locknut.
“Be careful not to change the set clearance when tightening the locknut.”
After tightening the locknut, the thermal clearance must be checked again. Use a feeler gauge to check the gap. The feeler gauge should fit into it with little effort; if this feeling does not occur, but it passes very easily or very hard, you need to adjust the gap again.
To adjust the thermal clearance in the remaining valves, it is necessary to turn the crankshaft half a turn. During adjustment, the operating order of the engine cylinders (1-3-4-2) should be taken into account. Turn the crankshaft by the bolt securing the generator drive pulley.
What types of adjustments are there?
Automatic gap setting
Most modern cars are equipped with hydraulic compensators. These are devices that are responsible for maintaining the thermal gap by using engine oil pressure. The hydraulic compensators themselves do not require any adjustments. The main thing is to ensure that they are not clogged with dirt and are always in working order. You must understand that if the malfunction of this device was not detected in a timely manner, then it is assumed that the gap adjustments could have gone wrong, so it is better to check them and, if necessary, restore them.
Adjustment with screws
A method of adjustment using special screws without using any additional parts, and in the vast majority of cases, disassembling the cylinder head is not required.
Adjustment with washers and pushers
A common, but rather complex method of adjusting gaps. The problem is that in order to set a new gap, the pusher must be removed and a new one of the appropriate size installed in its place. This may require disassembly and removal of the camshaft.
Adjustment of valves
First of all, on a carburetor car we remove the carburetor and air filter, and on an injection car only the pipes, which will prevent you from removing the valve cover.
Then we unscrew all the nuts around the perimeter by 10 using a socket wrench, be sure to collect the washers in containers so as not to lose them, since they are quite specific. Of course, you can later purchase them in the store, but this can significantly delay the work process.
Now we take a crooked starter or key, then rotate the crankshaft clockwise until the mark on the pulley coincides with the last ebb on the front cover along the way. With this action we set the pistons of the first and fourth cylinders to top dead center. It is at this very moment that the valves in these cylinders should be completely closed; accordingly, it is in this position that the adjustment is carried out.
The VAZ 2106 engine works according to the 1-3-4-2 scheme. That is, when the pistons of the first and fourth cylinders are at top dead centers, the pistons of the third and second are at the bottom.
So, after we have aligned the pistons as needed, we proceed to adjusting the valves. We can determine the ones we need by simply shaking the rocker arms - a light tapping sound will be heard. We need valves 8 and 6, counting from the front of the car.
To adjust, insert a feeler gauge between the camshaft cam and the rocker arm. If the probe enters with tension and comes out the same way, then nothing needs to be adjusted. If it passes easily, then you need to unscrew the locknut and unscrew the adjusting bolt. At this time, while we are unscrewing, we fidget with the feeler gauge to find the optimal position.
Once it is determined, tighten the locknut. It is very important to ensure that the adjusting screw does not turn even a degree. In any case, we need to check. To do this, we fidget with the probe again. If this is not possible, or vice versa, the probe moves without effort, repeat the procedure.
At this moment, if you look at the camshaft gear, the mark on it coincides with the cast on the camshaft housing. So, this is the best guide, because the crankshaft will need to be turned exactly 180 degrees, while the camshaft will turn 90 degrees. We adjust valves 4 and 7. Next, we turn the crankshaft again and adjust the valves in accordance with the table.
There is no point in discussing the assembly. The only thing worth paying attention to is the flatness of the valve cover plate. Over time, it is pushed through by washers, so it requires editing. If indentations are visible in the tightening areas, then it must be corrected on an anvil.
Useful tips
To avoid “pinched” valves on classic VAZ models, you need to take into account that the back surface of the camshaft cams may not be ideal. This shaft runout is sometimes about 0.04 mm. For this reason, it is necessary to additionally check the gap. This is done when the cam is in the following positions
- before the valve opens;
- after the moment of its closure;
To solve the problem, you will need to install the camshaft in a position where the mark on the gear is in the upper direction. Then the clearances at valves 4, 6, 7 and 8 are checked. Then you need to rotate the crankshaft 180 degrees, that is, the camshaft will rotate 90 degrees. After turning, you can check valves 7, 4, 3 and 1. The 3rd, 1st, 2nd and 5th valves are checked in the same way, and then the 2nd, 5th, 6th and 8th. Please note that all valve measurements must have the same end result. If the results differ, then when setting the gap it is necessary to take as a basis the place where the gap is minimal (the most “squeezed”).
I would also like to know that VAZ has a special device with a dial indicator for adjusting the valves. It is assumed that such a tool makes it possible to achieve higher accuracy compared to using a feeler gauge, and also allows you to easily adjust the valves “hot”. Unfortunately, in practice such solutions have certain disadvantages and errors. As a result, the measurement accuracy is often far from ideal and may even be inferior to the usual method using a probe.
Some craftsmen can easily adjust valves on imported cars using special tools for VAZ, making certain changes to the design of the device. It is also common practice to use only one pusher clamp, which is selected according to size. The procedure boils down to cranking the crankshaft until the pusher “sinks” the camshaft cam.
Then the clamp is inserted, after which the camshaft rotates until the cam comes off the washer. After removing the old washer and checking/replacing it with a new one, the camshaft rotates back again. Note that the camshaft must be rotated using a wrench that turns the camshaft gear. The crankshaft should not be turned, since the timing belt must be properly loaded when rotating.
If you set the valve clearances incorrectly
After 5-10 minutes of operation, the motor reaches operating temperature (this is about 90-100 degrees). According to the law of physics, all parts begin to expand. Engine wear will vary depending on whether the valve clearances are too large or too small.
Gap too big
If the gap is larger than the nominal one, the sound of the engine will be different. As the engine gradually warms up, this unusual sound (clunking) will disappear.
If the valve clearance is large, then the camshaft fist does not press on the valve drain rocker, but knocks on it.
If the engine runs in this mode for a long time, then:
- valve service life is reduced;
- the end of the valve stem may break off;
- riveting;
- there will be an increased noise level of the internal combustion engine.
Since the gas distribution phases are disrupted, engine power may drop by half.
Gap too small
In this case, the valve does not open completely, the exhaust gases do not have time to escape completely, hence the loss of engine power. Valve plates will burn out due to increased overheating.
Consequences of low valve clearance:
- Low compression in cylinders.
- The exhaust gases do not have time to escape through the small gap and the edges of the valves burn out.
- The valve plates do not fit tightly into their seats.
- High load on the timing belt or chain drive.
It is necessary to adjust the valve clearances as soon as possible if the following symptoms appear:
- A ringing sound appeared in the upper part of the cylinder head (cylinder head).
- If the timing belt has been repaired.
- If you have driven more than 25,000 km since the last adjustment.
- If the engine does not pull. Neither uphill nor in a straight line.
- If gasoline consumption has increased.
Negative consequences of advanced tuning
Increasing the power of a car by installing a new camshaft with expanded characteristics not only transforms the valve timing, but in proportion to the increased power reduces fuel efficiency and even increases the rate of engine wear!
That is why a radical change of the camshaft is the lot of those vehicles for which, for the sake of speed, it is possible to sacrifice environmental friendliness, efficiency and service life.
or call back 7 (921) 932-25-54
Adjusting the thermal clearances of the valve mechanism
Let's start with the fact that although different engines may have certain differences, the general principles of gap adjustment are similar for the vast majority of engines.
- The first nuance is that adjustments must be made at the internal combustion engine temperature specified for a specific engine type in the maintenance and repair manual. The average is about 20°C. This requirement must be carefully observed by those who do not have sufficient experience and strive to achieve maximum measurement accuracy. As for a qualified craftsman, it is no secret to a specialist that at a higher temperature of the unit, the gaps will initially increase. For this reason, valve adjustment on a warm engine is possible, but is carried out taking into account a number of amendments. It is worth adding to this that different motors may have parts made of different alloys and materials. As a result, thermal gaps may differ, and the cooling process may proceed faster or slower. For this reason, corrections for each internal combustion engine are individual.
- Now about the gap itself. The indicated gap on many motors is measured under the adjusting screw. You need to measure the gap using a set of special feeler gauges; the main one is the feeler gauge, which has a width of 10 millimeters. A number of nuances should also be taken into account. For example, consider VAZ cars. When making adjustments on classic models, there is a need for a wide feeler gauge. The fact is that the use of standard narrow probes leads to an error. This error is caused by the fact that the valve lever on such units is slightly beveled. Let us add that the optimal gaps on the “classic” are 0.15 mm. This clearance is the same for both intake and exhaust valves. It is quite obvious that it is quite difficult to accurately determine the indicated gap with one simple feeler gauge. The task is even more complicated, since it is not always possible to purchase a complete set of probes. In such cases, the experience of the master plays an important role, who actually tactilely determines the gap. To do this, take a 0.15 mm probe, after which its passage in the gap is assessed. If the indicated probe goes too “tight”, then the valve is clamped. Free passage of the feeler gauge will indicate increased clearance.
- It should be understood that it is not possible to set the gap perfectly right away, since after tightening the locknut it still gets a little off. For this reason, an amendment is made, the gap increases slightly. As for reducing the gap, such manipulation is not recommended. Note that there is a so-called table that contains various corrections in the case of valve adjustments on a hot engine. If you look at such data, then you can see the dependence of the increase in gaps on the degree of heating of the motor. In other words, the gaps should be larger when the engine is warmer. In this case, one should take into account the fact that the gaps are indicated for an idle internal combustion engine. After starting the unit, they will decrease, since the valves themselves will heat up the most and will be increased in length compared to other timing structural elements.
- Many people strive to minimize the noise from the operation of the timing belt. For this reason, there is a misconception that a slight reduction in clearances has a positive effect without harm to the engine. Actually this is not true. Indeed, if the valves are “clamped”, then the engine can run quieter when “cold” and/or “hot”. But reduced noise does not mean minimized wear due to the absence of audible impacts. The fact is that under certain conditions the valve stops closing completely. A loose fit of the plate disrupts heat transfer; the valve does not transfer excess heat to the cylinder head. The result is overheating and burnout of the valve. It turns out that incorrect valve adjustment with a decrease in clearance can lead to engine failure and the need for further repair. A clear sign of “pinched” valves is the condition of the camshaft, as the back of the camshaft cams will have noticeable wear.
Adjustment using a feeler gauge
- Remove the cover and ignition coil. We unscrew the soured bolts without serious effort so as not to strip the threads.
- The adjustment should begin with the least tightened one. Its cam will be in the “away from the rocker” position. Place the head of the key on the bolt holding the crankshaft pulley and turn it 180 away from the rocker arm, if possible. If it is not possible to take such an angle, then we turn to the largest possible.
Remember that the bottom valves (those closest to you) are exhaust valves. The gap in them should be within 0.20-0.25 mm.
- You should loosen the nut, take a 0.20 mm feeler gauge and tighten it by screwing in the rod. Put on the locknut, pull out the dipstick and tighten the nut completely. Check the gap by comparing how the feeler gauge passes 0.20 and 0.25. The latter will not go in completely. We mark the adjusted mechanism with a marker. We alternately adjust all the exhaust valves in the same way.
- Now we’ll find out how to adjust the intake valves on our own. This is done according to the same principle as the bottom row, only the gap size is smaller - from 0.10 to 0.15 mm.
- We check the dimensions of the set gaps with feeler gauges again and tighten the nuts tightly.
- We clean the valve box, armed with a utility knife and No. 0 sandpaper. Perform all movements from the valve to the edge to avoid litter getting into the box. We also first rough clean the lid with a blade, then carefully clean it with sandpaper.
- We change the gasket and, in a strictly defined order, following the manufacturer’s instructions, tighten the cover bolts.
- All that remains is to connect all the wires, hoses and pipes, and reinstall the air filter housing.
Adjustment using rack and indicator
To adjust the automotive thermal gap, a special rail is often used, along with an indicator. These devices allow you to achieve maximum accuracy, which cannot be obtained with the method described above. The order of work here is as follows:
- after carrying out the preparatory work and removing the valve covers, the engine must be turned until the marks on the camshaft gear and the marks on the housing coincide;
- You need to put your icons on the back of the built-in gear with a marker. This must be done every 90 degrees, relative to the mark set by the manufacturer;
- using three bolts you need to fix the rack on the protrusion of the block of installed bearings;
- You need to insert a dial indicator into a special slot on the bar. In this case, the scale should be set to zero;
- Using a special device, take the cam and pull it up a little. In a normal situation, the indicator needle will move by approximately 50 - 52 divisions.
If, as a result of the measures taken, the obtained parameters are slightly different, you will need to make adjustments using the method described above.
At the end of the adjustment process associated with setting the clearances in the valve mechanism, you need to start the engine and listen to how it operates in different modes. If the manipulation was carried out after the head was restored, it is necessary to ensure that the valves are properly ground in.
An example of valve adjustment on a VAZ 2108–2115
How to adjust a 6-cylinder in-line engine: video
When the gap is not only visible, but also heard
You can often hear valve clearances, especially in cold weather. This is expressed in a slight metallic clicking sound when the engine is not warmed up. As it warms up, the sound weakens. If you can hear it even when the engine is warm, then most likely all or some of the gaps are larger than normal. An increased thermal gap reduces the time the valve is in the open state, which reduces the efficiency of the engine, it begins to work intermittently, starts poorly, and detonation combustion may occur, which has a detrimental effect on engine parts. A reduced gap is even more dangerous, because it completely disappears when the engine is warmed up to operating temperature and the valve stops closing completely. As a result, the power and economic performance of the engine also decrease, but the most unpleasant thing is when the conical chamfers on the valves and on their seats burn out, and this problem cannot be corrected by simply adjusting the gap.
The engine is the heart of the car, so any signs of deterioration in its performance should make you wary and, at the first opportunity, start diagnosing it. If power has dropped, fuel consumption has increased, if the engine “troubles” or you hear popping noises in the exhaust system, check the serviceability of the spark plugs and check the valve clearances.
All owners of cars without a hydraulic compensator periodically face the need to adjust valves.
This mechanism (hydraulic compensator) is available on all modern cars, but if you don’t have it, you will have to adjust the thermal clearance of the valve mechanism “hand-to-hand.” If adjustments are neglected, then over time the valves begin to knock, and this knocking will intensify with the number of kilometers traveled. It will knock both on a cold engine and on a warm one. Naturally, this will significantly reduce the service life of both the valve mechanism itself and the car engine as a whole, since the performance of all components of the power unit depends on the serviceability of the piston group elements.
In addition to knocking in the engine, unset or incorrectly set valve clearance can also lead to problems such as shooting in the muffler.
Typically, popping noises begin to appear when the engine is warm, first when the internal combustion engine is running under load, and then, as the malfunction intensifies, when the engine is idling. This is due to the fact that the incorrect thermal clearance on the compression stroke does not allow the valve to close completely, which violates the tightness of the combustion chamber. As a result, part of the fuel charge may enter the exhaust manifold and ignite there. The problem can only be solved by adjusting the valves and setting the correct thermal gap.
The absence of a hydraulic compensator in the engine requires the car owner to pay more attention to his car, since the frequency of valve adjustment work is determined not by the manufacturer, but empirically, during operation. Simply put, the appearance of noise when the engine is running indicates that it is time to adjust the valves.
On domestically produced cars this happens after about 25-30 thousand kilometers. On imported cars, where the valve clearance in the engine is set, it behaves more stably, half as often, after about 60-70 thousand kilometers. However, taking into account that foreign cars without a hydraulic compensator are, as a rule, very old cars, the need to adjust the thermal gap may arise more often, approximately like in domestic cars, plus or minus 5-10 thousand. km. mileage
The specifics of the valve mechanism when adjusting the thermal gap will require certain knowledge and special tools, so it is better to entrust the entire process to car service professionals.
For example, when setting gaps, it is necessary to take into account the type of internal combustion engine. This concerns maintaining the engine temperature at which the valve clearance adjustment will be as accurate as possible. This data can be found in the automaker's repair manual for a specific engine. Most often, the “regulating” temperature is 20-25 degrees. If the temperature is higher than prescribed, then it will not be possible to adjust the valves correctly without adjustment.
The gap is measured with a special probe under the adjustment screw, and several such probes may be needed to eliminate errors.
It should be borne in mind that it is technically impossible to set the ideal gap the first time. This is due to the fact that after fixing the gap with a lock nut, its value inevitably gets lost. An experienced technician will make the necessary correction for the identified tightening error and slightly increase the gap.
It is not recommended to reduce the gaps, since the adjustment is carried out with the engine not warmed up and not running. After starting the engine and warming up all elements of the CPG, the valve thermal clearance will become smaller. Deliberately reducing the thermal gap to reduce engine noise will subsequently lead to negative consequences in the form of overheating and valve burnout, and wear of the camshaft cams.
How to adjust valve clearances on foreign cars
First of all, using the repair and maintenance instructions for your car, we determine the engine type. The fact is that some foreign cars can have up to ten types of engines on one car model. The tool required for adjusting and installing timing marks is also indicated there. However, in most cases a set of wrenches and feeler gauges is sufficient. Let's look at the features of adjusting clearances on a Mitsubishu ASX 1.6 with a gasoline and diesel engine.
Gas engine
This is what a Mitsubishu ASX 1.6 engine with a gasoline engine looks like
To do this, follow these steps:
- Remove the plastic engine casing (held on by rubber latches).
- We remove the ignition coils and valve cover.
- We set both camshafts according to the marks (the nominal clearances of the intake and exhaust valves are also indicated here).
We set the engine camshaft marks - Using feeler gauges, we measure the gaps “Second and fourth cylinder - intake valves”, “First and third cylinder - exhaust valves”. We record the measurement results.
- Rotate the crankshaft 360 degrees. Then we align the marks on the camshafts and measure the gaps of the other valves.
Checking the size of the engine valve clearances - We remove both camshafts, take out the adjusting cups and use the given formula to calculate the size of the new cups.
Adjusting valve clearances - We install new cups and install the camshafts in the cylinder head.
- Apply sealant to the indicated places and tighten the valve cover.
Apply sealant and tighten the engine valve cover
Diesel engine
Sometimes Mitsubishu ASX 1.6 can be equipped with a diesel engine. In this case, the valves are adjusted using bolts in the pushers.
This is how valve clearances are adjusted on a Mitsubishu ASX 1.6 with a diesel engine
The main signs of incorrect work
If the valve clearances are set correctly, the engine will run quietly and smoothly. With increased intervals, it will make extraneous knocks and noises; with decreased intervals, it will work unevenly. Further operation of such a vehicle is impossible; you must carry out repairs yourself or contact a service center. Otherwise, you may lose your car.
The trouble-free operation of your car is largely determined by regular operations to adjust the valve clearances. The frequency of these operations is set by the manufacturer, and the adjustment technology is quite simple and does not require special knowledge and skills. Good luck on the roads!
Sources
- https://FB.ru/article/226876/zazor-klapana-kakim-on-doljen-byit-instruktsiya-po-pravilnoy-regulirovke-klapanov-vaz-i-inomarok
- https://autochainik.ru/regulirovka-zazorov-klapanov.html
- https://pol-z.ru/regulirovka-teplovyih-zazorov-klapanov-v-pomoshh-avtolyubitelyu/
- https://mtz-80.ru/bez-rubriki/regulirovka-zazorov-klapanov-dvigatelya
- https://scart-avto.ru/remont/kak-otregulirovat-zazory-klapanov-priznaki-i-simptomy/
- https://KrutiMotor.ru/regulirovka-klapanov/
- https://VmyatynNet.ru/avto-rf/nastrojka-klapanov.html
- https://gp-prsmah.ru/tyuning-remont/na-chto-vliyaet-regulirovka-klapanov.html
- https://delis-avto.ru/obzory/proverka-zazorov-klapanov.html
- https://autostuk.ru/regulirovka-zazorov-klapanov-2-varianta.html
- https://4x4privod.ru/regulirovka-klapanov-poryadok-proved/
- https://auto-gl.ru/regulirovka-klapanov-dvigatelya-sovremennogo-avtomobilya/
[collapse]
How often should the gaps be adjusted and what size should they be?
Valve adjustment intervals are not defined. They depend on many factors: car and engine make, operating mode, mileage, etc. For each engine, the automaker indicates their value in the technical documentation or on its official website.
As an example, here is a table of clearances established for HONDA GX engines
The gaps are small. They do not exceed tenths of one millimeter. Usually they range from 0.09-0.4mm. They are determined using a probe. As a rule, these are sets with increments of five hundredths of a millimeter. It should be borne in mind that the clearances on the intake valves are usually smaller than on the exhaust valves. This is explained by the fact that the latter heat up much more, therefore the gaps in them are larger.
As for the frequency of inspection, there are average intervals accepted by the practice of operation and maintenance of engines. For screw adjustment, an interval is taken every 10-40 thousand km, and for adjustment using washers and pushers - 20-100 thousand. Check intervals depend on many circumstances, for example, when the engine operates under heavy loads and in extreme conditions, it is better to make adjustments more often .
