- home
- Engine
- …
Any internal combustion engine has an intake and exhaust mechanism (through which a new fuel mixture is supplied to the engine cylinders, and exhaust gases are removed). The most important element is the valves (intake and exhaust); the performance of the entire power unit depends on their correct operation. After a certain mileage, the engine may become noisy, traction also disappears, fuel consumption increases, and you may hear from mechanics (and simply from knowledgeable drivers) that you need to “adjust the valves.” What is this process? Why is it done and why is it so necessary? Let's figure it out, as usual there will be a video version...
At the very beginning, I would like to say that today I will not talk about the timing system with hydraulic compensators ; nevertheless, this is a topic for a separate article. Let's consider a system with conventional pushers, which are now very popular on many cars; it is this system that needs adjustment at a certain interval
Misregulation and consequences
When the thermal clearance of the valve changes during long-term operation or when individual elements of the system break down, the efficiency of the engine and the service life of the parts are significantly reduced. This is also accompanied by increased fuel consumption and a characteristic knocking noise in the engine compartment. If, for example, the gap is larger than normal, the element cannot open completely, and this contributes to a drop in power characteristics. Burning of the valve and its seat is possible if the gap is very small. In any case, these faults have a bad effect on the engine's response when you press the accelerator pedal.
Why do the valves burn after installing HBO?
The main reason why valves burn out on gas is the incorrect setting of the engine for LPG. Gaseous fuel differs from gasoline in octane number: for propane-butane the octane number is usually 100 units, and for methane it is 110. The higher the octane number, the smoother it burns, the longer it takes to reach the “peak” of combustion, so it should be ignited earlier. If the ignition is adjusted for 92 or 95 gasoline, the mixture will burn out in the exhaust tract.
When installing LPG (especially methane), be sure to install a CVT in order to adjust the moment of sparking when driving on gas! Or install dual-mode gas-gasoline firmware. On cars that initially came with LPG (like Lada Vesta CNG), such firmware is installed from the factory; for other models, similar software is created by chip tuning specialists.
The second common reason why valves burn out due to gas is running on a lean mixture. A lean mixture is less flammable, burns longer and burns out in the exhaust channel, thereby exposing the valve and its seat to overheating.
Any HBO needs configuration. On systems of the 1st–3rd generation, it is important to correctly adjust the gearbox, and on the 4th and newer systems, it is important to set the injection corrections relative to gasoline in the gas ECU. If you adjust the system incorrectly or consciously “strangle” it for the sake of saving, this is fraught with burnout.
Gas consumption on a modern engine cannot be 1:1 to gasoline. Their calorific value is comparable (within 40–45 kJ/g), but the density of propane-butane is 15–25% lower (500–600 g/l versus 700–800 g/l). Therefore, gas consumption on a normally enriched mixture should be greater than gasoline!
As with gasoline, common causes of valve burnout in an engine with LPG can be improper adjustment of clearances, carbon coking and cooling problems. Therefore, when troubleshooting a motor with a burnt-out valve, you should make sure that these problems do not exist.
On engines with manually adjusted valves running on gas, when adjusting the clearances, it is worth making an adjustment of +0.05 mm. For example, for 8-valve VAZ engines, normal intake clearances are 0.15–0.25 mm, and exhaust clearances are 0.3–0.4 mm, but on gas they should be shifted to 0.2–0.3 mm for intake and 0.35–0.45 mm for release.
Why do diesel valves burn out?
The reasons why valves burn out on diesel engines differ from those on gasoline internal combustion engines. They do not have spark ignition, and a lean mixture is a sign of normal operation, since air must always be supplied in excess for complete combustion of diesel fuel. Typical reasons why valves burn out on a car with a diesel engine are:
- too early fuel injection into the cylinders;
- over-enrichment of the mixture due to excessive pressure of the injection pump or overflow nozzles;
- incorrect adjustment of thermal clearances or malfunction of hydraulic compensators;
- overheating of the cylinder head due to impaired circulation of antifreeze or deterioration of its properties.
Most often, a valve on a diesel engine burns out precisely because of the above reasons. On older internal combustion engines with a mechanical injection pump, early injection may occur due to a breakdown of the timer (advance machine) of the pump that controls the timing of the fuel supply. In modern internal combustion engines with a Common Rail system, the culprit for valve burnout may be sensors that incorrectly determine the moment for injection, and worn-out injectors that pour fuel in excess of normal.
The reasons why valves burn out in a diesel car engine may be problems with the air filter and intercooler (on a turbodiesel). A clogged filter restricts the air flow, which is why there is a relatively large amount of fuel at a constant supply volume. An intercooler that overheats (for example, due to contamination) acts in a similar way. It cannot cool the air normally; as a result, although it develops the required pressure in the inlet due to expansion when heated, the amount of oxygen in it ultimately turns out to be insufficient, since the air mass is deficient relative to the norm. Both factors cause over-richness of the mixture, which on a diesel engine can lead to valve burnout.
Gap function
There are at least 2 valves in a car engine cylinder (maybe more depending on the car model). Through the inlet valve the combustible mixture enters the cylinder, and through the outlet valve the gases are removed. The part is driven by a gas distribution mechanism.
During operation, the motor heats up, resulting in expansion of all its elements. Therefore, when the motor is not running (in a cold state), there must be a gap between some parts sufficient for thermal expansion of the metal.
What does valve clearance affect? With rattling ones or with too tight ones - is it worse? Engine ZMZ-402.
Volga-3110, ZMZ-402, carburetor.
For the second week I can’t understand WHAT it is. The valves rattled a little and they said, “Everything’s fine, let them rattle like that, nothing will happen when they’re too tight, that’s worse.” For about 10 days now I’ve been FEELING that SOMETHING IS NOT SOMETHING. WELL, I DON'T LIKE THE HOW the engine works, there seems to be some kind of extraneous sound (not a hum or an obvious knock, but something in between). WHEN STARTING THE ENGINE (ONLY AT START!) there is a smell of gasoline, which disappears after a minute of running the engine. It feels like the car seems to be driving worse, especially during acceleration. He got our mechanic to complain, looked at it, and said, “EVERYTHING IS NORMAL, he doesn’t hear or smell ANYTHING abnormal.” Another source said that the rattling valves will break the rocker arms and the shaft - as a result, fuel will rush there, the consumption will be through the roof, and it will not run at all, the result is a replacement of the shaft, rocker arms, valves (It happened on a VAZ-2107). Question - WHERE is the truth - how scary are rattling valves? And in general, WHAT does valve clearance affect? WHAT do the above symptoms look like? Or again, “I’m imagining all kinds of dregs - this is the norm for the Russian auto industry”? Gasoline is crap, can the whole reason be the quality of the gasoline? Thank you.
Register, share links on social networks, receive
20% from each money transfer from users who come to the project through your link. More details After registration, you will also be able to receive up to 100 rubles for every thousand unique search clicks to your question or answer More details
I wouldn’t trust this source on the VAZ 2107, since he brought the car to such a state, and there are no rocker arms in the VAZ timing belt, and neither In any way, fuel cannot rush there, because the pistons suck it into the cylinders, and not under the valve cover. Also, philosophical arguments about worse clamped valves or a large gap do not make sense, because both of them are very bad, both for the correct operation of the engine and for the service life of the valves themselves. In short, the conclusion is this: it is imperative to adjust the valves, at the same time it is advisable to inspect the gas distribution mechanism, check for increased clearances of the rocker arms, the integrity of the pusher rods (sometimes the steel tips bounce off them)…
qna.center
How should the elements work?
The operation of a 4-stroke engine includes 4 cycles.
Each cycle has its own purpose:
- Intake - the intake valve opens and the fuel mixture is supplied to the cylinder.
- Compression - the valves are closed, the fuel mixture is compressed.
- Power stroke - the valves are closed, the burning mixture expands, its energy is directed to move the pistons.
- Exhaust - the exhaust valve opens, exhaust gases are removed.
For the motor to operate efficiently, the clearances must be properly adjusted.
The importance of adjusting engine valve clearances
After the start, the engine and all its parts begin to heat up, and therefore expand. At the same time, we should not forget about the natural wear and tear of rubbing and contacting parts. This necessitates strictly defined gaps between certain components. And the thermal valve clearances (between the camshaft cam and the valve stem) are among the most important.
If the gap is too small, the engine will not be able to fully realize its potential, which will immediately affect the dynamic and speed characteristics of the car. At the same time, the exhaust valves will overheat and their edges will melt.
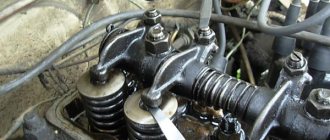
If the gap is larger than required, the car owner will be alerted to the characteristic “clatter” of the engine, which can sometimes go away as the car warms up. With increased clearance, the camshaft lobe begins to "knock" against the rocker of the valve stem instead of pushing through it.
Valve mechanism in section using the example of an engine with two camshafts
The need to adjust the valves is ripe if the following signs are visible:
- there is an extraneous, slightly ringing sound in the area of the cylinder head cover;
- the gas distribution mechanism was repaired;
- the last adjustment of the valve thermal clearances was carried out more than 20 thousand km ago;
- engine output has dropped noticeably;
- As a consequence, high fuel consumption is possible.
Most modern engines use hydraulic compensators to adjust thermal clearances. It is convenient and does not require third-party intervention, although there is an opinion that components still wear out a little faster. The engines of many cars, in particular VAZ classics, require manual adjustment of thermal clearances. Some people consider this a simple matter, others, on the contrary, consider it a responsible and serious job. It all depends on experience, variations of techniques, dexterity and patience. It is recommended to carry out work after approximately 20 thousand km since the last adjustment.
Also, there is not much difference whether you have to deal with a gasoline or diesel engine. There are no significant or fundamental differences in the valve adjustment process.
It’s even better to combine adjusting the valve clearance with changing the engine oil. And exactly in this sequence. This will allow dirt, dust and sand that may get into the engine during adjustment to then leave along with the old oil and oil filter.
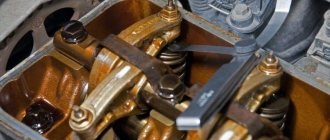
Different timing belt designs
More modern design. When the camshaft lobes press on the tappet cup. And that, in turn, goes to the valve. This design is used on VAZ 2108-10 cars. Valve clearances are adjusted using special calibrated washers. They have different sizes. They are selected depending on the size of the thermal gap between the cup and the camshaft cam.
The most modern system includes the use of hydraulic compensators as pushers. Adjustment of valve clearances is not required with this design. The hydraulic compensator is located between the camshaft cam and the valve. When the engine is running, oil under pressure is supplied to the compensator cavity. The cavity expands under oil pressure. And the gaps are completely removed. When the cam is pressed on the compensator. He starts moving. The oil pressure supply channel is blocked. Oil enters a confined space. And it prevents the internal cavity of the compensator from shrinking. As a result, the force from the cam is transferred to the valve. As you can see, thermal gaps are removed immediately. After the oil pressure expanded the compensator cavity. And the movement of the cams is transmitted to the valve without gaps.
If you hear valve knocking. This means that when the valve is pressed on the compensator, oil comes out of the compensator. Through the outer surface of the compensator and the block head housing. That is, the compensator seat is worn out and allows a breakthrough in oil pressure. Or the piston is jammed in the compensator cavity. And the Expansion does not happen.
In the case when mechanical transmission of pressure from the camshaft cam to the valve is used. Constant adjustment of the thermal clearances of the valves is required.
Why are valve clearances necessary?
Answering the question why engine clearances are needed, it can be noted that for normal operation of the motor, the thermal gap is quite important. Due to it, the closing and opening times of the valves are observed, and the preservation of the optimal level of tightness when closed is ensured.
If the gaps are set in accordance with the rules, after warming up their parameters are reduced to minimum values. This ensures regulation of gas distribution phases and long service life of parts.
During the operation of the car, the gap changes up or down. Depending on such deviations, certain problems appear. In most cases, this leads to a decrease in the service life of the valves, a decrease in the engine power level, the filling of the cylinders with the fuel and air mixture becomes worse, the overall combustion efficiency decreases, and so on. It is for this reason that it is so important to adjust the gaps from time to time.
It is necessary to check and, if necessary, adjust the gaps every 20 - 30 thousand kilometers. You need to rely on the standards prescribed in the repair manual for a car of a particular brand.
Valve clearance adjuster
A more effective and efficient way to adjust the valve mechanisms of the power unit is to adjust them using a device, which is a special rail with an indicator attached to it. This adjustment is much more accurate manually, since when using the device, it detects and takes into account all defects on the surface of the adjustable parts.
For mechanical adjustment, in addition to dismantling the cylinder head cover, you will additionally have to remove the accelerator drive, the protective shield on the ignition distributor, the exhaust hose from the crankcase, and for carburetor cars, the carburetor “pan”.
Using a special wrench, you need to rotate the crankshaft until the marks on the camshaft sprocket align (this is described above). To make this process easier, you can use a bright marker to mark the camshaft sprocket every 90 degrees. After that, we install the device rail on the valve being tested and fix it in a stationary state. We put an indicator on it and place its foot on the edge of the adjustable valve. To correctly perform this procedure, you will need a special grip, with which you need to clamp the cam and pull it up (a simple wrench will do). As a result, the indicator readings should deviate by 52 divisions. If they are slightly too low or too high, the valve needs to be adjusted. And then everything is extremely simple:
- using a 17mm wrench, loosen the locknut on the adjusting screw;
- the gap is adjusted with a key of 13, and all readings are clearly reflected on the indicator scale;
- the adjustment is checked and the locknut is tightened;
- At the end of the stage, it is again necessary to check the correct settings of the valve mechanism.
As you can see, this adjustment is much more accurate and simpler. But we should not forget that a highly qualified specialist will perform it at a high level and using a standard set of probes. In conclusion, it is worth emphasizing that most sets of feeler gauges contain an adjustment diagram that contains data on the angles of rotation of the camshaft and crankshaft, indicating the numbers of cylinders and valves.
How to ensure the required clearance
The required clearance can only be obtained through properly carried out adjustment work. When carrying out this process, the main gas distribution mechanism is adjusted, especially the gap located between the camshaft cams and the valve lever.
There are special instructions on how to make the adjustment. It is not enough to ensure that the valves are pressed more tightly, since as the temperature rises, all parts become larger in size. Such an expansion automatically leads to various negative consequences.
The intake and exhaust valves should close the seat tightly, but with a small gap. It is necessary to ensure that the valve stem does not rest rigidly on the top of the device.
In the process of self-regulating gaps, you need to strive for strictly established values. They should not be more than 0.15 mm. The maximum permissible error level is 0.05 mm. These parameters should be checked only with a cold engine.
By ensuring the correct clearances during the adjustment process, the driver will receive stable engine operation, significant fuel savings, and increased service life.
How does a camshaft work?
If we compare the operation of the camshaft with the speed of a Kalashnikov assault rifle, then the speed of the latter’s shots will be 10 times less. The crankshaft produces 6,000 or more revolutions per minute, with one working cycle consisting of two revolutions, ensuring the intake and release of the air-fuel mixture.
Thus, the frequency of opening and closing of each valve (intake and exhaust) in one minute is at least 3000 times. Moreover, the frequency of the so-called “dead spots” of the valves (i.e., when they occupy their extreme positions in the cylinders) is even greater - 6,000.
Whenever manipulating the crankshaft, valves and cylinders, it is necessary to take into account even hundredths of a second of engine operation, which significantly affects its operational capabilities and durability.
When to adjust valves
If your engine does not have devices to maintain the required clearance automatically, then you need to be prepared for the fact that every 30-35 thousand km. the indicated gaps must be checked.
Let us add that many car enthusiasts, especially owners of domestic VAZ models, determine the need for adjustment based on the appearance of noise during operation of the valve mechanism.
On foreign-made cars, the need to adjust the valves may arise after 60-80 or even 100 thousand km. mileage, since the engines have a longer service life and the set gaps on such internal combustion engines remain more stable.
Signs and consequences of improper clearance
After starting the engine, it itself and all its parts begin to heat up significantly and automatically expand. It is also worth taking into account the natural wear and tear of the elements in contact with each other. All this is the basis for ensuring strictly established gaps between certain parts. Deviations from the norm can lead to certain problems. The list of them depends on which direction the gaps have changed - more or less.
Gap too big
If the gap is larger than the required size, the driver will begin to hear the characteristic clatter of the engine, which gradually goes away as the car warms up. With increased clearance, the camshaft fist does not push through the rocker of the valve stem, but simply begins to knock on it.
Such long-term shock load leads to such unpleasant consequences as:
- significant reduction in valve life;
- riveting;
- chipping of the end, which further increases the gap;
- increased noise during engine operation.
At the same time, engine power decreases due to serious disruption of gas distribution processes.
Gap too small
With a very small gap, the car engine will not be able to fully realize its functionality. This will automatically affect the overall speed and dynamic characteristics of the vehicle. At the same time, there will be significant overheating of all exhaust valves with melting of their edges. Among the main consequences of a reduced gap size are the following factors, based on the loss of combustion chamber tightness:
- Reducing compression due to the release of the air-fuel mixture.
- During the working stroke, exhaust and hot gases break through and lead to severe burnout of the valves.
- The plates no longer touch the seats, which disrupts heat transfer.
- The valves are heated to temperatures that significantly increase corrosion and oxidation.
- Increased load on timing belts.
Based on everything said above, we can conclude that adjusting the gaps must be done without fail. The process must be carried out if the following signs are present:
The engines of modern cars are designed in such a way that thermal clearances must be adjusted manually. For some it may seem simple, while others consider this process serious and responsible. It all depends on the driver’s experience, the availability of certain skills and tools. Moreover, there is no difference between diesel and gasoline engines. The adjustment process is carried out here according to the same scheme.
Advantages and disadvantages of using hydraulic compensators
The use of compensators in the valve mechanism made it possible to significantly soften its operation, minimize shock loads and eliminate excess noise. The wear of timing parts has decreased and they have become more accurate, which increases the engine life, its power and torque. The disadvantages of introducing hydraulic compensators include the emergence of special requirements for the operation of internal combustion engines, as well as certain nuances at the time of cold start.
Structurally, the working fluid for compensators is engine oil. In the first seconds after starting the engine, there is practically no pressure, and the operation of the compensators at this moment is accompanied by a characteristic knocking sound. The hydraulic compensators knock especially loudly when they are cold, but as they warm up the noise disappears.
Operating principle of internal combustion engine timing valves
An ordinary ordinary driver, when it is necessary to adjust the valves, does not do it himself, but goes to a car service center. Because this requires certain skills and time. To teach yourself how to adjust valve clearances, you need to know the principle of their operation. An internal combustion engine has two shafts: the crankshaft (crankshaft) and the camshaft (camshaft). They are connected to each other through pulleys and a belt, through sprockets and a chain. The most common option is a timing belt driven engine. The crankshaft to camshaft transmission ratio is 2:1 (two to one).
The cams have a special irregular smooth shape that closes and opens the valves so that they correspond to the position of the crankshaft and camshaft, the engine stroke and valve timing.
When the internal combustion engine is running, it heats up accordingly, its parts heat up and expand due to high temperature. Because of this, the distance between the camshaft and the valve tappet changes slightly.
Question: why does the engine run differently when cold and when hot? Answer: because when the engine warms up to operating temperature, the valve tappet is pressed tightly against the valve and camshaft. This ensures efficient operation of the internal combustion engine.
And, if the valve end stops above the pusher, then a gap appears between the seat and the plate, and this leads to a decrease in compression in the cylinder.
It’s easy to check the compression: turn off the engine, unscrew the spark plug, screw in a special pressure gauge instead, turn the ignition key, get out and see what pressure the pressure gauge of a given cylinder shows.
And, if the end of a closed valve is located below the pusher, then during a certain valve timing phase, the valve will not open to the full distance it should. And this leads to a loss of power due to the slow removal of exhaust gases.
Burnt out valve: signs, diagnostics
Valves ensure the implementation of working processes in the cylinder. The intake valves are responsible for supplying a portion of the fuel-air mixture, and the exhaust valves are responsible for releasing combustion products. Burnout of one valve has a detrimental effect on the operation of the entire cylinder.
The content of the article
Signs that the valve is burnt out
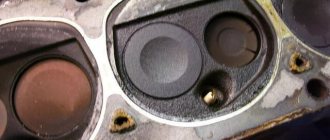
What does a burnt valve look like?
Signs of a burnt-out valve include engine shaking, smoke from the breather (the breather is a valve for venting the crankcase and releasing excess pressure) and, when the engine operates for a long time with a burnt-out valve, increased fuel consumption. Let us explain the popular concept of “motor troit”. This means a malfunction of one cylinder, which manifests itself in a loss of power and throttle response, vibration and shots in the exhaust pipe. But these signs of a burnt out valve are ambiguous.
The engine can also stall due to broken spark plugs or a weak spark.
Smoke from the breather can also occur if the piston is damaged. But there is a distinctive feature here - the color of the smoke should be bluish, and the spark plug should be covered with oil, which is associated with a broken piston. In case of burnout, the spark plug remains dry. Note that a burnt valve in a carburetor engine and in an injector gives the same symptoms, because The only difference is the fuel injection system.
How can you tell if a valve is burnt out?
If you have checked the spark plugs, but the engine still stalls, then you should proceed to the procedure for finding a non-functioning cylinder. It's not complicated. After starting the engine at idle, remove the caps from the spark plugs one by one. If the engine changes operating mode when removing the cap, this means that the cylinder is working. If the changes are insignificant, then you should look for the cause in this cylinder.
Removing the wires from the spark plugs
Next, you need to check the compression of the suspect cylinder. We measure the compression level with a compression gauge, and then repeat the measurement by pouring a syringe of oil into the cylinder. If the second value is higher than the first, then there is a problem with the piston. If the values coincide, the valve will burn out.
Why do valves burn out?
The valves operate at constant high temperatures (400-600°C) and significant mechanical loads. The inlet valve is in more gentle thermal conditions, because cooled by the incoming fuel-air mixture. Exhaust valves, on the contrary, heat up even more due to the exhaust gases.
Exhaust valves are more likely to burn out.
For proper operation of the valves, a clear fit of the valve to its seat must be ensured and the cooling conditions (opening - closing level) must be observed. The appearance of carbon deposits both on the valve itself and on the seat violates both requirements and leads to damage to the valve. Carbon deposits can form due to under-adjustment, wear, manufacturing defects, problems with the cooling system, elevated combustion temperatures, etc.
A factory defect is not that uncommon. The part is complex and operates under constant loads, so even a slight heterogeneity of the metal can lead to destruction of the entire part.
To protect yourself from defects, buy only from trusted manufacturers!
Wear is an insurmountable obstacle for all working parts. Therefore, do not neglect checking the valves after a certain mileage! Poor valve adjustment is the creation of insufficient clearances between the valve and the seat, often referred to as stuck valves.
How will the engine work and what will happen if the valves are clamped?
How to understand that the valve is jammed
If after starting the engine runs normally, but during long operation the thrust drops - this is a symptom of pinched valves. Another sign of jammed valves can be shots into the muffler when releasing gas. Because The combustion chamber is not completely closed, compression decreases and a disruption in the working process occurs. When adjusting, it is better to exceed the permissible gap than to make it smaller.
A burnt valve must be repaired as quickly as possible!
The consequence of clamped valves is overheating, increased fuel consumption and, as a result, burnout. It is undesirable to operate the engine with a burnt-out valve; this leads to burnout of the valve seat. What the car owner will end up having to do is replace the entire head.
What to do if the valve burns out?
In the case of burnt valves, repair consists not only of replacing them, but also of finding out the cause of the burnout. Therefore, the ignition and cooling systems should be checked.
If you have replaced and ground in one valve, take the time to ground in the rest.
You can replace the valve not only at a service station, but also in a garage if you are familiar with the basics of repair.
Thus, the valve is an important part of the engine, so in order to protect yourself from repairs, it is better to carry out routine maintenance on time.
mytopgear.ru
Preparatory work
So, the engine is cooled down, and the car itself is placed on a flat surface and immobilized. You can start working:
- Remove the carburetor air filter cover and remove the filter;
- We unscrew the filter mounting bolts and remove it, having first disconnected the pipes going to it;
- We remove the cable for manual control of the air damper (choke) and disconnect the throttle linkage;
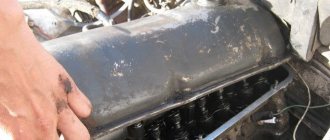
- Unscrew the bolts securing the valve cover and dismantle it;
- Check the chain tension (it must be normal, otherwise you will have to adjust the tension first);
- Remove the distributor cap.
Now you need to set the TDC of the piston in the 4th cylinder and the marks on the knees will help with this. camshaft drive shaft and cover. shaft, as well as on the camshaft gear and its cover.
To do this, you can use a key of appropriate size, which you need to rotate the knees. shaft for the drive pulley bolt. Or use one of the drive wheels. To do this, you need to hang it with a jack, engage 4th gear and slowly turn the raised wheel. In this case, the transmission will ensure rotation of the crankshaft. But with the second method, you will need an assistant, since it will be difficult to check the coincidence of the marks.
What are valve clearances for?
In order for the engine to work at its best and develop all its performance characteristics to the maximum, the valves must move clearly and synchronously. The valves should fit tightly into their seats and open to the maximum.
With correctly set valve clearances, a hot engine works almost the same as a cold one, that is, the loss of power is minimal.
When the car is used a lot, for example, working in a taxi around the clock, the valves quickly lose their settings. Many people have probably heard, they say that the valves are knocking. This is just the time to adjust the valves.
Advice from auto experts: It is necessary to check and adjust the valves every 25 thousand kilometers of actual mileage. Of course, there are many modifications and brands of engines. It would be better to read the operating manual for the specific engine. Maybe there's no need to adjust at all.
How often are adjustments made?
Of course, valve adjustment is done when a certain mileage has accumulated, but it is also different for different cars. This information can be found in the instructions. But experienced car enthusiasts advise visiting a service station after every 20-45 thousand kilometers for domestic cars, and 60-100 thousand for foreign cars.
But if you know how valve clearance affects engine performance, you will be able to identify problems yourself in time. If, when the hood is open, the engine makes noise, as if there is a sewing machine, then you need to urgently go to a service station. The second sign is a drop in power - the car does not “pull” as before. In such a situation, you don’t have to wait until the car has covered the allotted mileage; you need to take action as quickly as possible.
The adjustment work itself is very inexpensive and takes about an hour - you have to wait until the engine cools down.
On some cars, adjustment is not made at all - if special hydraulic compensators are used. They themselves provide optimal conditions, and they may only need to be replaced, but this is rare. Hydraulic compensators can be installed on most cars, and you can forget about such adjustments forever.
Sequence for adjusting engine valve clearances
Before making adjustments, set the cylinder piston to TDC (top dead center) on the compression stroke. In this position, both valves of the adjustable cylinder must be closed, and the rocker arms of these valves must swing freely within the clearance.
After this, slowly loosen the locknut on the adjusting screw or bolt. Use a feeler gauge and adjusting screw to adjust the required clearance, then tighten the locknut.
“Be careful not to change the set clearance when tightening the locknut.”
After tightening the locknut, the thermal clearance must be checked again. Use a feeler gauge to check the gap. The feeler gauge should fit into it with little effort; if this feeling does not occur, but it passes very easily or very hard, you need to adjust the gap again.
To adjust the thermal clearance in the remaining valves, it is necessary to turn the crankshaft half a turn. During adjustment, the operating order of the engine cylinders (1-3-4-2) should be taken into account. Turn the crankshaft by the bolt securing the generator drive pulley.
How to determine a bad cylinder?
The essence of the simplest test comes down to sequential shutdown of the cylinders. By simulating a malfunction, we observe changes in engine operation. After turning off the boiler in which the valve has burned out, changes in operation will be minimal. What are the best ways to do this?
Remove the high-voltage wire from the spark plug. At this time, the coil will experience increased loads, so the duration of such a stress test should not exceed 2-3 seconds. To avoid the risk of electric shock through a cracked GDP, such a check should be done wearing rubberized gloves or using pliers with plastic/rubber handles.
Physically disconnect the injector chip. If you have specialized diagnostic equipment, this can be done programmatically by connecting to the car via the OBD-II connector.
Adjustment of valves
First of all, on a carburetor car we remove the carburetor and air filter, and on an injection car only the pipes, which will prevent you from removing the valve cover.
Then we unscrew all the nuts around the perimeter by 10 using a socket wrench, be sure to collect the washers in containers so as not to lose them, since they are quite specific. Of course, you can later purchase them in the store, but this can significantly delay the work process.
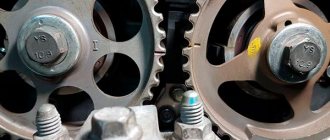
Now we take a crooked starter or key, then rotate the crankshaft clockwise until the mark on the pulley coincides with the last ebb on the front cover along the way. With this action we set the pistons of the first and fourth cylinders to top dead center. It is at this very moment that the valves in these cylinders should be completely closed; accordingly, it is in this position that the adjustment is carried out.
The VAZ 2106 engine works according to the 1-3-4-2 scheme. That is, when the pistons of the first and fourth cylinders are at top dead centers, the pistons of the third and second are at the bottom.
So, after we have aligned the pistons as needed, we proceed to adjusting the valves. We can determine the ones we need by simply shaking the rocker arms - a light tapping sound will be heard. We need valves 8 and 6, counting from the front of the car.
To adjust, insert a feeler gauge between the camshaft cam and the rocker arm. If the probe enters with tension and comes out the same way, then nothing needs to be adjusted. If it passes easily, then you need to unscrew the locknut and unscrew the adjusting bolt. At this time, while we are unscrewing, we fidget with the feeler gauge to find the optimal position.
Once it is determined, tighten the locknut. It is very important to ensure that the adjusting screw does not turn even a degree. In any case, we need to check. To do this, we fidget with the probe again. If this is not possible, or vice versa, the probe moves without effort, repeat the procedure.
At this moment, if you look at the camshaft gear, the mark on it coincides with the cast on the camshaft housing. So, this is the best guide, because the crankshaft will need to be turned exactly 180 degrees, while the camshaft will turn 90 degrees. We adjust valves 4 and 7. Next, we turn the crankshaft again and adjust the valves in accordance with the table.
There is no point in discussing the assembly. The only thing worth paying attention to is the flatness of the valve cover plate. Over time, it is pushed through by washers, so it requires editing. If indentations are visible in the tightening areas, then it must be corrected on an anvil.
Cleaning the throttle body - fashion or necessity?
Among motorists, quite often there is a fashion for certain actions aimed at improving the performance of the car. For example, now everyone has actively started cleaning the throttle valve, service stations are vying with each other to offer their services, and the Internet is full of advice on why, how and why this should be done. Let's see if this is necessary.
1 Throttle valve - what is the reason for poor starting?
Last but not least, the throttle valve should be blamed for poor engine starting and vibrations at idle. Especially if you haven’t looked under the hood for the last 100-150 thousand kilometers. During this time, dust mixed with oil could accumulate on the throttle valve - oil in small quantities comes out of the engine crankcase, and the air filter, clogged with dust, ceases to properly filter the air. As a result, the on-board computer can increase idle speed, which in turn leads to excessive fuel consumption.
We recommend that you read
- Throttle valve VAZ 2112
- Throttle learning
- Throttle Body Cleaner
- Auto scanner for self-diagnosis of any car
The throttle valve can last a very long time without replacement, but it does need cleaning. This element is responsible for supplying air to the intake manifold, from where it enters the combustion chamber mixed with fuel. The driver controls the process of opening and closing the damper by pressing the gas pedal. Adhered dust and oil can cause poor operation of this element - the damper may not close completely. The following “symptoms” indicate the problem:
- the engine starts with problems;
- at idle, floating speed is noticeable;
- at low speeds the car jerks;
- The idle speed “fails” and the car stalls.
You can even determine the degree of contamination visually. If there are no noticeable oil stains on the part, then the problem is different, but if the damper has lost its original metal color due to adhering oil, then it’s time to clean it.
2 Cleaning the throttle valve - cleaned it yourself, teach someone else!
The cleaning process itself is completely simple. We free the throttle body from the corrugation, and free the part from the cable with which it is connected to the gas pedal (in the case of a mechanical drive). To do this, you just need to press the pedal to the floor - the cable will loosen, and you can easily get rid of it. Then carefully disconnect the coolant hoses. Of course, all work must be carried out with the car cooled down, otherwise you will not avoid burns.
Having dealt with the hoses, remove the gasket in front of the throttle valve and the part itself. As a rule, it is secured with two nuts. We start cleaning from the base of the intake manifold - probably a lot of dirt has accumulated there too. You don’t need any special equipment for cleaning; a can of carbocleaner (carburetor cleaning liquid) and a clean cloth are enough.
Apply the spray to the surface you want to clean and leave for a few minutes. Just don’t overdo it – the cleaner is quite aggressive on the plastic and rubber components of the case.
You should not clean the valve with a metal brush - you will remove the protective coating along with the dirt, and also damage the seals along the throttle contour. There is no point in carrying out this operation more often than once every 100-150 thousand kilometers, unless you really like to tinker under the hood. Many people do not understand what cleaning can do for the very reason that the car did not need to clean the throttle valve at the time of service. As many drivers note, after cleaning the throttle valve, the engine speed increased significantly - this is a normal reaction of the car.
3 Additional measures – what else should you pay attention to?
Every motorist should have a universal device for diagnosing his car.
You can read, reset, analyze all sensors and configure the car’s on-board computer yourself using a special scanner.
As a rule, after such a mileage, not only the damper needs to be cleaned, but also the air filter is already clogged with dust. So don't forget to replace it along the way. It would seem that everything is simple, but only if you are the owner of a car without an on-board computer.
The trouble is that as the damper becomes dirty, the computer could take part in correcting the idle speed control (if the throttle is mechanical) or the position of the damper itself (if the part is electric), thereby increasing the idle speed. In this case, you will also have to work with the computer itself. No, we won’t have to crack the code or reflash the system, we’ll just indicate to the onboard “brains” that we’ve already put the part in order, and the speed should be returned to its original values.
This is done quite simply, the main thing is to strictly follow the instructions. First, warm up the engine and then turn off the car. We wait a few seconds and turn on the ignition again. Exactly three seconds later, press the gas pedal all the way five times in a row within five seconds (try to make it in time). Then we wait seven seconds and press the pedal to the floor again, this time we do not release it until the Check Engine light on the panel lights up. Hold the pedal until the light blinks. We release the gas three seconds after it starts to burn continuously.
When you restart the engine, the idle speed will be exactly where it should be with a clean choke. This procedure is not suitable for all cars - if your “iron horse” does not react in any way to the manipulations, and the speed still exceeds the permissible value, contact a service station, where they will reset the parameters.
Do you still think that diagnosing a car is difficult?
If you are reading these lines, it means you are interested in doing something in the car yourself and really saving money, because you already know that:
- Service stations charge a lot of money for simple computer diagnostics
- To find out the error you need to go to specialists
- The services use simple impact wrenches, but you can’t find a good specialist
And of course you are tired of throwing money down the drain, and driving around the service station all the time is out of the question, then you need a simple CAR SCANNER ELM327, which connects to any car and through a regular smartphone you will always find the problem, turn off CHECK and save a lot of money.
We ourselves tested this scanner on different machines and it showed excellent results, now we recommend it to EVERYONE! To prevent you from falling for a Chinese counterfeit, we publish here a link to the official website of Autoscanner.
If you set the valve clearances incorrectly
After 5-10 minutes of operation, the motor reaches operating temperature (this is about 90-100 degrees). According to the law of physics, all parts begin to expand. Engine wear will vary depending on whether the valve clearances are too large or too small.
Gap too big
If the gap is larger than the nominal one, the sound of the engine will be different. As the engine gradually warms up, this unusual sound (clunking) will disappear.
If the valve clearance is large, then the camshaft fist does not press on the valve drain rocker, but knocks on it.
If the engine runs in this mode for a long time, then:
- valve service life is reduced;
- the end of the valve stem may break off;
- riveting;
- there will be an increased noise level of the internal combustion engine.
Since the gas distribution phases are disrupted, engine power may drop by half.
Gap too small
In this case, the valve does not open completely, the exhaust gases do not have time to escape completely, hence the loss of engine power. Valve plates will burn out due to increased overheating.
Consequences of low valve clearance:
- Low compression in cylinders.
- The exhaust gases do not have time to escape through the small gap and the edges of the valves burn out.
- The valve plates do not fit tightly into their seats.
- High load on the timing belt or chain drive.
It is necessary to adjust the valve clearances as soon as possible if the following symptoms appear:
- A ringing sound appeared in the upper part of the cylinder head (cylinder head).
- If the timing belt has been repaired.
- If you have driven more than 25,000 km since the last adjustment.
- If the engine does not pull. Neither uphill nor in a straight line.
- If gasoline consumption has increased.
Adjusting the thermal clearances of the valve mechanism
Let's start with the fact that although different engines may have certain differences, the general principles of gap adjustment are similar for the vast majority of engines.
- The first nuance is that adjustments must be made at the internal combustion engine temperature specified for a specific engine type in the maintenance and repair manual. The average is about 20°C. This requirement must be carefully observed by those who do not have sufficient experience and strive to achieve maximum measurement accuracy. As for a qualified craftsman, it is no secret to a specialist that at a higher temperature of the unit, the gaps will initially increase. For this reason, valve adjustment on a warm engine is possible, but is carried out taking into account a number of amendments. It is worth adding to this that different motors may have parts made of different alloys and materials. As a result, thermal gaps may differ, and the cooling process may proceed faster or slower. For this reason, corrections for each internal combustion engine are individual.
- Now about the gap itself. The indicated gap on many motors is measured under the adjusting screw. You need to measure the gap using a set of special feeler gauges; the main one is the feeler gauge, which has a width of 10 millimeters. A number of nuances should also be taken into account. For example, consider VAZ cars. When making adjustments on classic models, there is a need for a wide feeler gauge. The fact is that the use of standard narrow probes leads to an error. This error is caused by the fact that the valve lever on such units is slightly beveled. Let us add that the optimal gaps on the “classic” are 0.15 mm. This clearance is the same for both intake and exhaust valves. It is quite obvious that it is quite difficult to accurately determine the indicated gap with one simple feeler gauge. The task is even more complicated, since it is not always possible to purchase a complete set of probes. In such cases, the experience of the master plays an important role, who actually tactilely determines the gap. To do this, take a 0.15 mm probe, after which its passage in the gap is assessed. If the indicated probe goes too “tight”, then the valve is clamped. Free passage of the feeler gauge will indicate increased clearance.
- It should be understood that it is not possible to set the gap perfectly right away, since after tightening the locknut it still gets a little off. For this reason, an amendment is made, the gap increases slightly. As for reducing the gap, such manipulation is not recommended. Note that there is a so-called table that contains various corrections in the case of valve adjustments on a hot engine. If you look at such data, then you can see the dependence of the increase in gaps on the degree of heating of the motor. In other words, the gaps should be larger when the engine is warmer. In this case, one should take into account the fact that the gaps are indicated for an idle internal combustion engine. After starting the unit, they will decrease, since the valves themselves will heat up the most and will be increased in length compared to other timing structural elements.
- Many people strive to minimize the noise from the operation of the timing belt. For this reason, there is a misconception that a slight reduction in clearances has a positive effect without harm to the engine. Actually this is not true. Indeed, if the valves are “clamped”, then the engine can run quieter when “cold” and/or “hot”. But reduced noise does not mean minimized wear due to the absence of audible impacts. The fact is that under certain conditions the valve stops closing completely. A loose fit of the plate disrupts heat transfer; the valve does not transfer excess heat to the cylinder head. The result is overheating and burnout of the valve. It turns out that incorrect valve adjustment with a decrease in clearance can lead to engine failure and the need for further repair. A clear sign of “pinched” valves is the condition of the camshaft, as the back of the camshaft cams will have noticeable wear.
Adjustment using a feeler gauge
- Remove the cover and ignition coil. We unscrew the soured bolts without serious effort so as not to strip the threads.
- The adjustment should begin with the least tightened one. Its cam will be in the “away from the rocker” position. Place the head of the key on the bolt holding the crankshaft pulley and turn it 180 away from the rocker arm, if possible. If it is not possible to take such an angle, then we turn to the largest possible.
Remember that the bottom valves (those closest to you) are exhaust valves. The gap in them should be within 0.20-0.25 mm.
- You should loosen the nut, take a 0.20 mm feeler gauge and tighten it by screwing in the rod. Put on the locknut, pull out the dipstick and tighten the nut completely. Check the gap by comparing how the feeler gauge passes 0.20 and 0.25. The latter will not go in completely. We mark the adjusted mechanism with a marker. We alternately adjust all the exhaust valves in the same way.
- Now we’ll find out how to adjust the intake valves on our own. This is done according to the same principle as the bottom row, only the gap size is smaller - from 0.10 to 0.15 mm.
- We check the dimensions of the set gaps with feeler gauges again and tighten the nuts tightly.
- We clean the valve box, armed with a utility knife and No. 0 sandpaper. Perform all movements from the valve to the edge to avoid litter getting into the box. We also first rough clean the lid with a blade, then carefully clean it with sandpaper.
- We change the gasket and, in a strictly defined order, following the manufacturer’s instructions, tighten the cover bolts.
- All that remains is to connect all the wires, hoses and pipes, and reinstall the air filter housing.
Adjustment using rack and indicator
To adjust the automotive thermal gap, a special rail is often used, along with an indicator. These devices allow you to achieve maximum accuracy, which cannot be obtained with the method described above. The order of work here is as follows:
- after carrying out the preparatory work and removing the valve covers, the engine must be turned until the marks on the camshaft gear and the marks on the housing coincide;
- You need to put your icons on the back of the built-in gear with a marker. This must be done every 90 degrees, relative to the mark set by the manufacturer;
- using three bolts you need to fix the rack on the protrusion of the block of installed bearings;
- You need to insert a dial indicator into a special slot on the bar. In this case, the scale should be set to zero;
- Using a special device, take the cam and pull it up a little. In a normal situation, the indicator needle will move by approximately 50 - 52 divisions.
If, as a result of the measures taken, the obtained parameters are slightly different, you will need to make adjustments using the method described above.
At the end of the adjustment process associated with setting the clearances in the valve mechanism, you need to start the engine and listen to how it operates in different modes. If the manipulation was carried out after the head was restored, it is necessary to ensure that the valves are properly ground in.
An example of valve adjustment on a VAZ 2108–2115
How to adjust a 6-cylinder in-line engine: video
Signs of jammed exhaust valves Nissan X-Trail t30 QR25DE gas/petrol — DRIVE2
I decided to share my solved problem with the valves on my gas X-Trail(e). So it was like this, on a run of 140k kilometers and after washing the injectors, my horse began to eat 11-13 on the highway instead of 9 liters per 100 km, and in the city instead 11-13, 15-17 and even (20 in winter) I decided to supply gas and installed it. And as it turned out later (out of ignorance), the gas workers and I were 100% sure that the qr25 had hydraulics and turned up the gas supply as necessary so that it would feather, and it would feather like an airplane at a traffic light (automatic transmission) and skid on straight wheels in the summer on new tires (Michelin Latitude Cross), I came to them, turn it down, they turned it down a little, and so I rode like that for 50 thousand (190k km). Gradually, over the mileage, I won’t say, it began to twitch while driving while standing, when it was cold, crackling noises were heard from under the hood when starting off and at low speeds, then, closer to finding the problem, it began to openly stall at 2000 rpm when cold, the rpms fluctuated between cold and hot, and stalled while driving. drive when releasing the gas. Well, I started looking for the problem, checked: air leaks, MAF, lambdas, replaced the ignition capacitor, re-read the entire drive and not only, called and visited a bunch of specialists, one grit one thing (the circuit, because of the valves, it can’t) another second (lamda chain has nothing to do with it) ) my third (MAF, ) and so on and so forth (when replacing the gasket at 187k km of the cylinder head, the master said that the exhausts of cylinders 1-2 were pressed 0.1 and 0.15 grit until spring, drive it and then we’ll adjust it) in short, complete misunderstanding. I started it somehow on cold, gas and 2000 rpm it adjusts, turn it off, unscrew the spark plugs 1-2 wet 3-4 dry, then I start leaning towards the valves and they needed to be adjusted 100%. I made an appointment with the same mechanic who did the cylinder head gasket. I changed it, no one else took it upon himself to sharpen the cups, just change them to the right size, but the problem with them is to wait a long time, etc. I’m going for repairs and I think if the problem doesn’t go away, I’ll sell the cattle to outbid and buy a SHNIVA or Patrick. I come to pick up the car after the repair, the master grit go start, I ask him for the code from the box, he kicked out gyr gyr gyr from under the hood, he grits no, I oh really! I go and start it, it’s cold, I put it in D and the plaque is silent, it’s like a watch, the revs don’t float HURRAY HURRAH HURRAY! So he sharpened the entire output from 0.1 to 0.35 runs, (the gaps increase when hot) I’ve been driving for a couple of days, all the twitching on D the revs are gone, they don't float, the stalling has stopped!
The issue price is 5000 rubles.
How to adjust valve clearances on foreign cars
First of all, using the repair and maintenance instructions for your car, we determine the engine type. The fact is that some foreign cars can have up to ten types of engines on one car model. The tool required for adjusting and installing timing marks is also indicated there. However, in most cases a set of wrenches and feeler gauges is sufficient. Let's look at the features of adjusting clearances on a Mitsubishu ASX 1.6 with a gasoline and diesel engine.
Gas engine
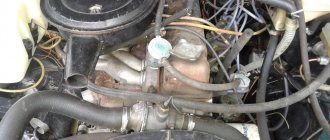
This is what a Mitsubishu ASX 1.6 engine with a gasoline engine looks like
To do this, follow these steps:
- Remove the plastic engine casing (held on by rubber latches).
- We remove the ignition coils and valve cover.
- We set both camshafts according to the marks (the nominal clearances of the intake and exhaust valves are also indicated here).
We set the engine camshaft marks - Using feeler gauges, we measure the gaps “Second and fourth cylinder - intake valves”, “First and third cylinder - exhaust valves”. We record the measurement results.
- Rotate the crankshaft 360 degrees. Then we align the marks on the camshafts and measure the gaps of the other valves.
Checking the size of the engine valve clearances - We remove both camshafts, take out the adjusting cups and use the given formula to calculate the size of the new cups.
Adjusting valve clearances - We install new cups and install the camshafts in the cylinder head.
- Apply sealant to the indicated places and tighten the valve cover.
Apply sealant and tighten the engine valve cover
Diesel engine
Sometimes Mitsubishu ASX 1.6 can be equipped with a diesel engine. In this case, the valves are adjusted using bolts in the pushers.
This is how valve clearances are adjusted on a Mitsubishu ASX 1.6 with a diesel engine
The main signs of incorrect work
If the valve clearances are set correctly, the engine will run quietly and smoothly. With increased intervals, it will make extraneous knocks and noises; with decreased intervals, it will work unevenly. Further operation of such a vehicle is impossible; you must carry out repairs yourself or contact a service center. Otherwise, you may lose your car.
The trouble-free operation of your car is largely determined by regular operations to adjust the valve clearances. The frequency of these operations is set by the manufacturer, and the adjustment technology is quite simple and does not require special knowledge and skills. Good luck on the roads!
Sources
- https://FB.ru/article/226876/zazor-klapana-kakim-on-doljen-byit-instruktsiya-po-pravilnoy-regulirovke-klapanov-vaz-i-inomarok
- https://autochainik.ru/regulirovka-zazorov-klapanov.html
- https://pol-z.ru/regulirovka-teplovyih-zazorov-klapanov-v-pomoshh-avtolyubitelyu/
- https://mtz-80.ru/bez-rubriki/regulirovka-zazorov-klapanov-dvigatelya
- https://scart-avto.ru/remont/kak-otregulirovat-zazory-klapanov-priznaki-i-simptomy/
- https://KrutiMotor.ru/regulirovka-klapanov/
- https://VmyatynNet.ru/avto-rf/nastrojka-klapanov.html
- https://gp-prsmah.ru/tyuning-remont/na-chto-vliyaet-regulirovka-klapanov.html
- https://delis-avto.ru/obzory/proverka-zazorov-klapanov.html
- https://autostuk.ru/regulirovka-zazorov-klapanov-2-varianta.html
- https://4x4privod.ru/regulirovka-klapanov-poryadok-proved/
- https://auto-gl.ru/regulirovka-klapanov-dvigatelya-sovremennogo-avtomobilya/
[collapse]