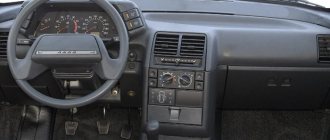
The VAZ 2110 heater has an automatic heating system; it is capable of creating the desired temperature in the cabin with an error of no more than two degrees. However, like any technology, it can fail. In this case, it won’t hurt to know how to remove the stove from a VAZ 2110 for restoration or replacement.
In the photo - The device of the VAZ 2110 heater
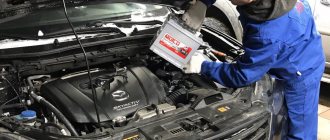
Dismantling procedure
To remove the VAZ 2110 heater, you must:
- Disconnect the minus on the battery;
- Free the windshield frame from the cladding, sound insulation upholstery, lining;
- Remove the stove fan;
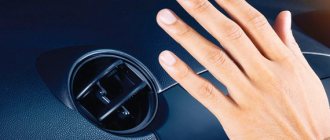
- Disconnect the vacuum hose;
- It’s good if you get creative and remove the front air intake housing, which is not at all easy to do. If you can't get to its screws, you may have to remove the dashboard. After that, the screws securing the heater are unscrewed, it rises, and it becomes possible to remove the air intake housing;
- Separate the hoses from the fittings;
- Remove the rear heater casing;
- After unscrewing the heater mounting screws (you can easily find three of them, and the fourth is under the soundproofing upholstery on the left), remove the heater, moving it towards the engine.
This article will tell you what to do if the stove does not heat well:
Search for reasons
If the stove stops working properly, you first need to determine what could have caused the malfunction. There are not many reasons:
- Airlock. It may appear when adding antifreeze to the cooling system. To remove the plug, you need to slightly lift the front of the car and turn the engine on at idle for about 10 minutes. If there was air in the system, it will come out. Next you will need to add coolant.
- Low antifreeze level. If there is insufficient amount of antifreeze, the cooling system will not function. Over time, it becomes less, so it is necessary to add antifreeze to the required level in the tank. If the stove does not work, continue to look for the reason.
- Switch. The fan rotation speed is set by a step controller. When you turn on the stove, it is only at maximum fan speed; operation is not provided in other modes, then the most likely cause of the breakdown is the stove resistor. It will have to be replaced with a new one.
- Weak flow at maximum speed. Also, the reason for the lack of heating may be the damper opening system. In most cases, this reason appears when the filter entering the cabin is dirty. The smell of dampness in the car will help determine this.
- Flow. This is the most common type of breakdown, which occurs in almost all VAZ car models. The appearance of a leak may be associated with a faucet or stove.
- Antifreeze in the cabin. If you find a puddle of coolant on the floor near the front passenger seat or smell an unpleasant odor, you need to check the radiator, as well as the tap. Separately, it is necessary to examine all the pipes that are secured with clamps.
How to remove the heater on a VAZ 2110
- first you will need to remove the air intakes with corrugation;
- If a spacer is installed, it must also be removed.
In the next step you need to get to the vacuum expander:
- remove the insulation from the end wall;
- remove wipers;
- remove the frill (this is a plastic part that stands between the glass and the hood).
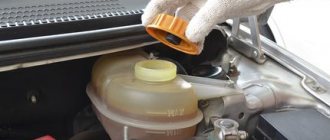
The next stage is draining the antifreeze:
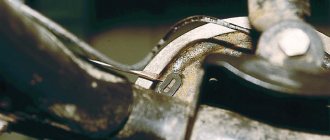
- To drain it carefully, you need to unscrew the clamp that comes from the bottom of the injector pipes and lower the hose into the container so that it is below the level of the stove. The capacity should be 1.5-2 liters. This is done to ensure that everything is dry, clean and tidy.
- The next step will be to remove the expansion tank.
- One half of the insulation was removed, leaving the second with it will be problematic since the screws on which the insulation is attached, and there are two of them, are located deep inside. The places are not convenient, but you can get there.
- When all the insulation is removed, all the barrels next to the insulation are removed.
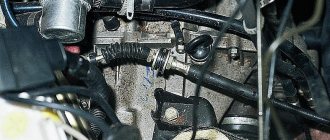
- Now we need to start removing the vacuum booster. Use a seventeen wrench to remove the nuts, there are only two of them. After unscrewing, carefully move the master brake cylinders to the side so as not to damage the brake system pipes.
- This is not all, we unscrew the pipe that goes to the vacuum booster.
- The next step is to remove the brake pedal. There are four bolts that need to be unscrewed. If you follow the pedal to its base, you can find bolts.
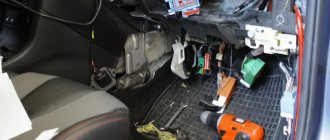
- And now we slowly get to the stove, there are three screws that will need to be unscrewed.
Unscrew them and remove the stove. The whole stove is in unsightly condition with sweat stains.
- The radiator itself is junk.
- We bought a new radiator, pipes (hoses) and heat treatment.
We may even find a lighter, a half-empty pack of cigarettes, and various garbage there. This is another reason among many that you need to treat your car with care.
We begin assembling the new stove in the reverse order:
- pedal;
- vacuum booster;
- main brake
Collecting Jabot
- insulation;
- vacuum expander;
- air collectors with corrugation;
- wipers;
- spacer.
Fill with antifreeze and try.
What do you need for work?
First of all, you will need a new heater radiator. The choice is presented in a fairly wide range, so decide for yourself here.
As for tools and materials, be sure to check the condition of the system pipes. It is possible that they are also damaged, so they will have to be replaced.
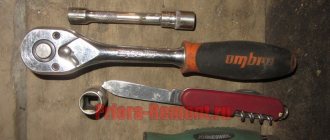
Tools include a short Phillips screwdriver and tweezers . The latter will help you install the latches.
We buy a replacement
- Radiator;
- Pipes;
- Antifreeze.
We clean everything and start reassembling in reverse order.
Another way to quickly change a stove radiator without any effort. Less cost and effort.
- remove the air corrugation;
- wipers;
- frill (you don’t have to unscrew it all the way up; you should also pay attention to the washer hoses; they can also be moved to the side for a while by unscrewing only one side);
- remove the expansion tank.
Changing the radiator by removing the vacuum expander is very simple and elementary.
We don’t touch the brake system yet, leave it clean. We unscrew the vacuum expander; it is secured with two bolts. Remove the vacuum hose. Next, remove four bolts from the interior.
One important point on how to drain antifreeze
It is worth paying attention, the drain plug located at the bottom is not needed; the drain from the side is also not needed. The pipe is removed, directed to the bottom, below the stove, and drained into a container. It turns out to be about three liters - this is more than enough to change the radiator and not lose an ounce. And if you drain the antifreeze from the radiator block, it will already be dirty and will need to be filtered or changed altogether, otherwise it will be clean. You just need to pour it directly into some container and fill it back and there will be zero losses.
Next action:
Unscrew the brake system. We carefully tighten a couple of bolts and move into the interior. You need to crawl under the steering panel and look at the top, then you can see two bolts that secure the radiator. If the car does not have power steering it will be much easier.
The pedal, the springs, the entire mechanism remains in place; there is no need to touch it and there are no problems.
It is better to attach an additional seal to the new radiator on both sides - this will ensure better heat transfer and prevent leakage from different sides.
Install the radiator and reassemble in reverse order.
There are never many ways to remove a stove radiator, let’s look at one more.
- First, let's salt the coolant. We take the largest syringe with a small tip in the form of a medical system and suck it straight out of the barrel with this design. There will be little liquid, and if the radiator is not fixed, the liquid will already flow out, so the draining process will not be long.
- Now drain the coolant from the radiator. Unscrew the drain plug. Drain and screw the plug back on.
- For convenience, it is better to remove the battery.
- Next is the air filter along with the pipe that goes to it. Don't forget to unscrew the air intake.
Removing the frill:
1) remove the rubber seal 2) remove the windshield wipers (unscrew the nuts with a head of ten) 3) take a thin screwdriver and remove the rivets under them, the self-tapping screws that we unscrew, then with a head of ten we unscrew the nuts on one side and the other, remove all the screws, remove three hoses from the expansion tank. And we remove the frill.
What to install?
Heating radiators used for the VAZ 2110 are usually divided into two types:
Until the fall of 2003, old radiators were installed on the “tenth” model, and then cars with new units began to be offered. There is practically no difference between them, but the repair differs in approach and complexity.
If you don’t want to spend that kind of money, but want to get an effective device with high quality indicators, then choose the DAAZ model. This radiator is made of aluminum, works well, and the price does not exceed 1000 rubles.
Stories from our readers
“Fucking basin. "
Hi all! My name is Mikhail, now I’ll tell you a story about how I managed to exchange my two-wheeler for a 2010 Camry. It all started with the fact that I began to be wildly irritated by the breakdowns of the two-wheeler, it seemed like nothing serious was broken, but damn it, there were so many little things that really started to irritate me. This is where the idea arose that it was time to change the car to a foreign car. The choice fell on the melting Camry of the tenth years.
Yes, I had matured morally, but financially I just couldn’t handle it. I’ll say right away that I am against loans and taking a car, especially not a new one, on credit is unreasonable. My salary is 24k a month, so collecting 600-700 thousand is almost impossible for me. I started looking for different ways to make money on the Internet. You can’t imagine how many scams there are, what I haven’t tried: sports betting, network marketing, and even the volcano casino, where I successfully lost about 10 thousand ((The only direction in which it seemed to me that I could make money was currency trading on the stock exchange, they call it Forex. But when I started delving into it, I realized that it was very difficult for me. I continued to dig further and came across binary options. The essence is the same as in Forex, but it’s much easier to understand. I started reading forums, studying trading strategies. I tried it on a demo account, then opened a real account. To be honest, I didn’t manage to start earning money right away, until I understood all the mechanics of options, I lost about 3,000 rubles, but as it turned out, it was a precious experience. Now I earn 5-7 thousand rubles a day. I managed to get the car buy after half a year, but in my opinion this is a good result, and it’s not about the car, my life has changed, I naturally quit my job, I have more free time for myself and my family. You’ll laugh, but I work directly on the phone)) If If you want to change your life like me, then here’s what I advise you to do right now: 1. Register on the site 2. Practice on a Demo account (it’s free). 3. As soon as you get something on the Demo account, top up your REAL ACCOUNT and go to REAL MONEY! I also advise you to download the application to your phone, it’s much more convenient to work from your phone. Download here.
- Old style heater (until September 2003)
- New model heater (after September 2003)
Reassembly
Consider important points when reinstalling the VAZ 2110 stove:
- If you have an old-style stove, then when installing the fan housing made of plastic, make sure that its pedal fits tightly into the groove intended for it. Otherwise, there may be problems with moving the damper, and the rather difficult disassembly of the stove will have to be repeated again;
- When assembling, also make sure that there are no extra bolts left, or that any parts become loose. This should not happen, otherwise you may not get any heat from the heater either;
- If possible, replace the plastic damper with a metal one, the latter is less prone to deformation and jamming;
- Also, if you have to completely change the stove radiator, it is better to focus on copper. Although it is more expensive, it is much more reliable and produces more heat; Heater radiator VAZ 2110 copper 2-row
- To avoid having to deal with repairs again soon, change the hoses and clamps.
Reassembly Features
Dismantling and replacing a radiator is a rather painstaking process that requires special concentration. Therefore, we recommend paying special attention to some nuances:
- During the process of reinstalling the plastic fan casing, working with an outdated model stove, it is necessary to check that the pedal fits exactly into the groove. Because if there is no tight fit, then there is a possibility that the damper will not work properly. Which will lead to emergency repairs.
- A fairly significant number of different bolts and fasteners will be needed in order to disassemble the stove. You should make sure that not a single fastener element remains and that all bolts are returned to their original places.
- We also recommend replacing the plastic damper with a metal one, if possible. The advantage of a metal damper is that it is more durable and there is less risk of jamming when using it.
- When completely replacing the radiator, it is better to give preference to a copper product. Although its cost is higher, it will serve more conscientiously. In addition, much more heat comes from a copper radiator. For people living in cold regions of our country, this issue is especially relevant.
- Rubber elements are not durable and have a limited shelf life. Therefore, we strongly advise you to pay attention to this during the repair and replace the hoses and clamps used on the previous equipment. This will allow you to avoid extraordinary repairs and save you from quite complex stove repairs. Therefore, take the trouble and devote a couple of minutes of your time to this issue.
The independent dismantling process takes several hours, so we recommend setting up for it in advance.
And for those new to this business, repairs may take even longer. But the advantage of dismantling it yourself is that you will save significantly on the help of service station specialists. In addition, you will gain vast experience and learn how to disassemble and assemble one of the most difficult components of the VAZ 2110.