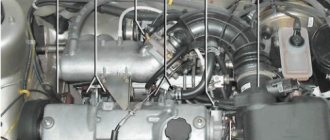
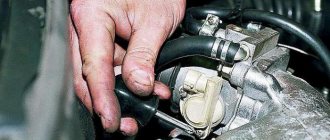
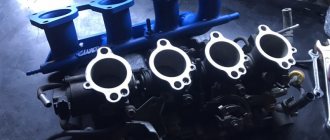
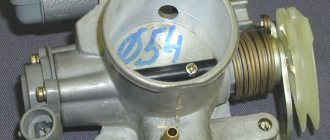
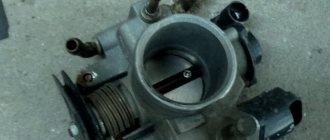
After several years of active use, the throttle assembly becomes seriously dirty and requires immediate cleaning; under the negative influence of crankcase gases, as well as small particles of oil and dust, the operation of the carburetor becomes unstable. Cleaning of the throttle valve (DZ) should be done every 50-60 thousand km, in addition, it is necessary to carry out preventive maintenance from time to time with mandatory partial disassembly of this unit.
SYMPTOMS OF THROTTLE VALVE CONTAMINATION:
1. It is difficult for the engine to switch from high speeds to idle when the accelerator pedal is suddenly released. For example, when you brake or coast in neutral. Instead of a smooth return to speed, they rapidly drop to 400-600 per minute, after which, as a rule, the engine stalls with characteristic shaking or with great difficulty is restored to the required speed.
2. Also, an engine with a dirty throttle assembly has difficulty with “cold” starting, and in some severe cases, “hot” starting. Before starting such an engine, you have to turn the starter for a long time, and the characteristic smell of gasoline can be heard from the exhaust. However, as soon as you slightly open the throttle several times by briefly pressing the gas pedal, the engine “comes to life” and starts.
CAUSES OF THROTTLE VALVE CONTAMINATION
A mixture of air and oil, as well as microscopic dust particles that pass through the air filter from the crankcase ventilation system. When used on a car, this substance slowly covers all internal surfaces, especially in places where there is strong air turbulence, that is, behind the throttle valve, as well as on the idle air control rod. From long-term operation, the thermal gap itself becomes “overgrown” with dirt, and the cross-section of the bypass channel of the idle air regulator in the throttle valve decreases.
Today I will talk about how to clean the throttle valve of a VAZ 2112 with your own hands with a detailed description of the entire process.
CLEANING THE THROTTLE VALVE
This work is carried out on a “cold” engine to avoid burns and other troubles.
From the tool you will need:
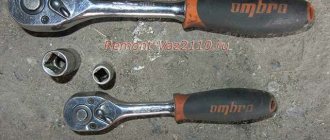
- Tortseva at "13".
- Screwdriver Set.
- Fluid for flushing the throttle body; as an option, I can recommend a time-tested cleaner for carburetors - Abro, it is highly effective and is very inexpensive.
HOW TO CLEAN YOUR THROTTLE VALVE - STEP BY STEP GUIDE
1. First of all, you need to remove the plastic (decorative) engine cover.
2. Then you need to unscrew the expansion tank cap in order to reduce the pressure in the cooling system.
3. You need to loosen the clamps (see photo, they are indicated by arrows)
4. Remove the forced ventilation hose from the air pipe. Carry out a visual inspection if you find traces of oil in the air pipe - most likely the thin forced ventilation channel in the throttle assembly is clogged. If this is so, then all crankcase gases, together with oil particles, go through a large ventilation branch.
5. Take a screwdriver and loosen the two clamps, then remove the throttle body heating hoses, they can be plugged for a while with something like bad spark plugs.
6. Remove the hose of the gas tank ventilation system; to do this, you need to unscrew the clamp.
7. All that remains is to remove the cable and unscrew the two fastening nuts of the throttle assembly.
NOW DIRECTLY ABOUT HOW TO CLEAN THE THROTTLE VALVE OF A VAZ 2112
1. Take the previously prepared cleaner and thoroughly clean the throttle valve, including all channels of the assembly. Pay SPECIAL attention to the calibrated positive crankcase ventilation duct; as a rule, it is so coked that you have to use a needle or a steel spoke to clean it.
2. Unscrew the two bolts and remove the idle air control (IAC). Properly rinse its channel in the throttle body, pay attention to its condition, the service life of the IAC is approximately 100 thousand km. If during the inspection you find that the idle air control rod is very dirty, sticks, has a lot of play or wear, I recommend replacing it with a new one.
3. If the gasket in the throttle assembly has a “human” appearance, there is no need to change it, but if it is damaged, replace it.
For those who like photos in the “before and after” style, I specially compared two images for greater clarity and demonstration of the work done.
Assembly is carried out in reverse order. That's all there is to cleaning the throttle valve, put everything back together and check the result. The result will be incredible, I can say from personal experience that after I cleaned the throttle valve the car seemed to have been replaced, everything changed, the engine performance, idle speed and sound changed so much that it seemed to me that the engine of my car had been replaced, or I had done something wrong "in the adjustments.
While driving, an unprecedented throttle response and sensitivity came from somewhere, the engine began to gain speed faster and “eat” less fuel. The idle speed has stabilized, in short, the result is simply stunning. I hope your throttle valve cleaning also did not go without a trace... Thank you for your attention, take care of yourself and your car.
Consequences of throttle valve contamination
The throttle valve contains a sensor that transmits information about its opening to the electronic engine control unit.
After this, the ECU regulates the supply of fuel to the combustion chambers. Many VAZ 2112 owners are thinking about increasing the power of their car by improving or replacing this engine unit. After a year or two, the car begins to behave less quickly, the idle speed disappears, and small vibrations begin to spread throughout the body. Symptoms of a clogged mechanical regulator are immediately noticeable - the engine takes a long time to switch from high speed to idle, even when the gas pedal is suddenly released. This is most felt when you switch to neutral speed or simply coast. This is usually followed by a smooth stop of the engine instead of the standard return to idle. There are also problems with cold starting or, conversely, an engine that is too “heated” will require turning the starter for a long time, which is fraught with consequences in its own way.
Often it is the condition of the throttle valve that affects this. How? The fact is that after 50–60 thousand kilometers, the patch on the damper becomes dirty, and this leads to improper operation of the engine. So before you think about completely replacing or upgrading your throttle body, maybe you should try just cleaning it?
Electric drive
Since 2011, cars produced by VAZ began to be equipped with an electronic gas pedal, which led to a change in the design of the Priora throttle valve.
Now the mechanism is driven by an electric motor connected through a gearbox. The idle speed regulator has been removed as unnecessary. The drive is controlled through an on-board computer, which, based on the readings of the damper position sensor, regulates the fuel mixture in the best possible way. The opening size began to depend not only on the accelerator, but also on the clutch and brake pedal. The damper returns to its original position using a return mechanism consisting of a spring.
The electronic drive allows you to maintain a constant engine speed when driving with varying loads, even without driver intervention.
Do-it-yourself damper cleaning
After a long period of use, the throttle valve becomes dirty under the influence of crankcase gases and small particles of engine oil, which negatively affects the operation of the entire engine.
On average, preventive cleaning of the damper needs to be done every 40–50 thousand km, but ideally every second cleaning should be carried out with complete disassembly of the unit and washing of all its components. The procedure for cleaning the throttle valve itself is not difficult; the main thing is to remove it when the engine has cooled down so as not to get burned.
To do the work at home, you will need a 13mm wrench, a set of screwdrivers and cleaning fluid. After removing the assembly, and this will not be difficult if you have the preparation, take the liquid and thoroughly clean the throttle valve, also pay attention to the forced ventilation duct. Sometimes it gets coated with a thick layer of plaque, so feel free to use a needle or a steel knitting needle for a perfect clean. Pay attention to the gasket in the throttle assembly; if it is defective, replace it. After this, reassemble and install the part in reverse order.
If done conscientiously, you will feel the forgotten power of your car and responsiveness to the commands of the accelerator pedal. If this does not seem enough, then you can think about updating the throttle valve on your VAZ 2112.
A few words about the car and the intake system
Since we are interested in the Priora throttle valve, we simply need to understand the engine structure of this particular model in order to find out where this part is actually located, why it needs to be cleaned and what damage can be caused by untimely maintenance. Lada Priora has been produced since 2007 in sedan, hatchback and station wagon versions.
The car went through several restylings, its appearance changed slightly, but the level of comfort, safety and quality of the Priora car noticeably improved. Today, models with automatic transmission are even available.
But no changes were made to the configuration of the equipped engines; the car is equipped with almost identical 4-cylinder engines with varying differences in the power offered: from 81 to 120 horsepower. All Prior engines are injection engines, the main difference from carburetor engines is the forced supply of fuel at certain moments directly into the engine cylinder. Our desired throttle valve also plays a significant role in this system. It migrated to the injection system from the carburetor, and, in principle, performs the same role - it meters the amount of air entering the intake manifold.
Throttle valve on Priora
On the Lada Priora engine, the valve itself is located in the throttle assembly, which in turn is located on the intake manifold. The unit is connected to the accelerator pedal drive, by pressing which the driver changes the position of the damper. The electronic intake system is a precise system for which it is necessary to take readings from certain sensors (mass air flow sensor, camshaft position sensor, crankshaft position sensor and many others). There are many of them, but we are concerned with the one that is directly related to the throttle valve. Correctly called a throttle position sensor (the abbreviation TPS is usually used), it monitors the position of the throttle and transmits data to the on-board computer so that all other elements of the power system work harmoniously.
The remote control position sensor can be either electrical or mechanical, which depends on the price of the car, although the difference between them is small.
The position sensor can also break, and when cleaning the throttle assembly, it would be useful to check it. If it becomes noticeable that the car does not switch well from high speeds to low speeds, the engine does not start well in cold weather, at low speeds the engine stalls or runs poorly - this could all be due to contamination of the throttle valve.
Throttle valve upgrade for VAZ 2112
The standard mechanical regulator on the VAZ 2112 has a diameter of 46 mm.
Often, auto-tuning specialists replace the factory unit with a more advanced one, with a diameter of 52, 54 or 56 mm. What is the increase in power after such a procedure, we will analyze further. The usefulness of installing such a unit is explained by a decrease in the speed of air flow and, as a result, the efficiency of the intake air system increases. The ideal option would be to install it in pairs with a zero-resistance filter. Since the diameter of the receiver on the VAZ 2112 is 53 mm, it is first recommended to try updating the regulator to a size of 52 mm.
Installation will not be a problem, since no modifications are required from the car owner. You may need to trim the gasket if you decide to install a 56 mm unit. The following positive effects can be immediately noted:
- increasing the response speed of the accelerator pedal,
- disappearance of idle problems,
- improving the overall driving dynamics of the VAZ 2112.
Some car enthusiasts talk about an increase in fuel consumption according to the on-board computer, although in fact this is not always observed.
It seems that changes for the better arise precisely because the driver replaced his old unit with a new one of 52 mm or more. But it is possible that the old one was simply very dirty.
Often, simple flushing, as mentioned above, gives the same effect as installing a new unit, even with an increased diameter.
Repair work
Now to the question of how the cleaning procedure is performed. For everything to go smoothly and without problems, it is enough to prepare all the necessary materials and tools in advance, place everything at hand and get to work.
To clean the throttle you will need:
- Screwdriver Set;
- 13mm wrench;
- Throttle valve cleaner.
Specialized preparations made from appropriate components are sold specifically for these purposes. Do not spare money on their purchase, since the funds will last for a long time. This is more profitable than changing the damper every time.
Cleaning with special means
Preparation
Let's start with the preparatory activities that will ultimately allow you to get to the throttle body and more and clean it properly.
- Remove the casing that is installed on the power unit.
- Unscrew the cap on the expansion tank. This will allow you to relieve excess pressure from the cooling system.
- Slightly loosen the tension on the mounting clamps, then remove the forced ventilation tube.
- Examine the current condition of the air pipe, which should also be removed and, if necessary, replaced.
- If there are significant traces of oil in the pipe, then you can be 100% sure that the throttle is definitely clogged.
- The problem is most likely in the forced ventilation duct. This is explained by the fact that contaminants in the form of gas from the crankcase and oil particles have no other way than through the ventilation branch.
- Next you need to remove the damper heating tubes. To do this, just loosen the clamps with a screwdriver.
- For a while, come up with plugs for them from improvised means - old spark plugs, some kind of non-hollow rubber bands. In short, anything that fits the diameter of the hole.
- Remove the fuel tank ventilation system hose. To do this, you must first unscrew the clamp, remove the cable and unscrew the throttle mounting nuts.
- Be sure to remove the connectors from two sensors - idle speed and throttle position. They are located on the unit being repaired, so there will be no problems with the search.
There is nothing difficult about cleaning the throttle valve. This procedure can be easily done with your own hands, without involving specialists from car services and without spending extra money.
- Using the purchased throttle cleaner, clean the channels and the entire disassembled assembly;
- Rinse the engine's forced crankcase ventilation duct especially carefully, since this is where the largest amount of pollutants comes from;
- Use sharp objects if you want to carry out the work responsibly and as thoroughly as possible. A simple knitting needle will do;
- Remove the idle air control. To do this, simply unscrew a couple of bolts;
- Be sure to wash the unit thoroughly;
- Check the condition of the rod. If it is heavily soiled or there is play, the element is easiest to replace. It's not expensive;
- Inspect the current condition of the gasket. If the gasket is damaged, be sure to buy a new one. Even if it is in satisfactory condition, we advise you to make a replacement once you have begun to dismantle this unit;
- After washing the throttle assembly elements, return all its components to their places, proceeding in the reverse order.
Cleaning result
If you follow the recommendations, use special cleaning products and do not rush, after the washing procedure all problems with the gas pedal will disappear, the engine will again clearly respond to your “commands”.
As you can see, cleaning the throttle is quite simple. The most difficult stage can only be called disassembling the unit. And then, in the confident hands of a master, even a beginner, everything will go smoothly and without mistakes.
Throttle assembly update result
It is worth noting the appearance of some problems in the operation of the engine on the VAZ 2112 after installing a throttle valve with a diameter of 52 mm.
The reason for this is a violation of the fuel-air ratio, which leads to incorrect operation of the ECU and engine. After this, many people prefer to use the ECU firmware editor, but there is no way to return the old throttle assembly to its place. Although the problem could have been simple contamination of the old regulator. After updating the firmware, a decrease in fuel consumption of 0.5 liters is noticed - maybe not significant, but still a plus. As a result, we can say that simply installing a throttle valve with a larger diameter will not give a significant increase in power and other indicators. Only in combination with a firmware update and other minor engine tuning will the effect be noticeable. However, the validity of these actions in individual cases must be taken into account. After all, even on forced engines there can be a damper of standard sizes (for example, 46 mm), which is enough for the correct operation of the air intake system.
Debugg
If you notice that the throttle has begun to perform its direct duties poorly, do not rush to go to a service station and hand over your money.
The problem with the damper can often be solved with your own hands.
Most often, a problem with the throttle occurs due to contamination, which leads to impaired functionality. To correct the situation, simply clean the element.
When Cleaning Is Required
The practice of "tens" car owners shows that on these cars the throttle becomes clogged literally just a few years after the start of active use of the car.
The biggest “pests” for the damper are particles of oil, dust and gases coming from the engine crankcase.
When the engine is running, dust mixes with air and oil, forming a kind of mixture that enters the throttle valve. Over time, this substance sticks to surfaces and accumulates on the idle rod.
Soon the thermal gap becomes covered with dirt, and access through the idle air regulator channel is significantly deteriorated. If you do nothing, the engine will begin to work incorrectly, the dynamics will drop, and the engine will respond late to pressing the gas pedal.
Signs of contamination
Problems with the throttle valve can be identified by characteristic symptoms.
Signs
Explanation
Engine has difficulty returning from high to low speeds
This happens when you take your foot off the gas pedal. Instead of a smooth return to the required parameters, the speed literally drops to the 400 rpm mark. The engine may stall and begin to shake. The speed can return to the desired level, but with difficulty
The engine is difficult to start when cold and even when operating temperature is reached
To start the engine normally, you need to turn the starter for a long time. You can identify the problem by smell. The characteristic aroma of unburned fuel will come from the exhaust pipe. Try pressing the pedal all the way down several times. This will open the throttle fully, air will flow in, and the engine will start. But in the first few minutes the engine will still stall
Troubling the motor is a rather indirect sign, since this is how the engine can behave in various types of failure. But don't rule out problems with the throttle.
How to replace the throttle valve of a VAZ 2112 with your own hands
VAZ 2112 throttle valve 54
Replacing the VAZ 2112 throttle valve is carried out in the event of a breakdown of the unit, in other cases it is simply removed and washed (cleaned), and repaired if possible. However, today there is a kind of tuning, when the throttle valve on a VAZ 2112 56 (diameter 56) is installed instead of the 54 or 52.
A similar procedure is performed in order to increase the amount of atmospheric air entering the combustion chambers.
Tuning and repair of VAZ 2110
I think those who had a carburetor car remember how regularly they cleaned the carburetor. So, the throttle assembly on fuel-injected cars also requires regular cleaning. Therefore, the topic of this article will be “cleaning and flushing the VAZ 2110 throttle assembly.”
Let’s immediately decide what tool we need:
- Head "13"
- Phillips and flathead screwdrivers
- Pliers
That's probably all that might be useful.
REMOVAL OF THE UNIT
The purpose of the throttle assembly (abbreviated as DU) is to regulate the air supply to the engine cylinders. Thus, it controls the enrichment or leanness of the fuel mixture.
The appearance of remote control malfunctions causes improper operation (interruptions) of the motor. If problems arise, the remote control is usually replaced with a new one, but often such problems are solved by removing and washing the remote control yourself.
What you need for cleaning
To remove and clean the assembly you will need:
- Screwdriver Set
- Head "13" with ratchet
- Old toothbrush with stiff bristles
- Cleaner
- Cotton swabs
- Latex gloves
Removal
Replacing the throttle valve on a VAZ 2112 or flushing is performed (begins) by removing the unit, for this:
- We remove the terminals of the VAZ battery, de-energizing the electrical network of the motor
- Disconnect the connectors from the throttle position sensor, idle speed control, and also remove the cable from the throttle valve actuator
- To avoid losses, partially drain the coolant
- Then loosen the clamp securing the air hose to the throttle body
- Then a clamp securing the ventilation hose of the 2nd circuit (crankcase gases) to the pipe on the cylinder head cover
- Now you can remove the air hose along with the crankcase ventilation hose
After releasing the clamps, remove the air hose
- Take a Phillips screwdriver and loosen the clamp, then remove the hose for crankcase ventilation (from the 1st circuit) from the remote control fitting
- Then we loosen the clamps securing the hoses that discharge and supply coolant, and remove these hoses
- Now, using the “13” head, unscrew the nuts that secure the throttle assembly to the receiver, photo below
Using a ratchet and a socket “13”, remove a pair of nuts that secure the unit to the receiver
- Then we remove our throttle assembly from the studs and loosen the clamp to disconnect the hose for purging the adsorber (this is necessary if your car has a system for collecting fuel vapors)
- Carefully remove the sealing gasket under the assembly
- If you have never carried out the steps to clean the remote control, then it will most likely be necessary to replace the gasket
- Then we unscrew the screws that hold the IAC (idle speed regulator) and then remove the regulator (don’t worry, the holes for attaching the regulator are designed in such a way that it will not be possible to mix it up when installing it)
Cleaning
Instructions for cleaning the remote control, it was not difficult to guess, require the use of a cleaning agent, with cotton swabs and a toothbrush:
- We clean all channels, hidden cavities, in addition, special attention should be paid to the place for landing the IAC, as well as the area that is located next to the damper
- After finishing the work, the unit should be perfectly clean.
- Don’t forget to clean the crankcase ventilation duct at the same time.
- The size of the channel is large, which is why it is most convenient to blow through it with a cleaning agent
- It is more convenient to carry out blowing with a foot pump, since the diameter of the hose fitting coincides with the wheel
- And the last stage is replacing worn out remote control pipes and blowing the rest with compressed air
- Such procedures can significantly extend the life of your mass air flow sensor.
Assembly
Installation of the remote control is strictly in the disassembly sequence, only in reverse. A cleaned remote control unit makes engine operation stable at idle, and the engine speed no longer fluctuates. There is a clear response when the gas pedal is operated. Additionally, the throttle assembly may need to be modified, but first study the video on such modifications.
Need for maintenance
The prophylaxis procedure should not be carried out in the absence of obvious reasons. Before starting, you need to carefully evaluate the condition of the throttle valve. If there are no obvious signs of tar deposits and areas of coking, then the reason for unstable operation may lie elsewhere.
Also consider the mileage of the car. Experts recommend resorting to flushing no earlier than after 100 thousand km. But on some cars, for example, a Ford Focus, it may be necessary to flush it after 30 thousand kilometers.
You should know how to clean your throttle body to achieve the desired result. This requires a special carburetor cleaning solution, for example, Abro Carb & Choke Cleaner or similar products. The assembly must be dismantled; only in this case can the maximum effect be achieved, otherwise carbon deposits will remain inside the tubes. Disconnect all pipes from the throttle valve to gain good access to the inlet part of the assembly.
Remove carbon deposits delicately using a clean rag or soft brush. Do not use excessive force; you may damage the valve. The internal elements are coated with a thin layer of molybdenum, which novice car enthusiasts mistake for harmful deposits.
The consequences of zealous cleaning can be different: the moving part of the damper will begin to bite, or vice versa, in the closed position it will begin to let air through. In this case, it will not be possible to do without repairing the throttle valve.
TUNING WITH REPLACEMENT
The standard valve (throttle assembly) usually has a diameter of 46 millimeters; many fans of various tunings decide to replace this part with an alternative one:
- VAZ 2112 throttle valve 52 has a larger diameter (there are also valves of 54 and 56 millimeters)
- Is there any benefit from such tuning?
- In various online stores they often offer to replace the standard 46 mm throttle body (DU) and install 52, 54 or 56 mm
- The product description says that an enlarged throttle body (also known as the throttle body) leads to a decrease in air flow speed, which improves the performance of the air intake system
- The effect of installing an alternative damper will be clearly visible when using a zero-resistance filter in the system
- We recommend installing a unit with a diameter of 52mm, because... the diameter of its air inlet for a standard receiver is 53mm
The valve is standard (standard) on the left and new (increased flow diameter) on the right
- In order to install a remote control of a different diameter, as a rule, nothing needs to be modified
- The maximum necessary action is a small trimming of the gasket (this is most often necessary when installing a 56mm throttle assembly)
The following positive effects are noticed after such an installation:
- The car becomes more agile
- Problems with idle speed disappear
- The gas pedal also becomes more responsive.
Installation disadvantages:
- Fuel consumption increases, although many believe that the BC gives incorrect readings and consumption does not change
- Some owners see the effect exclusively on 16-valve engines
The picture we described above may appear completely different:
- All the positive effect that many people notice when installing a larger diameter remote control usually appears because the old remote control already needed cleaning and naturally the motor was not working correctly
- After installing a (clean) new remote control, the engine starts working in its normal mode, this seems like a “new breath”
- In other words, all the described effects appear after regular cleaning of the remote control.
- And besides this, after replacing the remote control, with a larger diameter you will have new problems with the operation of the motor that did not exist before
- This is due to a violation of the ratio of gasoline and air, which the ECU is no longer able to correct.
- And instead of simply returning the remote control to the standard diameter, the owners are recommended to replace the firmware, the price of which is higher, but there is no point
- There is also an opinion that a remote control with a diameter of 52, 54 or 56 millimeters is a completely useless thing, and only installed in combination with other engine tunings produces a noticeable effect
- It remains unclear whether this effect is caused by remote control or other modifications to the engine
- After all, if on a turbo engine with a power of no more than 200 horsepower, standard 46mm dampers are left and their work is quite enough
Signs of trouble
The problem with many VAZ 2110s is that until a serious increase in speed, the car remains, as motorists say, in a “sluggish” state, it does not pull, and becomes more or less playful only when the revolutions reach approximately the 3000 mark.
This is very often associated with improper throttle operation. Moreover, the main culprit may be the manufacturer, but more on that later. And now - about some more signs of malfunction:
- engine speed fluctuates;
- there is no clear response from the car when you press the gas pedal;
- when changing gears, jerking can be observed;
- vibration is observed when the car is idling;
- stalls when changing speed;
- The engine does not start well if the car is already warmed up and then turned off.
LET'S SUM UP
| Supporters of replacing the remote control with a different diameter argue | Opponents of replacing the remote control with a different diameter argue |
| Replacement increases power and improves engine speed and gas pedal responsiveness | Washing or repairing a standard remote control gives similar effects |
| Does not affect gas mileage | Affects gas mileage, as everything is interconnected |
| Does not create problems in engine operation | Creates problems because the ECU cannot correctly adjust the ratio of air and gasoline in the mixture |
| Problems that arise can be solved with firmware | Problems are solved by flushing |
| Clearly, all tangible effects are associated with changing the remote control and are enhanced in combination with other improvements | Tangible effects are achieved by flushing the unit, and the use of other improvements improves the performance of the engine without replacing the remote control |
Here everyone decides for himself, we will not enter into disputes, there are simply different opinions, and we are obliged to warn about the pitfalls and the other side of the coin.
Removing the throttle
- Open the hood and remove the plastic cover from the engine.
- Open the expansion tank cap, this will reduce the pressure in the cooling system.
- We find the inlet pipe. I think you won't have any problems with this. This is the thickest pipe that goes into the throttle assembly. We unscrew the clamp that attaches the hose to the throttle assembly of the VAZ 2110. If there is a trace of oil in the hose, this indicates that the thin forced ventilation channel in the throttle assembly is clogged.
- Now we unscrew the pipe coming from the previous thick pipe from the throttle assembly. Now bend this inlet pipe to the side so that it does not interfere.
- Now unscrew the clamps from the 3 pipes shown in the photo below.
- Now we remove another pipe going to the throttle.
- After unscrewing the clamps, you may encounter a problem that the pipes are very tight. In this case, you can use pliers, but be very careful not to damage the pipes.
- At this stage, we remove the terminals from the TPS and IAC sensors.
- So, everything is disconnected from the throttle assembly except the throttle control cable, but more on that later. Now we unscrew a couple of nuts that secure the throttle assembly to the receiver.
- Let's take it out.
- Now you can remove the control cable. Use a flat screwdriver to pry up the fixing bracket and remove the cable.
That's all, now all that remains is to clean the VAZ 2110 throttle assembly.
Video
We hope our article was useful to you.
Recommended viewing:
- Why does the Priora's engine stall?
- All about the phase sensor on Priora
- How to replace wipers on a Priora. Wiper size.
- The wipers on the Priora have failed, what should I do?
- Replacing the expansion tank on a Priora
- Replacing the ignition switch on a Priora
Category: Life hacks, Personal experience, Repair
← Replacing the speed sensor
Spacers for pillars (houses) on Priora →
