A modern car has a set of standard options that provide the driver and his passengers with comfort and safety while driving. However, the standard multimedia system (radio) installed on the car often does not satisfy car owners in terms of sound quality.
This problem is usually solved by installing a non-standard power amplifier, especially if the speakers themselves in the car are replaced with more powerful and high-quality ones. Also, another radio cassette can often be installed.
At the same time, it is important to know how to connect the amplifier in the car correctly in order to get full functionality and good results. Let's look at how to connect the amplifier to the radio yourself.
Types and principle of operation
Before you get down to business, you should understand the principle of operation of the amplifier. Unlike stationary devices that operate on a 220-volt network, a device for a car is connected to the on-board network. The voltage here reaches only 12 volts. So the job of the amplifier is to take the weak signal and convert it into one that is suitable for driving the speakers. An important detail is that the received and converted signal differ not in wavelength, but only in its amplitude.
The internal structure of the amplifier consists of 3 elements:
- input circuit;
- power unit;
- output stage.
Input circuit. The amplifying device must be able to process signals of different levels. This is explained by the fact that the radio signals at the linear level can have different voltages. High level signals go directly to the load; if the level is low, the signal needs to pass through an amplifier.
In this case, it is important to take into account the correspondence of the signal level supplied from the head unit and the sensitivity of the input node.
Power unit. In operating condition, this unit converts low battery voltage into a higher voltage. For this purpose, the power supply is equipped with a transformer. An important feature of the sound signal is its variability, and therefore the functioning of the speakers requires 2 voltages at once: + and -. To achieve such conditions, voltages of different polarities are removed from the transformer. Their combination is used to obtain an alternating signal.
Output stage. This working unit includes powerful transistors, thanks to which increased voltage is supplied. This becomes possible due to the conversion of incoming signals
Manufacturers offer dozens of amplifier models with varying technical characteristics. According to the method of signal amplification, devices are divided into 2 categories:
- analog;
- digital.
Another classification is based on the quantitative difference between channels.
- Single channel. Such devices are designed for a nominal load of up to 2 ohms and are equipped with a volume control. More often, single-channel amplification devices are used to connect subwoofers.
- Two-channel. You can connect such a device to 2 dynamic heads, the power of which is higher than that of a single-channel amplifier for a car radio. An alternative option is to connect 1 powerful speaker.
- Three-channel. Devices with such characteristics are relatively rare.
- Four-channel. These are the most convenient devices that allow you to combine elements of an audio system. You can connect 4 speakers to such a device or use it as a two-channel device with a subwoofer connection.
- Five-channel. Such a device can be selected for a subwoofer and speakers.
- Six-channel. It is rarely used, since when it is used the battery is quickly discharged.
Car audio amplifiers
Purpose and principle of operation
The sound of your car radio can be improved by installing high-performance speakers. Unfortunately, the parameters of the standard equipment do not allow the use of high-power sound emitters, which limits the possibilities of modernization with little cost.
In such a situation, installing an autonomous sound amplifier will help out. It is an electronic device powered from the vehicle's on-board network that increases the amplitude (span) and power of low-frequency electrical oscillations.
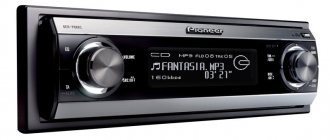
Four-channel car power amplifier with adjustable parameters
The input of the device is supplied with a signal taken, usually from the linear output of the radio. An acoustic system is connected to the output. In other words, in the electrical circuit the amplifier is located between the audio source and the speakers.
Classification
A car's interior sound system consists of several channels—separate “lines” for generating, amplifying, and processing the low-frequency electrical signals needed for speakers.
For this reason, one of the criteria for classifying car amplifiers is the number of channels, each of which has its own input and output.
Photo gallery: examples of car amplifiers for 1–6 channels
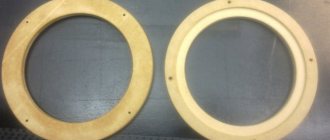
Low frequency amplifier for subwoofer
Car stereo audio amplifier
Six channel car amplifier
Typically the device has from 1 to 6 channels. The stereo system requires two (left and right speakers). The "front plus rear" scheme - four.
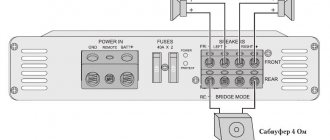
When a subwoofer is needed, choose amplifiers with an odd number of channels (3 or 5) or those that allow connection in bridge mode. The latter allows you to use a more powerful speaker, as it uses two amplification channels simultaneously. In addition, the low-frequency speaker can be connected using a separate single-channel amplifier - a monoblock.
Based on a combination of energy efficiency and output signal distortion indicators, automotive audio amplifiers are divided into classes A, B, AB, C and D.
Class A devices have the lowest efficiency and the least signal distortion. In contrast, Class C is characterized by high energy efficiency and high distortion.
Class AB is an economical compromise solution that combines acceptable sound quality and good energy efficiency.
Class D includes equipment with digital signal processing, which provides excellent sound. Its disadvantage is its high cost.
Specifications
From a consumer point of view, the most important parameter of car audio amplifiers is output power. Its value is indicated in the passport or certificate. You should not rely on the numbers printed on the case or front panel. As a rule, they are not true.
There are several techniques for measuring output power. The following are most often cited in documentation.
PMPO (Peak Music Power Output) - maximum peak output value. In practice, it does not characterize either the sound quality or the capabilities of the device and, as a rule, is given for advertising purposes.
RMS (Root Mean Squared) - root mean square (square) value of power at a given signal quality. This parameter characterizes the state at which even an inexperienced listener notices sound distortion.
DIN POWER is the most adequate parameter measured at the rated load with a normalized harmonic distortion coefficient. Its varieties are also referred to in the documentation as IEJA and IHF.
Among the main technical characteristics (except power output):
- frequency range,
- nonlinear (harmonic) distortion coefficient,
- signal/noise ratio,
- dumping factor.
In practice, the same characteristics of equipment from different manufacturers differ slightly and provide high sound quality.
Choice
Based on the number of channels, the amplifier is selected based on the number of speakers that need to be connected and their connection diagram.
An additional advantage may be the presence of crossovers - built-in audio frequency filters (HPF highlights the upper ones, LPF - the lower ones) with adjustable parameters (cutoff frequency, gain, slope).
When choosing the power of a car amplifier, take into account the capabilities of the speakers. To operate for a long time, they do not need to be overloaded, so the power should be less than what the speakers are designed for.
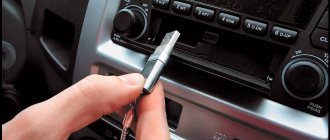
If there is no linear output (tulips) in the radio, which happens very rarely, you will need a high-level input.
How to install
Before you begin installing the amplifier in the car, you should consider the location of all components of the audio system. Some car enthusiasts do not pay enough attention to these issues and install the amplifier and speakers in any place they like. As a result of this approach, difficulties arise during the work process, and the sound quality is not of good quality.
So, when installing an amplifier under the seat, you need to calculate the amount of cable required to lay from the radio to the amplifier and from the amplifying device to the speakers. In addition to the cable, you will need sets of adapters (in the absence of tulips) and other consumables.
In addition, depending on the location of the devices, you can more accurately calculate the power and quality of the sound produced. Settings can help with this.
Choosing the right place
Before starting work, you must select a location and prepare a sufficient amount of cable. According to rough estimates, during the installation of equipment in the luggage compartment, about 5 m of cable will be required to connect the multimedia system and 3 m for each speaker. More exact dimensions depend on the make of the car. In this case, the cable should be taken with a small margin, since the wires need to be laid under the interior trim.
When choosing where the subwoofer, speakers and amplifier will be located, you need to consider several recommendations.
- Sufficient air circulation. This requirement is explained by the fact that the amplifier gets very hot.
- Position. The device should be mounted in the correct position, preventing it from being turned on its side or from top to bottom.
- Do not cover the device with a rug or other things.
Experienced craftsmen suggest considering several suitable options for placing an amplifier under speakers.
- The central or front part of the cabin. This arrangement will save on cable costs and achieve good communication with the radio.
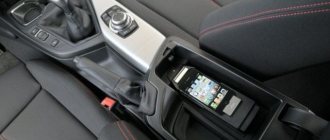
- Under the seat (you can use the passenger or driver's seat for this). This option will provide free, quick access if repair or replacement of the amplifier is required.
- On the back shelf. This connection diagram is suitable for cars with a coupe or sedan body.
- In the luggage compartment. This option is worth considering if you plan to connect 2 amplifiers.
Wires for installation
Wires for connecting the amplifier must be selected taking into account the power of the device. In addition, about 30% is added to this indicator, which is lost due to low efficiency.
For example, you can consider the characteristics of 2 two-channel amplifiers to which you need to select wires. The total power of these devices reaches 200 W, however, taking into account the maximum volume, they require a power of 260 W.
To determine which wires are needed for such equipment, use the Ohm's law formula: I=P/U. Here I stands for current, P stands for power, and U stands for voltage level.
The car battery has a voltage of 12V, so as a result of the calculation it turns out that the current is 21.6 A.
Fuse
The proximity of the power cable to the car body requires the installation of a fuse. If a short circuit occurs, this device will help prevent fire. It is recommended to install the fuse close to the battery, since the amplifier already has the necessary protective elements. The optimal fuse rating is 50 A. Devices with a larger value should not be selected.
When choosing a fuse, keep in mind that there are several types of such devices. In cars, only 2 types are most often used.
- AGU. These fuses consist of a glass cylinder with an exposed metal tip. Inside it there is an insert made of fusible material. This option is low cost, but it quickly breaks down as a result of frequent vibrations.
- ANL. Such a device is made from a solid metal plate and is fixed with bolts to the clamp.
When purchasing a fuse, it is important to consider the compatibility of its rating with the rating of the wiring. If the fuse characteristics are high, the wire will ignite during a short circuit. If the rating of this device is small, it may fail when peak loads occur.
If a car enthusiast installs powerful audio equipment, it makes sense to purchase a storage device. Some people don’t know why such a device is needed or whether it is needed. The device operates like a capacitor (it accumulates energy and then slowly releases it). As a result of this equipment, subsidence does not occur even when powerful acoustics are used.
Interconnect cable
The signal is supplied from the radio to the amplifying device via an interconnect cable. This part is extremely important, so it is not recommended to skimp on it. The quality of the received signal depends on the characteristics of the interconnect cable. You need to select this part taking into account the following features:
- a fairly thick central core (the cable should not be thin);
- continuous shielding;
- high quality durable insulation.
2 din connection via ISO connector
The connection diagram for a Chinese 2 din radio is described in detail in the operating instructions supplied with it from the manufacturer. To facilitate installation work, on the back panel of the player, as a rule, there is the necessary marking of all components and connections. Mostly, the difficulties for car enthusiasts who are faced with the installation of a standard or non-standard radio for the first time are caused by the correct connection of the car's electrical wiring to the receiver.
All work on connecting the car radio is carried out through the ISO connector, which consists of two plug boxes - A and B (each contains eight contact connections) or one combined box, where A is the plug for the power connections of the radio, B is responsible for the car acoustics.
The standard wire connection diagram (pinout) is as follows.
- Connector A. 1, 2 and 3 pins are not used.
- 4 - yellow power cable going to the car battery;
- 5 - blue wire, amplifiers and external antenna;
- 6 — orange cable, backlight;
- 7 - red - ignition;
- 6 - black. Weight.
- Block B. Everything here is also quite simple.
- Contacts 1 and 2 - purple, purple-black wire. Plus and minus of the right rear speaker (speakers);
- 3, 4. Gray. Gray-black. Plus or minus the front right column;
- 5, 6. White. White-black wire. Front left plus or minus;
- 7 and 8. Green and green-black wire. Rear left positive and negative contact.
When connecting a car radio, it is very important not to mix up the contact groups of wires. Since the sound quality of your equipment depends on them. And often the safety of the equipment itself.
How to connect with your own hands
Those who do not know how to connect an amplifier to a car radio should first familiarize themselves with the tips and recommendations of experienced professionals. Another difficulty lies in the fact that there are several options for connecting the amplifier to the radio. This depends on the type of amplifier chosen, additional equipment, and mounting location.
The process has several nuances, taking into account which such situations can be identified.
- Connection in bridge mode.
- Carrying out installation if there are no linear outputs on the head unit. This situation often becomes a big problem for beginners when connecting an amplifier to a standard radio.
- The difference is in the connection diagram of the amplifier with speakers or with an additional subwoofer (passive or active).
- Availability of additional devices (remote microphone, headset).
- The need to connect an amplifier at home through a power supply.
- The presence of 2 amplifiers (how to connect amplifiers to the standard radio in this case).
The simplest connection of the amplifier is carried out according to the standard scheme. In this case, the amplifying device is connected directly to the battery.
Before connecting the car amplifier, the negative charge is connected to the car body (for the purpose of grounding). The positive charge must be connected to the battery terminal with the “+” sign.
After this diagram for connecting a car amplifier with a power source has been completed, it needs to be connected to other acoustic devices. During the work, you need to know which wire goes to the amplifier sockets.
A wire with red insulation on “+” is intended for connecting voltage.
The wire painted black at “-” is attached to the GND connector.
The signal cable coming from the radio is connected to the Remote socket.
In powerful audio systems, a capacitor is installed before connecting the amplifier in the car.
Step-by-step connection process
The entire workflow can be divided into several stages.
At the initial stage, you should prepare all the necessary devices and consumables.
- The amplifier is installed in a pre-selected location.
- The interior trim is dismantled to install additional and signal wires. The latter should be protected from contact with wiring.
- The power cable is laid from the battery to the amplifying device. The fuse must be mounted 30 cm from the battery.
- A signal cable is attached to the Line-out connector (it is on the radio) and connected to the Line-in socket (it is on the amplifier).
- An additional cable is used to connect the Remote connectors (on the amplifier) and B+Ant (at the source).
- Connection to speakers. If the task is how to connect an amplifier with a bridge, then one of the amplifier channels is fixed with a “+” terminal, the other with a “-”.
- If there is a capacitor, fasten with short wires.
Connection without tulips
Standard devices with a built-in amplifier often do not have linear outputs. Adapters will help solve this problem. The progress of work in this case will be somewhat different.
- The head unit is removed and connected to the adapter. In this case, it is important to set the output signal indicator (it must match the characteristics of the amplifier).
- Attach the adapter to the wiring harness (using electrical tape). To avoid knocks and damage to the housing, the adapter is wrapped in foam rubber.
- The signal cable is attached to the adapter, and power is supplied to the amplifier. Line wires are secured in accordance with their standard markings.
How to connect two or more amplifiers
This equipment will allow you to achieve high signal power and good sound quality. In this case, the car enthusiast must be prepared for several difficulties:
- power supply;
- turning on amplifiers remotely;
- running an RCA cable to multiple amplification devices.
If you decide to connect a second amplifier, then it must be equipped with a capacitor. The circuit should be selected taking into account the power of the devices. You can use 1 capacitor for 2 amplification devices. It is placed parallel to the battery.
The RCA cable is installed taking into account the requirements of the amplifier brand. One possible option is to use the output connectors on the amplifiers (if available). Another optimal solution is to separate channels by input. This is done using a crossover.
Chinese players for passenger cars
It should be noted that the entire production cycle for the assembly of this type of equipment occurs in full compliance with the requirements of the companies that own the brands, which guarantees the high quality of the declared trademark.
There are a number of car radios that are positioned as native, Chinese products. But upon closer examination, these often turn out to be the same Kenwoods, Prologies, and so on, in a slightly modified form. By the way, very good quality. For the reason that Chinese developers do not bother themselves with technical changes to the devices, limiting themselves, as we have already said, to changing the design.
The third option for Chinese players can be called gadgets of unknown brand and manufacture. You should stay away from such radios, because apart from troubles and wasted money (despite the low price), they will not bring you anything.
To summarize our introduction, let's say. Most of the sound reproduction equipment present on the modern market is Chinese in nature, but developed and certified to global standards by well-known companies. Accordingly, the process of installing, connecting and operating these gadgets, as well as additionally connected equipment, is uniform (by model). And it is no different from the European (American, Japanese) assembly technology (does it exist at all?).
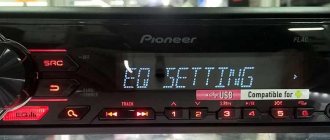
Settings
Before setting up the amplifier, you need to consider what devices will be used in the system.
If you do not use a subwoofer for acoustics (only 4 speakers), this scheme is considered the simplest. In this case, experts recommend setting the following parameters:
- Bass Boost (bass enhancement filter) - set to 0;
- Level (amplifier power indicator) - 0 (8V);
- Crossover Selector (responsible for switching the LP-AP-HP filter) - set its position to FLAT.
After such manipulations, you should adjust the radio. This can be done automatically by selecting the desired equalizer. It is possible to manually adjust the powerful and soft sound of the car radio. After turning on the song, the volume is set to 90%. At this time, the Level control on the amplifier is slowly scrolled and the position with the loudest and clearest sound is found. Bass Boost can be added.
If you have a subwoofer connected through an amplifier, a slightly different approach will be required. The sub is connected to Rear, and the speakers to Front. In this case, the indicators may be the following:
- Bass Boost - at level 0;
- Level - 0 (8V);
- Front - the Crossover Selector control should be in the HP position, while FI PASS can be left in the range of 50-80 Hz;
- Rear - the Crossover Selector indicator in this case is on LP, and LOW PASS is set to the level of 60-100 Hz.
Setting up the amplifier is done in the same way. It is important to adjust the sensitivity of the front and rear speakers.
Additional manipulations may be required if the car enthusiast decides to install a microphone for a Chinese radio or other equipment.
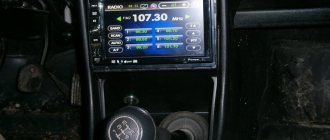
Features of Chinese car radios
2 din radios differ significantly from smaller devices. These multifunctional modules with a 7-inch diagonal LCD screen allow you not only to listen to music, but also to watch videos. The size of the radio exceeds the dimensions of a 1din device, which immediately catches your eye. Users note their stable operation and high-quality sound.
Most often, Chinese 2 din format radios are equipped with a GPS module. With such a car player, there is no need to purchase a navigator. Additional gadgets can be connected to a Chinese head unit (GU) of this format: multifunction steering wheel, rear view camera, GPS antenna. This slightly modifies the connection diagram of the car radio, because new wires appear that were not on the standard chip.
In most cases, the audio device comes with ISO connectors and wires. Otherwise, you will have to buy an adapter to connect the purchased car player. Switching the device with a source of electricity will not be difficult, since the pinout of radio tape recorders of both formats is identical.
The yellow DC +12V wire is connected directly to the battery through a safety device.
The red control wire is connected to the ignition switch. It is desirable that when the key is turned to the ACC position, there are no other consumers besides the control unit. This will reduce the load on the battery. It is better to connect the black wire (“ground”) to the negative terminal of the battery, and not to the car body, since a 2 din radio is an energy-intensive device.
The GU has the ability to reduce the brightness of the backlight of the buttons and screen when the side lights are turned on. This makes it possible not to blind the driver at night. Power is provided by the wire marked ILL. Terminals KAY1 and KAY2 are responsible for connecting the remote control for the car radio (multi-steering wheel).
Problems and their solutions
Several possible problems may occur:
- Poor sound quality. In this case, it is recommended to check the correctness of the established indicators. If necessary, make additional adjustments.
- When you turn on the audio system, there is no sound, or the radio displays an error. There can be two reasons for such a problem: the absence of contact in the place where it should be present, or the presence of contact in those places where according to the scheme it should not be. To troubleshoot, you should double-check that the connection is correct.
If you were unable to solve the problem yourself, it is better to contact a specialized center.
- How to connect a SAB without an amplifier to a radio
- How to connect a horn to a radio
- Connecting a capacitor to an amplifier
- Microphone for car radio
Connecting speakers
The following wires are responsible for connecting the speaker system of a Chinese 2 din radio:
The first 2 connect the front speakers, the rest - the rear ones. The speakers have 2 wires - positive and negative. A pure color is “+”, and a similar one with a black stripe is “-“.
It must be remembered that failure to observe polarity when connecting speakers will lead to sound distortion, since the devices will operate in antiphase.
If the standard control unit on a car is being replaced with a “Chinese” one, and the markings of the speaker wires do not correspond to the ISO connectors, then you must remember that a cable with a wide terminal is positive, and a cable with a narrow terminal is negative.
If the speaker outputs on the connected car player have additional “tulip” type connectors, then it is advisable to use them if the same connection is also available on the car speakers.
Power connectors (power supply).
Three contacts marked - +12V.
Power is supplied from the positive terminal of the battery. The supply wire should not be thin. It is advisable to install a fuse at a distance of 40 cm (or less) from the battery (pictured). It is designed to protect the vehicle's electrical wiring.
The control wire from the head unit (radio tape recorder) is connected. The interconnect wire usually has a third thin wire, which is used as a control wire. It is needed so that the amplifier turns on and off together with the head unit.
GND (ground), connected to vehicle ground.
The wire must have a cross-section no smaller than the supply one and be as short as possible.
Conclusion
Now you have enough knowledge to go to a specialized store yourself and go through all the procedures: purchases, consultations, connections and settings - on your own. If you are not burdened with financial difficulties, it would be better to purchase an active type device, and then you will not have questions about how to connect a subwoofer to a computer. However, if you want to save money, or the hidden talents of radio electronics have awakened in you, you can safely purchase components at a reasonable price and create a full-fledged speaker system with your own hands. In any case, with a subwoofer you are guaranteed a life with rich bass, a lot of pleasure and the indignation of your neighbors.
Tags: battery, sconce, type, choice, generator, house, , capacity, sign, cable, like, computer, capacitor, , magnet, installation, power, load, voltage, setting, nominal, connection, polarity, potential, rule, wire, start, , work, size, regulator, relay, garden, network, system, connection, resistance, ten, type, current, installation, filter, photo, shield, effect
Connecting the audio system
It is not difficult for a person with minimal knowledge of electrical engineering to connect a Chinese 2 din radio. You just need to follow the included instructions exactly. In addition to connecting 4 speakers, it is possible to connect an amplifier or subwoofer. The wire marked AMP-CONT is responsible for this. The line has a built-in fuse, and power is supplied with a time delay of 8-10 seconds to reduce noise that occurs when the car player is turned on.
The acoustics are connected to the 2din radio with special multi-core acoustic wires. Their length should be minimal to reduce line resistance. It is not advisable to twist the wires, as this affects the sound quality. It is better to use special connectors.