02/28/2022 26,634 checkpoints
Author: Ivan Baranov
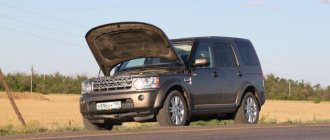
The gearbox is a rather complex unit that requires proper attention and diagnostics. Today, the problem of poor gear engagement is relevant for many vehicles, so it is important to understand how the unit is diagnosed and repaired. From this material you will learn why first gear is difficult to engage, what is the reason for this, and how you can engage first gear if necessary.
[Hide]
For what reasons do interruptions occur?
The gearbox is not only one of the most complex, but also one of the most basic components in any vehicle. The reasons for malfunctions that make it difficult to engage first gear can be associated with both incorrect use of the unit and driving on a bad road surface. In any case, if you don’t know why the speed turns on poorly, then this indicates a certain breakdown of the unit itself.
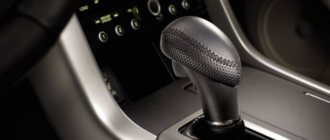
Gear lever
It should be noted that a similar problem often occurs in older cars that are bought second-hand and not at car dealerships. Therefore, if you purchased a used car, then you shouldn’t even be surprised by such a problem, especially since similar faults will appear in any car sooner or later. In addition, if you try to turn on the speed and this happens, but very poorly and with great difficulty, then over time the unit selector may completely stop responding to any commands from the motorist. Naturally, not every driver will be able to constantly start driving in second gear, so it is important to understand the reasons why first gear is difficult to engage.
Below is a list of breakdowns that can cause the gear lever to shift gears poorly:
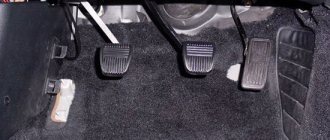
- The problem is in the clutch operation - the mechanism engages poorly, disengagement is incomplete. This problem often occurs in domestically produced cars and in most cases it is due to the fact that the mechanical clutch cable comes off from the mounting point. In fact, it is not particularly difficult to identify this - if the cable breaks, the pedal will be recessed into the floor and will not move. This, as you understand, is directly related to the operation of the clutch, and not the gearbox.
- There was a breakdown in the operation of the drive rod for controlling the gear shift mechanism. Then not only the first, but also the reverse and other speeds will turn on poorly.
- Failure of the unit's jet thrust.
- For unknown reasons, the fastening bolts located on the side or selector rod for selecting the gearbox mode have become loose. The problem is solved by tightening the bolts.
- The transmission gear shift drive was incorrectly adjusted.
- The plastic elements in the gearbox control drive have failed or have expired.
- The link was poorly adjusted. As you know, the purpose of the rocker is very important in connecting the gearbox and the gear selector, so incorrect adjustment may well be the cause of the problem. In addition, the plastic bushings on this link could wear out or fail.
- Failure of synchronizers can also be called one of the most common failures in a gearbox. Unit synchronizers are brass bushings necessary for easier switching of unit modes. Since brass itself is a soft material, it can wear out and wear out during the operation of the vehicle. To correctly diagnose the condition of the synchronizers, you should pay attention to the operation of the gearbox - if a grinding or unpleasant sound appears when shifting gears, then the problem is in them. Moreover, this sound will appear constantly when you try to engage first gear. If only sound appears, but the gearbox selector switches to one mode or another without problems, then a malfunction will occur soon.
- Failure of gearbox bearings. Such a malfunction does not occur so often, one might even say that it is rare, but any motorist can still encounter it. If you own a car with a manual transmission, then the bearings could get stuck in it, as a result of which the shaft stops rotating along the path. In such cases, it is difficult to engage first gear; at other speeds the problem usually does not appear.
- The box shaft has failed. The unit shaft is usually not subject to operational wear or very heavy loads, but the malfunction may be caused by a factory defect. In the event that even minor mistakes were made in production, the shaft may well break. If so, then the problem of engaging the first gear may be just the beginning of a major breakdown that you will face. As practice shows, often in such cases the unit itself breaks down completely.
- The problem of clutch failure is relevant for owners of cars with automatic transmission. There are cases when, if the clutches are not functioning correctly, a push occurs when the first speed is turned on, but then everything works fine. The problem can only be solved by replacing the clutches.
Failed bearing
You, as a motorist, need to understand that failure of the unit shaft or bearings cannot be diagnosed at home. Only experience and equipment will help you understand this reason. Accordingly, if problems arise with turning on the first speed, it is advisable to immediately contact a professional.
Clutch disc and flywheel
In fact, wear occurs both at the clutch disc and at the flywheel itself. However, here, most likely, the gears will shift, but slip! You release the clutch pedal, but slippage occurs, that is, the car does not move, and it may jerk.
We look at the disk, maybe change it. We also look at the wear on the flywheel! If it is large, then we change it completely.
From experience I can say that our working VAZ 2111 was used mainly intercity, after 2 - 3 years the mileage was very high. The following symptoms began to appear: the gears turned on very poorly when the engine was running! We removed the manual transmission, looked at the basket - clutch disc - flywheel. And everything went for replacement, there was a lot of wear, and one petal on the basket was cracked. They even changed the release lever and the fork.
If the reason is not eliminated even now, then the problem is in the gearbox itself! It's worth taking it apart and looking at it
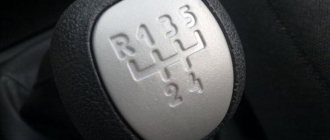
How to engage first gear without harming the gearbox?
Often, inexperienced motorists, turning the gearbox selector from second to first speed, may notice how some difficulties arise, in particular, how difficult it is to engage first gear. In such cases, a novice driver often tries to turn on the speed using force, simply by driving the selector into the desired position. This should not be done under any circumstances, since such actions can be fraught.
Actually, having noticed such a drawback in the manual transmission, motorists developed a rule - the first speed should be engaged only in order to move away. In all other cases, second, third and fourth gears are engaged. Experienced motorists especially often use this rule, but we would like to say on our own that this is fundamentally wrong.
Operating principle of gearbox synchronizers
Any driving instructor will tell you that the choice of speed should be based on driving speed and engine crankshaft speed. In principle, even parking normally is only possible in first speed. If you try to park in second gear, you will have to maneuver very quickly, and in such cases there will be a strong load on the clutch. Actually, just like the gearbox unit itself. Accordingly, you must learn one simple rule for yourself - you can engage first gear when driving only if the speed is low and the crankshaft speed is low.
Release bearing
The clutch fork is connected to the release bearing; it is this bearing (under the influence of the fork and your foot) that presses the clutch petals and disconnects the disc from the flywheel and basket. If the bearing is “covered”, then this process becomes very difficult. To be fair, it is worth noting that the gears will still be switched on, but it will be very difficult! With crunching, whistling and other jokes. It's worth changing it. However, again you will need to remove the transmission
Theory of gearbox operation
Every motorist who understands the structure of a gearbox knows that all modern cars with a manual transmission are equipped with synchronizers. This element is one of the important components of the unit. The purpose of synchronizers is to equalize the speed of all gearbox shafts. In addition, these elements are responsible for painless and shock-free gear shifting for the box.
It should be noted that directly when the driver pushes the gearbox selector when switching from second to first gear, you can feel an obstacle. This obstacle prevents the activation of the first speed and it is this obstacle that is called the synchronizer. If the gearbox is relatively new or a synchronizer has recently been installed on it, then you will not experience problems with the transition from high speed to low speed. The first gear will be engaged without any obstacles.
Worn out synchronizer
But if your vehicle has already traveled more than a hundred thousand kilometers, then this will directly affect the functioning of some elements of the unit. In particular, first of all, synchronizers will stop working normally - they simply will not be able to perform the tasks assigned to them initially. Then the motorist is forced to perform various “tricks” that our grandfathers told us about - these are all kinds of gas shifts with double disengagement of the clutch and so on.
When performing such tricks, the throttle change will act as an equalizer for the interconnected gears. Thus, if the difference in angular speeds is high, and the synchronizers are worn out quite badly, then the driver will have to accelerate even more. In the case when the angular speeds are the same, the motorist will immediately understand this - the gearbox selector will be able to switch from high speed to low speed without any problems. Thus, it will no longer be worthwhile to make efforts.
New synchronizer for gearbox
Engine mounts
I personally have never had this happen, but many people write that this is a fairly common problem. Actually, the problem is this: the engine hangs on cushions, the gearbox is connected to it (manual transmissions, by the way, have their own cushions). It happens that the fastening breaks, or it unscrews. The engine or “box” may sag, the scenes may break, or they will hit something.
THEN there is another not very serious problem - these are pillows! If the programs don’t turn on, then we watch them.
These malfunctions, AS I THINK, ARE NOT PROBLEMS AT ALL! Anyone can identify them on pits or lifts, and this is done quite quickly. Personally, I came across rockers and cables, using the example of a VAZ, a clutch cable.
However, if you have checked everything, and the gears do not engage with the engine running. Then it’s worth looking at the box itself and the accompanying attachments. Let's move on to complex faults.
Methods for engaging first gear
So, if the modes in your vehicle are difficult to engage and you have already understood the reasons and theory, then let’s move on to the most important thing - methods for engaging first gear. The simplest method in this case would be to activate first gear while driving the car. You need to push the unit selector forward without any effort and do this until the corresponding synchronizer comes into operation. However, it should be noted that this method is relevant for most passenger vehicles and some trucks.
It should be taken into account that this cannot be done in most old trucks, since the design of the unit itself does not allow this, since they simply do not have synchronizers. In addition, you need to take into account that this method of activating the first speed is hardly relevant if the synchronizer on your vehicle has already exhausted its service life. This will simply be impossible.
Double car re-gas
Then the driver will only have to wait a while until the car practically stops in order to turn on the desired speed. Or use force to engage the gearshift lever. In principle, neither the first nor the second method can be called the optimal solution to such a problem. As practice shows, it is best to use the same old-fashioned method with re-gasping.
You can find out how to do this below:
- So, while driving in second gear, start depressing the clutch pedal.
- When you press the pedal, move the gearbox selector to the neutral position. Having done this, you can disable the clutch pedal.
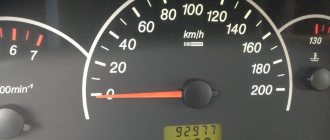
- Then, when the pedal is completely lowered, you need to lightly press the gas with your right foot, pressing the pedal. In this case, pay attention to the tachometer, which shows the number of revolutions. You need to increase the revolutions to two and a half thousand per minute, that is, the needle should be at the number 2,500. Here, pay attention to one important nuance - the greater the difference in angular speeds of the mating gears of the box, the higher the number of revolutions needs to be raised. That is, 2,500 is the minimum, add gas if necessary.
- Then depress the clutch pedal again.
- Next, the box selector should be moved to the initial mode activation position, that is, first speed. Here, also pay attention to the fact that if the selector does not enter the required position correctly, then most likely you simply did not give enough gas. If this is the case, then repeat the steps, only add more gas.
- As a result, you need to release the clutch pedal smoothly, not abruptly. If you did everything correctly, the gearbox lever will move to the required position without any problems, shocks or extraneous sounds.
If you were unable to do this, then do not be discouraged - rarely does anyone manage to perform a double gas change the first time. By repeating the procedure several times, you will be able to remember everything that needs to be done to correctly engage the first speed. Actually, the same methods allow you to activate first gear when driving in third, for example, if in an emergency you need to brake the engine. In this case, the higher the driving speed, the longer you will need to wait for the synchronizers to help you. Or you need to press on the gas more.
But do not regard double throttling as a way out of the situation. This method can be called a temporary solution, but the unit will still have to be repaired. Since replacing synchronizers is a rather complex process, we recommend that you seek help from specialists. If you still decide to perform this procedure yourself, then the instructions provided below will be useful to you.
Loading …
Changing synchronizers
Replacing gearbox elements is carried out in several stages. We will not describe them in detail, since all actions are individual for each individual car.
Moreover, if you have never encountered such a procedure, you are unlikely to be able to perform it yourself:
- First you need to remove the gearbox from its installation location. To do this, use the recommendations in the service manual or search our resource - here you can find several instructions. The dismantled gearbox is thoroughly cleaned of dirt and dust.
- After this, you should remove the clutch cable retainer.
- Next, unscrew the four nuts that secure the rear cover of the unit; move it to the side.
- After this, unscrew the screw securing the fifth speed fork. Then turn it on, to do this you need to move the synchronizer clutch down with the fork. This must be done in such a way that the coupling splines are together with the gear. Having done this, you should activate either the third or fourth speed.
- Then you need to unscrew the nut that secures the input shaft. To be able to move it out of place, pull the key firmly, since it is most likely tightened with force. Carry out similar actions with the nut that secures the secondary shaft.
- Next, lift the fifth speed gear and remove it with the synchronizer and the secondary shaft fork. Please note: the clutch should not move from the hub at this point. Installation of new elements is carried out in the reverse order. You need to be as careful as possible. As you can see, in general the process is quite complex and responsible, so do not bother replacing synchronizers without experience.
For those with automatic
If your car has an automatic transmission. It will not hurt you to know the modes in which your machine can operate:
- P – For parking and starting the engine. Switching to this mode is possible only after the machine has completely stopped.
- R – To move backwards. Switching to this mode is also possible only after stopping the car and with the brake pedal pressed.
- N – Neutral. When the engine is completely disconnected from the gearbox.
- D – Moving forward without restrictions on gear shifting (the most commonly used operating mode of the automatic transmission).
- D3(S) – Low gears for climbing and braking engines on descents.
- D2 – Mode for difficult conditions (slippery or mountainous roads). Gears above second are not shifted, that is, only first and second gears are engaged.
- D1(L) - Movement occurs only in 1st gear, used off-road on mud, snow or ice, where you need to drive without changing the throttle, and also to overcome steep climbs.
The automatic transmission also has a button on the mode shift lever with the inscription O/D OFF. When it is turned on, the inclusion is prohibited, increasing the gears of the analogue of the 5th gear of the manual transmission. That is, if your automatic machine has 4 gears for moving forward, then for more dynamic acceleration it will use only three lower gears.
About a faulty automatic transmission, an automatic transmission is much more complex than those encountered with a manual transmission, and the chances of repairing it in your garage are slim. But despite this, you still need to know something about it, if only in order not to harm it through improper use.
An automatic transmission is much more demanding in terms of accuracy in maintaining the oil level in it than a manual transmission. Both too low and too high oil levels are very harmful to her. Both of these can lead to serious damage. In both cases, oil foaming occurs. When there is a lack of oil due to the fact that the oil pump begins to capture air along with the oil. When there is excess oil, it foams on the rotating parts, which in this case are immersed in it. Foamed oil compresses better and has low thermal conductivity. Therefore, if you operate a machine with such oil, the pressure in its control systems will be low. Which will lead to slipping of the clutches and their intensive wear. Deteriorated thermal conductivity will not allow all excess heat to be removed. Which, together with low pressure, will lead to the machine failing and requiring serious repairs.
Troubleshooting gearbox
Troubleshooting the gearbox is done by removing it from the car, disassembling it, and troubleshooting parts if it is found that some of them are badly worn. Particular attention should be paid to the condition of the sliders and clamps. If burrs are noticed on the sliders, they must be removed with a file. You also need to check the condition of the springs and retainer balls. The springs must be intact, and the latch must move without problems in its seat. If necessary, worn or damaged elements must be replaced.
You should also carefully inspect the power forks for bending. Even a slight bend can affect the ease of gear engagement.
After assembly, gear shift adjustment must also be performed. To be precise, the position of the scenes is set.
What to do?
Next, we will look at several ways to solve the problem that can be done at home. The process of repairing a transmission is not such a simple task, so if you are not confident in your abilities, then do not try to do it yourself. It is better to contact specialists, because if you make even a small mistake, it can develop into more serious problems in the future.
Tools
Regardless of what kind of breakdown you have, prepare in advance all the necessary tools that you may need to disassemble the gearbox:
slotted screwdriver; a set of heads for unscrewing bolts; set of wrenches; mounting blade; hammer; pliers with thin jaws; Phillips screwdriver; Litol lubricant; jack; container for draining transmission oil from the gearbox; technological plug for the hole in your robotic gearbox.
A set of tools for dismantling and repairing the VAZ Priora gearbox
Removing the manual transmission
- First of all, before disassembling the gearbox, it is necessary to drain the transmission fluid from the gearbox. To do this, find an oil drain hole under the bottom of the vehicle, place a previously prepared container and unscrew the plug. Wait 40-60 minutes until the oil is completely drained. Now you can begin dismantling the gearbox.
- To begin, find in the cabin under the instrument panel the fastening nut of the clutch cable housing, which is connected to the pedal. It needs to be unscrewed. To do this, you will need an "8" socket or wrench. When the nut is unscrewed, remove the stop from the bracket.
- Then you need to dismantle the locking element and the housing of the wear compensation device for the driven shaft linings from the clutch pedal pin. To do this, take a slotted screwdriver and pry out the element.
- Now remove the plastic bushing from the pedal and then inspect it. If the bushing shows signs of wear or any physical damage, the bushing should be replaced. Before installing it directly, take “Litol” and lubricate the element so that it does not become dry.
- Next, dismantle the rubber seal of the clutch pedal cable sheath - it is located in the engine compartment.
- Then you need to remove the end element from the cable fork, after pulling it forward in the direction of travel of the vehicle.
VAZ Priora gearbox disassembled
Remove the nut securing the clutch cable end to the bracket, which is located directly on the gearbox. To do this, use a wrench set to “17”. Remove the cable end from the bracket hole. Then you need to remove the cable from the car. Now remove the plastic retaining plug and remove the wiring block from the speed sensor. Using a 10mm wrench, you need to unscrew the three mounting bolts on the front crankcase cover and remove it. Now you should support the engine of your vehicle with a reliable support or secure it using a device for lifting loads. Next, remove the nut securing the rear suspension support of the power device directly to the bracket. To do this you will need a key or socket on “15”. Now you need to remove the rear airbag upper limiting device. Unscrew the bolts securing the airbag to the vehicle body. Remove the cushion and its lower stop.
What is it for
First of all, it’s worth understanding how a manual transmission works. In short, it is needed to transmit torque to the wheels from the crankshaft, as well as to change the gear ratio. To put it even more simply, the gearbox changes the torque, which gives the car the ability to move without problems at different speeds and under constantly changing load conditions. The gearbox is based on three shafts (primary, secondary, intermediate) and gears of different sizes. The interaction of the shafts is ensured by these same gears.
Now about the tandem of the internal combustion engine and gearbox. The essence of its engine operation comes down to the rotation of the crankshaft. When the shaft rotates, the gearbox input shaft, which is connected to the flywheel, also begins to rotate. If the driver selects neutral gear, the secondary shaft does not begin to rotate. But when the driver selects another gear, the secondary shaft gears immediately engage with the input shaft gears. The force from the unit is transmitted to the drive wheels through a chain of automotive transmission elements. Of course, the meshing of the gears should cause something like shocks. This is where the synchronizer turns out to be a very necessary mechanism.
On a VAZ 2110, it is not so uncommon for the gears to shift poorly or get knocked out. A mechanism for adjusting the speed selection drive is provided specifically for this purpose.
Adjustment may be necessary if:
- the box was recently removed for repairs;
- one of the gears falls out;
- the speeds do not engage well or simply get knocked out when the car is moving.
If you have one of these problems, try making adjustments first. Its sequence:
- Under the bottom of the VAZ 2110, find and slightly loosen the nut on the bolt that tightens the clamp that secures the rod designed to control the gearbox;
- Use a screwdriver to slightly move apart the grooves in the end of the rod and the resulting gap on the clamp itself. This is necessary to ensure easy movement of the rod in relation to the gear selection rod. Place the rod in the neutral position;
- Release the shift knob from the cover in the cabin;
- Align the lever using a special template. This is done like this: install a template in the window of the rear speed lock bracket lining. After this, insert the lever axis stop into the groove of the template, pressing it without unnecessary force in the transverse direction;
- Then adjust the axial play of the rod in the rear direction, and its axial play by turning to the left;
- Install the clamp, not reaching a few millimeters from the end of the rod. Then tighten the clamp thoroughly with the bolt.
Knocking out the speed
If it turns on, but immediately turns off, then the latch may be stuck in the squeezed position, so it no longer does its job. It is also possible that the spring that presses the ball retainer is destroyed. Without the force of the spring, it will not be able to hold the slider in the desired position.
If significant force is applied while shifting into gear, the shift fork may bend.
Poor switching may also be caused by incorrect installation of the gearshift knob. In this case, the rocker does not bring the gear to full engagement.
Setting the temperature of the supplied air from the heater
To fine-tune the control unit, it has an adjusting screw. To check the accuracy of temperature control, close all doors and windows and place a control thermometer next to the temperature sensor. Set the fan control knob to position A, and the temperature knob in accordance with the temperature measured by the control thermometer. If after 15 minutes the actual temperature in the cabin does not correspond to the set temperature, remove the controller from the socket and turn the adjusting screw clockwise to increase the temperature and counterclockwise to decrease it. After adjustment, check the operation of the control unit again. The control unit, temperature sensor with microfan, micromotor and heater damper position sensor cannot be repaired and must be replaced with new ones if they fail.
Malfunction of the interior temperature sensor and controller in VAZ 2110 2111 2112 cars
1. If the interior temperature sensor is working properly, the heater operation algorithm should be as follows: at maximum (red dot) - movement to open the damper; at minimum (blue dot) - movement to close the damper, other positions are fixed depending on the temperature set by the interior temperature sensor
To see if the damper is moving, it is better to remove the front deflectors; they have two plastic latches on the right and left (be careful not to tear off the backlight wire when removing). After removing the deflectors, you can clearly see whether the damper is moving or not, i.e.
air flows through the heater or not. In addition, you can check the resistance of the interior temperature sensor.
Checking the interior temperature sensor on VAZ 2110 2111 2112 cars.
Temperature characteristic - the resistance of the temperature sensor should be as follows: at 22 C - 20 Ohm; at 16 C - 25 Ohm.
Checking the controller with a heater (stove)
Checking the controller is as follows. We take out the controller from the socket. Turn on the ignition, turn the temperature knob and measure the voltage on the pink and brown wires (long controller connector). If the voltage changes (should turn on after changing the position of the temperature knob and turn off after about 13 seconds), then the controller is working, if not, then the controller needs to be changed.
Checking the micro-gearbox VAZ 2110 2111 2112
We check whether voltage is supplied to the micro-reducer. It's not that simple here. To get to it you need to remove the frill. Open the engine compartment. We unscrew the sound insulation, unscrew the two screws for 10 fastening the frill, remove the wiper drives and unscrew the three fastening screws that are under the round plugs and move away the frill, which prevents the washer hose from being completely removed. We see two connectors. One is a damper position sensor, and the second is a micro-gear drive, to which the brown and pink wires fit. We remove the connector, turn the temperature knobs and measure the voltage. If it changes, it means the wire is not frayed anywhere; if it doesn’t change, then it means the wire is broken somewhere in the harness. Checking the micro-gearbox. We supply 12 volts from the battery to the micro-gearbox connector. If it doesn’t spin, then definitely change it; if it spins, then the contacts in the connector have simply oxidized. To be absolutely sure that the gearbox is working, you can remove it by unscrewing the three screws that secure it (be careful not to drop the screws inside) and move the micro-gearbox to the right. Unscrew it, take it out and check it. If it's faulty, we buy a new one. There is a position sensor on the micro-gearbox. So don't worry during installation, you don't need to configure anything. The controller itself will set the damper according to the sensor.