1200 rub. for the photo report
We pay for photo reports on car repairs. Earnings from 10,000 rubles/month.
Write:
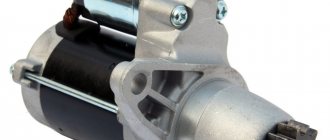
The reasons that the starter does not turn may be a malfunction of the retractor relay, a weak battery charge, bad electrical contacts in the circuit, mechanical failure of the starter, and so on. It will be useful for every car owner to know what to do if the starter does not turn the engine . Indeed, in most cases, repairs can be done yourself. Moreover, a breakdown usually occurs at the most unforeseen moment, when it is not possible to use the help of a car repairman. Next, we will consider in detail the causes of the malfunction and methods for eliminating them.
Signs of a faulty starter
There are actually many reasons why a car won't start. However, a faulty starter can be determined by the appearance of one or more of the following symptoms:
- the starter does not turn on;
- the starter clicks, but does not turn the engine crankshaft;
- when the starter is turned on, the crankshaft rotates very slowly, which is why the engine does not start;
- You can hear the metallic grinding sound of the Bendix gear, which does not mesh with the crankshaft.
Next, let's move on to discussing the possible causes of a possible breakdown. In particular, we will analyze situations when the starter either does not rotate at all or does not rotate the engine crankshaft.
Stator problems
Staters of modern starters are mainly made using permanent magnets, but there are also units with classical windings. Insulation breakdowns, breaks and interturn short circuits are possible in it. To check the absence of the listed problems, it is recommended to use the diagrams presented in the image below.
The permanent magnet stator has virtually no problems. Despite this, in domestic units, poles may peel off or cracks may appear.
Reasons why the starter does not turn
Often the reason that the car does not start and the starter does not turn the flywheel is a discharged battery . This reason is not directly related to the breakdown of the starter, however, before diagnosing this unit, it is necessary to check the charge of the battery and, if necessary, recharge it. Most modern car alarms block the starter circuit if the voltage level from the battery is 10 V or lower. Therefore, you will not be able to start the engine under this condition. To prevent this from happening, monitor the battery charge level and recharge it periodically if necessary. Also be aware of the density of the electrolyte. However, we will assume that everything is in order with the battery charge level.
Let's consider one particular case... Owners of a 2007-2008 Ford Focus 2 car may encounter a problem when the starter does not turn due to an error in the original immobilizer. Diagnosing this breakdown is very simple - to do this, just turn on the battery power directly to the starter. However, it works without problems. As a rule, official dealers replace the immobilizer under warranty.
The reasons that the starter does not turn and “shows no signs of life” may be the following situations:
- Deterioration or loss of contact in the starter circuit . This may occur due to corrosion or deterioration of the bolted wires. We are talking about the main “ground” contact attached to the machine body. It is also necessary to check the ground of the main and starter solenoid relays. According to statistics, in 80% of cases, problems with a non-working starter come down to malfunctions in the car’s electrical circuit. Therefore, in order to eliminate the problem, it is necessary to inspect the wiring, that is, inspect the starter power circuit, tighten the bolted connections on the blocks and terminals. Using a multimeter, check for voltage on the control wire going to the starter; it may be damaged. To check it, you can close the starter “directly”. How to do this is described below.
- Faulty starter retractor relay . This could be a break in its windings, a short circuit in them, mechanical damage to internal components, and so on. It is necessary to diagnose the relay, find and eliminate the fault. You will find additional information on how to do this in the corresponding material.
- Short circuit in the starter winding . This is a fairly rare, but critical problem. It occurs most often in starters that have been used for a long time. Over time, the insulation on their windings is destroyed, as a result of which an interturn short circuit may occur. This can also happen due to mechanical damage to the starter or when it is exposed to aggressive chemicals. In any case, it is necessary to check for a short circuit, and if it occurs, then the solution would not be repair, but a complete replacement of the starter.
Ignition contact group VAZ-2110
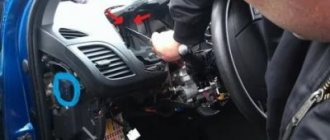
- Problems with the ignition switch contact group , which may be the reason why the starter does not turn. If the contacts in the ignition switch are damaged, then no current passes through them to the electric motor, and accordingly, it will not spin. The test can be done using a multimeter. Check whether voltage is supplied to the ignition switch and whether it leaves it when you turn the key. It is also necessary to check the fuses of the contact group (usually located in the passenger compartment, under the “dashboard” on the left or right side).
- Slipping of the freewheel of the starter drive. In this case, repair is impossible; the mechanical drive of the starter must be replaced.
- The drive moves tightly along the shaft thread. To fix it, you need to disassemble the starter, clean the threads of debris and lubricate them with machine oil.
Next, we will analyze the problems of which this fact is a symptom. that the starter cranks the crankshaft very slowly, which is why the engine does not start.
- The viscosity of the engine oil does not match the temperature conditions. This situation can arise when the engine oil becomes very thick in extreme cold and prevents the crankshaft from rotating normally. The solution to the problem is to replace the oil with an analogue with the appropriate viscosity.
- Battery low . If it is not charged enough, then there is not enough energy to turn the crankshaft at normal speed using the starter. The solution is to charge the battery or replace it if it does not hold a charge well. This situation is especially relevant for winter .
- Poor contact of brushes and/or poor tightening of wire tips going to the starter. To eliminate this breakdown, it is necessary to inspect the brush assembly, change the brushes if necessary, clean the commutator, adjust the tension of the springs in the brushes or change the springs.
Let's list a few more atypical situations due to which the starter does not turn both cold and hot. So:
- The problem is with the control wire that goes to the starter. If its insulation or contact is damaged, it will be impossible to start the engine using the key. We recommend that you review it. To do this you will need the help of another person. One of you should try to start the engine using the ignition key, while the other one pulls the wire, trying to “catch” the position in which the necessary contact will occur. Another option is to apply a direct “+” from the battery to the mentioned control wire. If the engine starts, you need to look for the cause in the ignition switch; if not, in the insulation or integrity of the wire. If the problem is a damaged wire, then the best option is to replace it.
- Sometimes the permanent magnets . To eliminate the damage, you need to disassemble the starter and re-glue them to their designated places.
- Fuse failure . This is not a common, but probable reason that the starter does not work and does not turn the engine. First of all, we are talking about fuses for the contact group of the ignition system.
- The return spring on the starter retractor relay flies off. To eliminate the malfunction, it is enough to remove the specified relay and install the spring in place.
What elements need to be changed?
When carrying out a major overhaul of the starter, you need to change almost all of its elements. There is a bronze bushing in the back cover, which helps transfer power to the rotor winding. If not everything, then a lot depends on her condition. With a large gap between the rotor and the bushing, the transmission of electricity occurs much worse, therefore, a large amount of current will be lost.
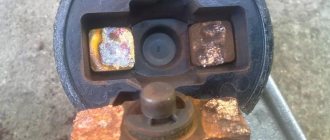
Replacement of brushes is required. This is the unit that is subject to friction and destruction because of it. On some starter models, this operation cannot be performed, since they are connected to the power supply by soldering. Therefore, if the brush assembly is severely worn, you need to bite off the wires. After this, solder the new brushes into place. Unfortunately, this repair method is not always reliable. If the starter does not respond to turning the ignition key, then it needs to be overhauled. And for this, a new bendix must be installed.
The starter clicks but doesn't turn over
Inspection of starter brushes on VAZ-2110
Very often, when the starter malfunctions, it is not the mechanism itself that is to blame, but its retractor relay. It is important to understand that when you turn on the ignition, it is not the starter that clicks, but the mentioned relay. Malfunctions consist of one of the following reasons:
- Failure of the power wire that connects the starter windings and the traction relay. To solve the problem it is necessary to replace it.
- Significant wear on starter bushings and/or brushes. In this case, they need to be replaced.
- Short circuit on the armature winding. You can check this using a multimeter. As a rule, the winding is not repaired, but another starter is purchased and installed.
- Short circuit or break in one of the starter windings. The situation is similar to the previous one. The device needs to be replaced.
- The fork in the bendix is broken or deformed. This is a mechanical failure that is difficult to fix. The optimal solution in this situation would be to replace the bendix or the fork separately (if possible).
Checking the solenoid relay
It is possible to determine the functionality of the retractor without removing it from the car starter in the following way:
- Check the wiring going to the relay for a break.
- If the wiring is in good condition, the operation of the traction relay is checked. To do this, turn the ignition key and listen for the click; its absence indicates a malfunction of the relay.
- If the activation click is heard, but the starter does not rotate, a possible cause of the malfunction is burnt contact plates. To check the assumption on the relay, disconnect the terminal coming from the lock, after which, using a screwdriver, connect the terminal coming from the battery with the terminal that goes to the starter. The result will be the supply of electricity to its engine, bypassing the relay. If rotation begins, the retractor is faulty.
- Checking the voltage going to the starter will allow you to determine what the problem is - in the wiring, battery or starter. The multimeter is connected to the positive terminal of the relay, where the battery voltage is suitable, and the negative terminal of the device is connected to ground. When the ignition is turned on at this moment, the voltage should be 12 V. If the value is lower, the battery energy is most likely not enough to start the engine, but it is enough for the relay to operate.
The starter does not turn when hot
Starting the engine directly
Sometimes car owners have problems when the starter does not turn “hot”. That is, with a cold engine, after a long period of parking, the car starts without problems, but when it heats up significantly, problems arise. In this case, the most common problem is incorrectly selected starter bushings, that is, having a smaller diameter than required. When heated, a natural process of increasing the size of the parts occurs, which is why the starter shaft jams and does not rotate. Therefore, choose bushings and bearings in accordance with the manual for your car.
Also, in extreme heat, contacts in the vehicle's electrical system may deteriorate. Moreover, this applies to all contacts - on the battery terminals, the solenoid and main starter relay, on ground, and so on. Therefore, we recommend that you inspect them, clean and degrease them.
Closing the starter directly with a screwdriver
Planetary gear
If the starter shaft is difficult to rotate, a common cause is thickening of the lubricant in the planetary gear. At the same time, when the engine is cold, the electric motor turns the crankshaft worse than when the engine is hot. This is due to the fact that the lubricant changes its viscosity depending on the temperature. When hot, it liquefies and interferes less with the rotation of the shaft.
To solve the problem, you need to disassemble the planetary gearbox and clean out all the contents. After this, new lubricant should be applied.
The reasons why the starter does not work well and turns weakly are often related to the condition of the planetary gearbox gears. Therefore, it is important to inspect them for signs of wear and broken teeth.
Emergency engine starting methods
When the starter does not click or make any sounds at all, the engine can be started if it is closed “directly”. This is not the best solution, but in cases where you need to go urgently and there is no other option, you can use it.
Let's consider the situation of how to start the engine directly using the example of a VAZ-2110 car. So, the sequence of actions will be as follows:
- engage neutral gear and set the car to the handbrake;
- turn on the ignition by turning the key in the lock and open the hood, since we will carry out further actions in the engine compartment;
- remove the air filter from its seat and move it to the side in order to get to the starter contacts;
- disconnect the chip going to the contact group;
- use a metal object (for example, a screwdriver with a wide flat blade or a piece of wire) to short-circuit the starter terminals;
- as a result of this, provided that the other components listed above are in good working order and the battery is charged, the car will start.
After this, install the chip and air filter back. An interesting fact is that in most cases the engine will continue to be started using the ignition key. However, you should remember that the breakdown still remains, so you need to look for it yourself or go to a car service center for help in order to fix it.
Emergency engine start
We offer you another method that will be useful to you if you need to start the engine in an emergency. It is only suitable for front wheel drive passenger cars with manual transmission! The algorithm of actions is as follows:
- it is necessary to jack up the car by hanging any of the front wheels;
- turn the hung wheel outwards all the way (if the left wheel - then to the left, if the right wheel - then to the right);
- wrap a tow rope or strong rope around the surface of the tire 3-4 times, leaving 1-2 meters free;
- engage THIRD gear;
- turn the key in the ignition;
- pull strongly on the end of the cable, trying to spin the wheel (it is better to do this not in place, but with a slight run-up);
- when the car starts, first of all set the gear to neutral (you can do this without pressing the clutch pedal) and wait until the wheel stops completely ;
- lower the hanging wheel to the ground.
The described method of spinning the wheel of front-wheel drive cars is reminiscent of the method of starting a crooked starter (using the crank) used in old rear-wheel drive cars (for example, VAZ “classic”). If in the latter case the starter is spun using a handle, then in front-wheel drive cars it is spun from the axle shaft on which the raised wheel is located.
Conclusion
The starter is a simple but extremely important mechanism in a car. Therefore, its failure is critical , as it does not allow the engine to start. In most cases, problems are related to the car's electrical wiring, poor contacts, broken wires, and so on. Therefore, if the starter does not turn over and does not start the engine, the first thing we recommend is that you inspect the contacts (main ground, relay contacts, ignition switch, etc.).
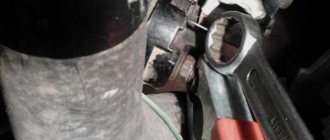
The purpose of writing this text is to warn car owners against one common mistake. When the key is turned to the START/KRANK mark, the starter does not turn, and then they try to close the power terminals directly. Having opened the hood and reached the starter, they see two copper taps - they are closed. In this case, the electric motor is activated, but the solenoid relay is not activated, and the freewheel bearing remains in place. In reality, power taps cannot be shorted! We will talk further about how to properly close the starter with a screwdriver.
Broken bendix teeth or flywheel ring
This problem usually appears on cars with high mileage, especially after a recent flywheel replacement or repair of the starting mechanism. When you turn the key, the starter makes strenuous attempts to start the engine: it clicks, buzzes (sometimes with a squeal), but the internal combustion engine does not start. The problem here is the engagement.
Broken bendix teeth
The flywheel teeth (on most cars) are beveled to help the Bendix gear engage more smoothly. If there is significant wear, jamming of the traction relay fork, wedging or wear of the gear itself, it does not reach the point of reliable contact and does not fit along the relief of the teeth. Slipping leads to more wear and, since the part is not repaired, to unscheduled replacement.
If, when starting the internal combustion engine of a car, any extraneous sounds arise from the starter, this is a reason to check it as soon as possible. Otherwise, he will “remind himself” on the road.
Source
Scheme, theory and practice
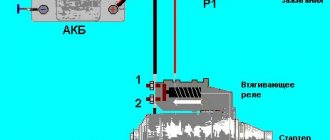
Let's see what the wiring diagram of any electric starter looks like. Contact B is constantly supplied with voltage.
Starter and its external circuits
In the diagram we see three “positive” contacts and one negative (8), which is always connected to the body. What needs to be closed:
- Before closing the starter, locate the S terminal. It is often made in the form of a petal;
- How to distinguish contacts B and M: the first will have a potential of “+12”;
- You need to close contact B with terminal S. This is done briefly and after turning on the “neutral”;
- Contacts M and B cannot be closed.
We move from theory to practice. On a VAZ-2114 car everything looks simple.
Solenoid relay VAZ-2114
Terminal B here is covered with a rubber band, and petal S is in contact with the terminal in plastic. The plastic plug is removed before “shorting”.
Closing the starter contact with a screwdriver
Make sure that the metal of the screwdriver does not touch the relay body when closing. Otherwise, we will simply close the “+” contact to “ground” (dangerous). All work is carried out with the ignition on.
- B – Bold, “thick” wire;
- M – Motor (electric motor);
- S – Start.
What to buy?
- 2110-3708010, -03, 04 – 9 teeth, 2 holes;
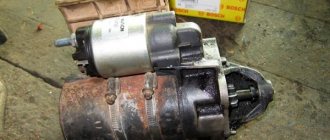
On the right is the BOSCH starter, on the left is PROMO-ISKRA
The choice depends on the type of gearbox. And nothing else.
Chemistry
There is no need to clean copper with WD-40 - after that everything will only get worse. Special equipment needed:
- Ammonia;
- ASIDOL (Lenbytkhim LLC) - excellent, by the way, also polishes glass;
- Molykote S-1002;
- Kontakt 60 or 100 (acid) and WL (wash);
- CRAMOLIN ContaClean (acid).
CRAMOLIN requires a remover. It's easier to take an eraser and ammonia.
We close the starter “in French” (special cases)
Access to the starter is always open from under the bottom - you just need to remove the crankcase protection. An example is in the photo below.
Under the bottom of Renault Megane 2
It is difficult to reach the starter from the engine compartment. In the best case, it is closed by a filter (VAZ), in the worst case, by a battery. You can remove the filter, but what about the battery?
Starter installation location (circle)
Everything is done so that the starter can be changed, repaired, but not short-circuited.
What does terminal S look like?
On Renault cars, the terminal looks like a threaded outlet. The nut screwed onto it is “white”, although it itself is made of copper (see photo).
Starter Renault Logan, phase 1
We have already talked about the VAZ - they use a plug. If you remove it, you can see the “petal”.
The starting method using a screwdriver is not the best. The problem is limited access.
50 Amps
The pull-in relay on the “Ten” consumes 50 Amps. For budget Lada models the current is 30 A, for many foreign cars it is higher. This means that a current of 40-50 Amps will flow from terminal B to terminal S. Think about the dangers of this.
We are going to short-circuit the starter with a screwdriver, but at the connection points where the current will flow, it may “stick”. In this case, without unnecessary panic, remove the negative terminal from the battery.
To remove the minus terminal, you need a 10mm open-end wrench. Keep it with you.
Repair of a collapsible solenoid relay
The manufacturer equips starters with a non-separable or collapsible retractor device. If a non-separable relay breaks down, it must be replaced, but a dismountable relay can be repaired. The described method allows you to check the solenoid relay of all VAZ models: 2101, 2102, 2103, 2104, 2105, 2106, 2107, 2108, 2109, 21099, 2110, 2111, 2112, 2113, 2114, Niva, Lada Priora, Kalina, Granta, Vesta and most foreign cars. Disassembly and repair of the relay is carried out in the following order:
- Unscrew the nuts securing the housing cover.
- If necessary, the ends of the windings are additionally soldered.
- After removing the cover, inspect the power contacts:
- If they burn, the damaged part is cleaned with sandpaper;
- When worn out, replace.
- The device is assembled in the reverse order and tested for functionality.
- The repaired relay is installed back on the starter.
conclusions
Let's look at diagram 1 again. If the key is not turned to the Start label, terminal S is “hanging in the air.” This can be done for any car, even if the circuit has an additional relay. This means that it will not be necessary to disconnect the standard wire from terminal S... And in the case of a VAZ, the disconnection is carried out in order to gain access to the terminal.
We removed the filter, disconnected the plug, and tried to close it...
If the engine filter cannot be removed or access is blocked by the battery, we do it differently - we use only the crank.
It is better to close the contacts not with a screwdriver, but with any wrench (see photo). It is desirable that the handle be insulated.
12 Volt voltage is not dangerous, but errors can result in blown fuses. Good luck.
For those who do not understand everything: the filter must be removed from the mounts, but not from the “corrugation”. The filter housing is placed on the battery.
Safety block, wires, terminal blocks
The so-called black box of the motorist, in which fuses and relays are located, quite rightly comes into question in such situations. A short circuit or simply stagnation of contacts may occur in the block. Experienced motorists recommend not hitting the block too hard, this really helps.
If that doesn’t help, find the terminal blocks with the power wires and clean them thoroughly from oxides. Then carefully solder everything.
You can also test the ignition switch and clean the chips whose wires go to the starter. It is better to replace the nuts on the terminals with brass ones to make contact better.
Battery
ATTENTION! A completely simple way to reduce fuel consumption has been found! Don't believe me? An auto mechanic with 15 years of experience also didn’t believe it until he tried it. And now he saves 35,000 rubles a year on gasoline! Read more"
The battery charge may be so low that the battery is unable to crank the starter directly. Naturally, this is not related to mechanical failure of the starter; the whole difficulty lies in the battery itself.
In order not to find yourself in a false situation, before checking the starter or disassembling it, you should properly test the battery. If it has been used for a long time, then this is another reason for a thorough check, because over time, the acid inside evaporates and the electrolytes no longer cope with their functions.
Thus, if the battery is discharged, it should be recharged, and if it does not hold a charge, then replace it with a new one.
It is extremely important to monitor the density of acid batteries. Testing this parameter is one of the mandatory stages of the maintenance process, which also involves diagnosing the acid level and measuring current.
You should know that in classic batteries the density is shown in g/cm3.
The technical condition of the battery is easy to determine, taking into account the criteria for electrolyte density. So, if the battery does not hold a charge, then you need to test the quality and level of acid in each section.
The test is carried out with a special device at plus 25 degrees Celsius. If the values differ from the standard ones, corrections are made to the readings, as indicated in the table below.
| Temperature of the electrolyte when measuring its density, ◦C | Correction to the hydrometer reading, g/cm3 |
| from -55 to -41 | -0.05 |
| from -40 to -26 | -0.04 |
| from -25 to -11 | -0.03 |
| from -10 to 4 | -0.02 |
| from 5 to 19 | -0.01 |
| from 20 to 30 | |
| from 31 to 45 | 0.01 |
| from 46 to 60 | 0.02 |
In the battery, the density should be maintained close to optimal values. It is important to know that the required parameters are accordingly determined by the geographical area in which the battery is operated. Taking into account the totality of all rules for care and operating conditions, the density of the battery must be established.
More details about this in the table below.
| Climatic zone (with average temperature in January, ◦С) | Electrolyte density | |
| Poured | In a fully charged battery | |
| Far North (from -50 to -30) | 1.27 | 1.29 |
| Northern zone (-30 to -15) | 1.26 | 1.28 |
| Central zone (-15 to -4) | 1.24 | 1.26 |
| South zone (-15 to 4) | 1.22 | 1.24 |
| Tropical zone (from 4 to 6) | 1.2 | 1.22 |
Battery condition
When the battery is discharged, a characteristic sign will be clicking noises from under the hood when trying to start the engine, which is produced by the retractor relay, as well as slow rotation of the crankshaft.
This occurs because with the low voltage supplied by a dead battery, the relay cannot be fully retracted and its core is thrown back by the return spring and the starter clicks. In addition, a low battery will be indicated by dim lights from the side lights and headlights, and after turning the key, the instrument lighting will go out almost completely.
When the battery is normally charged, the voltage at its terminals should be 12-12.4 volts. The voltage is measured with a multimeter. If it is below 11 volts, then starting will be difficult, in addition, the state of charge will not be enough to provide a large starting current.
Starter
If the battery is in order, then the starter may not turn directly only in one case - if it has one or more faults inside. As a rule, this is due to a short circuit in the winding, slipping of the bendix and tight shaft movement. Let's look at each of these reasons in more detail.
Winding
It should also be initially tested and measured to ensure its serviceability or malfunction. You need to arm yourself with a special tester or a regular test lamp. To carry out diagnostics, remove the winding output, lift the brushes slightly and pull them out. A short circuit in the winding will be indicated by a 12 volt light coming on.
The brushes are checked in the same way. Voltage is supplied directly to the brush holder (without insulation) and to the starter housing. And to check the armature and commutator, you should lift the brushes a little and apply voltage to the starter body.
Again, if the control indicator lights up, this will indicate a burnt out winding. It will be necessary to disassemble the starting device to more accurately determine the reasons. It is possible that there are faulty parts that prevent the starter from functioning properly.
Bendix slipping
In principle, such a malfunction is not related to the topic of the article. However, in some cases, if Bendix has had a negative impact on the starter, the starting device will not show any signs of life at all when starting directly.
Bendix or OM is the most important part of the starter. It is this that engages with the flywheel of the crank shaft and ensures the decoupling of the starter and the motor at the time when the latter starts.
It’s interesting, but Bendix is a made-up name. In other words, it does not reflect the essence of the action performed by it. But the classic engineering name for the unit is an overrunning clutch (OM).
Until you understand the operating principle of the OM, the nature of the malfunction will be difficult to identify. Being a kind of clutch, the bendix can only rotate in one direction. If you try to turn it back, the OM jams. Thus, the bendix releases the crank shaft just at the moment when the internal combustion engine starts.
It turns out that the OM simultaneously guarantees long-term and uninterrupted operation of the entire starting device. At the moment when the starter turns off, it is the bendix that disengages the starter from the flywheel, and given the speed at which the crank shaft rotates, the danger of the starter device breaking becomes clear. If the OM does not disengage, the starter armature will continue to rotate, which will ultimately lead to damage to the device.
We can say that the Bendix operates on the principle of a ratchet. The cause of the malfunction is almost always related to the gear teeth. Over time, they work, do not engage and slip through. The teeth are subject to enormous stress as they are forced to regularly grind against the rotation of the crank shaft.
It is noteworthy that OMs come in two types: with gears and with rings. In the first case, the gears wear out over time, and in the second, the rings with balls or the spring.
The following symptoms become characteristic signs of OM malfunctions:
- the starter rotates, but idle;
- teeth slip;
- The starter does not rotate because it is damaged due to a faulty bendix.
More details about starting device malfunctions can be found in the table below.
| Malfunction | Cause of starter failure | Eliminating or preventing starter failure |
| The starter does not turn on | Lost contact in the starter power supply circuit due to corrosion or loose wire ends | Inspect the starter power circuit, clean and tighten all terminals |
| Starter relay malfunction (winding breakage, sticking, contact disk misalignment) | Check the operation of the starter relay and eliminate the malfunction | |
| Short circuit in the starter winding | Repair or replace car starter | |
| Lack of reliable contact in the ignition switch | Check the ignition switch. If necessary, replace the contact part of the switch | |
| When the starter is turned on, the engine crankshaft turns slowly, at a low speed. | The oil in the engine crankcase does not match the viscosity of the season | Replace the oil with the recommended one for the season. |
| Low or faulty battery | Check battery, charge or replace | |
| Oxidation of battery terminals and cable tips | Disconnect the tips, carefully clean, reinstall and lubricate with clean petroleum jelly | |
| Poor brush contact and loose wire ends | Remove and disassemble the starter. Clean the commutator, replace the brushes, adjust the tension of the brush springs | |
| The starter armature rotates, but the starter does not turn the crankshaft | Starter drive freewheel slipping | Replace car starter drive |
| The drive moves tightly along the screw thread of the shaft | Wash the shaft thread and lubricate it with engine oil | |
| When you turn on the starter, you hear a grinding noise from the starter gear, which does not engage | Nicks in the teeth of the flywheel ring in a car | Eliminate nicks by refilling damaged teeth |
| Incorrect adjustment of the drive gear stroke and the closing moment of the switch contacts | Adjust the travel of the drive gear and the closing moment of the traction relay contacts | |
| Weakening the buffer spring of the car starter drive | Replace the spring in the starter | |
| The starter does not turn off after starting the engine | Drive jamming on the armature shaft or sintering of the traction relay contacts | Stop the engine, remove and disassemble the starter and eliminate the cause of the jamming |
| Jamming in the ignition switch | Replace the lock | |
| Short circuit in the starter relay winding | Replace starter relay | |
| Excessive starter noise while driving | Bearing wear | Replace bearings |
| The drive gear disengages from the ring gear with a delay | Check the operation of the drive and eliminate the malfunction | |
| Starter loosening | Attach the starter to the car | |
| Loosening of the starter pole (the anchor touches the pole) | Tighten the pole fixing screw |
Forget about fines from cameras! An absolutely legal new product - Traffic Police Camera Jammer, hides your license plates from the cameras that are installed in all cities. More details at the link.
- Absolutely legal (Article 12.2);
- Hides from photo and video recording;
- Suitable for all cars;
- Works through the cigarette lighter connector;
- Does not cause interference to radios and cell phones.
Key - ignition - Great Encyclopedia of Oil and Gas, article, page 2
Key - ignition
The CL warning lamp is powered by battery current when the engine is not running and the ignition key is turned on. The current path is shown by dotted arrows. When the lamp lights up, it indicates that the battery is low. During operation of the generator, when the voltage in the winding of the PC702 relay is 7 - 7 5 V, the contacts open and the signal lamp goes out.
To emergency stop the gas engine compressor, it is necessary to close the fuel gas valve on the engine and turn the ignition key to the Stop position (turn off the ignition), turn on the oil pump and turn it off after 20 minutes, unload the compressor cylinders, manually turn the lubricator and crankshaft.
So, making sure that the gearshift lever is in the neutral position, turn the ignition key (Fig. 13) clockwise until the starter operates. As soon as the engine starts, the ignition key should be released immediately.
The oil line contains a green indicator light on the pressure gauge, which lights up after the ignition key is inserted into the lock. When the engine is running with a working lubrication system, the light should go out.
Remember your first night trip in a newly purchased car: you had difficulty inserting the ignition key, in an attempt to switch from high beam to low beam, the wipers constantly turned on, setting up the radio turned out to be simply an insoluble task. Nothing happened automatically, without a hitch; I had to think about every action.
To avoid allowing unauthorized persons to drive the vehicle, the driver should not leave the vehicle with the engine running or the ignition key left in the lock unattended.
If the ignition switch is working properly and the indicator lamp 9 lights up fully when it is connected to terminal 50 of the ignition switch in the Start position of the ignition key, then you should check the starter relay. It must be disassembled and the contact disk and contacts cleaned.
Before filling, the filling operator must conduct a thorough inspection of the outer surface and fittings of the tanker, check the presence of residual pressure in the tank tank and the suitability of the gas in it for the purpose of the tank, and take the ignition key from the driver.
The ignition system (Fig. 12) consists of a battery 4 and a generator 8, an ignition coil 14 with a variator 17, a breaker 9 with a capacitor 10, a distributor 18, spark plugs /, an ignition key 2 and low and high voltage wires.
To calibrate the indicator scale, first supply it with power directly from the battery and use trimming resistor R4 to set the microammeter needle to zero. Then, with the ignition key turned off (in order to prevent the flow of uncontrolled battery current), the positive terminal of the battery is connected through a powerful (about 60 W) resistor with a resistance of 2 4 Ohms to the car body and the tuning resistor Y7 is set to the 5 A mark. After calibration, the positive terminal of the indicator power supply is connected to the positive wire of the vehicle's on-board electrical network.
So, making sure that the gearshift lever is in the neutral position, turn the ignition key (Fig. 13) clockwise until the starter operates. As soon as the engine starts, the ignition key should be released immediately.
The regulator works as follows. After turning on the power with the BI switch (ignition key), while the engine is running at low speeds and the generator voltage is less than the specified level (see Table 6), determined by the position of the potentiometer RZ slider and the stabilization voltage of the zener diode D, the latter is locked. Transistor T is also locked, and transistors Tu and G3 are unlocked. The excitation winding of the generator is connected through diode Dz and open transistor T3 to the positive pole of the battery E, and the generator receives full excitation. As a result, the generator voltage increases as the engine speed increases or its load decreases. When the generator voltage reaches a given level, the zener diode D ] and transistor T are unlocked, and transistors G2 and G3 are locked. The field winding is disconnected from the power source, and the generator voltage begins to decrease.
Let us, however, continue to consider the connection diagram. The remaining free end of the left electromagnet coil is connected through the ignition key to the positive pole of the battery. The negative terminal of the battery is connected to ground.
Pages: 1 2 3 4
Summarizing
It is advisable that the starter spins the engine crankshaft during an attempt to start it for no more than 10 seconds, then the device must be given a minute pause. Failure to comply with this rule will, at best, lead to a discharge of the power source, and at worst, it will completely disable the starter. Only replacing it can save the situation, since not every auto electrician will undertake the task of rewinding burnt windings, since it is not always possible to perform this procedure efficiently. In addition, the cost of this service is comparable to the cost of a new element.
