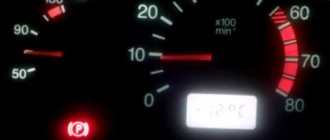
In order to figure out the reason for the lack of idle speed on your own, without contacting car service specialists, you need to have at least the slightest idea of which unit to look into, which sensors to test. Fortunately, there are forums on the Internet where they will prompt you and give you practical advice, and On YouTube they will also show you what needs to be done. Our article, in general, is about this.
Low battery
The most common problem in this case! It is especially relevant in winter! In this case, you need to charge, replace the battery, or warm it up (if the problem occurs in winter) or light it.
The main sign of a bad battery will be the noise of the relay operating when you turn the ignition key! But if the battery is “healthy” and the noise of the relay being activated is present, then see the next point.
In general, starting the engine in winter is a separate issue. Which will be the subject of a separate article!
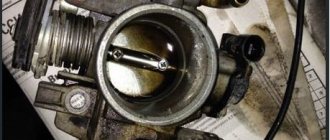
Checking the idle air control
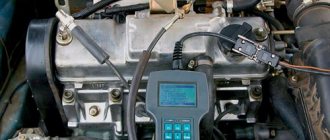
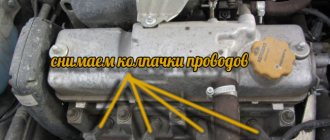
One of the reasons that the car stalls at low speeds is a malfunction of the idle air control (IAC). It should be tested to either rule out this cause or troubleshoot. There are several ways to check the serviceability of the IAC on the VAZ-2110:
- With the ignition off, connect the multimeter probes to the power supply. When they are connected, turn on the ignition and check the integrity of the winding and the power supply circuit in the following order: first, the probes are connected to pins 1 and 2. When the IAC is working properly, readings from 50 to 80 ohms appear on the multimeter sensor. When testing the 2nd and 3rd pins, as well as the 1st and 4th pins, there should be indicators indicating an infinite value.
- Visual inspection method. It is necessary to remove the regulator, disassemble it and determine the degree of coking, the degree of wear of the spring and other elements of the regulator. It is quite easy to visually determine that the regulator is simply time to change.
- It is still possible to carry out diagnostics using special testers, but purchasing such a tester will cost much more than replacing the part itself. It's up to you to decide whether it's worth purchasing such a device.
Starter malfunctions
Above we described the most common reasons for a non-working starter. As you understand, the malfunctions described above are not directly related to the starter. Therefore, before removing and replacing the starter, carefully check all 3 points stated above again. Below we will look at the problems with the starter itself. Next we will talk about the elements of the starter itself.
- Solenoid relay is faulty. There is nothing left to do but replace it (How to replace the solenoid relay?). But first, again, pay attention to the retractor terminals. In 90% of cases, they need to be cleaned. If, when you try to start the car with the key, you hear clicking sounds, then the problem is most likely in a discharged battery, but if it is charged, then there is a problem with the relay contacts. If there are no sounds or clicks, then the relay winding has burned out (in this case it needs to be replaced).
- The brushes do not fit tightly to the commutator.
- Severe wear on the commutator.
If you still haven’t figured out what the problem is, try starting the car from a pushrod (How to start from a pushrod?) and drive to a service center.
The fuel pump does not pump: causes and diagnostics
Let's start with the fact that if the gas tank is full, the battery is charged, the spark plugs are dry and there is a spark, the starter turns the engine normally, but the engine does not seize, then you should pay attention to the gas pump. A common problem is that there is no power to the fuel pump after the ignition is turned on. In a similar way, the malfunction manifests itself in motion, when the power to the fuel pump is lost and the engine suddenly stalls.
An equally important point is how much the fuel pump pumps. In other words, the pump may hum and buzz (power is being supplied), but not create the required pressure in the fuel line. The pressure in the fuel system with a working fuel pump must be more than 3 bar (which depends on the specific car model). The indicated pressure is accumulated in the fuel rail and has an indicator of 300 kPa and above.
To check, you need to measure the pressure in the fuel rail with a pressure gauge, taking into account the indicators that are the norm for a specific car model. Using the example of injection VAZs, the pressure when the ignition is turned on is 3 atmospheres, at idle the figure is 2.5 atmospheres, when you press the gas 2.5-3 atmospheres. This method will help you accurately determine:
- malfunction of the fuel pressure regulator in the rail;
- breakdown of the fuel pump or a noticeable decrease in its performance due to wear;
- severe contamination of filters (fuel filter and/or fuel pump mesh);
In the second case, when you press the gas, the pressure does not increase; in the latter case, the pressure gauge needle rises, but very slowly or jerkily.
We also recommend reading the article on how to check the fuel pressure in the fuel rail yourself. From this article you will learn how to correctly measure gasoline pressure with a pressure gauge in the process of diagnosing a gasoline pump with your own hands.
A decrease in pressure below the norm will lead to the fact that the engine may not start or start with difficulty, stall, jerk, operate unstably and with failures. If this happens due to the fault of the pump and not the fuel filter, then there is a high probability that the coarse filter screen of the fuel pump is clogged. In this case, there is no need to change the fuel pump itself, since it will be enough to replace or even clean the mesh.
We also recommend reading the article on how to clean the fuel pump stack yourself. From this article you will learn how and what means you can clean the fuel pump filter with your own hands.
If you suspect that there is no voltage to the fuel pump, there is a quick way to check. It is enough to turn the ignition key and listen, as when you turn the key you should hear a slight hum from the fuel pump. If such a buzzing noise is not heard, it means there is no power to the fuel pump, there are problems with the wiring, etc.
We add that this method of determining the operation of the pump by sound is not suitable for all cars. On some models (especially premium ones), sound insulation is at a high level and the fuel pump turns on immediately after opening the driver's door, and not when turning the key in the lock. In this case, it may seem that the fuel pump does not work when the ignition is turned on, and the sound of the pump may simply not be heard.
Also in the general list of possible reasons why the fuel pump does not pump, the following are noted:
- failure of the fuel pump fuse;
- fuel pump relay failure;
- problems with the ground of the fuel pump;
- malfunction of the electric motor of the fuel pump;
- oxidation or damage to fuel pump contacts and terminals;
- the fuel pump itself is faulty;
Wiring to the fuel pump
On most cars, the wiring to the fuel pump consists of three wires: “plus”, “minus”, and also a wire for indicating the amount of fuel in the gas tank. If the fuel pump does not pump, then the cause may be a lack of power.
To check the power to the fuel pump, just take a 12-volt light bulb and supply it with power from the external connector of the fuel pump. After turning the ignition, the control lamp should light up. If this does not happen, then the problem is in the external circuits. If the lamp comes on, it will indicate the need to check the internal contacts of the fuel pump.
To check the external wiring, you should alternately connect the positive and negative contacts, which are removed from the fuel pump power connector, to the ground of the pump. The contacts must also be connected to the fuel pump relay. If you place the negative contact on ground, after which the ignition is turned on and the light comes on, then this means that this contact is faulty. If the light bulb does not light up, then problems with the “plus” are obvious. If you place a contact on the relay and the light comes on, there is probably damage to the wire on the section that connects the relay and the fuel pump itself.
Fuel pump electric motor
If checking the pressure in the fuel rail and the external wiring to the fuel pump gives positive results, then you should check the fuel pump motor. This electric motor is responsible for circulating gasoline inside the fuel pump.
When checking, you need to take into account that the terminals on the fuel pump themselves tend to oxidize, as a result of which power is not supplied and the pump does not pump. In this case, the motor is working, but the terminals need to be cleaned or re-soldered.
To check the fuel pump motor, you will need to attach the test lamp wires to a cleaned and serviceable terminal of the electric motor, after which you should turn on the ignition. If the light comes on, this will indicate that the fuel pump motor is not working.
Fuel pump ground contact
Problems with the fuel pump mass may be indicated by a fuel level sensor that is not working correctly. The mass may be poorly secured; in this case, the fuel pump does not pump fuel. The ground wire is usually located under the dashboard and runs through the cabin. It is necessary to find the specified wire, check and clean all contacts, then securely fasten the ground to the fuel pump.
Fuel pump relay
The fuel pump relay is often mounted next to the fuel pump ground, that is, under the dashboard.
A normally operating relay after turning on the ignition for a couple of seconds allows the pump to create pressure in the system and immediately turns off. When the ignition key is turned, the driver hears a characteristic click (the relay is turned on), then a similar click will indicate that the fuel pump relay is turned off. If such clicks are not heard, this indicates a malfunction of the relay or its contacts. The optimal solution would be to replace the fuel pump relay with a new or known-good device. Let us add that the cost of spare parts is quite affordable.
Fuel pump fuse
During diagnostics, be sure to check the fuel pump fuse. The specified 15 A fuse is usually located in the fuse box in the engine compartment and is marked FUEL PUMP, which means fuel pump.
The fuel pump fuse needs to be pulled out and its contact inspected. The integrity of the contact will indicate that the device is normal. A damaged contact will indicate that the fuel pump fuse has blown. In this case, you need to install a new fuse, which has a very low cost (as in the situation with the fuel pump relay).
Purpose of the fan switch sensor
As we have already mentioned, the DVV is part of the engine cooling system and duplicates the function of the thermostat. The main task of the sensor is to protect the vehicle’s power unit from overheating and promptly give a command to the ECU to turn on the fan. How does he work?
While the engine is running, the coolant temperature may rise. As soon as it reaches a certain level, the DVV gives a command to the electronic unit of the car.
The fan immediately starts and powerful air currents blow over the radiator. As a result, the coolant temperature decreases to the optimal level much faster.
Fan sensor location
Finding the sensor is not difficult - it is located directly in the radiator. A more precise location may vary (it all depends on the design features of the model of a particular year of manufacture).
For example, the DVV can be located in the right or left tank, in the lower or upper part of the radiator.
Finding the location of the sensor is not difficult. This is almost the only unit on the radiator from which wires extend. Another distinctive feature is the large nut head, which can be unscrewed with a “30” wrench.
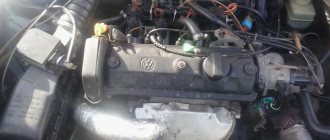
Replacing diesel fuel assemblies
Removal of diesel fuel assemblies in VAZ 2110
The VAZ 2110 interior temperature sensor is used to monitor temperature parameters in the car. This controller is also a transmitter connected to the ECM. In cold weather, the VAZ air controller transmits information to the ECU, which promotes optimal air flow throughout the car interior. As in the previous case, the malfunction of the device may be due to problems in the operation of the electrical circuit, so it would be a good idea to check the wiring if the controller does not turn on.
To replace the interior, you need to perform the following steps:
- The car must be set to the parking brake. Disconnect the battery.
- Using a flat-tip screwdriver, you need to move the device body away from the installation site.
- First, the upper part of the diesel fuel assembly is removed, this will allow for more convenient dismantling of the controller. When the device is removed from the latches, proceed carefully, since you will still need to disconnect it from the wiring (two connectors). First, the wiring is disconnected, then the combustion engine itself is removed.
- As for installation, the procedure looks similar, but is done in reverse order. After installation, it is necessary to diagnose the functionality of the device.
Why the 16-valve VAZ-2112 began to accelerate poorly - slow acceleration and poor dynamics
Poor acceleration of the 16-valve VAZ-2112 is a consequence of a malfunction in the ignition system or fuel supply. It is difficult to eliminate the causes of such a failure, but it is quite possible to do it yourself. To do this, a considerable amount of work will have to be done.
Lost power on the VAZ-2112 - many symptoms and reasons, more details in the video below:
Generator overload
If the battery is charging, but the voltage is insufficient, it means the generator is overloaded. This is facilitated by the installation and connection, in addition to standard electrical equipment, of various gadgets that require electricity. The generator is operating at the limit of its capabilities.
Modern drivers love various car tunings. Thus, serious music systems, powerful lighting and other equipment are installed. Someone also increases the battery power. So, with a 70 Ah battery, the standard VAZ generator cannot fully charge it. It just doesn't have enough power. As a result, the generator provides little charge.
Instructions for replacing the controller
Replacing the regulator looks like this:
- First, the battery terminals are disconnected. All coolant should be drained from the radiator unit.
- Next, you need to disconnect the wiring from the device; to do this, you just need to disconnect the plug. For greater ease of removal, you can remove the air filter.
- After this, the controller is dismantled; to do this, it must be unscrewed. The unscrewing procedure is performed using a wrench. The failed device is removed from the outlet hose hole.
- As for installation, in this case the procedure will look similar, only in reverse order. When installing a new device, do not forget to change the O-ring. When installing the controller, tighten it as much as possible and connect the wiring to it. Now all you have to do is refill the antifreeze and connect the battery, after which you can check the performance of the DTOZH.
The operating principle of the VAZ 2109 - 2114 generator.
In order to understand why on the VAZ 2109 - 2114 the generator gives little charge or does not charge at all, you need to understand how it works and know the principle of its operation.
The generator consists of five main parts shown in the figure below: armature - 5, stator - 6, relay-regulator paired with brushes - 10, diode bridge - 9, housing - 3.7.
The operating principle is as follows:
- a positive wire goes from the battery to the diode bridge (9) and the diode bridge (9) is connected to ground through the housing (3.7) of the generator
- voltage through the diode bridge (9) is supplied to the stator (6) of the generator and a magnetic field appears in the stator
- when the car starts, the engine, using a belt drive, turns the generator rotor (5)
- in the rotor (5), rotating in the magnetic field of the generator (6), a current appears
- The current is removed from the rotor by brushes (10) and through a relay-controller (10) is supplied to the car battery.
Failure to comply with any of the points leads to a malfunction of the VAZ 2109 - 2114 generator.
Why does the 16-valve VAZ-2112 stall when accelerating?
Repeatedly, many drivers were faced with the fact that the 16-valve VAZ-2112 began to become dull during acceleration or a drop in speed was felt. This may be due to various reasons that you need to know how to eliminate.
The video shows the process when a VAZ-2112 was tripping, did not pick up speed well, the check engine light came on periodically, and a solution:
If the diesel engine doesn't work
A decrease in traction can also occur in diesel engines. If we look at old cars that have completely mechanical power systems, then the most common cause is depressurization of the system.
As a result, air enters the fuel, which is why the fuel injection pump is unable to provide the required pressure.
- clogged filters;
- weakly pumping fuel priming pump;
- damaged plunger pair;
- Coking of injector nozzles.
And if we also add possible problems with the timing belt and CPG, then identifying the cause will not be so easy.
In modern diesel installations, where an additional electronic component is used, the search range will increase.
For example, the Common Rail system uses all the same sensors as the injection engine. And if at least one of them breaks, this will certainly affect the operation of the control part.
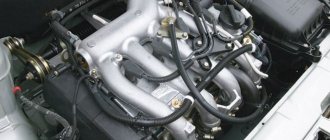
Power drop on a VAZ carburetor engine
To begin with, let's take VAZ cars with a carburetor power system and an 8-valve timing system - VAZ-2109, VAZ-2110, VAZ-2114, VAZ-2115.
The same power plant is installed on these cars, so the reasons are identical.
Let's go through those components, due to malfunction of which a drop in dynamics may occur.
In general, the main reason that the engine does not pull is a change in the processes in the combustion chambers - a mismatch in the proportions of the air-fuel mixture, the combustion process is disrupted, the filling of the cylinders and the removal of exhaust gases does not occur as required.
Supply system
Very often, a drop in traction occurs due to the power system. Structurally, the carburetor fuel system used on cars from VAZ-2109 to VAZ-2115 is very simple and is almost completely mechanical, so identifying the cause is not particularly difficult.
A decrease in power can occur due to:
- Severely clogged fuel filter (its throughput drops and the pump is simply not able to pump the required amount of fuel);
- Contamination of the carburetor channels (the jets and fuel channels in this element have a small cross-section and debris often clogs them);
- There is air leakage in the area from the tank to the pump (because of this, the performance of the fuel pump drops sharply);
- Damage to the fuel pump membrane (a small crack in it leads to the fact that the vacuum required for pumping fuel is not created in the pump chambers);
- The fastening of the carburetor or intake manifold is loose (due to this, air leaks around the carburetor and the proportion of the air-fuel mixture is greatly disturbed);
- The hole in the fuel tank cap is clogged (because of this, a vacuum is created in the tank and it is much more difficult for the gas pump to pump gasoline out of it);
How the cooling system works
When starting a cold engine, the coolant moves in a small circle. To put it simply, all components work except the radiator. The main task after starting the engine is to quickly reach operating temperature, which is about 90 degrees. When operating a system with a main radiator, this is quite difficult to do; warming up will take a longer period of time. Plus, the throttle valve heating is turned on in a small circle.
When the thermostat opens, it switches to a large circle in which the radiator participates. By turning it on, cooling is much more efficient. At high speed, when the oncoming air flow is very good, the temperature remains at the same level. And when driving through a traffic jam, when there is no this flow, the temperature of the coolant rises. The sensor installed in the radiator is responsible for triggering the fan. When a certain temperature is reached, the contacts close and the fan turns on, creating a powerful air flow.
Welcome, friends, to the DIY car repair website. It's no secret that engine overheating rarely ends in something good. Such a malfunction is fraught with a whole range of problems, which most often lead to the need for repairs and additional costs.
In such a situation, you can only rely on the cooling system, one of the main elements of which is the VAZ 2110 fan switch sensor (abbreviated as DVV).
Design of a car generator
Any generator, with the exception of direct current models, creates multiphase alternating current - three or four phases, depending on the power. Why such a complication if the on-board network uses only direct current anyway? The fact is that a multiphase alternating current generator has higher efficiency, and most importantly, the current is removed not by brushes from the rotating rotor, but from the stationary stator windings. Accordingly, there are no problems with burnout of the collector (the current in it is much less than what the generator produces), and the collector itself is simpler - two rings, and not a set of insulated lamellas.
To convert polyphase alternating current into direct current, a diode bridge is used. At a minimum, it contains several powerful diodes with twice the number of phases - they are engaged in rectifying the current. Some generators also have additional diodes that provide power to the relay regulator.
The relay-regulator itself is no longer a relay: instead of an electromechanical device, electronic circuits are used to control generators, but the name “relay-regulator” has already firmly established itself behind it. They operate in the same way - by changing the current in the rotor winding (and the magnetic field in the core), they increase or decrease the voltage at the generator output so as to keep it within specified limits from 13.7 V (old low-power generators) to 14.5 V (modern generators designed for high power consumption of the on-board network and accelerated battery charging). Modern generators are no longer independent units, but are integrated with on-board controllers: the ECU controls the voltage, raising it after the engine starts to speed up battery charging, and then lowering it to normal.
The relay-regulator is powered from an external network (Zhiguli, most foreign cars) and from the generator itself through additional bridge diodes (front-wheel drive VAZs). The second circuit is considered less reliable, but has a distinctive ability to self-excite due to the residual magnetization of the rotor - the generator, spun up to high speeds, produces enough current for the relay-regulator to operate and bring it to operating mode.
Other reasons
Finally, we note that some reasons are very rare and can be considered specific.
These include loosening the exhaust manifold, although initially it may seem that this cannot affect the engine.
In fact, on many cars, heat from the manifold is used to warm up the air entering the cylinders, and for this purpose a special screen is used, to which the air duct fits.
So, if a breakdown occurs and the exhaust gases break out, then most of them will enter the cylinders again through the air duct, and due to a lack of air, the power will decrease.
Also, the reason may lie not in the engine, but in the transmission elements, especially for cars equipped with automatic transmission.
Malfunctions in the box lead to the creation of excessive load on the engine, which will be perceived as a loss of power.
Composition of the VAZ 2110 cooling system
It is very difficult to single out the most important element, since all components play the main role in the cooling system. Let's start with the first thing that catches your eye. This is an expansion tank with a plug in which there are two valves (inlet and outlet). While the engine is running, the coolant heats up and expands. The tank is necessary to release excess fluid from the system.
The radiator, fan and temperature sensor are parts located at the front of the car. A radiator is necessary for effective cooling of the liquid in the system. The fan is triggered by a sensor and blows a strong air stream onto the radiator. Due to the blowing, significant heat is removed from the radiator. A sensor is a simple switch whose contacts close at a certain temperature.
A pump installed in the engine block, driven by the timing belt, is necessary to ensure the circulation of coolant in the system. And the thermostat simply switches the cooling circuits. There is also a radiator in the heating system; it is installed in the stove (snail). One pipe from the block (hot liquid) goes to it through a faucet installed on the body. And one pipe comes out of the stove and goes to the thermostat.
Pipes and clamps are secondary parts, but they affect the operation of the entire system, since it is through them that the coolant moves. The slightest crack in the pipe can cause a rapid decrease in the coolant level and an increase in its temperature. There are one or two temperature sensors in the engine block; they are necessary for the operation of the temperature gauge and the ECU.
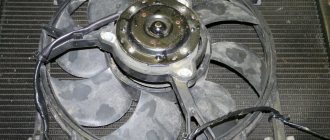
Main causes of fan failure
If the fan does not turn on when critically high temperatures are reached, there may be several reasons:
- Malfunction of the fan switch sensor (in this case, it must be checked and, if it fails, replaced);
- Fan failure.
If this happens, replacement costs may be significantly higher. To check the fan, connect its contacts directly to the battery (observe the polarity). If the device starts normally, then there is a high probability of failure of the internal combustion engine.
Operating principle and triggering requirements
So, the main element of the DVV is the contact group inside the node. When the desired temperature is reached, the sensor contacts begin to expand and at a certain moment close. After this, the signal goes to the ECU, which, in turn, gives a command to the fan.
What should the switch-on temperature be? You must remember that DVVs are available with different temperature limits.
Most often, switching on occurs when 92 degrees Celsius is reached, and switching off occurs at 87. Sensors are also sold with other temperature ratings, but for the VAZ-2110 the 92/87 option is most suitable - so give preference to it.