There is no need to worry; replacing a muffler on a VAZ 2110 is not at all a regular job that will have to be done systematically.
Replacing the exhaust system is performed in several situations:
- The muffler begins to make a loud noise;
- Muffler elements burn out;
- Connecting pipes break.
The sound of a burnt out muffler.
On a VAZ 2110, you can replace the muffler with your own hands, which will allow you to significantly save on the services of a service station.
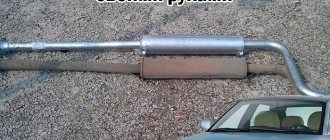
The exhaust system of the VAZ 2110 includes a downpipe (pants), a neutralizer, a resonator and a main muffler.
Photo of the new muffler on the VAZ 2110
Today we will tell you about replacing the muffler, as well as the resonator.
Exhaust system VAZ 2110
Replacing the muffler on a VAZ 2110
VAZ 2110 owners are quite lucky, since replacing the muffler is quite simple and does not require special skills or extensive experience. But you definitely need an inspection hole.
The replacement procedure sequence is as follows:
- The muffler is connected to the resonator through an O-ring on the pipe flare. Plus, the connection is compressed with a clamp, which consists of two parts.
- The clamp must be dismantled, so remove the ring. Since the O-rings used here are graphite, they should not stick to the metal.
- Now the old muffler can be dismantled quite easily.
- Be sure to check the condition of the suspension rubber bands located on different sides of the muffler body. They often end up stretched or covered with cracks. Rubber bands are quite cheap, so buy new ones and replace the old ones with them.
- The new muffler is first mounted on rubber bands, after which it is inserted into the same new graphite sealing ring between the flares. Use a clamp to compress the connection. Ready!
How does a resonator work?
Externally, the resonator is very similar to a muffler, which is why it is often called a small or additional muffler. This rather complex part consists of a large number of layers, with one of them performing its function.
Looking at the resonator in one section, it becomes obvious that it actually closely resembles a regular car muffler. In more detail:
- The resonator design consists of several chambers separated by a special mesh, due to which there is a constant narrowing and expansion of gas flows, occurring in strong jerks. The resonator allows you to smooth out this pulsation, creating smooth flows.
- By shifting these chambers, the direction of exhaust gas flow changes, which also helps smooth out uneven pulsations.
- The exhaust frequency is also damped thanks to internal perforations. Allows you to reduce the volume of exhaust sounds.
See also: PTF pre-wiring diagram
The resonator operates due to a large number of closed cavities connected to the pipe by many holes. All existing holes in the product cause vibrations of different frequencies, which change due to friction.
The resonator is located between the standard muffler and the intake manifold (or converter). However, the location of this item may vary depending on the vehicle model and manufacturer.
If we talk about the characteristics of resonators, there are several types that distinguish these products.
Changing the resonator
It is also advisable to replace the resonator on a VAZ 2110. This is done after changing the muffler.
New resonator for VAZ 2110
The work of replacing the resonator is performed in the following sequence:
- The resonator is secured to the muffler with a crimp clamp with an O-ring.
- It is attached to the neutralizer using a floating flange consisting of two bolts and a flare.
- On the opposite side of the element there is a so-called fist.
- Removing bolts is often quite difficult. So that you don't have to suffer, just cut them off with a grinder and buy new bolts. This is the simplest solution to the problem.
- If you couldn’t get a grinder, use a liquid key. This is a popular product among motorists - WD40 or its analogues. Treat the bolt attachment points with this compound, wait a while, after which the bolts should come off.
- After removing the bolts, remove the muffler clamp.
- Remove the resonator from the suspension rubber bands. Check the condition of the rubber bands. If they are worn out, replace them with new ones.
- Take a new resonator, secure them to rubber and connect them to the muffler so that the pipe leading to the muffler from the resonator is parallel to the ground.
- If you notice wear, burrs, or traces of rust on the neutralizer fist, be sure to coat the connection with sealant. Moreover, it must be a high-temperature sealant.
- Armed with new bolts and nuts, tighten the catalytic converter and resonator flanges.
- The neutralizer is fixed to the resonator with two bolts using a flange connection. The fastening occurs to the states, but there is a receiving pipe, using a spring-loaded connection and two flares. The space between them contains a sealing ring made of graphite or metal asbestos.
Resonator device
Structurally, the resonator consists of a perforated pipe (perforated along the entire length inside the device) placed in a metal box. The design also has a throttling hole, designed to increase the efficiency of damping wave vibrations in the pipeline. The internal cavity of the resonator is divided into two or more unequal parts by partitions located in a plane transverse to the pipe. In addition, most modern exhaust resonators have thermal and/or sound insulation (often of the same material) located under the shroud to reduce its temperature and/or noise emanating from the device.
Internal parts of the resonator
The internal cavities have an uneven volume to ensure periodic contraction and expansion of the exhaust gas flow, which in turn evens out its uneven pulsation. That is, each chamber has its own resonant frequency. In addition, they have a slight offset relative to the axis of the body. This is necessary to change the direction of exhaust gas flow. And internal perforation in the pipe is necessary to dampen high-amplitude sound waves created by gases.
Replacing the neutralizer
As you can see, the exhaust system of the VAZ 2110 car is designed quite standardly, its repair is not difficult even for a motorist with little experience.
When changing the muffler and resonator, it is likely that you may need to replace the converter. This operation is simple and can be done in a few steps.
The neutralizer serves to dampen vibrations from the engine and prevent them from occurring in the exhaust system of the domestically produced VAZ 2110 car.
If it needs to be replaced, it is done like this:
- If the old springs and bolts are intact and have no obvious damage, you can continue to use them. They show characteristic signs of wear, be sure to buy new elements.
- The ring should be replaced in any case, no matter how well the old one is preserved. If gases begin to leak through the old ring, this will lead to very rapid wear and damage to the converter flare and the exhaust pipe.
- After installing the neutralizer, new bolts are put on, they are carefully but firmly tightened. Moreover, the first thing you need to do is tighten the bolts that secure the resonator.
Checking the resonator
Having identified the problems listed above, every car enthusiast should know how to check the resonator. This will not only normalize the operation of the engine and exhaust system, but will also increase the comfort of using the car, including for the people around it.
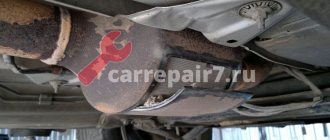
To check, you will need an inspection hole (if not, you can jack up the car). The diagnosis is made by visual examination. During the process, it is necessary to carefully inspect the integrity of both the device itself and the pipes connected to it (especially at their joints).
A clear sign of a problem is the formation of condensation in the cooling resonator, after which it begins to drip to the ground. This means that your body has lost its integrity and needs to be repaired, or rather replaced. You can check for condensation after some time, with the engine turned off (so that the resonator box cools down). Note! Some car enthusiasts, when making resonators on their own, specially drill a hole in the body to remove moisture. Therefore, if you bought a car with a similar resonator, then this test method will not suit you.
In addition, the integrity of the resonator body can be determined by the presence of exhaust gases escaping from it. This also indicates depressurization and the need to replace it. This fact can be checked with the car engine running by looking under the bottom. To be on the safe side, you can have a helper "turn off the gas" at the same time to get more exhaust gases through the system. Also, suspicion of depressurization is caused by the appearance of smoke under the bottom of the car while driving or when parked with the engine running.
Replacing pants
Trousers
The exhaust pipe, also called pants (due to its appearance), is attached to the manifold using studs and nuts. Its fixation with the neutralizer is carried out by a spring-loaded connection.
- Remove the exhaust pipe, paying special attention to its attachment to the manifold. Studs are used here, not bolts. They are screwed into the manifold, and connecting nuts are screwed onto them.
- If the pin is damaged, it will be extremely difficult to replace it. Therefore, it is important to try to keep the old one intact and safe.
- Treat the nuts with WD40, a product we all know. This will allow you to avoid using excessive force and keep the studs intact. If that doesn't work, the studs are drilled out. The process is complex, lengthy, and requires experience and skill.
- There is a gasket between the manifold and the pants that needs to be replaced. Also install a new converter o-ring.
- Now firmly press the exhaust pipe using the nuts. To do this you will need to compress the gasket.
- Then tighten the bolts of the spring-loaded connection with the neutralizer of your VAZ 2110.
As you noticed, there is nothing complicated in this work. Each element is quite easily dismantled and a new one is installed in its place. Just be careful, act carefully and consistently. Plus, of course, do not forget about the importance of the quality of new parts. Buy only good spare parts that will ensure long-term and efficient service of the exhaust system on your VAZ 2110.
Installing a new exhaust pipe
All work is done in reverse order. But there are several features that you definitely need to know:
- Install a new exhaust pipe.
- A new gasket needs to be installed between the exhaust manifold and the pants.
- Be sure to install a new O-ring between the neutralizer and the pants.
- Tighten the nuts on the exhaust manifold studs. Tighten them evenly in a crisscross pattern.
- Tighten the bolts that are on the spring-loaded connection to the converter.
This completes the repair of the exhaust system. The sound will be muffled as much as possible, the car will become almost silent. It is advisable to lubricate the new gasket with a CV joint type compound. This will improve the seal.
Any VAZ 2110 car is equipped with an exhaust gas exhaust system; without it, the vehicle cannot be operated. The output device is a complex assembly consisting of many interacting parts.
It is designed for safe, efficient removal of waste gas products, cooling them and eliminating noise. The exhaust design on all domestic cars is very similar, but each model has its own nuances.
VAZ 2110 REPLACING THE SILENCER ON YOUR OWN
Replacing a muffler for a VAZ 2110 or its parts is not work that needs to be done systematically. It is not necessary to change parts of the exhaust system often, in cases where the muffler begins to make noise, its elements burn out, or in the event of a break in the connecting pipes. You can change any part of the muffler with your own hands. The VAZ 2110 exhaust system consists of a reception pipe (another name for pants), a neutralizer, a resonator (additional muffler), and a main muffler.
Purpose of the resonator
First, let's figure out what a resonator is for. As mentioned above, it is part of the exhaust system of a car engine. Its main function is to dampen low-frequency sounds that occur when gases are released and enter the gas exhaust system. There are two reasons why noise occurs in it:
- sound of gas expansion;
- vibration noise from the exhaust system.
Along with the muffler, the tasks of a car resonator include reducing the speed of exhaust gases. This becomes possible thanks to the physical law, according to which gases moving quickly in a narrow pipe, when entering a large volume, lose their speed and, accordingly, their energy. In the exhaust system, the resonator is located in front of the main muffler, being, in fact, the first link in the chain of muffling sounds of the exhaust system. That is, its main tasks are preliminary noise reduction and balancing of fluctuations in the exhaust gas flow.
Some car owners call it the "mid muffler" (due to its physical location roughly in the middle of the car's bottom) or the "second muffler." However, this is not true, since the exhaust system resonator and muffler have different operating principles.
The car exhaust system resonator also performs the function of releasing exhaust gases from the engine exhaust and creating uniform pressure in it. This provides minimal resistance to the movement of exhaust gases and allows you to use almost all the useful engine power.
HOW TO REPLACE THE SILENCER ON A VAZ 2110
We are changing the muffler of the VAZ 2110, the replacement is made in the inspection hole:
- The muffler is connected to the resonator through an o-ring, which is installed in the pipe flare and compressed with a clamp that folds in two halves
- We remove the clamp, then the ring, it is graphite and does not stick to the metal.
Attaching the muffler to the resonator
- Removing the old muffler
- We check the condition of the suspension rubber bands located on the sides of the muffler body. If they have cracks or are stretched, they should be replaced.
VAZ 2110 muffler suspension rubber band
- We install a new muffler, first on the rubber bands, then insert a graphite ring (preferably a new one) between the flares and compress it with a clamp.
So we replaced the muffler on the VAZ 2110, replacing the resonator is the next step.
Installing a new muffler
Assess the condition of the rubber hangers, which are located on different sides of the main muffler body. If they are overstretched or have cracks, be sure to replace them with new ones during installation.
The cost of these rubber bands is small, they are available in any store. Next you need to do the following:
- Install the new main muffler onto the rubber hangers.
- Insert a graphite O-ring between the pipe flares.
- Place the clamp in place and tighten the nuts using 13mm wrenches.
At this point, the repair of the main muffler of the VAZ-2110 exhaust system (8 valves) is completed. Start the engine and check the muffler operation. There should be virtually no sound from the exhaust pipe. The motor will run clean and smooth.
RESONATOR REPLACEMENT
Resonator VAZ 2110
So:
- The resonator is attached to the muffler using a crimp clamp with an O-ring;
- It is attached to the neutralizer by means of a floating flange (two bolts) and flaring;
- On the opposite side of the neutralizer there is a “fist”;
- It is often problematic to unscrew the knuckle mounting bolts; they are simply cut off with a grinder and replaced with new ones;
- If suddenly you don’t have a tool at hand, we clean the places where the bolts are attached and treat them with a “liquid wrench” (WD-40 or its equivalent);
- Unscrew the bolts and remove the muffler clamp;
- We remove the resonator from the suspension rubber bands, change the rubber bands if necessary;
- Then we hook a new resonator onto rubber bands and attach it to the muffler so that the pipe running from the resonator to the muffler is parallel to the ground;
- When there is wear on the neutralizer fist or there are burrs, grooves or rust on it, it is necessary to lubricate the connection with a special high-temperature sealant;
- Using new bolts and nuts, tighten the flanges of the catalyst and resonator;
- The neutralizer is attached to the resonator by means of a flange connection (two bolts), to the receiving pipe (pants) by means of a spring-loaded connection and a pair of flares, between which there is a graphite or metal-asbestos ring.
Removing and installing the resonator
Many car enthusiasts are interested in a logical question: how to remove the resonator? The answer to this question depends on the make of the car. However, in general the algorithm is simple and will be something like this:
- it is necessary to disconnect the resonator pipes at the points of their connection with the exhaust system (front - on the engine or catalyst side, rear - on the muffler side);
- remove the resonator from the suspensions that secure it to the bottom of the car;
- remove the resonator with its pipes.
How to replace a Renault Logan resonator
Installing a new device is carried out in the reverse order. When removing the resonator, it is important not to damage the O-rings connecting its pipes to the rest of the exhaust system.
As an example, we present to your attention two video instructions for replacing the resonator on popular cars Renault Logan and VAZ 2110, VAZ 2111, VAZ 2112, VAZ 2114, VAZ 2115, Kalina, Priora, Granta.”
Finally
Partial or complete failure of the car exhaust system resonator is not a critical malfunction. Diagnosing a broken resonator is easy even for an inexperienced car owner. This is indicated by a loss of power, the spread of exhaust gases under the floor and/or into the passenger compartment, and increased background noise when the engine is running. Please note that in this case the car can be operated, but we recommend not to delay repairs, since driving with a burnt-out resonator can lead to failure of other elements of the car’s exhaust system.
Date of publication: August 25, 2016 Category: Automotive.
When any mechanism operates, a characteristic noise is created, and if we are talking about a gasoline internal combustion engine, then the “sound effects” are characterized by increased volume, which causes a lot of discomfort for both the driver and the driver, as well as pedestrians. As you know, the role of a sound muffler is performed by a conventional muffler that is part of the exhaust system, but few people know why a resonator is needed, which is also an important component of this unit.
From the name it is obvious that this part is responsible for the resonance of sound flows that occur when the car engine is running. Simply put, the resonator dampens sound vibrations as exhaust gases exit the combustion chamber. Let's take a closer look at the device and characteristics of this element.
REPLACING THE CONVERTER
Attaching the neutralizer to the resonator
- This connection dampens engine vibrations and prevents them from reaching the exhaust system.
Attaching the converter to the exhaust pipe (pants)
- When replacing the neutralizer, we leave the old springs and bolts, provided they are intact.
- We definitely need to change the ring - gases escaping through it will quickly damage the flaring of the exhaust pipe and the converter
- Having installed the neutralizer, we tighten the mounting bolts, then tighten them, first tighten the bolts securing the resonator.
You can also watch the video.
Types of automotive resonators
When choosing an exhaust system resonator, you need to know what types they are and what materials they are made from. Currently, automotive resonators made of aluminized steel and stainless steel are popular. The former are distinguished by their low price but short service life. Its body is made of thin steel with a top layer of aluminum to prevent corrosion. However, this anti-corrosion composition is not durable. Therefore, we do not recommend that you purchase an aluminized steel exhaust resonator. It is better to buy a car resonator made of stainless steel. This material has a smoother surface (i.e. creates a minimum of turbulence in the system), and is also more stable when operating under extreme temperatures.
CHANGING PANTS
So:
- The receiving pipe (pants) is attached to the manifold by means of studs with nuts, and to the converter by means of a spring-loaded connection
- When removing the exhaust pipe, we pay special attention to attaching it to the manifold. Instead of bolts, there are studs screwed into the manifold, with nuts screwed onto them. Replacing a damaged stud is not easy, so it is very important to preserve them
Nuts securing the pants to the manifold
- The nuts should be sprayed with WD-40 so as not to use excessive force, and save the studs;
- Otherwise, you will have to drill out the stud if it breaks; this requires experience and considerable effort;
- We replace the gaskets between the pants and the manifold. We also install a new o-ring for the neutralizer;
- Then we firmly press the exhaust pipe using nuts to the manifold (squeezing the gasket);
- Tighten the bolts of the spring-loaded joint with the neutralizer.
Now replacing the muffler on a VAZ 2110 yourself is not a problem for you. If anything in our article remains unclear to you, watch the VAZ 2110 muffler replacement video.
Malfunctions on VAZ cars of the tenth family
AvtoVAZ specialists conducted research, the results of which revealed that the car body, being a closed structure, has its own peak harmonics and can resonate at a certain frequency. To suppress spurious frequencies emitted by both the vehicle engine and those shielded by the body, it is necessary to use the range from 60 to 400 Hz, corresponding to medium and high engine speeds. A change in noise characteristics can be caused by making minimal changes to its design.
The most difficult noise to deal with is at low frequencies. From a technical point of view, it is impossible to combine tuning the exhaust system of a car and combating noise. You can maintain maximum power with a direct-flow muffler, and reduce the sound to a comfortable volume with a factory one.
Owners of VAZ 2110–2112 most often encounter breakdowns, burnouts and leaks in the exhaust system. Incorrectly set ignition, excessively rich mixture and pipe corrosion are the main causes of burnt out exhaust pipes. This defect is accompanied by knocks and pops, which indicate burnout of metal parts. A sign of burnout may be smoke from the exhaust pipe, indicating an overly enriched fuel mixture that is burning in the exhaust pipe.
Car muffler malfunctions can be caused by various reasons - pipe burnout, system leakage, breakdowns
The appearance of knocks on the body in the area where the muffler is located indicates mechanical defects in the part - changes in geometry, destruction of the rubber band, suspension or damper cushion. Eliminated by identifying the location of the breakdown and troubleshooting. Worn parts are replaced with new ones.
Muffler gaskets
The gas junction formed between the rear and additional mufflers is insulated using a rubber gasket or O-ring. In addition to the main function of closing the gap, it is also used to eliminate the movement of the pipes of the part relative to each other.
Rubber O-ring located between the car muffler flanges
The appearance of carbon deposits under the bottom of the car at the joints of the exhaust pipe sections indicates damage to the gasket. Ruptures of the sealing ring are accompanied by the appearance of an unpleasant smell of exhaust gases in the vehicle interior and a sharp grinding noise that occurs during operation of the power unit.
Their replacement
A damaged exhaust system sealing ring cannot be restored - it can only be replaced with a new one. The gasket can be replaced manually in a few minutes.
- The exhaust pipe flanges are secured with small bolts. Due to prolonged use, they can become covered with dirt and rust, which makes them difficult to unscrew. You can unscrew the bolts using a special tool or a grinder.
The exhaust pipe flanges are secured with bolts that need to be unscrewed
After unscrewing the bolts, the resonator pipe is carefully moved to the side
The old o-ring is removed from the resonator pipe manually or using a screwdriver
Carbon deposits from the muffler flanges are cleaned with a wire brush or sandpaper.
The new muffler gasket is installed on the flange, after which the muffler is tightened with clamps
The cermet ring adjacent to the muffler gasket is fragile, and therefore when replacing the sealing ring, care must be taken so as not to destroy the ceramic.
REPAIR OF EXHAUST SYSTEM PARTS
So:
- It is possible to weld parts of the exhaust system only if they have been damaged as a result of mechanical impact
- In the event that a pipe breaks, or a weld seam or tank burns out, you need to replace the entire element, it has already become unusable
- The only part to which this does not apply are metal expansion joints. They change regardless of the exhaust system itself
- The cost of the neutralizer in comparison with other elements of the system is decent. Therefore, many people change it to a stronger (flame arrester)
- The neutralizer is cut off, leaving only the connecting flanges, as well as a fist with flaring, and a flame arrester is welded in
- The cost of a flame arrester is much lower than a neutralizer. However, there is no afterburning of fuel residues. Therefore, its installation is permissible on cars with one lambda sensor. In addition, the flame arrester increases fuel consumption by about 10-15%.
Car owners often encounter the problem of fluid leaking from the cooling system. Often the reason lies in rusted or squeezed out plugs in the engine cylinder block. To fix the problem, just replace them with new ones.
Plug locations
So:
- There are plugs on the sides and ends of the cylinder block that are squeezed out of the block when the coolant freezes in it.
- Two plugs with a diameter of 34 mm are located on the cylinder block on the side of the coolant drain plug, and two more on the oil filter side
- There is another plug with a diameter of 17 millimeters on the rear end side of the crankcase
- The last plug with a diameter of 34 mm is located at the front end of the cylinder block
These plugs are changed if the coolant in the cylinder block is frozen. The plugs can be changed without removing the engine. On a VAZ 2110, replacing the cylinder block plugs is done using a special tool. To do this you will need:
- beard or chisel
- hammer
- pliers
- durable screwdriver
- telescopic magnetic pointer (purchased at any automotive store)
- new plug
- sealant
- skin
Replacing plugs for a VAZ 2110 engine block
- Remove the negative terminal from the battery
- Drain the antifreeze from the cylinder block and radiator
- Remove the air filter along with the hose
- We disconnect the exhaust pipe together with the bracket and lower it down a little so that the flange is removed from the manifold studs
- Turn the movable sector of the throttle valve drive all the way and disconnect the throttle valve drive rod
- We unscrew the bolts securing the throttle valve drive bracket. We move the bracket without disconnecting the rod to the side so that it does not interfere with us.
- Remove the belt protective cover and cylinder head cover
- We unscrew the nut securing the tension roller and remove the roller along with the axle and a special spacer ring, then remove the timing belt from the camshaft roller
- We unscrew the bolt securing the pulley and remove the pulley along with the key.
- Unscrew the nut securing the timing belt to the block head itself
- If necessary, unscrew the bolts securing the head and remove the block head.
Now that we have access to the plugs, we begin replacing the plug of the VAZ 2110 engine block.
- We take a beard or chisel in one hand, and a hammer in the other
- Place the chisel on the edge of the plug
- Gently tap the hammer on the striking part of the chisel. The plug turns (Photo below)
We tap with a hammer on the striking part of the chisel, the plug rotates
- We pry it up and pull it out using pliers
- If the plug does not turn, drill a small hole in it, screw a knob into it and remove the plug.
- We use a telescopic pointer with a magnet if it is necessary to remove a plug that has fallen inside. We pull the failed plug to its hole and remove it with pliers
- Clean the edges of the plug hole from rust using sandpaper
- To increase the tightness, coat the edges of the installed plug with sealant
- Attach the plug to the hole
- We press it in using a suitable mandrel and a hammer.
Press in the plug using a mandrel and a hammer
- Reinstalling the block head
- Fill the cooling system with antifreeze (antifreeze) or water
- Connect the negative terminal to the battery.
- Checking the engine operation
If everything is not clear when replacing the plug, this video will help you - replacing the plug for the VAZ 2110 cylinder block.
DIY resonator
Before you design and assemble a resonator of your own design, you need to understand one simple thing. The thicker the material from which the exhaust system is made (including the resonator), the more effectively it will combat vibrations and pops. For this reason, the exhaust manifold, which first receives gases from the cylinder head, has such an impressive weight.
However, when choosing a material, you should not overdo it and choose too large blanks. Otherwise, the mass of the resonator will be significant, and this will affect the dynamic characteristics of the car and the load on its chassis.
There are a number of reasons why car owners make their own exhaust resonators. One of them is to reduce the noise that a standard factory muffler produces. Usually, for this purpose, an additional resonator is installed in the exhaust system. The second reason is the manufacture and installation of a direct-flow automotive resonator. Its characteristics are as follows:
- reduction in engine power losses (really insignificant, about 5.10%);
- changing the sound background of the engine and exhaust system (for lovers of low noise).
To make a direct resonator you will need:
- a set of locksmith tools;
- welding machine (it is advisable to use modern semi-automatic machines or inverters);
- Angle grinder with a set of cutting and polishing discs.
The design of the resonator will differ depending on the materials used and the imagination of the car owner. We offer you one of the options for self-manufacturing a direct-flow automotive resonator:
- Pre-prepare the pipe that will be the internal base of the resonator. It should be the same diameter or slightly larger than the factory one. Make sure that in the future it can be easily welded to the existing system, so do not choose a diameter that is too large (it is not yet possible to connect the pipe with a flange).
- Then in this tube it is necessary to drill holes similar to the original resonator.
- After this, you need to find a pipe of a slightly larger diameter (about 3.5 cm) that will serve as the outer shell. Its length must be reduced (according to the project, by an average of 5-10 cm on each side).
- Make the necessary plugs to seal the housing at the ends. For this, sheet metal is used, where the outer diameters of large and small pipes are drawn. After this, the workpieces are cut out and processed by a grinding machine.
- A pipe of larger diameter is placed in a pipe of smaller diameter, and the cavity between them is filled with glass wool (or better yet, modern mineral wool with good heat and sound insulation characteristics).
- Next, you need to weld places along the edges of the pipe with large diameter finished plugs at the ends.
- After welding, clean the seams with a grinder. After that you should paint them.
- The last stage is welding a new resonator into the exhaust system of the car. Also clean welds after finishing work.
DIY resonator
This algorithm is approximate. There are a wide variety of options for homemade resonators. In some cases, they are simply removed from the system and a piece of pipe is installed in their place. However, we do not recommend that you do this, since you will not get a significant increase in the car’s power, but additional rumble from the exhaust pipe is guaranteed!
Additional problems
After installing a homemade resonator, the car owner will most likely be faced with a number of problems that need to be solved. First of all, we are talking about increasing the mass of the exhaust system, and, accordingly, the car as a whole. This is true if you used heavy metal objects to make the resonator. Therefore, a situation may arise where it is necessary to replace the supports and/or shock absorbers. That is, strengthen them. Otherwise, the car body will “sag” and the chassis will experience additional load.
Also, replacing the resonator implies changing the proportion of air entering the engine and the amount of exhaust gases. Therefore, it is necessary to empirically determine which optimal configuration to choose and make appropriate adjustments to the fuel supply and air filtration.
Mufflers for VAZ 2110 cars
The information contained in the operating manuals or electronic catalogs about the structure of the exhaust system of tenth-generation VAZ cars does not always correspond to reality, which causes some disagreement among car enthusiasts. The selection for cars is carried out on the basis of a specific body type: for example, in the case of front-wheel drive cars in a hatchback body, the muffler is much shorter than in models with sedan and station wagon bodies. The difference in length is explained by the length of the car body.
The parts installed on the tenth family are divided into two body types:
- Station wagon and sedan - VAZ 2110 and VAZ 2111;
- Hatchback - VAZ 2112.
Mufflers for VAZ 2110/2112 cars are classified according to body type
Classification is also carried out according to old and new models. The main difference from similar parts on the Lada Samara is that for the tenth family, subcategories play a significant role. The muffler mounts of older models are made in the form of a hook: they were produced until 2007, and then the mounts were converted to pins.
Mufflers of old and new models differ in the type of fastenings
Design
The main task of the muffler is to reduce the noise level while the car is moving and the engine is idling. The resonator, or additional muffler of the car, is an element located in the middle of the exhaust system. Its design consists of the following parts:
- frame;
- throttle;
- block;
- thermal insulation;
- perforated pipe.
Design of the exhaust system of tenth generation VAZ cars
The structure of the part itself is as follows:
- frame;
- middle obstacle;
- rear barrier;
- rear perforated pipe;
- middle perforated pipe;
- exhaust and inlet pipes.
The structure of the VAZ 2110 muffler and the direction of movement of exhaust gases in the system
The perforated tube is the main component of the direct-flow muffler design. Combustion products entering it effectively expand in its body due to perforation. This operating scheme allows you to speed up the process of removing combustion products several times. Installing such a muffler increases the level of exhaust system resistance by up to 10%, which is significantly higher than without its use.
Exhaust system of VAZ-2110
Exhaust system
a – without converterab – with converterb – exhaust gas flow diagram1 – exhaust pipe mounting bracket2 – gasket3 – exhaust pipe4 – muffler suspension cushion5 – additional muffler6 – muffler pipe connection clamp7 – main muffler8 – rear muffler suspension cushion9 – oxygen sensor (lambda probe)
10 - three-component neutralizer11 - additional muffler housing12 - inlet perforated pipe13 - blind partitions14 - exhaust perforated pipe15 - main muffler body16 - left perforated pipe17 - front blind partition18 - middle blind partition19 - rear blind partition20 - rear perforated pipe21 - right perforated pipe
The exhaust system consists of an exhaust manifold, a exhaust pipe 3, an additional 5 and a main 7 muffler. The exhaust manifold and exhaust pipe mounting bracket 1 for 8-valve engines (2110 and 2111) are interchangeable with parts from Samara. The exhaust system of the 2112 engine is distinguished by an exhaust manifold and a downpipe.
On most cars equipped with an injection system, the exhaust pipe is equipped with an oxygen sensor (lambda probe). A three-component neutralizer is additionally installed in the exhaust system of these vehicles. Mufflers and neutralizer are non-separable units and when they fail, they must be replaced with new ones.
The exhaust manifold is cast from cast iron. A metal-reinforced heat-resistant gasket is installed between it and the cylinder head. The exhaust pipe is attached to the exhaust manifold on four studs (for the 2112 engine - on six). The connection is sealed with a heat-resistant gasket. The receiving pipe is made of stainless steel. It is attached to the power unit using a bracket with a clamp covering both outlet pipes.
The exhaust pipe is pivotally connected to the pipe flange of the additional muffler or neutralizer (for models where it is provided). Between the flanges there is a metal-graphite ring with a spherical outer surface. The inner surface of the flanges is also spherical, and they are tightened with spring-loaded bolts, which allows the muffler pipe to move (without losing its tightness) relative to the exhaust pipe when the power unit oscillates relative to the body.
To reduce noise and better thermal insulation of the body, the additional muffler has a protective cover. For vehicles with a neutralizer, an additional muffler is available with a shortened front pipe.
The neutralizer is designed to reduce emissions of carbon monoxide, nitrogen oxides and unburned hydrocarbons into the atmosphere. For this purpose, two ceramic blocks with many pores, coated with so-called afterburning catalysts: rhodium, palladium, platinum, are used. Passing through the pores of the neutralizer, carbon monoxide is converted into low-toxic carbon dioxide, and nitrogen oxides are reduced to harmless nitrogen. The degree of gas purification in a working neutralizer reaches 90-95%. For normal operation of the converter, the composition of the exhaust gases (in particular, the oxygen content in them) must be within strictly specified limits. This function is performed by the controller, determining the amount of fuel supplied depending on the readings of the oxygen sensor
The neutralizer and oxygen sensor are very sensitive to lead compounds - both of them are quickly “poisoned” and stop working, which, accordingly, leads to an increase in emissions of toxic substances. Therefore, if your car is equipped with a neutralizer, its operation, even short-term, on leaded gasoline is strictly prohibited. A faulty ignition system can also cause the neutralizer to fail. If sparking is missed, unburned fuel enters the converter, burns out and sinteres the ceramics, which can lead to complete blockage of the exhaust system and engine shutdown (or severe loss of power).
The main muffler is located after the additional muffler and is connected to it using an O-ring with clamps (as on the Samara). The mufflers are suspended from the body brackets on four rubber pads.
HdSxozARNdCZoZ0rmlIZmTSTN29TNdkrbraqebaqo3I5Ndk9etIUo3AwmLs6nl5wnl5SFlEwN2GVh4OUMDIuhRk4gDA4h3QSnlOuOBu0gBAypbefebaqebAsmLIQFlCsFlGwnlKxOB0rm2cWoDKrF JcZgBk2hJgZgBm4GJszhBarbraqebaqMdC0mj1QMb1ZNd90HjeZhBi4hBq0gZg4eR48F2SxoZ4=
Flame arrestor instead of a resonator
There are several main reasons for resonator failure:
- mechanical damage due to an impact in the body area or under the influence of vibration with a violation of the integrity of the rubber suspension;
- burnout of the body or internal structural elements;
- destruction of the internal structure.
Signs of resonator failure are as follows:
- a characteristic cutting sound (in case of minor leaks) or roar (in case of severe damage);
- rebound from the body;
- the smell of exhaust gases in the cabin;
- exhaust gases coming out from under the car.
Car owners often wonder whether it is possible to install a resonator instead of a flame arrester. It all depends on the design features of the exhaust system of a particular vehicle. It is also necessary to take into account the experience of manufacturing such a replacement on similar vehicles.
In most cases, installing a flame arrester is suitable to replace the central resonator that is installed behind the catalytic converter or particulate filter. In this area the exhaust gases are still hot. The main muffler follows the central resonator. Therefore, installing a flame arrester here will not have a significant effect on the increase in noise and will work properly, reducing resonance and participating in the cooling of exhaust gases.
Installing a flame arrester instead of the main resonator is impractical. Except when the exhaust system is changed to a sports version. So it makes sense to install a louder one instead of a muffler. This will increase the noise output and echo resonant phenomena may occur.
Resonator or flame arrester
Car owners are often faced with a choice: resonator or flame arrester?
A resonator is an integral part of the exhaust system, the main purpose of which is to suppress resonance phenomena, equalize the flow of exhaust gases and reduce noise. Made from heat-resistant stainless steel.
There are many different resonator designs. Each engine has its own parameters. One of the main characteristics is internal volume. Important parameters are the number of chambers and the type of communication between them (through perforated holes in pipes, through pipes offset relative to each other, or through holes in the walls of the chambers). Resonators are also divided according to the type of internal contents:
- hollow;
- with packing made of heat-resistant materials.
The principle of operation is as follows. Exhaust gases, depending on the engine speed, enter the resonator with a certain pulsation. Once inside the resonator, they follow a developed route with a constant change in direction and division of the main flow into smaller directions. As a result, the initial impulse dissipates. A more uniform movement of gases is created with a relatively small amplitude of pressure changes.
The main difference between a flame arrester is its direct-flow design. A high-quality flame arrester is made of stainless steel. The central pipe is perforated with a calculated frequency and hole diameter. The body is often made of two layers. This is done to increase reliability (if one layer is damaged, the second will not allow gases to escape) and to achieve even greater noise suppression efficiency.
The internal space of the case is filled with heat-resistant materials. It can be a metal or mineral filler. Its main task is to freely pass gases through itself, breaking them into as small streams as possible.
A flame arrester, unlike a resonator, is capable of operating for a long time under the influence of higher temperatures. Therefore, it is advisable to install it in places located close to the exhaust manifold.
Exhaust gases have a wave-like flow structure with areas of high and low pressure. When a portion of high-pressure exhaust exits into the flame arrester, gases penetrate through the holes into the housing packing. There they are divided into smaller flows and cooled. When a low pressure area approaches, the exhaust gases exit the packing and are added to the flow. In this way, the pulsation amplitude decreases, which leads to the elimination of resonance phenomena. Cooling is also carried out, which has a beneficial effect on subsequent elements of the exhaust system.
In general, the functionality of the resonator and flame arrester are similar. The differences are that the flame arrester can withstand a greater temperature load, and the resonator does a better job of suppressing resonance phenomena and reducing noise. Based on this, we can conclude that it is more expedient to install a flame arrester instead of exhaust system elements located closer to the manifold. It is better to install the resonator in the second half of the exhaust system.
Resonator, flame arrester instead of catalyst
Most car owners in Russia, when problems arise with the catalyst, choose the path of removing it and installing a replacement. This is due to a fair attitude towards violation of environmental standards, as well as the low cost of such replacement. A new catalyst is expensive. Installing a replacement is much cheaper.
Instead of a catalytic converter, it is more advisable to install a flame arrester or stronger one. This is due to operating conditions close to the engine. High temperatures can quickly damage the resonator. Especially if it's empty.
An exception is the installation of a resonator in the design of an exhaust system with multiple catalysts. Here you can implant a resonator in place of the last catalytic converter. It is usually located a considerable distance from the engine, and when it reaches it, the exhaust gases cool and lose kinetic energy.
How to remove the main muffler on a ten
As with most front-wheel drive models, replacing the exhaust system of the VAZ-2110 is quite simple. You do not need any special skills, extensive experience, or special tools.
But it is advisable to carry out all work on an inspection hole or overpass. The sequence of work is as follows:
- The connection between the resonator and the muffler is made using flared pipes and an O-ring. This connection is crimped with a metal clamp, which consists of two halves and bolts.
- First of all, dismantle the clamp; to do this, unscrew the nuts from the bolts using two 13mm wrenches and remove the O-ring. On cars of the tenth family, sealing rings made of graphite are used. Therefore, they do not stick to the surface of the pipe.
- Remove the old main muffler from the rubber hangers.
How can I fix the problem?
So, the place of gas breakthrough through the muffler has been detected, you just need to make a decision about replacement or try to repair the unit. Often the holes in the body are small, and in this case it is not always advisable to buy a new muffler. It is necessary to remove the unit from the car and show it to a welding specialist, who will tell you whether it can be repaired.
The craftsman will cut out the rotten part of the body, shake out the remains of the burnt partitions from the inside and apply a patch of new metal. Fistulas that occur at the points where the pipe is connected to the body must also be eliminated by welding. The only caveat is that these repairs solve the problem only temporarily. Such a muffler will not serve for a long time, and it may perform its function poorly; due to the lack of partitions, the sound will break through.
If it is decided that the muffler needs to be replaced, then you need to select and purchase it. New elements are made of black or stainless steel, so the choice is limited. The latter last much longer than black ones, but their cost is higher. In addition, welding work in case of repair of a stainless steel body will be more expensive. When purchasing a new muffler, it is worth purchasing a new set of suspension rubber bands, as well as a graphite O-ring. It is installed at the junction of the resonator and muffler pipes.
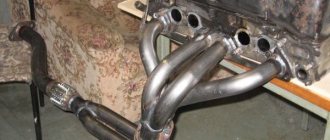
I foresee a lot of negativity for talking about this work. But the work was done and I see no reason to hide it. Moreover, the customer was both pleased and satisfied with the quality of the work and the price. To begin with, a young man approached us with a request to install an exhaust system on a 2110 .His friends gave him such an original gift for his birthday. He may not need it, but since it was given, he needs to install it. The system consists of a manifold, a resonator, a bypass pipe above the rear beam and a muffler with a nozzle. Everything except the rear part is made of stainless steel.
old and new
At first glance, everything should be simple and predictable... we remove the standard system and install a new one. But this is only on the floor and outside the car. In fact, it turns out that the exhaust manifold mounting flange is thicker than the intake manifold. And since both of them are fixed with one nut on a stud , then it is almost impossible to press them without modification.
Adding to the complexity is the limited access through the non-removable spider of the new pipes. Poorly tightened manifolds not only leak air, but also prevent the engine from starting. Thus, our craftsmen had to modify the stainless steel mounting flange to the required size. After this titanic work on a limited budget, the entire remaining system was installed in 600 seconds. Strangely enough, the sound turned out to be quite pleasant and bassy.
Work such as replacing a muffler for a VAZ 2110 is carried out only when necessary, when an old part of the exhaust system fails. This occurs due to increased noise of the product, which is expressed in increased volume of the system (roaring, crackling or other noise), associated with burning out the walls of the part or receiving mechanical damage. A defect such as a break in the connecting pipe of a part also occurs, which requires immediate repair.
The work can be done with your own hands, because... no special skills are required to install and dismantle the waste gas exhaust system. The “tens” output system includes the following components:
- intake manifold pipe (popularly called “pants” due to its external similarity);
- neutralizer;
- additional type muffler (so-called resonator);
- main muffler;
- intermediate elements.
How to remove the neutralizer
The VAZ-2110 exhaust system is standard for all cars. Almost the same design is used on nines, sevens, and even foreign cars. Even a motorist with very little experience can repair all elements of the system. If you have already decided to change the resonator and muffler, then it is also advisable to install a new neutralizer. The neutralizer is necessary to dampen the vibration coming from the car engine. This is a device that mechanically separates the muffler resonator and the exhaust pipe.
Replacement is carried out as follows:
- If there is no damage to the springs and bolts, they can be reused. If there is wear, you need to purchase new elements.
- The ring is replaced in any case, even if it is in almost perfect condition. If this ring begins to allow exhaust gases to pass through, damage to the flaring of the exhaust pipe and the converter will occur.
- Unscrew all the bolts used to secure it. They must first be treated with a penetrating lubricant.
Installation of a new neutralizer
If you decide to modify your car, you can install the Stinger exhaust system on the VAZ-2110. It is more reliable and advanced than stock.
All work is carried out the same way. The neutralizer is installed as follows:
- Install the neutralizer, and then put on the bolts. This must be done very carefully, making half a turn, no more.
- When tightening, you must first tighten the bolts that secure the neutralizer to the resonator. The last to be tightened are the bolts securing the converter to the exhaust pipe.
Muffler resonator in exhaust
Regardless of what make and model of car you own, as well as what year it was made, sooner or later you will have to face the fact that the time will come to replace any consumables, or repair some parts of the car. It’s worth noting right away that almost 99% of the replacement and repair work can be done with your own hands by almost any car owner. But in order to independently figure out what happened to your vehicle or find detailed instructions on how to fix this breakdown, read the block of repair articles on our website, which describes and clearly shows everything you need to know to bring your “swallow” into perfect condition!
The muffler resonator is an element of the exhaust mechanism; its functions include the ability to dampen low-frequency sounds that arise during engine operation. It will be useful for any car enthusiast to know the location of the resonator, as well as what possible problematic issues he will encounter during its operation. A malfunction of the exhaust pipe resonator is not critical, but it will cause a lot of trouble not only for the car owner, but also for those around him. You will learn further in this article about eliminating the problematic issue that has arisen, the method of dismantling and installing the unit, and the method of creating a resonator with your own hands.
Purpose of the resonator
First, let's look at why we need a resonator in a car. As mentioned above, this auto part is part of the exhaust system of the car engine. Its main task is to dampen the sound of low frequencies that arise when exhaust gases enter the gas exhaust system. There are two reasons why sounds appear in it:
- sounds from expanding gases;
- noise from vibration of exhaust system parts.
Resonator location
Together with the muffler, the functions of the resonator include reducing the speed of movement of exhaust gases. This happens thanks to the laws of physics, based on this, gases quickly move through a narrow pipe, when they enter a huge volume, their speed and, naturally, energy are lost. In the gas exhaust mechanism, the resonator is installed in front of the main muffler and is the initial link in the chain of sound muffling in the exhaust system. It turns out that its main functions are to first reduce noise and balance the pulsation of the exhaust gas flow.
Sometimes car owners call it the “middle silencer” (because it is located approximately in the middle of the bottom of the car) or the “second silencer”. But this is incorrect, since the exhaust system resonator and the muffler have different operating principles.
The resonator of the vehicle exhaust system also releases the engine exhaust from exhaust gases and creates equal pressure in it. This provides low resistance to the movement of exhaust gases and it becomes possible to use the full power of the engine.
Since the resonator can still take away part of the power by 10-15 percent, sports cars use so-called direct-flow mufflers and do not install resonators.
Resonator structure
By design, the resonator consists of a perforated pipe, which is placed in a metal housing. The device also has a choke hole, which is designed to increase the effect of damping wave oscillatory movements in the pipe. The cavity inside the resonator is divided into two or more unequal parts using partitions that are located in a transverse plane to the pipe. Even the most recent resonators use thermal insulation and/or sound insulation (often the same material) that is located at the bottom of the housing and is designed to reduce its temperature and/or sounds that come from the structure.
Internal structure of the resonator
The cavities inside come with different volumes in order to periodically narrow and expand the flow of exhaust gases, which also makes it possible to even out their unevenly distributed pulsation. In other words, each chamber has its own resonant frequency. In addition, they are slightly offset relative to the axis of the frame. This is necessary in order to achieve a change in the direction of the exhaust flow. And perforation inside the pipe is necessary to dampen the huge amplitudes of sound waves produced by gases.
The performance of the resonator is influenced by the following factors:
- its level of wear and tightness;
- the degree of contamination from carbon deposits (how clean is how effective);
- diametrical cross-section (the larger the diameter of the structure, the greater its efficiency).
Problems with the resonator
Like any auto part, the resonator breaks down from time to time. Because it is designed to pass through exhaust gases that have a temperature of hundreds of degrees. But in general, added to this are the aggressive chemical elements contained in the escaping gas mixture, which leads to inevitable burnout of the metal mechanism parts.
The main symptoms of a resonator malfunction:
- The performance of the muffler and exhaust system has deteriorated . This is revealed by the increased noise that comes from the exhaust pipe, this mainly concerns low-frequency sounds (roar).
- Exhaust gases appear from under the bottom of the car . This is a sure symptom of a depressurized resonator or other parts of the gas exhaust mechanism.
- There is a characteristic rattling metallic sound where the resonator is located . It happens due to the fact that one (or a couple) of components burns out inside the building. As a rule, in this case it begins to dangle or comes off and rattling begins in one of the chambers.
- Engine power drops significantly . Due to the breakdown, the resonator's ability to transmit is greatly reduced. Therefore, it will poorly or not at all dampen the uneven pulsating movements of exhaust gases. And this gives feedback on the deterioration of the power unit’s performance.
When you have a similar situation with 1 or several of the above-mentioned symptoms of a resonator malfunction, you need to quickly investigate its activity.
Checking the resonator
If the above problems are detected, the driver must know how to check the resonator. This will make it possible not only to make the operation of the engine and the exhaust gas release mechanism normal, but also to increase the comfort of using the car.
To check, you will need an inspection pit (or a jack). Diagnosis is made by visual inspection. You should carefully inspect whether the device itself and the tubes attached to it are intact (especially at the joints).
When working in a pit and using a jack, you must be careful and follow safety rules.
The real symptom of the problem is the condensation formed in the cooled resonator, which then begins to fall drop by drop to the ground. This indicates that the frame has lost its tightness and needs to be repaired or even replaced. You can check for the presence of condensation some time after turning off the engine (so that the resonator frame has cooled down). Please pay attention! Sometimes car lovers, when making resonators themselves, specially drill a slot in its frame to remove moisture. Therefore, when buying a car with such a resonator, this testing method will not suit you.
Broken resonator
The integrity of the frame can be determined by the presence of exhaust gases that come out of it. This also indicates depressurization and the need to change it. This fact is verified when the machine engine is running, by inspection under the bottom. To be sure, you can ask someone to rev it up so that a lot of exhaust gases pass through the mechanism. Another suspicion of depressurization arises when smoke appears from under the bottom of the car while driving or standing with the engine running.
In practice, it turns out that it is not worth repairing the resonator, since it is better to replace it. This is especially true for cars with significant mileage (more than one hundred thousand km).
Types of car resonators
If you choose an exhaust system resonator, you need to know what types exist today and what they are made of. Today, resonators that are made of aluminized steel and stainless steel are popular. The first ones are inexpensive, but do not work for long. Their frame is made of medium-gauge steel, which is coated with aluminum on top to prevent rust. But this anti-corrosion complex is not durable. Therefore, we do not advise you to purchase an exhaust resonator made of aluminized steel. It would be good to purchase a car resonator that is made of stainless steel. This material has a smooth layer on top (otherwise, there will be few turbulences in the mechanism), and is even more stable when operating in conditions of high and low temperatures.
DIY resonator
Before designing and assembling a resonator of your own production, you need to understand one simple thing. The thicker the material from which the exhaust system is made (including the resonator), the greater the effect will be in the fight against vibrating movements and emerging noise. That is why the exhaust manifold, which primarily receives gases from the cylinder head, can be of such impressive weight.
Parts of the exhaust systems of foreign cars are heavier than domestic ones. This means that they are quieter and more comfortable.
But, when choosing material, do not overdo it and do not choose very large blanks. Otherwise, the weight of the resonator will become large, and this will affect the dynamics of the car and the load on the chassis.
There are a number of reasons why car owners make exhaust resonators themselves. One of them is to reduce the noise produced by the standard factory muffler. As a rule, for this purpose another resonator is installed in the gas exhaust mechanism. Another reason is to make and install a direct-flow resonator for the car. Its advantages are:
DIY resonator
- engine power losses are reduced (really small, about 5-10 percent);
- the sound background of the engine and exhaust system changes (for those who like low sound).
To make a direct-flow resonator you will need:
- mechanic's tool kit;
- welding machine (it’s good to use current semi-automatic ones or inverters);
- angle grinder with a set of discs for cutting and grinding.
The structure of the resonator differs depending on the material you use. We will describe to you one of the ways to create a direct-flow resonator for a car with your own hands:
- Prepare the pipe for the internal base of the resonator in advance. It must be the same or slightly larger diameter than the factory one. It is necessary to ensure that it can then be easily glued by welding to the existing mechanism, so you should not choose a larger diameter (if it is not possible to connect the pipe with a flange).
- Next, in this tube you need to make a slot with a drill, similar to a stock resonator.
- Then you need to find a tube with a slightly larger diametrical cross-section (about 3-5 cm), it will become the outer frame. Its length must be reduced (depending on the structure, by approximately 5-10 cm at each end).
- They make plugs that are needed to seal the frame at the ends. To do this, they use sheet metal, where they mark with a pencil the diameters of the outer tubes, large and small. Then the workpieces are cut and processed with a grinding machine.
- A tube with a large diameter must be placed on a tube with a small diameter, and the cavity between them must be filled with glass wool (it’s good if you have modern mineral wool with good heat and sound insulation properties).
- Next, it is necessary to weld points at the ends along the edges of the tube with a large diametrical cross-section using previously prepared plugs.
- After welding, you need to clean the seams with an angle grinder.
- Finally, you need to weld a new resonator into the car exhaust gas mechanism. After all, you need to clean the seams after welding.
DIY resonator
The given scheme of work is approximate. There are many different options for resonators that you can make yourself. Sometimes they are simply thrown out of the mechanism, putting a piece of pipe in their place. But it is not recommended to do this, since it will not add much to the power of the car, but an extra roar from the exhaust pipe will be provided!
Additional problematic issues
After installing a self-made resonator, the car owner will most likely encounter a number of problematic issues that must be resolved without fail. First, the mass of the exhaust mechanism and, naturally, the vehicle as a whole will increase. This applies to you if you used heavy metal elements to create the resonator. Therefore, situations may arise where it is necessary to change brackets and/or shock absorbers. Or strengthen them, otherwise the car frame will “sag”, and the chassis will have to bear an additional load.
In addition, changing the resonator will entail a transformation in the ratio of air entering the engine and the volume of exhaust gases. Therefore, using an experimental method, you need to find out what good settings to choose and make the necessary adjustments in the supply of the fuel mixture and filtration of the air mass.
Resonator dismantling and installation
Many drivers are wondering how to remove the resonator? The answers will differ depending on the car brand, but in general, the action plan is something like this:
- we disconnect the resonator pipes where they are connected to the exhaust gas removal mechanism (in front, on the side of the engine or catalyst, behind where the muffler is);
- remove the resonator from its suspensions, which secure it to the bottom of the car;
- dismantle the resonator with its pipes.
Method for changing the Renault Logan resonator
Install the new device in the reverse order. When dismantling the resonator, do not damage the seal rings connecting its pipes to the rest of the exhaust gas removal mechanism.
As an example, we present to you two videos with instructions that demonstrate changing the resonator on the famous Renault Logan and front-wheel drive VAZ 2110, VAZ 2111, VAZ 2112, VAZ 2114, VAZ 2115, Kalina, Priora, Granta cars. .
Bottom line
Failure of a car exhaust system resonator, partially or completely, is a critical failure. Even an inexperienced car owner can find out about a malfunction. This will be indicated by a loss of power, exhaust gases will spread under the bottom and/or in the cabin, and the sound background during engine operation will increase. It is necessary to take into account that you can use the car in this case, but we do not advise you to delay repairs, since driving with a faulty resonator leads to failure of other parts of the car's exhaust gas release mechanism.