The design of the gearbox of classic domestic cars suffers from low reliability and inability to withstand high loads. Repairing a VAZ 2107 5-speed gearbox is a rather complex procedure that requires a responsible approach and extensive experience. However, if you know the procedure and are technically trained, you can perform the maintenance yourself. As a rule, cars begin to have problems with the inclusion/deceleration of speeds and the loosening of the rocker. With such symptoms, surgical intervention in the structure will be required.
Signs and causes of box malfunctions
Among the most popular reasons for visiting a service station are:
- the appearance of specific noise while driving;
- extraneous sounds during acceleration;
- one or more gears do not engage, it is knocked out.
The symptoms are a clear sign of wear on the gears and synchronizers. Mechanics are often cited as the cause of the breakdown.
- Overly aggressive driving. Stock transmissions are not designed for such driving conditions. Acceleration before the cutoff, too high a pace of movement on dirt or low-quality asphalt roads.
- Natural wear and tear. Some cars are equipped with a frankly weak transmission. Such devices rarely survive the 200,000 kilometer mark.
- Mechanical damage. Impacts against stones and curbs can damage the crankcase of the device, which causes lubricant leaks and dry operation.
- Using low-quality oil or neglecting to service the device. If you pour a surrogate lubricant into the gearbox, the reaction can be unpredictable. Similarly, the mechanism responds to the lack of replacement of the working fluid.
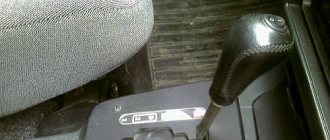
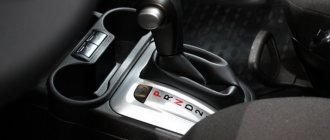
Lever tuning
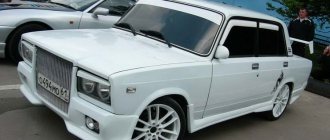
The gear lever is located on the “seven” somewhat poorly, some believe that it is too long, others stretch far, and a general remark when turning on the reverse gear is added to the main ones, that we hit our hand on the passenger’s knee.
Some select levers from foreign cars that are suitable in size and secure them. The second, and easiest, thing to do when upgrading the handle yourself is to simply make it shorter. To do this, the lever rod is sawed off to 5 - 7 cm in length and the thread is re-cut.
The most radical way of tuning is to move the lever closer to the driver and reduce its travel when changing gears. It looks, when brought to its logical conclusion, solidly.
Read more about this procedure on the website.
The above “tuning of the lever makes the interior of your car unique, but do not forget about driving safety because the given examples have their pros and cons, and it’s up to you to decide whether to do them or not.
>
When and how often should you check your gearbox?
The manufacturer does not set a strict time frame for repairing the device. The only recommendation is a scheduled oil change.
The company recommends changing the fluid after 2,000 kilometers for the first time and after 60,000 kilometers for the second time. Further maintenance is limited to maintenance every 20,000-30,000.
Box faults
There are several types of symptoms of breakdown or wear of the VAZ 2107 gearbox.
- Lack of response to the inclusion of a position.
- The speed takes off at full speed.
- Increased noise, howling or grinding coming from inside the mechanism.
- The gears are stuck in tightly.
- Oil leaked.
The transmission does not start
The reason for the lack of an adequate response to the driver’s manipulations is:
- wear of gears and gears;
- abrasion of synchronizer bushings;
- mechanical damage to the guide bushings;
- synchronizer spring wear.
Knocks out gear when driving
The next trouble is the gearshift lever clicking out immediately after engaging the gear.
The reasons are:
- the lever joint is jammed;
- physical breakdown of the direct lever - the part is changed;
- the shift forks in the gearbox are bent;
- The clutch is not working properly.
Crunching and grinding in the box while driving
The following breakdown is caused by the following factors:
- wear of bearings on shafts;
- gear splines are worn out, parts are replaced;
- There is not enough oil in the crankcase of the device, it is recommended to add lubricant.
Increased noise
The consequence of the following problems is increased noise emission.
- Lack of lubrication in the gearbox housing. The mechanism runs dry, which provokes the appearance of extraneous sounds.
- The fluid hasn't been changed for too long. After the lubricant wears out, a large amount of thick ointment consisting of soot, acids, and metal shavings forms inside the mechanism. The mass clogs the channels and oil starvation occurs.
- Wear of gear teeth and bearings.
Difficult gear shifting
In this case, you will need to check the clutch - the device may not work correctly. Damage to the basket or disk is also relevant. Separately, the cause may be pouring an excessively thick lubricant or a malfunction of the synchronizer.
Oil leak
Lubricant leakage can be caused by factors.
- Mechanical damage to the crankcase when it hits or hits another surface.
- Wear of oil seals and seals caused by natural aging of rubber.
- Overflow of liquid and, as a result, its displacement from the mechanism.
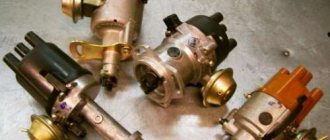
Gear shift mechanism
Numbers 1, 2 and 16 are the speed forks: 3rd, 4th, 1st and 2nd, rear and 5th. Fork rods No. 5, No. 7 and No. 9 are controlled by lever No. 8, which is located in the car interior.
The gear shift works according to the following scheme: if lever No. 8 changes position, the hinge engages with a recess located on one of the axes, the other end of which is in rigid engagement with fork No. 3. It, in turn, fits into the recess on the forward gear at numbers 16, 23, 24, 25 or number 20 for the rear. Lever 8 moves the fork, which leads to engagement of the required secondary shaft gear with the appropriate intermediate gear. The torque transmission circuit is closed and the secondary axis rotates at a speed that corresponds to the gear ratio of the meshed gears. If you engage reverse gear, then, unlike others, the lever will be pushed down while driving.
Diagnostics of box bearings
To check the condition of the gearbox bearings, the device must be disassembled and access to the parts must be opened. This method is the most accurate and effective.
After dismantling and disassembling the unit, you should check the shafts for play, the integrity of the seals and sealing rings. Additionally, the condition of the seats is checked. In normal condition, the formation of backlash and damage to rubber seals is unacceptable. If this is found, the part should be replaced.
Rules for disassembling and assembling the gearbox
If the user has never encountered the repair of such a complex unit, the procedure should be carefully prepared.
- Disassembly of the mechanism is carried out only after it has been completely cleaned of dirt.
- All the tools required for disassembly are pre-prepared - keys, squeezes, pliers, lock ring pullers. It is also advisable to have a separate container for storing small bolts, nuts, and washers.
- It is necessary to dismantle the mechanism parts by first treating the bolts with an anti-boiling agent.
- When disassembling, the units are folded in the dismantling sequence.
- Human memory is extremely unreliable - a photograph of a disassembled mechanism before its reassembly is the best reminder.
- All gaskets without exception must be replaced. Recycling of seals is strictly prohibited.
- No one has canceled the abundance of the cleaner. When washing the structure, you should not skimp on the cleaning material; the better you wash it, the more fun it will be.
- Assembly of the unit is carried out exclusively in the reverse order.
- If after installation there are excess parts left (which is not uncommon), the entire gearbox is completely rebuilt.
It is also necessary to maintain maximum cleanliness during work. Dust, metal shavings, or foreign objects can cause serious damage to the gears.
Reasons for the bulkhead
The above procedure involves complete disassembly of the unit as a preventative measure. However, it happens that the manual transmission unit knocks out or slips during driver manipulations. Moreover, the VAZ five-speed transmission suffers from such things all the time. The reason for the repair may be one of the following factors:
- the rocker lever gets stuck;
- extraneous noise when driving;
- one of the gears falls out;
- Positions are difficult to switch on.
For a more accurate understanding of the process, you can watch video master classes of the process from experienced specialists.
4th gear slips out
On a five-speed VAZ 2107 gearbox, fifth speed overshoot can provoke wear of the gear, synchronizer, and related parts.
During the repair, the 3/4 clutch, the damaged element and a complete set of seals that are subject to separation during disassembly are replaced.
Note! Some mechanics claim that in 40% of cases, replacing the driveshaft mount and clutch fork saves the day.
5th gear slips out
The five-speed gearbox of the “seven” periodically gives out vagaries to the user due to insufficient gear lubrication. It is recommended that in case of knockout or tight engagement of a position, completely change the synchronizers, gear, fork and bushings - this will ensure stable operation of the unit.
Note! Before purchasing spare parts, it is necessary to troubleshoot them. Some stores sell "crooked" parts.
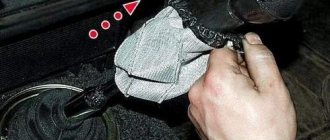
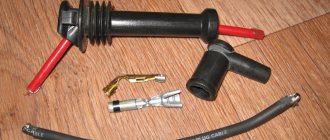
Repair of gearshift lever (backstage)
If the gearbox linkage (handle) becomes loose, repairs can be carried out even without removing the unit from the car. However, some experts recommend using “garage” repair parts. For the convenience of the reader and a clearer explanation of the process, it is better to complete the description in pictures.
- Dismantle the cover and remove the locking bar from the rocker bushing.
- After release, the lever axis is removed; for convenience, you can push the insert with a screwdriver or a pusher.
- Usually the bushing itself wears out; you can replace it with a new insert or a standard M10 bolt.
- Next, fasten everything in the reverse order and tighten the structure.
Dismantling the old-style gearbox
Before repairing an old-type VAZ gearbox, it is advisable to study the user manual or technical documentation. The main nuance is the absence of 5th gear - the classic system has only 4 positions. Therefore, the reverse gear is located separately. This should be taken into account during repairs.
Technical characteristics of manual transmission
In the operating instructions, the technical characteristics of the box are indicated together with the characteristics of the transmission. This is given in tabular form:
| Clutch | Single-disk, dry with hydraulic drive and central diaphragm spring |
| Transmission | Mechanical, five-speed, three-way, three-shaft, with synchronizers on all forward gears |
| Gear ratios | |
| First | 3.667 |
| Second | 2.100 |
| Third | 1.361 |
| Fourth | 1.000 |
| Fifth | 0.820 |
| Reverse | 3.530 |
| Cardan transmission | Twin-shaft with intermediate support and elastic coupling |
| main gear | Hypoid |
| Final drive ratio | 3.9 or 4.1 |
| Differential | Conical, two-satellite |
Replacing bearings
It is impossible to repair the bearings - when they wear out, the non-separable structure changes entirely.
Main shaft bearing
For dismantling you will need:
- clamp the input shaft into a yew;
- Using a special puller, remove the bearing from its seat.
The removal procedure is accompanied by slight tapping of the part. The installation procedure is performed in reverse order.
Secondary shaft
The only difference between the procedures is the use of different sized bearings.
Intermediate shaft
The procedure is similar. Using yews and a special puller.
Front cover
It is installed in the clutch housing. Inside there is an oil seal for the input shaft. On the end wall there is a hole for draining transmission oil, which can flow out of the crankcase if the oil seal is worn. In addition, the box housing contains:
- Primary and secondary shaft.
- Gears, synchronizers.
- Intermediate shaft with shift drive elements.
There is a filler hole in the left wall of the new VAZ-2107 gearbox. It is closed with a metal plug with a conical thread. At the bottom, the box housing is closed with a stamped steel cover. The crankcase is secured with ten nuts. There is a breather in its cavity. There is a passage for oil in the rear wall of the crankcase. it enters the cavity of the lid
Sources
- https://7vaz.ru/remont/kpp-na-vaz-2107.html
- https://rus-avtomir.ru/remont/kpp-vaz-2107
- https://prometey96.ru/tyuning/korobka-vaz-2107.html
- https://kalina-2.ru/remont-vaz/razborka-sborka-kpp-vaz-2107-5-stupka
- https://iga-motor.ru/avtomobili/kak-raspolovinit-korobku.html
- https://GrandFart.ru/tormoza/korobka-pyatistupka.html
- https://AvtoSotka.ru/korobka-peredach/sborka-kpp-vaz-2107.html
- https://CoptersWorld.ru/pro-dvigatel/transmissiya-vaz-2107.html
[collapse]
Replacing oil seals
Structurally, the oil seal is a sealing device that closes the passage to oil. When a part wears out, the housing stops holding liquid and an oil leak occurs.
To dismantle the part, you will need to perform a certain sequence of actions.
The procedure is performed like this:
- completely disassemble the gearbox to open access to the oil seal;
- pry off the seal ring with an awl;
- remove the oil seal itself from the shaft;
- Installation of the new part is carried out in the reverse order.
Disassembling the secondary shaft oil seal is more difficult.
- Remove the centering device from the shaft flange.
- Use a special puller to pull the flange off the secondary shaft along with the washer;
- Use a screwdriver to pry the oil seal out of its socket.
- Carefully install the new seal.
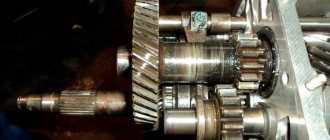
How to replace gears and synchronizers
Initially, it is recommended that if replacement is necessary, contact a car service center. However, if you are confident in your abilities, you can perform the operation yourself. For this you will need:
- yews;
- special puller;
- flat head screwdriver.
Next, the procedure is performed as follows.
- Remove the shaft from the gearbox and clamp one side of it into a yew, having previously wrapped it with a soft lining.
- Using a screwdriver or awl, remove the retaining rings and all bearings.
- Then rest the shaft against the double support and remove the gears from it in direct sequence.
Transmission repair without removing the box
In case of emergency, you can repair the VAZ 5th transmission without removing the housing from the car. When performing the procedure, the car is driven onto an overpass or inspection hole. All manipulations are performed upside down, which complicates the process. Therefore, experienced auto mechanics prefer to first dismantle the unit from the car.
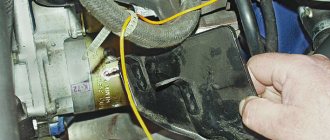
Work on dismantling the five-speed gearbox VAZ 2107
Installing the car on a lift (you can use an overpass or a pit) is preceded by disconnecting the battery and removing the radio panel:
- Remove and disassemble the gearbox rod.
- Remove the cover from the gap where the lever attaches and remove the foam filling.
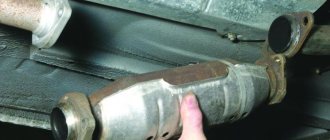
- Remove the exhaust pipe from the exhaust system.
- Move the starter, disconnect the speedometer wire.
- Unscrew the bolts holding the cardan and remove it.
- The clutch cylinder is removed using the same method.
- After this, the gearbox is removed from the car. To do this, it is best to invite assistants who will support the mechanism while you unscrew the mounting bolts. At this stage, it is also advisable to drain the transmission oil.
After all these steps have been completed, we repair the VAZ 2107 gearbox.