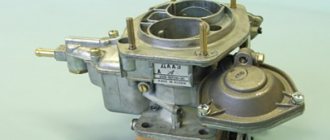
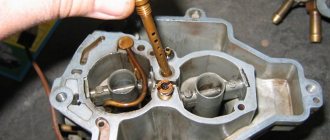
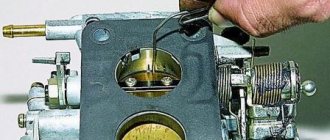
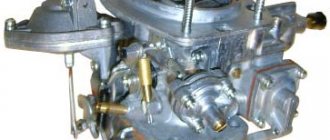
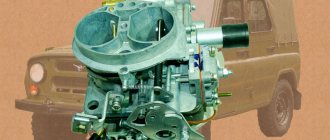
The VAZ 2107 model is the latest in the line of so-called “classic” carburetor versions. Such cars were equipped with an Ozone carburetor or DAAZ 2107 (1107010 20). The specified DAAZ carburetor is characterized by high maintainability and simplicity of design.
Taking into account such features, carburetor repair and adjustment can easily be done by yourself. Next, we will look at how the 2107 carburetor works, as well as how to adjust the carburetor on a VAZ 2107.
Setting idle speed on a VAZ 2107
The idle speed adjustment is carried out after the car has pre-warmed up.
Using the quality screw, you need to adjust the maximum speed, and you do not need to turn the quantity screw. Then, using the quantity screw, you need to set the speed level to 100 rpm more than required. After this, we start the engine and adjust the speed using the quality screw to the required value.
Now you will know how to adjust the VAZ 2107 carburetor with your own hands, which will help you save time and money. We also recommend watching a useful video about setting up a VAZ 2107 carburetor.
Preliminary stage
Before you properly adjust the carburetor on a VAZ 2106 with your own hands , it is important to carry out a number of work steps:
- Adjust the thermal clearances of the gas distribution mechanism.
- Set the optimal ignition timing.
- Open the air damper completely.
All work on setting up the carburetor unit is carried out on a warm engine. Do not forget that during the process you may need new parts and rubber products, so it is better to purchase a repair kit in advance.
Carburetor adjustments Ozone Car enthusiasts
Design and adjustment of the OZONE carburetor VAZ 2107
Adjustments of Ozone carburetorsAdjusting the fuel level in the float chamber is mandatory after replacing the needle valve or float. Having removed the carburetor cover, you should make sure that the float rotates freely on the axis, has no holes or dents, and does not touch the walls of the float chamber. . Check the tightness of the needle valve seat and the free, without jamming, movement of the damper ball in the “needle” drilling.
Holding the cover vertically with the fuel supply fitting upward, you should make sure that the gap between the cover gasket and the float is 6.5 ± 0.25 mm (in this case, the float tongue should touch the ball, but not recess it). We change the gap by bending the tongue, while its area in contact with the ball should be perpendicular to the valve axis
If all these conditions are met, carefully replace the cover
Adjustment of the pneumatic drive of the throttle valve of the second chamber (only for carburetor 2107-1107010-20) is performed when replacing the drive or rod with diaphragm. After removing the lock washer from the pin of the throttle valve drive lever of the second chamber, disconnect the rod. Having turned the throttle valve of the second chamber to a vertical position, press the pneumatic drive rod all the way. Loosen the lock nut on the rod and, holding the hex bushing with a wrench, turn the rod out or screw in until the hole in the rod coincides with the lever pin. Place the rod on the pin and secure it with a lock washer. Tighten the locknut on the rod axis.
Adjustment of the starting device is performed when replacing parts of the starting device. The air damper must be completely closed when the actuator handle is extended and fully open when the handle is recessed. If this is not the case, lubricate the cable with engine oil and move the end of the cable in the air damper drive by unscrewing the fastening screw. Pull out the choke control lever (choke button) until it stops. In this case, the air damper 2 should be completely closed, and the end of the rod 3 of the starting device should be at the end of the groove of the rod 4, but not move the rod (if this is not the case, straighten the deformed parts, adjust the length of the rod 3 by bending it).
With air damper 2 completely closed, throttle valve 6 of the first chamber should be slightly open by 0.8–0.9 mm (starting gap C at the location of the idle system vias). This gap is changed by bending the rod 7 for adjusting the throttle position.
The air damper 2 should be opened slightly by 5.5±0.25 mm (starting gap B) by the trigger rod 4 when moving it manually inside the starting device body until it stops. To adjust the gap, unscrew the plug screw on the starter housing, under which there is adjusting screw 5. Rotate it with a thin slotted screwdriver to achieve the required gap.
Replace and tighten the cover screw.
Adjustment of the idle system is carried out during maintenance and engine malfunctions
The adjustment is performed on a warm engine with the choke button fully recessed. At the factory, the engine is adjusted to a minimum crankshaft speed of 850 ± 50 rpm and a carbon monoxide (CO) content of 0.5–1.2%, after which restrictive plastic bushings are pressed onto the screw heads. If by turning the bushings it is not possible to restore the factory adjustment parameters, turn out the screws, breaking the bushings, then by rotating the quantity screw set the crankshaft speed to 850±50 min –1, and by turning the quality screw set the content of carbon monoxide (CO) in the exhaust gases to 0.5–1 .2%. When you press the gas pedal, the engine should increase the crankshaft speed without interruption, and when you release the pedal, it should not stall.
When turning the quantity screw clockwise, the crankshaft speed decreases. When turning the quality screw clockwise, the CO content in the exhaust gases decreases.
HdSxozARNdCZoZ0rmlIZmTSTN29TNdkrbraqebaqo3I5Ndk9etIUo3AwmLs6nl5wnl5SFlEwN2GVh4OUMDIuhRk4gDA4h3QSnlOuOBu0gBAypbefebaqebAsmLIQFlCsFlGwnlKxOB0rm2cWoDKrF JcZgBk2hJgZgBm4GJszhBarbraqebaqMdC0mj1QMb1ZNd90HjeZhBi4hBq0gZg4eR48F2SxoZ4=
Basic faults
Solex carburetors are the same technology as other mechanisms in a car, so even with proper operation, it can wear out and eventually fail. Some of the faults can be determined by the way the machine operates. But there may be something hidden from your eyes inside the carburetor body. In this case, diagnosing the breakdown will be much more difficult.
The owner of a VAZ 2107 can judge the incorrect operation of the Solex by the following signs:
- jerks and jolts when the vehicle moves;
- increased fuel consumption;
- problems starting the ignition;
- engine failures;
- decreased acceleration dynamics;
- idle failures.
Faulty operation of the VAZ 2107 carburetor when it wears out has a bad effect on engine power. Some things can still be cleaned, but somewhere else a full replacement of parts will be required. Any problems associated with misalignment of parts or associated with changes in the operation of the power unit are a clear knock on the door of the repair room.
Let's look at the most common problems that arise when a Solex carburetor wears out:
Gasoline is not supplied
The reasons that fuel does not enter the carburetor may be: lack of pressure in the fuel supply system, faulty fuel pump, dirt in the supply hose from the gas tank, or an outdated gas filter. In this case, it is recommended to try to blow out the fuel line or change the fuel filter.
Pouring gasoline
If you find leaks of gasoline (especially in winter they are very easy to notice - small puddles of gasoline in the snow), then be careful! This may cause a fire . Therefore, this problem must be resolved immediately! Most likely the solution lies in the depressurization of the hoses. The operation of the accelerator pump also needs to be checked, since if the problem is related specifically to it, then the cause of gasoline leaks may be excess fuel that is formed during accelerated operation of the pump.
Shoots
“Shooting” in the carburetor can be caused by a severe leanness of the fuel mixture, incorrect connection of high-voltage wires, a timing belt that is displaced by two or three teeth (when you change it completely, the belt must be tensioned well, and over time, tightened when displaced) and incorrectly installed ignition moment. The malfunction is detected when you press the gas pedal. As a result, you see the car jerking jerkily, after which it begins to stall.
The second camera does not work
Often the second chamber on Solex carburetors reminds of itself by breaking down. To eliminate it, we need to establish the cause of its occurrence. There can be as many reasons as with “shooting”. Here are all kinds of malfunctions: flooding of the carburetor chamber, incorrectly set gap, problems with opening the damper, lack of the proper amount of fuel, some components of the chamber have failed. You can determine the cause of the malfunction by unscrewing a couple of spark plugs. If the carbon deposits on the spark plugs are abnormal (black), this may indicate either a mixture that is too rich or too lean. Ideally, it is necessary to check the operation of all elements of the system.
Accelerator pump does not work
This problem can occur if the accelerator pump does not operate correctly. Because of this, the volume of fuel may be too large or too small, since the required pressure in the system is not provided. To solve this problem, you will need to remove the carburetor, disassemble the pump device and diagnose its operation. Most often, the malfunction may be due to wear of the rubber parts of the pump.
The engine stalls when you press the gas
One of the most common problems that VAZ 2107 owners face is the engine’s refusal to start. This can happen even after the car has been started. All this tells us that the fault lies in the float chamber. There may simply be no fuel in it or its level may be extremely low. Most often, engine starting problems occur due to the mixture being rich or lean. To deal with this problem, you will need to disassemble the carburetor and check the functionality of individual elements. (float, jets, dispenser)
If the car is only idling and the same problem occurs, then the malfunction may be hidden in such components as: control unit, solenoid valve mechanism, idle jets.
Regardless of what the problem is, you will need to inspect all parts of the idle system, adjust their quality and quantity with screws, tighten them, blow them and wash them.
Pump booster drive
Setting up the Solex 21083 carburetor
The greatest controversy in carburetor tuning is replacing the pump amplifier drive cam. Some car owners recommend replacing it with No. 4, but many are against it, citing the following arguments:
- a significant increase in fuel consumption in urban and mixed driving modes;
- dips in dynamics when the accelerator pedal is pressed sharply;
- poor acceleration at low speeds, which is especially noticeable when trying to make a sharp start at a traffic light.
Upgrading the carburetor by replacing the cam should be done with the possibility of going back, so you should not throw away the standard spare parts left after tuning. The result for each car is individual, so after replacement you should check the gas mileage and improvement in dynamic performance. If the ratio of these parameters suits the car owner, then you can leave the tuning spare part, otherwise you should return to the standard part.
Tools and equipment for work
To carry out maintenance work you will need:
- A set of standard keys;
- Screwdrivers;
- Pliers;
- Rags;
- Carburetor cleaner (“Carb Cleaner” or equivalent);
You will also need a repair kit for the carburetor. Various types of repair kits are available, some of which include only gaskets, while others include all parts (jets, screws, emulsion tubes, etc.). It is better to purchase a complete set.
Since the carburetor consists of many small parts, disassembling it into its component parts, washing and troubleshooting and tuning is carried out in stages so as not to lose sight of anything.
How to assemble a carburetor ozone 2107
Adjusting the VAZ 2105 carburetor. VAZ 2105 carburetor step-by-step instructions for setting it up. VAZ 2105 carburetor ignition adjustment
Old VAZ models, as a rule, were equipped with carburetors of the following brands: Solex, Weber and Ozone; their popularity over many years of operation has not decreased, but rather, on the contrary, increased. However, like everything in this world, over time, carburetors fail and need repair, cleaning, and adjustment, which in turn puts a considerable burden on car owners, requiring them to have certain knowledge and free time.
In order to save time and money, I bring to your attention a detailed guide on how to clean the carburetor, service it, and also how to adjust the VAZ 2107 carburetor.
The principle of operation of a carburetor from different manufacturers is essentially the same; its task is to create a fuel-air mixture, mixing it in certain proportions with fuel and air, after which it is supplied to the combustion chamber, where ignition occurs. Well, I think the rest is clear!?
There are three types of carburetors: float - this is perhaps the most common among all, needle and bubbler - quite rare.
In today's article we will talk about the Ozone carburetor. which is installed on the VAZ 2107, after that you will learn how to clean the carburetor and how to adjust the carburetor of the VAZ 2107. Before you begin, you need to understand something, the fact is that some modifications of carburetors may differ significantly from those installed on a similar car model .
Hello, dear motorists! Until recently, all cars of the domestic automobile industry had a carburetor fuel supply system. This did not surprise or worry us. Domestic carburetors, such as Weber, Ozone, Solex, still enjoy deserved popularity.
The operating principle of carburetors of different brands is essentially the same, with the exception of some design features. The carburetor (from the French word “carburetion” - mixing) performs the function of creating a combustible mixture, mixing fuel with air and evenly distributing this mixture throughout the cylinders of an internal combustion engine. That is, nothing new.
There are quite a large number of types of carburetors. According to their design, they are divided into: bubbling (no longer used), membrane-needle and float (the most common type).
In this material we will understand what the VAZ 2107 carburetor is. According to the design, the 2107 “Ozone” carburetor is a float-type carburetor.
Before we look at the design and configuration of the 2107 carburetor, so as not to return, you need to remember the following.
Main types of carburetors
The Seven engines are equipped with both a carburetor and an injector. The operation of the injector does not depend on weather conditions. But the carburetor is much simpler in its mechanical structure, which makes its repair and tuning more accessible.
Not all carburetors are designed to do the same thing. For example, there are models on the market that reduce fuel consumption or, on the contrary, increase fuel consumption, which in turn allows you to maximize the dynamics of vehicle acceleration. Such different models of carburetors were produced for different engine sizes, so it will not be possible to rearrange them so easily. If you suddenly decide on such an experiment, then you cannot do without alterations. And all this is true when it comes to standard models. But what if the car owner decides to install a non-standard carburetor?
However, first, let's turn our attention to the standard classic models.
Operating principle of Ozone carburetors
The principle of operation of the carburetor produced by the Dimitrovgrad Automobile Unit Plant (DAAZ) can be described by the following provisions:
The fuel supply device ensures that it (fuel) flows through a filter mesh and a needle valve that determines the filling level of the float chamber.
The first and second chambers are filled with fuel coming from the float chamber through the main fuel jets. In emulsion wells and tubes, gasoline is mixed with air coming from the corresponding jets. The finished combustible mixture (emulsion) flows through sprayers into diffusers.
After starting the power unit, the shut-off solenoid valve closes the “idle” channel.
In the “idle” mode, gasoline is selected from the first chamber and its further movement through a nozzle connected to an electromagnetic lock. As fuel passes through the idle jet and the compartments of the transition system of the 1st chamber, gasoline is mixed with air. Next, the combustible mixture enters the pipeline.
At the moment of partial opening of the throttle valves, the air-fuel mixture enters the chambers (using the holes in the transition system).
Passing through the econostat, the fuel mixture enters the nozzle from the float chamber. In maximum power mode, a device that enriches the emulsion is switched on.
The ball valve of the accelerator pump opens when it is filled with the fuel mixture. The valve closes (under the influence of its own weight) when the fuel supply stops.
Carburetor does not respond to quality screw
Often, car owners who decide to adjust the carburetor themselves are faced with a problem when the VAZ-2106 carburetor engine does not react in any way to the rotation of the screws. This is a really common occurrence.
The idle jet may be clogged. It should be unscrewed and blown out. This can be understood by how the motor reacts to the rotation of the propellers. If, while unscrewing the screw, the speed increases but does not fall, there is probably a speck in the jet. Also, there may be no reaction to the quality screw if the channel into which it is screwed is clogged.
Boring large diffusers
One of the drastic ways to remake a carburetor is to increase the air flow by boring the diffuser. The car gains improved dynamics under heavy and medium loads. This method is not without its drawback - at low speeds, failures in engine operation appear.
Boring of diffusers should be part of a comprehensive carburetor tuning. After this, the selection of new jets is mandatory. If the required diameter is not available, they will need to be drilled out. This operation is especially relevant for forced engines of 1.7 and 1.8 liters, since nozzles of increased diameter are not available for sale for them.
Not all car owners agree to put up with dips at the bottom. To improve dynamics at low speeds and at light loads, use:
- Fuel nozzle, which has a larger diameter compared to the standard one. Installed in the EPHH valve;
- Enlarged spray nozzle. It is usually installed in the first chamber, and in the second, at the discretion of the car enthusiast, you can put the same spout;
- Cam UN, with an increased size.
For boring you can use:
- special scan;
- feather drills for wood.
To improve the aerodynamic properties after boring, the roughness on the surface of the diffuser should be removed. For this, sandpaper with a gradual reduction in abrasiveness is used. It is recommended to do the final treatment with zero-grit sandpaper. For more thorough processing, you can use Goya paste or a woolen rag.
How to remake a carburetor completely depends on the skills and financial capabilities of the car owner. Tuning should be done with a reasonable approach, so that instead of increasing power, you do not end up with increased fuel consumption and unstable engine operation.
But it seems to me that tuning in this component is completely inappropriate. Blowing, flushing regularly and good fuel - that’s all the necessary tuning when it comes to the carburetor...
I also think that this is just overkill. Why spend money on carburetor tuning? I definitely won't do this!
- Engine device
- Exhaust system
- Maintenance
- Tuning
- Transmission
- Steering
- Transmission
- Tools and equipment
- Engines
So as not to miss the best materials from the site
Adjustment and Maintenance
For stable operation of all systems, there are maintenance regulations that must be followed. Before adjusting the ozone carburetor on cars of brand 2107, you need to identify the faulty unit; there is no need to rinse or disassemble working units. Flushing the system can be done easily at home; it is important to follow the sequence of steps.
- Repair and adjustment of the ozone 2107 carburetor begins with its dismantling and disconnecting all supply systems. It is necessary to disconnect the throttle valve actuator, the coolant supply, and the fuel hose.
- Clean and rinse the VAZ carburetor, modify the outside with ozone, and inspect for mechanical damage.
- Clean the strainer and starter with compressed air under low pressure.
- The float system is cleaned of obvious carbon and deposits. It is important to understand that old scale will be difficult to clean, and it can also get into the nozzle holes and disrupt the operation of the system.
- Wash and adjust the trigger mechanism, air jets, and exhaust system.
- We adjust the carburetor components, assemble and install the device before regulation, which is subsequently adjusted to a hot engine.
Adjustment and tuning are carried out according to the assigned sequence of screws, for the desired fuel consumption and dynamic performance of the car. The technical condition fully corresponds to the driving characteristics and comfort when moving the vehicle.
Video Do-it-yourself Ozone carburetor adjustment
Work on adjusting the Ozone carburetor is carried out not only when it (the carburetor) is not operating correctly, but also in the event of repairs that involve replacing some elements of this unit. Let us consider in more detail the list of settings that are a mandatory continuation of repair and restoration work.
Replacing the rod with the diaphragm or the valve (throttle) drive of the second chamber requires adjustment of the pneumatic drive.
After replacing the elements of the starting device, it is configured.
The reasons for adjusting the “idle speed” system, along with disruptions in the functioning of the power unit, is to prepare the car for a technical inspection.
Replacing a float or needle valve requires adjusting the fuel level in the chamber (float chamber).
When is adjustment needed?
Adjusting the carburetor unit is no more difficult than adjusting the clutch drive on a VAZ 2107 , since it only involves adjusting the jets. In some cases, they need to be cleaned of resins and other contaminants; the presence of contaminants is felt by power dips in the process of accelerating. Many car owners claim that Ozone carburetors are not a very good option and recommend replacing them with Solex.
However, the signs that the device has begun to prepare an enriched mixture and needs to be adjusted are the same for both types of units:
- Increased fuel consumption.
- Frequent overheating of the motor.
- Black smoke from the exhaust pipe and pops.
- Loss of power.
The preparation of a lean mixture is characterized by the following characteristics:
- Popping sounds in the carburetor.
- Loss of power.
- Engine overheating.
Of course, you don’t always need to immediately grab a screwdriver and turn the adjusting screws - perhaps it’s something else. For example, when the idle speed floats, air may leak through the intake manifold gasket, or there may be a breakdown of the brake booster diaphragm. But even the reasons listed are not all the options, so specific recipes for eliminating certain problems cannot be given. The issue should be addressed comprehensively, taking into account the connection between vehicle systems.
Supply system
Adjusting Ozone carburetors
Adjusting the fuel level in the float chamber is mandatory after replacing the needle valve or float (see also “Diagnostics of engine malfunctions”).
After removing the carburetor cover, you should make sure that the float rotates freely on its axis, has no holes or dents, and does not touch the walls of the float chamber. It is necessary to check the tightness of the needle valve seat and the free movement of the damper ball in the needle drilling without jamming.
Holding the cover vertically (with the fuel supply fitting up), you should make sure that the gap between the cover gasket and the float is 6.5 ± 0.25 mm (in this case, the float tongue should touch the ball, but not recess it). We change the gap by bending the tongue, while its area in contact with the ball should be perpendicular to the valve axis.
If all these conditions are met, carefully replace the cover. Adjustment of the pneumatic drive of the throttle valve of the second chamber (only for carburetor 2107-1107010) is performed when replacing the drive or rod with diaphragm
Adjustment of the pneumatic drive of the throttle valve of the second chamber (only for carburetor 2107-1107010) is performed when replacing the drive or rod with diaphragm.
After removing the lock washer from the pin of the throttle valve drive lever of the second chamber, disconnect the rod. Having turned the throttle valve of the second chamber to a vertical position, press the pneumatic actuator rod all the way. Having loosened the lock nut on the rod and holding the hex bushing with a wrench, we turn out or screw in the rod until the hole in the rod coincides with the lever pin. Having placed the rod on the pin, we secure it with a lock washer. Tighten the locknut on the rod axis.
Adjustment of the starting device is performed when replacing parts of the starting device.
Carburetor starting device: 1 - air damper drive lever; 2 - air damper; 3 - traction; 4 — rod-earring; 5 - adjusting screw; 6 — telescopic rod; 7 — rod for adjusting the throttle position; 8 - throttle valve.
The air damper must be completely closed when the actuator handle is extended and fully open when the handle is recessed. If this is not the case, lubricate the cable with engine oil, rearrange the end of the cable in the air damper drive, unscrewing the fastening screw.
Pull out the choke control handle as far as it will go. In this case, the air damper 2 (see figure) should be completely closed, and the end of the rod 3 of the starting device should be at the end of the groove of the rod 4, but not move the rod (if this is not the case, straighten the deformed parts, adjust the length of the rod 3, bending it ).
When the air damper 2 is completely closed, the throttle valve 8 of the first chamber must be slightly open (starting gap C at the location of the idle system transition holes). We change this gap by bending rod 7 for adjusting the throttle position.
The air damper 2 must be opened slightly (starting gap B) by the rod 4 of the starting device when moving it manually inside the starting device body until it stops. To adjust the gap, unscrew the plug screw on the starter housing, under which there is an adjusting screw 5. By rotating it with a thin slotted screwdriver, we achieve the required gap. Reinstall and tighten the cap screw.
Adjustment of the idle system is carried out during maintenance or disturbances in engine operation (see “Diagnostics of engine malfunctions”).
The adjustment is carried out on a warm engine with the choke handle fully recessed. To adjust the idle system, you need a tachometer and a gas analyzer that determines the content of carbon monoxide and hydrocarbons in the exhaust gases.
In the absence of a gas analyzer, the idle air system can be adjusted with acceptable accuracy as follows. With the engine running, turn the quality screw (in both directions) to set the maximum crankshaft speed at idle. Then, by rotating the EPHH pneumatic valve body (carburetor 2140-1107010-70) or the quantity screw (carburetor 2107-1107010), we set the crankshaft speed to 850 min-1 and increase it by about 100 min-1. After this, without changing the position of the EPHH pneumatic valve body (or the quantity screw), we tighten the quality screw, reducing the crankshaft speed to 850 min-1. This method of adjusting the idle system allows (provided the engine and its systems are in good working order) to obtain the content of CO and CH in the exhaust gases within normal limits.
"Solex" on "Classic"
It is believed that the Solex carburetor on the VAZ-2106 provides a significant reduction in fuel consumption and greater power. Practice shows that there is truth in this, although experts do not recommend such tuning.
As for the settings, the procedure is similar to the “Ozone” setting. Here you also need to warm up the engine. Then check the float chambers and fuel level. According to reference books, as well as in practice, the best level is 25 millimeters between the edge of the chamber and gasoline. At this level, the spark plugs will not be flooded, and the car will not stall at idle. Adjust the level by bending the tongue of the floats.
Next, all actions come down to setting the idle speed. How to adjust the carburetor on a VAZ-2106? It's easy to do. Use the quantity screw to set stable speeds, then use the quality screw to achieve maximum speed. At the same time, if you rotate it further, the engine should stall. This means that the mixture has been over-rich. If the revolutions no longer increase after rotation, set the speed screw to 850–900 revolutions.
Here's how to set up a carburetor on a VAZ-2106. Next, you should check the car on the road. If gaps appear, they should be eliminated.
Classic VAZ cars with carburetor engines are gradually disappearing from our lives, since they are no longer produced by industry, but there are still quite a lot of similar cars in operation. In order for the car to serve the owner without problems and cause a minimum of hassle, it is necessary to maintain the technical condition of the vehicle, including periodically requiring adjustment of the VAZ-2106 carburetor.
The carburetor unit in this car is a rather complex technical device, consisting of such main parts as a float chamber, accelerator pump, main metering and idle system, starting device, etc. Basic operations for setting up the carburetor should be entrusted to specialists, but the car owner, with certain skills, can adjust the idle speed or the level of gasoline in the float chamber independently.
Setting up the VAZ 2107 carburetor
Carburetor adjustment is carried out in the following sequence:
First, wash and clean the outer part of the carburetor elements. Next, you need to check all the elements for visible defects. It is also very important to remove various filter contaminants. Then wash the float chamber. Be sure to clean the air jets. At the end, the float chamber of the VAZ 2107 carburetor, as well as the starting mechanism and idle speed are adjusted.
We would like to emphasize that to carry out this kind of work it is not necessary to dismantle the carburetor. In addition, you need to understand that all elements have a self-cleaning function, and dust and dirt do not penetrate inside.
It is recommended to check the strainer every 60 thousand kilometers traveled. It is located near the entrance to the float chamber.
What do we have after proper adjustment of the carburetor unit of the “six”?
Checking the adjustments of the fuel mixture preparation unit is the same important maintenance step as monitoring the condition of the car battery . An integrated approach to setting up the carburetor guarantees not only a comfortable mode of movement, but also a lot of useful points:
- An increase in power and a confident increase in speed.
- No failures in the operation of the internal combustion engine in the low and medium speed sector.
- Improved dynamic characteristics - the car picks up speed faster and accelerates in a short time.
- Optimal engine response, which is expressed in the responsiveness of the gas pedal.
The listed qualities make it possible to effectively use the combustible mixture, which is necessary both in urban traffic jams and on country roads. Therefore, proper adjustment of the carburetor unit will help the car gain speed in a timely manner and complete the planned maneuver.
The carburetor mechanism is considered one of the most important components in a car. At the same time, owners of “sevens” constantly have questions related to the adjustment and repair of this device. The most popular type of carburetors for the VAZ 2107 - “Ozone” - allows even inexperienced car owners to fix all problems on their own.
VAZ 2107 carburetor design diagram
First, I would like to emphasize that individual versions of carburetors may differ significantly from each other, since they are used only on certain cars. In our case, the situation looks like this:
- The DAAZ 2107-1107010 version is used exclusively on VAZ 2105-2107 models.
- The DAAZ 2107-1107010-10 version is installed on VAZ 2103 and VAZ 2106 engines with an ignition distributor, which do not have a vacuum corrector.
- The DAAZ 2107-1107010-20 version is used exclusively on the engines of the latest VAZ 2103 and VAZ 2106.
The design of the VAZ 2107 carburetor looks like this:
- float chamber;
- autonomous idle system;
- dosing system;
- transition system of two chambers;
- idle shut-off valve;
- throttle valve;
- crankcase gas exhaust compartment;
- econostat.
You simply do not need more detailed information, since it is not useful for adjusting the VAZ 2107 carburetor. The carburetor of this car includes the following devices that provide and also distribute the combustible mixture:
- Support for starting and warming up the engine.
- Econostat system.
- Maintaining a stable gasoline level.
- Acceleration pump.
- Engine idle support.
- The main metering chamber, in which the fuel and air nozzles, emulsion tube, VTS atomizer, well and diffuser are located.
Before cleaning the VAZ 2107 carburetor and further tuning it, you must clearly understand that you should not disassemble those elements that normally perform their functions. In particular, you need to be very careful with the dosing system.
Description of models
The first VAZ 2107 was standardly equipped with a DAAZ carburetor In Russia, they were modified to meet the needs of the local automobile industry. DAAZ products had simple assembly, which subsequently affected their price. The given carburetor model was characterized by maximum simplicity and made it possible to provide good acceleration characteristics to the car. Initially, the space in the engine compartment was created specifically for DAAZ.
The VAZ 2107 carburetor is a complex, high-precision device, consisting of two chambers, one of which - the first is equipped with a special mechanical damper drive. It can be installed on any domestic rear-wheel drive car. The volume of the model in question is 1.5 and 1.6 liters.
Gasoline consumption when using DAAZ increases noticeably. But this is consistent with the car’s speed indicators, which are also increasing. And this is especially important when overtaking.
Drawing our attention to the model - “Ozone” - it is worth noting that this is a more modified version of the standard DAAZ. The new optimized mechanism had better environmental performance. Thanks to this, “Ozone” received its environmentally friendly name. In addition, it consumed much less fuel than the previous version, so for such an economical car as the VAZ 2107, the Ozone carburetor was considered the most optimal option of all possible.
Good maneuverability and speed of the car were given by a pneumatic valve located in the new carburetor and ensuring the efficiency of the second chamber. However, there was one “but” - even if the valve was slightly dirty, the second chamber stopped working. The speed of the vehicle immediately decreased. This was noticeable in the acceleration dynamics of the car and when the engine was running at medium speeds.
The Solex 21053 carburetor is no less popular among VAZ 2107 owners. At the moment, it is the latest development. Solex has a rather complex assembly, but at the same time it has a fuel reverse supply system, which makes this carburetor the most economical among the entire DAAZ line.
The carburetor mechanism has a larger volume compared to other models: 1.8 Solex versus 1.5, 1.6 other DAAZs. All these features tell us that this carburetor model is simultaneously designed for economical and fast driving.
Initially, Solex was created for cars with front-wheel drive. And yet, this carburetor can be installed on a VAZ 2107 without special modifications. Solex is picky only about the quality of fuel.
Important! The system may malfunction! In most cases, this is due to the fact that the air and fuel channels are clogged with dust. The solution to this issue will be timely maintenance of the carburetor.
All of the carburetors we list are installed on classic engines. If the size of your engine is not designed for the existing carburetor, then you will need to select and replace the jets. It is also worth adjusting the carburetor.
On the issue of non-standard carburetors, it is worth saying that in some cases, owners of “classics” resort to just such a solution. Without alterations and adjustments there is no question here.
“Solex” 21073 is a model designed for engines with a volume of 1.7 liters. The carburetor differs from previous versions by large channels and jets. Dynamic growth is guaranteed! But so does the subsequent expense.
The following non-standard model is installed on cars of the VAZ 2108 and 2109 series. “Solex” 21083 for installation on version 2107 will require certain modifications. Also, installing it will lead to the fact that at about 4000 rpm the engine will not be able to spin up any further. To install this carburetor model, you need to drill out the chamber diffusers. Then expand them. During the modification process, large jets are also installed. The result of such work can please you: fuel consumption will be lower, and the dynamics will exceed those of other models.
Refinement of the Ozone carburetor
The main problems of carburetor operation
So, in what cases is the Ozone carburetor modified? The main disadvantage of a carburetor is the unevenly distributed fuel entering the engine cylinders. Carburetor injection cannot create the necessary fuel-air mixture, which will be universal for any operating mode of the power plant. The problem with any carburetor is the stepwise preparation of the working mixture (gasoline + air). When you press the gas pedal, the engine gradually moves from idle to high speed, and then to medium speed, at which time various metering elements are connected or disconnected in the carburetor system. Due to such stepwise transitions, peculiar “dips” arise and the power of the power unit is lost due to the strong depletion or enrichment of the mixture used.
It is important that the working mixture during injection is distributed evenly and in equal quantities to all cylinders, but in reality this does not happen. This is due to shortcomings in the design of the intake manifold during its production.
A clear example of such a case is the domestically produced intake manifold, which was installed on VAZ cars.
The main drawback of the intake is the different lengths of the manifold intake ports. This design leads to uneven filling of the cylinders with the working mixture. In this case, engine power is greatly lost.
During the transition from low to medium and high speeds at medium loads, the 1st and 4th cylinders receive a mixture that is richer to a greater extent than the 2nd and 3rd. This is due to the operation of the 1st chamber of the carburetor in this mode. When you sharply press the gas pedal, the accelerator pump will again supply a large amount of fuel into the 1st chamber, the main part of which will then enter the first and fourth cylinders.
The designers of Solex carburetors were partially able to solve this problem by installing an accelerator pump nozzle in both chambers.
When the engine reaches medium and high speeds and the load increases, the 2nd chamber is activated and the rich working mixture enters the 2nd and 3rd cylinders. With such a mixture distribution, the engine operates unevenly, therefore, it will not be possible to accelerate quickly and smoothly. Torque and power are reduced, resulting in poor transmission performance and increased fuel consumption.
The carburetor problems don't end there; Another is the discrepancy between the intake manifold and head channels at the junction.
Some mechanics try to solve the problem by polishing the channels, hoping that such carburetor tuning will increase power and torque. Unfortunately, all efforts are in vain, since vortex flows form in the place where the manifold and cylinder head are connected. Thus, there is no point in polishing the channels, since this will not ensure uniform supply of the mixture to the cylinders.
Adjusting the rods
An equally important stage in the process of adjusting the “six” carburetor is performed through the transitions:
- Remove the air filter and its housing.
- Measure the distance between the central points of the tips, it should be 80 mm .
- To change the length of the rod, release the tip with a screwdriver and unscrew the lock nut with an “8” wrench, and then perform the adjustment by rotating the tip.
- Tighten the fasteners and install the rod in its original place, start the engine and press the gas pedal all the way. If the throttle does not open completely, the damper has a travel reserve.
When asked how to further adjust the carburetor on a VAZ 2106, experts recommend performing a few more simple steps:
- Remove the end of the longitudinal linkage and unscrew the locknut.
- Reduce the length of the rod, secure it and again check the degree of opening of the damper by pressing the gas pedal to the floor. The damper must be completely closed.
- If it is necessary to increase the rod length, you need to loosen the throttle cable.
Grinding the diffuser
It is recommended to start tuning a Solex carburetor by reducing the resistance to air flow in the intake tract. The factory-made diffuser has a lot of sagging and protrusions caused by poor casting quality and subsequent surface treatment. Because of this, parasitic air flows and turbulence arise, which interfere with the flow of the mixture into the combustion chamber.
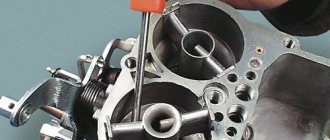
To correct the situation, you should disassemble the carburetor and visually inspect the diffuser. It usually looks like the one shown in the figure below.
Initially, it is necessary to sand all seams and protrusions that have arisen due to imperfect production technology. As a result of the modification, you should get a result as in the figure below.
At this stage, it is possible to complete the improvement of the passage of the fuel-air mixture, but as you know, there is no limit to perfection. Experienced car enthusiasts recommend not stopping only at polishing manufacturing defects, but giving the diffuser maximum aerodynamic characteristics. You can achieve good streamlining of the surface by giving it a shape similar to an oval or wing, as shown below.
By modifying the surface of the diffuser, you can increase the efficiency of the DaAZ carburetor by up to 20%. Eliminating an aerodynamic error changes the composition of the mixture, so after assembling the carburetor it is necessary to adjust it again.
Checking the condition of the strainer
It is necessary to fill the float chamber with fuel by pumping. This will close the shut-off valve, after which you need to move the top of the strainer, remove the valve and clean it with solvent. For optimal results, it is also recommended to use compressed air to blow out the valve.
This is interesting: Changing the oil in the Lada Vesta engine
If you decide to adjust the VAZ 2107 carburetor because the engine has started to run unstable, first of all, we recommend checking the strainer. Problems often arise due to problems in the fuel supply, which can be caused by a clogged filter.
Do not use a rag to clean the bottom of the float chamber. This will cause fibers to form on the bottom, causing the carburetor jets to become clogged. To perform cleaning, use a rubber bulb and compressed air.
A bulb is also used to check the tightness of the locking needle, since the pressure that appears as a result of squeezing this object with your hands approximately corresponds to the pressure of the gas pump. When installing the carburetor cover, you need to check whether the floats are set up. Significant pressure will be felt during installation. At this moment, the VAZ 2107 carburetor must be listened to, since air leaks are unacceptable. If you notice even a minimal leak, you will have to replace the valve body, as well as the needle.
The importance of carburetor modifications
Carburetors produced from the factory are designed to operate the engine on a forced lean mixture, which ensures maximum efficiency and environmental concern. Because of this, the standard carburetor does not allow the engine's power to be fully realized, and the car does not realize all its dynamic characteristics. Carburetor tuning is especially important when boosting the engine, since the need for a sufficient amount of prepared air-fuel mixture increases even more.
https://youtube.com/watch?v=so42voipmPM
Standard carburetor adjustments can affect idle speed, but set it up for optimal performance in the midrange. and even more so at high speeds it is not possible. At speeds above 4500, engine starvation occurs, since an unfinished carburetor is not able to cope with an air flow at a speed of about 120 m/s. As a result, a situation arises that an untuned carburetor strangles both forced and conventional engines.
Modifying the carburetor to reduce fuel consumption is an extremely rare operation. For the most part, it leads to failures when operating under load and unstable idle speed. This leads to a decrease in the reliability of the power system, so tuning the carburetor to reduce fuel consumption is not recommended.
Why do I adjust the carburetor myself?
Self-adjustments save money and time. There are types of work that cannot be done with your own hands without special equipment. But I am capable of servicing a carburetor, which does not have a complex design.
Therefore, I am happy to do this process myself, without outside help. After correct adjustment, there is a feeling of pride and satisfaction for the result obtained. My car runs like a clock, which is nice.
Source ru.megasos.com prosedan.ru vipwash.ru mylada.net make-1.ru
Setting up the carburetor VAZ 2107 float chamber
To adjust the float chamber, perform the following steps:
Check the position of the float and make sure that its mounting bracket is not deformed (if the shape has changed, the bracket will have to be aligned). This is very important, because otherwise the carburetor float will not be able to sink normally into the chamber. Adjustment with closed needle valve
Open the cover of the float chamber and move it to the side. Then you need to carefully pull the tongue of the bracket. You need to ensure that there is a distance of 6-7 mm between the cover gasket and the float
After immersion it should be between 1 and 2 mm. If the distance is noticeably greater, you need to change the needle. When the needle valve is open, there should be approximately 15 millimeters between the needle and the float.
To perform these steps, it is also not necessary to remove the carburetor from the engine.
Float adjustment
One of the main stages in setting up a carburetor unit. A high level will produce a “rich” mixture, and more of it will be supplied to the cylinders, but there will be no expected dynamics. Only fuel consumption will increase, as well as its toxicity.
The float tongue must be installed so that its stroke is no more than 8 mm. In some cases, the problem may be the needle valve. Then you need to remove the float, pull out the needle and check the patency of the holes.
