Most owners of the domestic small car Lada Kalina 2 often have questions related to the design of the head optics, its purpose and basic repair, maintenance and replacement measures, for example, how to remove the headlight.
As you know, headlights serve to illuminate the road surface and to indicate a vehicle in traffic. Modern optics have a block structure that contains lamps that perform different roles: low or high beam, turn signals, dimensions, etc. Today, headlights have become an attribute of safety when driving. And when replacing, a logical question arises: how to remove the headlight? Also, sometimes only the headlight glass needs to be replaced.
Maintenance and replacement of the rear light
To replace the lamps in the rear light of Kalina 2 station wagon and hatchback, you need to remove the entire headlight unit. To do this you need:
- Unclip the plug next to the seat belt bolt.
- Unscrew the nut.
- Open the seal window and unscrew the remaining fasteners.
- Pull out the flashlight.
- The lamps are pulled out by turning the base counterclockwise.
When replacing lamps in a hatchback body, carefully remove the nuts so that they do not roll under the trim. The missing part will rattle while driving and you will end up having to disassemble the entire luggage compartment.
The Kalina sedan has special compartments in soft upholstery for access to the nuts. There is no need to remove additional plugs.
To keep your car in excellent condition, you need to periodically replace lamps, clean optics, or install new ones. Removing front, rear headlights and foglights in Kalina does not require expensive tools or special knowledge.
Conclusion
Of course, you can replace lamps or perform other operations on a lighting fixture without removing the bumper, but this will require additional time and skill. Also, when carrying out such a procedure, without removing the device from the car, it is necessary to disconnect the battery.
If you decide to dismantle the headlight, then its installation should be carried out in the complete reverse order. Also, do not forget to apply sealant before seating the device in the socket. Before leaving, be sure to check its functionality. If everything works perfectly, then your Lada Kalina is ready for use, and will delight you during night trips.
How to disassemble a headlight on Kalina
Your VAZ: how to disassemble the headlight
Removing the headlight during its next repair is quite difficult. Especially for a driver who does not have relevant experience. However, you may need to do this at any time, since no car is immune from breakdowns.
If a certain element of a car light fails, you need to know exactly how to properly disassemble the device. These acts can be applied to various brands and models of cars (Vortex Tingo, VAZ 2110 and other cars).
Without proper experience, disassembling headlights is unacceptable!
How to disassemble spotlight: cooking tools
It is worth noting that the process of disassembling a car flashlight requires certain skills. In order to perform all the necessary manipulations, you must first prepare the following description:
- a set of matching screwdrivers;
- a fairly powerful household hair dryer (it heats up the sealant);
- sockets and keys;
- mounting knife (this tool is used to remove sealant from the headlight housing);
- sealing composition.
READ Replacement Rear Pads Gazelle Next
It is also important to properly prepare the conditions under which the headlight will be disassembled. The workplace must be thoroughly cleaned of possible contamination and other undesirable elements
In addition, it is necessary to ensure high-quality lighting of the workplace.
The process of disassembling the front and rear lights has some differences.
Video on how to disassemble a spotlight
How to disassemble a headlight: rules of procedure
It doesn’t matter which car the headlight breaks on (Kalina, Priora or any other car), the disassembly rules for the specified device look like this:
How to disassemble headlights
How to separate the glass from the headlights how to disassemble the light
lanosis How to disassemble headlights
on the glass branch of Lanos village
lights
.
- The sealant should heat up evenly around the entire perimeter of the lamp. The maximum heating temperature of the sealant is 3000 degrees. Otherwise, the device may be damaged.
The distance between the hair dryer and the headlight housing should be 20 millimeters. This value is considered optimal.
However, you should be guided by the information provided in the vehicle manual.
READ How to Remove the Rear Door Trim of the Lacetti Sedan
How to disassemble a headlamp: working with a headlamp
When using a hair dryer, the sealant in the headlights heats up well
When disassembling headlights on a foreign or domestic car (VAZ 2107, 2109, 2114), the fender sheet must be on the correct side. After this, you need to remove the cover of the opening of the bracket on which the radiator is attached. Then you need to remove the gaskets and strengthen the bumper.
After completing these steps, the headlight is removed. The following manipulations are performed:
- heating the sealant;
- detaching the glass from the body.
When the above operations are completed, you can directly replace the required parts. When assembling the flashlight, make sure all components are installed correctly.
How to disassemble a headlight: working with backlight
Tail lights, compared to front lights, have differences in design. Below is relevant information about the grant.
Thus, the disassembly and disassembly of the rear light is carried out according to this scheme:
- removing the safety brackets along with removing the edge of the lamp;
- heating the sealant with a powerful hairdryer;
- removing softened sealant with a special knife;
- Remove the glass from the headlight housing.
Before removing the flashlight, it is important to disconnect the power source from the machine to eliminate the possibility of a short circuit. READ Replacing License Plate Light Bulbs Passat B6
READ Replacing License Plate Light Bulbs Passat B6
How to disassemble fog lights
Everything is quite simple here. The lamp must be removed from the car. Then remove the sealant using a high-powered hair dryer and a knife attachment. After this, you need to disconnect the glass from the body. This can be done with a screwdriver or knife.
Removing the sealant from the rear lights can also be done with a hairdryer.
The battery must also be disconnected when removed.
Rules for adjusting light
After installing the headlight, you need to adjust the luminous flux. You can do this yourself or by contacting a specialist. When making adjustments yourself, you should direct the light from the headlight to the wall with the markings. There should be 5 meters between the car and the wall.
We measure the distance from the ground to the car headlight (H), draw a vertical line on the wall parallel to the center of the car, then draw a horizontal line equal to the height H+10 cm. Set the Kalina headlight adjustment switch to position 0 and turn on the lamps. Using the adjustment screws, we adjust the luminous flux as shown in the figure.
Replacing a headlight on a Kalina with a little skill and patience is a simple process, although it takes several hours. Basic recommendations: put screws and bolts in one place to prevent their loss, check the functionality of the lamps before assembly, do not be nervous.
Technological process of removing headlights on Grant
Many car owners are wondering: how to remove the headlight of a Lada Grant? Easier than it seems. To begin with, you will need two keys from the tool - 8 and 10. And now you can go directly to the process itself:
- To begin with, we remove the “negative terminal” from the battery so as not to accidentally short-circuit anything.
- We are dismantling the front bumper, since it is impossible to get to the lower mount otherwise.
We removed the bumper and took out the headlight (I ran a little ahead)
It is worth remembering that when the lower mounts are removed, the optics should be held so that the upper “ears” do not crack under load when dismantling occurs.
Let's sum it up
Some owners, in order to give the appearance of their Lada Kalina individuality, are inclined to modify the headlights. This means painting the outer bulb of the body, gluing the eyelashes, pasting with a protective film, tinting, also replacing the headlight glass, etc. In any case, the headlight must be fully operational and demonstrate its functionality in any driving situation. It will be useful to have several lamps in stock. And now you know how to take it apart.
Replacing any of the lamps in the Lada Kalina headlight is not at all difficult. Our step-by-step illustrated instructions will help you cope with this task. There are differences in the procedure for replacing lamps in the headlights of cars manufactured before and after 2013, which we will show.
LADA > Kalina
Replacing lamps in a car headlight since 2013
Removing the headlight
Unlike older Lada models, in which dismantling the lighting fixture took, at most, 10 minutes, Kalina has a more sophisticated system. In order to remove the headlight, first of all, you have to remove the front bumper. Once this procedure is completed, you will have access to the bumper support beam. It is not necessary to remove it completely. If you need to remove only one headlight, unscrew the beam mounting nuts only on the side where the headlight you need is located. Now you can go directly to the lighting fixture itself. To dismantle it, first unscrew the two lower fasteners located under the power beam. Next, we move on to the upper fastenings. In order to unscrew them, you will need an 8 wrench and a Phillips screwdriver.
The headlight is now completely free and can be removed from its socket. But, first do not forget to disconnect the electrical plug with the wires. Also, when removing the part, be especially careful, since it is often glued to the sealant, and if you try to rip it off suddenly, you may lose the headlight on the floor.
Operations for removing the headlight unit Lada Kalina
1. Disconnect the “-” wire from the battery.2. Remove the front bumper from the car, see the article “Removing the front bumper on a Lada Kalina car.” If you do not remove the bumper, it will not allow you to remove the headlight from the car.3. Under the bumper there are two screws securing it, unscrew them.
4. Also unscrew the bolt and screw of the upper headlight mountings.
5. Disconnect the connectors of the electrical wiring harness suitable for the headlight unit and the turn signal on it.6. Now you can remove the headlight from the car.
7. Install the headlight unit on a Lada Kalina car in the reverse order. To ensure uniform clearances between the headlight unit and the fender, loosen the fastening bracket nut.
The procedure for dismantling the lights
You should know that the Lada Kalina 1118 flashlight system consists of:
- housings;
- glass (polycarbonate);
- lamps;
- reflector;
- wiring;
- lamp plugs;
- decorative inserts (masks).
As for the ease of removal and subsequent replacement of the lamp on the 1118 model, the process usually involves removing the front bumper. After this, the screws on the top and bottom of the lighting fasteners become accessible. After dismantling them, you can immediately remove the headlight unit, not forgetting to first remove the blocks with wires.
Removing the front optics
To do this you will need to use:
- key for 8 and 10;
- a set of screwdrivers (flat and Phillips);
- new lighting system component.
Set of tools
In order to adjust the block lighting on the Lada. You will need to complete the following steps:
- Remove the air filter housing, as well as the coolant unit.
- Remove the PTF plug using a screwdriver.
- Unscrew the bolt on the lower fastener of the lighting component using a 10mm wrench. Insert your hand into the PTF hole.
- Remove the bolts located on the upper fastener of the light block component. They are located closer to the radiator. Use the key at 8.
- Unscrew the screw securing the product to the car fender using a large Phillips screwdriver.
- Expand the Lada Kalina headlamp so as to move the part closest to the radiator closer to the car engine. This measure will allow you to remove the lower fasteners from the seat.
- Remove the lower iron fasteners of the headlight. To do this, you will need to remove a couple of bolts with a short head.
Removing the headlight on Kalina
Remove the car light by moving towards you. At the same time, try not to damage the paint layer, since during dismantling the lamp will be located as close as possible to the bumper and fender.
After this, you can install a similar device in reverse order.
Reasons and methods for replacing light elements on Kalina
Lada Kalina first generation: technical characteristics of the model. Lada Kalina station wagon weight
You may need to replace the headlight on a car of this model for a number of reasons. Impacts to the body from other drivers or animals, careless driving on uneven roads, rough repairs of parts under the hood can damage the integrity of the fasteners. Light elements become loose and can fall out at the most unsafe moment on the road. Headlights that do not fit well in the grooves must be replaced.
Replacement is a simple process if you approach it responsibly and without nerves. For an experienced master, this operation takes about 3 hours. But even if you have never encountered such a situation before, these instructions will help you replace the headlight without any problems.
The entire process of removing the Kalina headlight can be divided into 5 main stages:
- unscrewing the bolts from the crankcase protection;
- removing the license plate (will allow you to get to the lower radiator grille);
- removing the lower and upper radiator grilles;
- unscrewing the front bumper (you will have to remove a large number of bolts and screws);
- removing the bumper amplifier (it interferes with dismantling and putting back the headlight).
When the screws holding the headlight on top and bottom are unscrewed, you should remove its housing, first carefully clamping all the wires. During repairs, it is recommended to inspect the inside of the bumper and the metal underneath for signs of corrosion. If such formations exist, you need to clean them and coat them with a rust converter.
Which optics is better to choose
While using the machine, the lights are subject to sudden temperature changes, impacts from stones and small grains of sand. These factors negatively affect glass, reducing its transparency, worsening light characteristics.
High-quality headlights that meet safety requirements are installed from the factory. Unofficial replacements are equipped with xenon lenses, “angel eyes” and modified reflector geometry. These lights look beautiful, but wear out faster due to poor quality materials and can fog up in humid weather.
When choosing new optics, it is better to trust the official
When purchasing, it is important to clarify the modification of the body and the year of manufacture of Kalina. Depending on the configuration, there are darkened masks or improved lighting characteristics
Low and high beam optics
Depending on the body type, Kalina has different parts installed:
- sedan, hatchback – standard optics;
- sport, station wagon - are equipped with a more elongated reflector with an increased area to increase the lighting area by 20%.
To connect improved optics to Kalina, you do not need to lay additional wires or change contact connectors. The optics are no different in mounting points and shape.
When purchasing flashlights, you should pay attention to original parts with improved performance. This will improve the characteristics of the beam without interfering with the wiring or altering the standard fasteners
Fog lights
When buying new PTFs, it is better to choose from original parts. Standard lights are equipped with durable glass and a high-quality reflector that directs the beam in accordance with GOST.
Fog lights for Kalina are produced by:
- Bosch;
- "Kirzhach".
The models differ in the shape of the glass, but there is no difference in quality. The headlights are connected to the standard wiring and installed in the mounts on the bumper. There are no fog lights in the basic trim levels. To connect them, you will have to additionally purchase a button for the interior, a PTF relay, and remove the bumper plugs.
In stores you can find modernized flashlights with lenses for gas-discharge lamps or LED modules. Such products are not certified for use in Kalina because they do not meet transport safety requirements. For such parts you can receive a fine and an order to eliminate the malfunction within 10 working days.
Types of PTF for Kalina
The automotive industry offers a wide range of fog lights. They are selected for a specific make and model of car. According to the form of PTF for the Lada Kalina car there are:
- oval;
- round;
- square;
- double;
- recessed.
Different types of PTF fog lights differ not only in manufacturer, but also in configuration, technical parameters, and quality of manufacturing of optics. On average, fog lights cost 1,500 rubles. As for manufacturers, it is important to install the following headlights for the Lada Kalina:
- ProSport. A Chinese brand that produces parts and components for cars on the Russian market;
- "Ray". Manufacturer of spare parts similar to German ones, but the quality of the product is an order of magnitude lower than that of the original;
- "Kirzhach". High-quality lens-shaped headlights with convex glass with a good level of brightness and range of light;
- Bosch. PTFs with the highest technological parameters have flat glass and excellent quality.
Fog lights Bosch, Hella
So, all of the above headlights produce fog lights suitable for the Lada Kalina car. The standard fog lights are equipped with an H11 socket. During their installation, no special fastening or other manipulations are required. Having removed the old PTFs, following a simple algorithm of actions, you should install new headlights. For example, Hella headlights, which, by the way, are an excellent option for additional car lighting.
Headlight design for Lada Kalina
Headlight unit installed on a car
Like most new generation cars, VAZ 1117-1119 models are equipped with headlights of a simple design. Let's look at what elements are included in this node:
- Outer glass that protects the light bulbs and prevents water and dirt from getting inside.
- A plastic case to which all the main elements are attached.
- The rubber seal between the glass and the body provides good water and dirt resistance.
- Lamps for signaling turns, as well as low and high beam.
- There is a plastic reflector installed inside the case, which has a mirror surface and reflects the light of the bulbs.
Each headlight unit is equipped with light bulbs, which are well, one might say tightly, fixed in the housing, which ensures their resistance to vibration.
Headlight diagram with explanation
Dismantling and repair
In the event of a minor traffic accident, when the headlight housing is not damaged, only the glass can be replaced. To do this you will have to dismantle the element. How to do it?
- Remove the front bumper.
- Disconnect the connectors of the wires supplying power to the headlight.
- Unscrew the lower fasteners.
Unscrew the lower headlight mount
Unscrew the top fastenings of the headlight unit
After installing the headlight in place, be sure to re-adjust it so as not to blind oncoming traffic and not “shine into the milk.”
Glass repair will take a maximum of half an hour.
We take out the headlight towards ourselves
So, let's move on to the sequence of actions.
- Carefully remove the rubber seal.
- As practice shows, it is glued and to dismantle it you will have to cut through it with a thin knife.
- When the glass and the body are separated, it is necessary to clean off the old seal and glue residues.
Disconnecting the headlight housing and glass
The repair has been completed and the headlight can be installed in the reverse order.
The installation and repair of the Lada Kalina headlight is quite simple and dismantling and installing the element will not take much time. Of course, if the housing is destroyed, the entire element will need to be replaced. As experience shows, if the fastening elements, the so-called “ears”, break, the headlight does not change, and the damaged part is simply “soldered”. It's much cheaper than replacing an entire element.
Replacement of glass in the headlight unit of a Lada Kalina car (for Bosh headlights)
Lada Kalina hatchback red dragon logbook replacing the heater radiator without removing the panel and steering wheel
1. Remove the headlight unit from the car, see the operations described above2. Remove the six metal rivets that hold the glass in place. You can remove the rivets using a flat blade screwdriver.
3. Remove the glass.3. Install new glass on the headlight unit. (The seal between the glass and the headlight housing is sealed with a rubber seal. If the rubber has lost its plastic properties, use a sealant. Apply a thin layer to the place where the glass contacts the seal. Replace the glass, remove excess sealant.4 Install the metal clips in their places. Reinstall the headlight.
In head optics, low beam lamps most often have to be replaced. For a Lada Kalina car, the low beam lamp is a halogen lamp with an “H7” socket, the power of which is 55 watts (no more). Osram bulbs may come from the factory, but others will do. After replacement, the filament will occupy a new position, and the headlight adjustment may be lost. So, checking the settings, and, if necessary, adjusting the headlights is carried out immediately after replacing the lamps, which on the Lada Kalina is done without dismantling the headlight unit.
Tuning options
In order to change the appearance of optical instruments, they are tuned. The following types of interventions are considered the most common:
Installation of LEDs. In order to get rid of the unpleasant yellow color of headlights, LEDs are used
It is extremely important not to reverse the polarity, as this will blow the fuse. Connecting new lamps depends on their type
In some cases, it is necessary to tear the base off the diode and move its antennae towards the holes. Headlight tinting. This can be done in two common ways. The first one is to use black tint film. Just one layer of this material is enough. Black spray paint is also used. In order to create a really good tint effect, you will need to apply several layers. In some cases, the color used is not black, but a shade that is directly similar to the car body. After such tuning, the visibility of the road surface at night deteriorates. Cilia. A special film is used for this. Oracal 970 is most often used. This material is publicly available, so it can be purchased not only in highly specialized stores, but also in many others. Eyelashes can be either rectangular or curved. First, make a stencil out of cardboard and try it on the body of the car. After this, you can cut the elements directly from the film. In order to stick them on later, a soap solution or special products are used.
Tuning of optical devices of Lada Granta is done both with your own hands and at a service station. Additionally, you can install bi-xenon or other types of headlights on your car that differ from the standard ones. No special skills are required to install the lens. It is enough just to correctly remove the optics without damaging its elements.
Grant's optical devices differ significantly from many other vehicle headlights of this brand. This applies to the design itself, the lamps used and many other features. That is why it is necessary to understand not only how to operate these devices, but also what possible malfunctions may occur with them. In this case, the use of flashlights will be correct, long-lasting and safe.
Granta and Kalina headlights are considered non-separable. If a crack appears on the glass, the headlight unit is replaced as an assembly. However, with a strong desire, it is still possible to disassemble it. Let's look at how to remove the glass and headlight mask with your own hands. The process is shown using the example of a Lada Granta headlight. On the Lada Kalina 2 headlight, all actions are performed in the same way.
Required
: remove the headlight, prepare a Dremel (disc diameter 20 mm), sharp knife.
Headlight glass mounting diagram:
The sealant that holds the original headlight glass in place is heat resistant. That is, you won’t be able to loosen its “grip” by heating it with a hairdryer or in the oven. In addition, there are four fastening brackets on the edge:
How to replace headlight glass
:
- Seal the glass with masking tape to prevent damage during work.
- We cut off about 7 mm of the U-shaped fastening (using a Dremel), and then remove the remaining sealant (photo No. 1).
- We cut off about 2 mm of the sealant between the glass and the plastic using a Dremel (photo No. 2, color green).
- We remove the remaining sealant using an L-shaped blade (you can bend an ordinary knife after heating), photo No. 3.
When reassembling, we use a transparent glass sealant (for example, ABRO).
What it looks like in practice:
The process is also shown in the video:
How to remove a mask from a headlight
:
- The inner mask is attached using a spring mechanism, which is connected to a hydraulic corrector.
- The outer mask is held in place by 4 Torx screws.
Now it becomes possible to install powerful LED or flexible DRLs. Have you ever had to disassemble the headlights on a Grant or Kalina yourself? How did you manage to do this?
Step-by-step replacement instructions
Each H7 standard bulb has an iron base, which is pressed to the headlamp with a wire clamp. To bend this bracket, just get close to the plane of the headlight from behind. Let's open the hood and see what exactly will bother us.
Engine compartment of Kalina-2 (VAZ-2192, 2194)
Behind the headlight on the right is a washer reservoir. It is dismantled like this: disconnect the electric motor terminals, tighten the plug harder, find one nut and one fastening bolt. The fastening elements are unscrewed with a 10mm wrench, then the tank is placed on the engine. Next we could look at how to remove the headlight on Kalina-2, but in this case this is not required.
Before performing any manipulations with electrical equipment, always disconnect the negative terminal of the battery. It is better to connect this terminal last (before closing the hood). Be careful.
Replacement sequence:
- Remove the rubber cover covering the low beam lamp compartment;
- Disconnect both terminals from the lamp contacts;
- The fastening bracket is removed from the grooves by first pressing on it, then the bracket is moved to the side;
- They take out the lamp, install a new one in its place, and return the bracket to its place.
Next, perform steps “2” and “1” in reverse order. The connection diagram is not important - there are only two contacts, and both go to the filament. Now, if we connected LEDs, then everything would look more complicated.
The bracket presses the cartridge to the plane of the headlight
When installing a halogen light source, you must remember: the surface of the lamp glass must be perfectly clean. Do not allow grease marks to remain on the flask. Installation is carried out using only cotton gloves. The glass of the flask is cleaned with industrial alcohol or Secunda.
Replacing head lamps
Each lamp has its own resource, the value of which depends on many factors. Over time, devices break down and require replacement. And then the question arises: how to disassemble the headlight?
The replacement procedure is simple, but before that you need to choose the right lighting devices from the mass of products offered on today's market. Although sometimes all you need is to replace the headlight glass.
So, if the headlights are purchased, then we change:
- Remove the protective cover from the headlight housing. It's rubber, so it's easy to pull off if you pull on one of the three tags.
- Disconnect the power connector.
- Release the spring clip.
- How to remove the headlight? We take out the lamp and install a new element in its place.
- If contact occurs, it is necessary to wipe the surface of the flask with a cloth moistened with alcohol.
- Changing side lamps
- We also remove the cover and disconnect the corresponding cartridge from the on-board network.
- We remove the lamp and install a new one in its place.
Replacing low beam lamps
First you need to prepare for high-quality work. Prepare a new lamp (one or two as needed), the necessary tools (keys, screwdrivers, pliers), gloves (preferably cotton), a clean cloth and a bottle of alcohol.
Before you begin replacing the low beam lamp in a Kalina car, you must do the following. Firstly, it is advisable to place the car on a flat surface, turn on the parking brake, and for safety reasons, put blocks under the wheels of the car to prevent it from rolling. Next, open the hood of the car. After this, you should disconnect the wire from the negative terminal of the battery so that the wiring does not short circuit. To replace the lamp in the right headlight unit, you must remove the washer reservoir.
You can replace the low beam lamp after the entire optical unit of the headlight has been removed from the car, but we will look at how to replace the halogen lamp without removing the lighting fixture from the car body.
Procedure for removing the low beam lamp
- By pulling one of the petals of the rubber plug, remove it from the low beam headlight;
- We remember, or better yet, write down the correct location of the wires suitable for the halogen lamp, disconnect them;
- Carefully remove the spring clip holding the lamp. Press on the protruding part of the latch and disengage it; To avoid having to completely disassemble the headlight, the latch should be handled gently so that it does not jump out of the mount due to a sudden movement and does not fall inside the optical device.
- Pull out the burnt out lamp.
Installing a new halogen lamp
It is advisable to carry out the process of installing a new halogen lamp with gloves, since contact of the glass bulb with the skin of the fingers will subsequently cause the lamp to darken and fail. If the glass surface of the lamp does come into contact with your skin, wipe it with a swab soaked in alcohol.
Lamp installation procedure
- By inserting a lamp into the headlight hole? make sure that the protrusion of the lamp fits into the grooved recess of the mounting socket, this way the lamp is secured against turning;
- Carefully install the lamp mounting clip into place. We take into account that the antennae of the latch lie near the center of the base, where the contact group is located.
- Hold the lamp fixing clamp until it snaps into place;
- We connect the wires, install a protective rubber cap, connect the battery and check the correct operation of the lighting fixtures.
Video help on replacing low beams
https://youtube.com/watch?v=z1IyX4njizY
Replacing a damaged low beam lamp on a Lada Kalina car is easy to do. Follow the instructions carefully, and you will make sure that the occurrence of such a breakdown will no longer cause you panic or indignation. And having spare bulbs in your car will make your trips pleasant and safe at any time of the day.
Lighting system design
Optics for Kalina are manufactured at two factories:
- Bosch;
- JSC "Avtosvet"
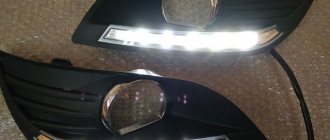
The headlight design of the Lada Kalina is no different from most cars. The flashlight has low and high beam modules, blocks with turn signals and side lights. In the new Kalina body, the dimensions also play the role of running lights.
The following lamps are used in Kalina optics:
- low – H7, 55W;
- long range – H1, 55W;
- direction indicators – PY21W, 21W;
- Dimensions – W5W, 5W.
Light elements from the dimensions fit into the license plate lighting module on the trunk lid. Since 2013, modernized optics have been installed in Kalina, where part W21/5W is responsible for the clearance and daytime light. The fog lamps are equipped with H11 lamps with a power of 55W.
Features of headlights
As standard, Lada Kalina headlights are combined into blocks, which are divided into three sections, providing:
- low beam;
- side and main beam;
- turn indicator.
When turning on the low beam, only low beam bulbs are used. If you turn on the high beam lighting, a complex consisting of high beam and low beam lighting at the same time lights up, each with a power of 55 W. At the front of each section of indicators there are specialized transparent lenses.
The turn signals glow orange and have a power of about 20 watts.
The headlights are adjusted using a specialized corrector. The electric headlight corrector has an electromechanical drive. The standard adjustment system contains a device mounted directly on the dashboard itself and a specialized wire that connects the electrical wires in the headlights. To adjust the electric headlight corrector, you will have to disassemble them.
Replacement or removal of the lighting system occurs for various reasons. Among the most common are:
- headlight tuning;
- installation of a new kit instead of the old one;
- need to adjust the electric headlight leveler.
Before removing a headlight when it needs to be replaced, it is advisable to identify the company that manufactured the part. To do this, you need to carefully examine the glass. If the AL symbols are present on it, this lighting complex was manufactured by Bosch.
Some headlight models from this manufacturer are made of polycarbonate and do not have a low beam lamp cap. If the lamp used for low beam in a polycarbonate headlight is equipped with a cap, it is most likely made.
Headlights
Replacing a headlight yourself will require preparation of the car and tools. To work you will need:
- set of wrenches;
- screwdrivers;
- rag;
- gloves to protect hands.
For ease of work, you need to wash Kalina in advance and clean the space in the garage. To replace the headlights, you need to remove the bumper and unscrew several mounting bolts.
Dismantling
Steps required to remove headlights:
- Open the hood lid.
- Disconnect the battery terminal.
- Pull out the clips from the front of the fender liner.
- Unscrew the radiator grille fasteners and remove it.
- Unclip all the clips along the contour of the bumper and unscrew the screws.
- Remove the bumper without scratching the corners of the fenders and headlights.
- Disconnect the optical power plug.
- Remove the two screws holding the light on top.
- Remove the lower headlight bolts.
- Carefully remove the part.
Repair
To disassemble the Kalina headlights, they will need to be dismantled. You can repair the Kalina headlight by polishing the glass, replacing it, washing the internal parts, or restoring the reflector.
To remove the glass you will need:
- Dismantle the part.
- Heat the headlights in the box using a hair dryer.
- Tear off the glass.
- Carry out all the required work and assemble the lantern using a special sealant.
To disassemble the headlight, it will take several hours, depending on the experience of the car owner. Replacing Kalina's headlight glasses will improve the exterior and increase light transmittance.
While working, it is important to follow safety precautions, do not leave the hair dryer unattended and use gloves
Installation
Before installing the lights, you should wash the mounting points and mounting space. Installation is carried out in the following order:
- The power plug is connected.
- The Kalina headlight mounts are aligned and secured with standard bolts.
- The bumper is hung from the front and screwed onto self-tapping screws.
- The radiator grille is installed.
- The left and right fender liner clips are being returned.
In versions with fog lights, you will have to additionally connect the connectors to the lamps when installing the bumper and disconnect them during removal.
Fog lights
PTFs for Kalina are installed only on expensive trim levels. However, all wiring is installed from the factory and there are “ears” for mounting on the bumper. To install headlights, you will have to purchase a power button, frames in body color and a relay.
Installation of fog lights:
- Use a screwdriver to remove the plugs under the PTF.
- Screw the lights into the standard recesses.
- Snap frames to hide excess cavity.
Lada Kalina Cross uses matte black plugs that do not require painting. When installing on your own, you should buy bolts for fastening the headlight in advance.
How to connect the electrical part
Connecting the PTF to the standard wiring does not take much time. To search for the braid, you should inspect the area of the spar at the entrance of the main beam. The PTF plug is taped to the wires with electrical tape.
Fog lights Kalina 2 are often equipped with detailed instructions and an additional switch that must be installed instead of the old module to turn on the light. Connecting to pre-laid wiring does not take much time and does not require laying additional contacts.
If there are no power cables in the braid, you will have to independently pull the wires into the cabin, connect them to the connector, fog lights with plus and minus, and connect them through a relay. A detailed description of the connection is included with the part in the form of a diagram.
During the installation process you will need:
- insulating tape;
- copper wires;
- corrugation;
- connectors suitable for lamps.
When installing wiring, disconnect the battery and strictly follow the instructions.
Which xenon is better to choose?
There are a lot of tempting offers on the car market today.
However, when making a choice, you should always first pay attention to the manufacturer. The most budget option is considered to be xenon from China (about $40 per set), and the elite category is completed by German manufacturers - Bosch, Osram, Hella (up to $150 per set)
Experienced car owners do not recommend buying cheap "China" cars due to frequent cases of rapid combustion of ignition units, changes in the color of the lamp, or frequent blinking of the light. As an alternative to the “average” one, you should take a closer look at the Korean xenon Sho Me, which is famous for its low defect rates and works properly in all weather conditions. Judging by the reviews, such xenons can remain on a car for about 10 years without any complaints from drivers.
Secondly, it is necessary to take into account the glow temperature (TC). The lowest threshold is 3000 K. The higher this indicator, the shorter the length of the light beam. For example, xenon with TC = 3000 K has a yellow light, while 4300 K is a white soft light, which is considered the most suitable for installation, therefore it is installed on the car at the factory.
Not every car is standardly equipped with good optics, which allows the driver to feel confident on the night road. Owners of inexpensive brands modify their headlights themselves, making them more modern and bright. Lenses are great for these purposes. Moreover, installing lenses in headlights is available to everyone.
Adjustment features
Since Lada Kalina is a representative of the budget segment, it is equipped with a minimum of required lighting devices. Here we focus on head optical devices. Headlights allow the driver to have sufficient visibility when driving, and also serve to identify a specific car on the roadway.
This is interesting: Repairing or replacing a caliper on an Audi A6
Adjustment of the Lada Kalina headlight beam is carried out using a specialized device during a technical inspection. Mechanics advise owners to periodically check the correct beam and adjust the headlights (if necessary) and if necessary, know how to adjust the headlights yourself. The indicated procedure can be carried out independently.
The settings of the Lada Kalina lighting devices are interconnected with the condition of the load-bearing elements of the chassis, lamps and tire pressure. Before adjusting the lighting devices, it is recommended to check the points indicated here to ensure they are in good condition and that the indicator (pressure) is correct. If there are deviations from standard values, then the identified deficiencies should be eliminated immediately. For example, the pressure parameter should be the same on both sides of the car. Darkened lamps will also need to be replaced with new analogues.
To adjust the optics in the Lada Kalina, the owner will need the following tools:
- cardboard sheet;
- five-meter tape measure;
- "hexagon" (6 mm).
Adjustments should be made in a dark box or at the appropriate time of day. Also one of the main conditions is the presence of a vertical wall. We install the car on a level area five meters from the designated structure. We adjust the corrector to the zero position.
A cardboard sheet is required to periodically block the beam of headlights. The adjustment process itself is carried out using a hex key with a dimension of 6 mm. The light beam of each headlight is individually compared with a special circuit. Here it is necessary to achieve the correct direction of the beam, which will allow the driver not to dazzle oncoming traffic participants in the dark.
About the design and purpose of headlights
In Lada Kalina 2, the headlights are endowed with their own design features. Each headlight unit contains three sections that perform the following functions:
- road lighting in low beam mode;
- the same, only in long-range mode;
- dimensions lighting;
- direction indicators.
Headlights must be adjusted correctly, otherwise they can cause not only the driver, but also other traffic participants a lot of inconvenience. Correctly adjusted optics will allow you to confidently illuminate the side of the road and will not dazzle oncoming drivers.
By activating a special switch in the interior of the Lada Kalina 2, the driver turns on the low beam mode. If the same handle is switched to the high beam mode, then in parallel with the switching on of the corresponding lamps, the lighting devices responsible for the low beam also remain active.
The turn signal lamps have bright orange bulbs, and the section housings have transparent lenses.
In Lada Kalina, the headlight units are equipped with electromechanical drives, which makes it easy to adjust the light beam depending on the load on the body and the road situation. A special regulator is located on the panel in the cabin, and the drive mechanism is in the headlight.
When assembling the Lada Kalina body, the manufacturer uses headlights from such well-known manufacturers as Bosch and Avtosvet. To find out which brand produced the headlight for a particular car, you should carefully examine the body of this optics. The “AL” symbol will indicate that the headlight was produced in “Bosch” (Russia). This brand uses material such as polycarbonate. This headlight model does not use a cap that would be visible above the low beam bulb.
Avtosvet products are also made of polycarbonate, but the design already includes the specified cap.
Having disassembled the headlight, the owner of the Lada Kalina can discover the presence of many parts and other elements in it, including:
- wiring;
- lamps and reflectors;
- glass;
- fastening brackets and plugs;
- drive mechanism, etc.
Thanks to the active work of the manufacturer's engineering corps, the headlight design is constantly being improved. This is how neon headlights appeared in the Lada Kalina arsenal. Although their light transmittance is slightly lower compared to standard options, however, during testing, this modification of optics demonstrated enviable results.
Next, we will tell you how to remove the headlight and replace it.
Replacing the High Beam Bulb Kalina
How to replace a low beam lamp on a Lada Kalina
During the daytime, every car owner relies on daylight, vision and reaction. But with the coming of darkness everything changes
Particular care should be taken at this time, as tragedies often occur due to negligence when visibility is poor. To prevent this, the headlights must be in good working order
If they don't work, no movement can be made. Even if you want, it won't work as the visibility will be zero
So, it is very important to make sure that the light is flawless and shines brightly
How to replace the low beam lamp Kalina hatchback, sedan, truck
Change is not easy. You do not need to have special knowledge or abilities. Even an inexperienced motorist can cope with this task. The only thing is to act one by one and correctly. So, replacing a lamp consists of the following steps:
- First you need to open the hood.
- Then turn off the power by disconnecting the battery terminal.
- The washer reservoir should also be removed for convenience.
- Then the rubber cover is removed.
- Later, the light bulb must be removed by squeezing the retainer with your fingers.
- Then he pulled out the bulb and the terminal turned off.
This ends the procedure
It is very important to understand how the lamp was installed and what wires were connected to it
Abstract of replacing light bulbs High beam
Right H1 headlights on viburnum
2, on the left farcolb far away.
Replacing the H1 high beam lamp from VAZ. Lada Kalina 2
replacement
lamp closed World
H7.
Lada Kalina
.
Otherwise, you will not be able to connect the new headlight correctly, which will require you to contact a specialist. If you feel that you cannot do this job, it is best to immediately take the machine to a technical service where all the procedures will be carried out for you. Of course, you have to pay for this, but the result will be maximum.
Install new: sequential instruction
The procedure for removing and installing a headlight on the right or left side is not much different from each other
It is only important to strictly follow the instructions. When installing a new light bulb, you should only hold it as a base; You can't touch it with your hands
Once removed, it can be removed completely.
Please note that the Lada Kalina (16-valve engine) requires a bulb with an H7 socket. Install the new one as follows:
- Adjust the seat so that the protrusion on the base aligns with the groove on the headlight. This needs to be firmly fixed. Only then will it become clear that the protrusion has fallen into the groove;
- press the clamp onto the lamp so that the center of the base is between the antenna antennas;
- lock the latch in place;
- Attach both wires to the latch and close the lid tightly.
After completing this procedure, you need to turn on the headlights from a close distance and check their operation. If everything is fine, then the installation was completed correctly. Otherwise, you will have to take your car to a service center and pay money for it. Lamps should only be purchased in specialized stores. It is advisable to give preference to well-known manufacturers and models with a guarantee. Osram H7 12V 55W headlights for Lada Kalina Cross are very popular today.
Poor quality headlights should not be stored or purchased as they will not work for long and will require frequent adjustments or replacement
It is important to understand that not only your safety, but also the safety of the pedestrian depends on these light bulbs. It is especially important that the lighting is of good quality at night to avoid tragic consequences
There is a special offer on our website. You can get a free consultation with our corporate lawyer by simply submitting your question in the form below.
Replacing head lamps
Each lamp has its own resource, the value of which depends on many factors. Over time, devices break down and require replacement. And then the question arises: how to disassemble the headlight?
Dimensions Kalina
Fog lights Kalina
The replacement procedure is simple, but before that you need to choose the right lighting devices from the mass of products offered on today's market. Although sometimes all you need is to replace the headlight glass.
So, if the headlights are purchased, then we change:
- Remove the protective cover from the headlight housing. It's rubber, so it's easy to pull off if you pull on one of the three tags.
- Disconnect the power connector.
- Release the spring clip.
- How to remove the headlight? We take out the lamp and install a new element in its place.
Attention! When replacing a halogen lamp, avoid touching the bulb with your hands. This may damage the device
Over time, greasy fingerprints will cause the glass to darken, causing the lamp to overheat and eventually burn out.
- If contact occurs, it is necessary to wipe the surface of the flask with a cloth moistened with alcohol.
- Changing side lamps
- We also remove the cover and disconnect the corresponding cartridge from the on-board network.
- We remove the lamp and install a new one in its place.
Bi-xenon installation
How to remove a headlight on a Priora
With their own hands, car enthusiasts can install bilens into the lighting device. The first step will be to acquire the necessary elements
Attention should be paid only to those products that can easily fit into the cavity of the Kalina headlight. For example, if you buy a G-5 kit, you will have to cut the lenses. Work begins with dismantling and disassembling the headlight
Then, using a file, they cut the seat in the shape of a cone, due to which the lens will fit into the body by about a centimeter. It is necessary to remove the cap so that it does not block the flow of light, and then mount the lens in the prepared place. The element is secured using factory fasteners
Work begins with dismantling and disassembling the headlight. Then, using a file, they cut the seat in the shape of a cone, due to which the lens will fit into the body by about a centimeter. It is necessary to remove the cap so that it does not block the flow of light, and then mount the lens in the prepared place. The element is secured using factory fasteners.
Eliminating the causes of water appearance
Removing fogging of taillights or headlights:
- The cables are disconnected and the corrector hose is disconnected.
- Remove the headlight, thoroughly clean the surfaces, check the technical holes and breathers.
- Be sure to check the O-rings that are located in the connectors and sockets of the lamps - any rings that are even slightly damaged must be replaced immediately.
- Carefully examine the surface for the formation of cracks. Small ones can be sealed with sealant.
- Check the seam for tightness. It is necessary to replace the seal, it is advisable to go around the sealant in a circle.
- If a lot of water collects in the housing or the headlight on the Granta Liftback constantly sweats heavily, some car owners drill a small hole in the glass at the bottom. This often helps, but it is not the best solution to the problem.
It is permissible to use only those compounds that are designed specifically for headlights. The sealant can be silicone, anaerobic, polyurethane and heat-resistant, with a liquid or paste consistency. The market offers sealants DoneDeal, Dow Corning 7091, ABRO WS-904 and others.
Only special sealants can withstand such operational loads, have good adhesion, and glue reliably. The compositions are very durable and elastic, do not allow water to pass through, can withstand high and low temperatures, the negative influence of petroleum products, and vibration.
At the same time, polyurethane sealants cannot be used for gluing joints and dismountable elements, and anaerobic sealants are intended for treating relatively flat surfaces. Can be used to seal shallow cracks.
How to remove, change and adjust the headlight of a Lada Kalina (station wagon, hatchback): lamp replacement and tuning
Regardless of the vehicle, the vehicle should only be operated with the optics working. If for some reason the headlights do not shine or do not work correctly, the car owner must have them repaired before driving on the road. From this material you can learn how to remove the headlight on Kalina and replace its glass, as well as lighting sources.
Content
[ To uncover]
[Hide]
Design and features of optics on Kalina
Before you disassemble the front or rear lights or change the bulbs in the optics of the Kalina station wagon, sedan or hatchback, let's understand its structure:
- external glass designed to protect light sources and prevent moisture and dust from entering them;
- a plastic case onto which the main components are fixed;
- a rubberized seal between the headlight housing and the glass is used to ensure the tightness of the structure;
- low and high beam lighting sources, as well as turning lights;
- a plastic reflector located inside the housing, characterized by the presence of a mirror surface and used to reflect light from lamps.
Kalina diode optics
If the lights are not adjusted, this can cause inconvenience not only to the car owner, but also to drivers of oncoming cars. If the car owner can properly adjust the headlights, this will allow optimal illumination of not only the road, but also the side of the road. At the same time, the optics will not blind oncoming drivers.
When the low beam is operating, only the corresponding bulbs turn on. If the driver activates the high beam, then the high and low beam sources are turned on. The headlight itself for Kalina is equipped with an electromechanical drive and can be easily adjusted using a corrector. The corrector itself is installed on the center console, so adjustments are made from the passenger compartment. The regulator is connected to the drive located directly in the headlight using wiring (the author of the video is the Lada Kalina channel).
Dismantling and repair of optics
One of the most common malfunctions in the operation of optics, if you do not take into account the failure of lighting sources, is damage to the headlight glass. If the lamp itself is damaged, it will have to be removed and disassembled to change the glass.
How to disassemble the headlight and how to replace the brake light bulb:
- First you need to open the trunk and move the brake light source to the left.
- The Kalina brake light lamp must be pressed and turned to the left, so that the device can be removed from the installation location. The installation procedure is performed in reverse order.
- If you need to replace the glass, you will have to remove the bumper to do this. To do this, you need to unscrew the corresponding fasteners.
- After dismantling the bumper, it is necessary to disconnect all the wiring connectors that are connected to the optics.
- After completing these steps, you can unscrew the lower fasteners of the flashlight; to do this, use a wrench. After this, similar actions are performed with the upper bolts securing the optics. When all the screws are removed, the optics themselves can be removed.
- The next stage will be the glass repair itself. You need to pull the headlight towards you and carefully remove the rubberized seal. It is usually attached to the lantern quite tightly, so most likely you will have to use a utility knife to cut the elastic.
- After the headlight housing and glass are separated from each other, all remaining adhesive and sealant should be removed from the perimeter of the housing. To do this, you will also need to use a utility knife, and if the residues are small, then use sandpaper. Make sure that the surface on the housing is clean and free of sealants and dirt.
- Before installing new glass, the housing around the perimeter of the installation will need to be treated with a solvent. This will allow the surface to be degreased, so that the fit of the new glass will be maximum.
- Next, apply glue to the new seal and connect the glass itself to the body. The tightness of the structure must be optimal, otherwise the problem of fogging of the optical glasses from the inside may arise. Press the headlight on both sides so that the lens is connected to the housing as firmly as possible.
- At this stage, the repair can be considered complete; assembly is carried out in the reverse order. When installing the lights, they will need to be readjusted.
↑ Features of tuning headlights and optics on Lada Vesta
A large test drive of the new VAZ model, numerous auto news, and reviews showed that the car is equipped with quite high-quality optics that illuminate the road well in poor visibility conditions (darkness, bad weather conditions). However, reviews from Lada Vesta owners often indicate that the car has good, but not excellent, optics. Firstly, halogen lamps do not shine as brightly as similar LED lamps, and secondly, they have a much shorter service life. Thirdly, maintenance of such optics is more expensive. In this regard, many drivers replace the standard optics unit with a modernized one.
As a result of replacing the headlight unit with an improved one, the low beam (as well as the high beam) becomes brighter and the light spot becomes clearer. The Lada's LED rear lights become more visible in the dark and in poor visibility conditions. In some cases, car enthusiasts tint the glass of their rear lights black. Despite this, the turn indicators, side lights, and brake light are still clearly visible when switched on.
Interesting! After replacing the optics, as a result of comparing Lada Vesta models with standard equipment and with improved headlights, it was found that the model with updated headlights looks more stylish and modern.
You can replace the standard headlight unit with an improved spare part yourself. To do this, you will need to study the corresponding photo and video instructions that tell you how to properly replace or modify the headlights on a Lada Vesta.
Reasons for adjusting headlights
Headlight position during final adjustment
Many car enthusiasts do not understand why and how to adjust headlights. According to regulation No. 699 of the “International Automobile Convention” of December 12, 1999, there are basic rules for the use of light at night. It states that car light must fall at a certain angle, offset to the right for left-hand drive cars, and to the left for right-hand drive cars.
It is for this purpose that headlight correctors are installed on the car. If they are not enough for full adjustment, then you need to adjust the light manually by adjusting the headlights using the mounts.
Another reason is the load on the car, the curb weight, as well as the number of passengers who regularly drive the car.
Eliminating fogging of the front optics on a Ford Focus 3 car
It is worth noting that headlights usually do not fog up opposite the lamps; most often, condensation appears on the glass below. On a Ford Focus 3, moisture accumulates most in the turn signal area, let's look at how to eliminate the defect here
We purchase corrugated door wiring and a standard nylon tie. We carefully make a hole in the lower ebb of the turn signal, use a soldering iron, since when drilling, the chips will get inside the body.
We fake holes on the sides of the ebb and install a screed in them.
We put the corrugation on top and fill it with padding polyester inside.
To ensure that the corrugation does not dangle, we tighten it with another tie to the body.
We got a new ventilation hole next to the turn signal, and now the glass on the headlight will not fog up.
Replacing glass with Kirzhach headlights, teaser) — Lada Kalina Sport, 1.6 l., 2012 on DRIVE2
“Why?” - you ask, “yes, because I have a Kirzhach headlight, which you can’t disassemble without mats and besides, you won’t find glass! Yes, yes, for the viburnum with Kirzhach headlights there is officially no such part as glass, only a replacement assembly !There was no such spare part in the stores, only at the car market there was a set of glass for 2800! Horror in one word.
I also bought a set of headlight bases, of excellent quality, for which special thanks to Igor for an excellent donor from Viburnum.
PS There are changes in hardware ahead, it will be fun) Don’t switch! (c)
Thank you for your attention!
www.drive2.ru