Your car has two power sources, a battery and a generator. The first of them fed the electrical circuit when the engine was not running. Second source during engine operation. In this case, the battery switches to receive electricity and supplements the energy consumed to start the engine.
In practice, failures of one or a second power supply are quite common. They often open up in the same way. The starter does not want to turn the engine and as a result, the engine does not start. When the engine is running, the battery indicator light illuminates on the switch. This means that an error has occurred and the battery is not loaded.
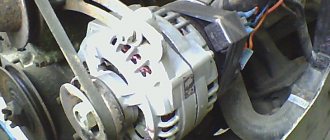
Checking the generator on the car
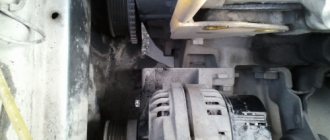
The first thing to check is whether the alternator belt is obtrusive. If it is not broken, check the belt tension. Then the battery comes. Use a tester (multimeter) to measure the voltage at the terminals. It should be around 12-12.7 V. If everything is normal, start the engine. If the battery is drained, charge it and restart the engine.
Measure the voltage at the battery terminals (battery). It must be included within a given range, typically 13.2-14.5 V. However, these limits may vary depending on modern vehicles. If there is an instruction manual, you can read it. Any deviation from the specified values in any direction indicates a malfunction. These deviations can be of three types:
- No charging current - the generator does not work.
- Charging current is present, but below the minimum value - insufficient battery charging.
- Voltage is higher than the maximum value - the battery is overcharged.
All three cases indicate a problem with the vehicle's electrical system.
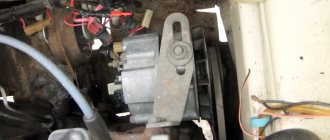
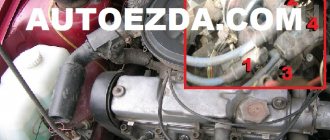
But before that, make a visual inspection of all the wires and cables going from the generator to the battery. There should be no visible damage, breaks or oxidation on the electrical wires. Be sure to check the battery, starter and alternator terminals. They must be clean and dry. Any oxidation, rust and dirt should be removed. This often helps to restore the lost contact and the car begins to work properly. If this does not help, proceed with a detailed inspection.
Using a Multimeter
For a more accurate inspection, it is better to remove the generator from the car. First of all, remove the voltage regulator from the generator and check it. To check the voltage regulator you will need a multimeter and a rectifier with a voltage regulator. It is better to use a power adapter instead of a charger. Voltage adjustment from 0 to 16V is quite sufficient.
Connect the positive end of the power supply to the regulator - usually a male connector. Connect the negative wire to the negative terminal, which usually ends with the relay mounting lug. Connect the red test lead to the positive lead of the power supply and the black lead to the negative lead. Connect two bare wires to the brushes, one for each brush. Connect the bulb to the other cleaned end (this can be removed from the car's taillights while you check). The test bench is ready.
Continuity of the relay regulator
Plug in the power adapter and carefully turn the knob to increase the voltage. At the same time, observe the readings of the multimeter. The bulb should be off at first, but as the voltage increases it should glow at first half a volt and then gradually brighter as the voltage increases.
When 14.5 V is reached, the regulator should operate, turning off the voltage. After this, the light should go out. Typically, the regulator is assumed to be working if it cuts current between 14.2 and 14.8 V. If this occurs at a lower or higher value, the voltage regulator is faulty. Also the relay is faulty unless there is a power outage.
If the relay is damaged, it must be replaced with a new one. If everything is ok, keep checking.
DIY generator repair
Stator repair usually means rewinding the generator stator. For this procedure you will need an impressive set of tools:
- Winding machine;
- Copper wire (about 8 coils may be required);
- Tamping;
- Drilling machine;
- Device for drying a varnished stator;
- Hammer, set of screwdrivers and keys.
Winding the stator of a car generator is the repair of the stator. First you need to remove the stator itself from the generator. The old winding is scorched, but before this, a diagram of the generator stator winding must be drawn up, identical to the old three-phase or single-phase winding. When scorched, the magnetic properties of the metal stator package do not deteriorate, so there is no need to worry. When the winding is completely burnt, the seat should be completely cleaned. Syntoflex insulating gaskets are cut and installed in the grooves.
The winding should be rewinded according to a pre-drawn pattern. The linear principle is used in a single-phase generator, and the three-phase stator winding involves a star or delta connection. When rewinding, the wire from the first groove should go directly to the fourth. First, half the turns are wound in one direction, then the second half in the opposite direction. The grooves are sealed with the protruding parts of the gaskets, after which the coils need to be tapped with a hammer. To avoid damaging the winding, you need to use a spacer.
Before checking the performance of the stator with currents, you should make sure that there is no short circuit. If there is a short circuit, it means the insulation was installed poorly. You should find the problem area and, using a gasket, eliminate the breakdown.
Before impregnation with varnish, you need to check the dimensions of the rewound unit; it should not protrude beyond the edges when assembling the generator. The contacts are connected with a thread that will not melt when dried and placed in a container with varnish. After impregnation of the stator, it is placed in an oven for drying, after allowing the element to flow around. If there is no suitable furnace, the stator can simply be suspended by installing a heating element underneath. When the varnish stops sticking, drying is complete. When using heating, drying usually takes about 2-3 hours.
When the generator operates unstable, for many the solution to the problem is to replace the entire unit. But if you know how to check all the elements of the generator, then even the stator winding procedure will be within your grasp.
How to test a generator with a multimeter
The alternator diode bridge can be tested using a multimeter, but you can also use the stand that was used to test the regulator.
However, first of all, without removing the rectifier bridge from the alternator, connect the red test lead to terminal 30 of the alternator, and the black lead to the housing. Set the tester operating mode to diode (diode icon). If it is not there, set it to 1-2 kOhm. The multimeter should show infinity. If the readings are different, the diode bridge is faulty.
Then check that the rectifiers are not damaged. Leave the positive sensor (red) on terminal 30 and the negative sensor in alternate contact with the jumper mounting screws. The multimeter readings should show infinity in all cases, with any other signs of malfunction.
Then connect the positive sensor to the axle mounting bolts and the negative sensor to the generator housing. In this case, the tester should also give infinity.
However, in practice such verification is usually not enough. In most cases, it is necessary to perform a more detailed check of the generator.
Careful testing
To do this, unscrew the screws securing the rectifier unit, disconnect the copper wires of the stator winding and remove the diode bridge from the generator. Now you can test each semiconductor separately. Before checking, it is recommended to rinse the stabilizer under running water using a medium-hard brush, and then dry thoroughly. A hairdryer is good for quick drying.
Attach one of the tester probes to the diode board, and connect the other probe to the center contact of each diode attached to the board. Then swap the sensors. In one case, the multimetron should indicate infinity, in the second - a nominal resistance of about 570-590 Ohms. Rectifiers are considered faulty if:
- In the first and second measurements (with reverse polarity), the multimeter readings coincide;
- The diode resistance is greater or less than the nominal values.
Do the same with the second plate of the diode bridge. If one or more diodes fail, it will be easier to replace the entire rectifier assembly. True, there are craftsmen who replace damaged diodes separately, but such work requires a certain skill and dexterity.
Checking the armature and stator windings
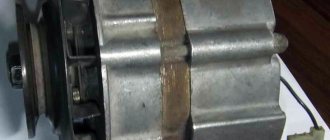
The generator must be completely disassembled for further testing. First of all, you should visually check the fittings. Brush rings should be free from darkening, spattering and raceway wear. Black spots and minor signs of wear can be removed with a cloth. Rings with deep grooves must be replaced or, if the thickness of the ring allows, turned on a lathe.
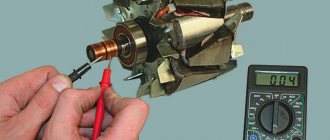
The armature winding should not have a distinct burning smell. The color of the winding must be uniform, without damage or tears. A multimeter is needed to check the armature winding for gaps. Set it up to test or measure resistance and connect the probes to the brush rings. The winding resistance should be from 3 to 5 Ohms. Then leave one probe on the ring and connect the other to the body. The multimeter display should show infinity.
The generator stator is diagnosed outside the housing. First perform a visual inspection. There should be no visible damage to the cable and its insulation. Then connect the probe to the stator housing. Touch the terminals one by one with the other wire. There are three of them in total. The tester must be in test mode. If the display shows infinity, the stator is OK.
A further check is the diagnostics of the windings. The resistance of all three windings must be the same.
Before reinstalling the generator, check the bearings and replace if necessary. They should not jam or squeak when turning. This means that they are very worn and will soon fail. Therefore, it is better to replace them immediately.
One of the main components of any car's electrical circuit is the battery and alternator. We'll talk about the latter in this article. What is the generator of the domestic VAZ 2106 car, what malfunctions are typical for it and how to repair the device, read below.
Multimeter - what is it
A multimeter is a measuring device used to measure resistance, current or voltage. Also, using such a device you can check the wiring for breaks. Each of these measurements involves the use of separate measuring instruments, such as a voltmeter, ammeter or ohmmeter. Therefore, a multimeter is considered a universal tool (mulmeter = voltmeter + ammeter + ohmmeter). In practice, analog and digital multimeters are used.
What is a multimeter
Analog
This multimeter is equipped with a special hand, like on a watch, by the movement of which the measurements are read. The analog multimeter is also equipped with a measuring scale with resistance, current and voltage values. The device is inexpensive, so it is very popular. The disadvantages of an analog multimeter include measurement errors (this mainly applies to products made in China).
Analog multimeter
Digital
Unlike an analog multimeter, a digital multimeter has an LCD or LED screen that displays data. These devices are easier to use and also have high accuracy, which cannot be said about cheaper analogues.
Digital multimeter
Note! Some types of digital multimeters can work in conjunction with a computer, transferring data obtained as a result of measurements to it.
Video - How to use a multimeter
Diagnostics
How to disassemble and disassemble the device in the car, how to fix the connections? Before we tell you how to disassemble and reassemble the voltage device on a VAZ 2106 with your own hands, let's take some time for diagnostics. How to test a generator at home? There are three testing methods in total - on the machine itself, on the stand, and also using an oscilloscope. The last two methods are not of interest to us, since they require special knowledge and operation of equipment.
Diagnostics of the VAZ 2106 generator cannot be carried out by disconnecting it from the battery, as this will cause a voltage surge, as a result of which the rectifier unit may fail. If you have ever had to check the voltage regulator of a VAZ 2106, the diagnostic procedure will be identical in the case of a generator.
First, you will need to start the engine, the engine should be running at 2500-300 rpm and the battery should be at its maximum charge. Using a multimeter, measure the voltage on the battery cables - this parameter should be 14 V. If the readings are different, the problem is either in the voltage switching or in the device itself. If the voltage relay has been adjusted and the problem persists, the unit must be repaired or replaced.
Generator stator
The stator windings can only be examined by disconnecting or unsoldering the leads from the diode bridge. The resistance between the terminals of the windings should be approximately 0.2 Ohm. And between the terminal of any winding and 0 (common terminal) there is about 0.3 Ohm. If the stator windings or diode bridge are shorted, the generator makes a loud noise during operation.
Also carefully inspect the condition of the internal parts of the stator and the outer part of the rotor. They should not touch each other during operation. As they say, “shoes.” During such operation, the generator makes increased noise, which indicates wear of the bearings or bushings.
Video, testing on a homemade stand:
Common faults
What are the malfunctions of the VAZ 2106 generator and how to fix them?
The first type of crash is the toolbar always or occasionally when moving, the reasons are as follows:
- Strap slides - adjust the strap tension.
- Open the circuit between the center of the hub and the No. 85 plug of the direction indicator relay.
- Damaged control control relay.
- Damage to the voltage regulator.
- Open the circuit in the box winding.
- Used generator brushes and slip rings oxidize. Cleaning the rings as well as replacing the alternator brush may solve the problem.
- The engine valves were shorted or open.
- There is a short circuit in the winding wiring or open stator circuit.
If the warning lamp does not light up after turning on the ignition, the reasons may be as follows:
- The filament is blown - the light bulb can simply be replaced.
- Damage to the lamp relay.
- Break in wiring or short circuit of valves.
- The stator winding is short to ground. The problem can be solved at the stator exchange.
- The generator cannot charge the battery.
If the generator is not working normally but the battery is not charging normally, the problem may be caused by
- The strap is not tight enough or may slip when driving at high speed. This problem can be corrected by adjusting the oxidation battery terminals, the wires have been damaged or the wiring harness tips are loose.
- The battery terminals are oxidized, the wiring is damaged, or the cable lugs on the mechanism are loose.
- If the battery is damaged, it must be replaced.
- Problems with the voltage regulator can be cleared by cleaning the contacts and adjusting or replacing the element.
Resetting the battery is most often caused by poor contact of the regulator housing with ground. It is much less common due to failure of the controller itself, as well as battery failure.
If, on the other hand, the generator assembly is very noisy, this is due to:
- When loosening the pulley nut, it should be tightened.
- Curve fans - just adjust them.
- Load-bearing elements are ineffective.
- Short circuit or wire break in the mechanism.
- The appearance of noise can be caused by the brush of the knot - they simply wipe it (video author - Sergey Bakaev).
Dismantling and removal
How to dismantle the VAZ generator and how to dismantle the device? Which generator is better to install on the VAZ-A 2106?
To restore the VAZ 2106 generator, follow these steps:
- First, unplug the plug from pin 67 to the node.
- Then disconnect the plug from the so-called terminal. neutral cable.
- Then move the insulating cover slightly, then the 10 flat wrench to unscrew the cable nut, especially for the thirtieth saw. The wiring harness may be disconnected.
- Now you can take off the strap. If you just need to replace it, buy a good bar - check its condition if there is no damage to the tape. The VAZ 2106 alternator belt size must be compatible with the nominal one, it is indicated in the service manual.
- Using a 17mm flat wrench, unscrew the two nuts that protect the adjusting rod to be removed.
- Then unscrew the lower nut securing mechanism, remove the screw, as well as the bushing. The assembly itself will be attached to the bracket.
- Then you can remove the group. In case, we recommend that you additionally read the article by our VAZ-2106 generator repair specialist.
Here is a list of actions that should absolutely not be performed during verification:
- The functional test should not be carried out during a short circuit or in other words a “spark”;
- connect terminals of different configurations to each other, and also connect terminal 30 or B + to ground;
- diagnostics and operation of the generator cannot begin without connected consumers. This is especially important to observe when the battery is disconnected;
For what reason can a generator fail?
There are two main verification methods. One of them, although very old, allows us to reliably understand the performance of the device. The second works more subtly and is able to respond to minor system flaws. Thanks to the second method, you can detect the smallest malfunctions in the operation of each element.
- There is an old method for identifying a failed generator. It's very simple, but there can only be two results:
- works properly;
- there are problems at work.
- Since anyone can test a car's alternator at home using this method, its popularity is justified. You need to start the engine and turn on the low beam headlights. It is necessary to disconnect the negative terminal from a running engine. If the headlights shine constantly and the engine clock does not chime, the generator is working. If the engine operation is uncertain or the brightness of the headlights changes, it is necessary to carry out a more in-depth diagnosis, since the device is in a faulty state.
Measuring with a special device will reveal even a small malfunction. There are a number of indicators that are considered optimal for all types of machines. An unloaded battery voltage ranges from 12.5 to 12.7 V. Since the battery is loaded when the engine is started, normal readings are 13.8 to 14.8 V. At maximum load, the voltage reading should drop to 13.8. If this does not happen or the voltage is even lower, check the generator.
Main signs of generator malfunction
The following signs will indicate that the generator has failed or problems have arisen in its operation:
- constant lighting of the warning light in the form of a reddish battery on the dashboard, which indicates that the generator is not charging or is producing insufficient current;
- constantly discharging battery;
- interruptions in the operation of electrical equipment (lighting and alarm units, multimedia, heating and ventilation) while the engine is running;
- the appearance of a corresponding burnt aroma in the cabin (engine department);
- excess heating of the generator stator;
- rumble (rustle, whistle) of the generator.
Read also: Difference between VGP pipe and electric welded pipe
The appearance of similar symptoms is a serious reason to conduct a diagnosis. To do this, it is absolutely not necessary to contact a service station, because you can completely check the generator for operability on your own, especially if you have even the slightest ability to use an auto tester. But first, let's talk about the main breakdowns.
Check Features
Since not all drivers are able to correctly check the generator, if a malfunction is identified, but if it is impossible to diagnose it yourself, it is better to contact a service center. Experienced technicians will be able to suggest the reasons for the breakdown and explain why they were unable to conduct the research themselves.
The sequence of actions is as follows.
To check the condition of the voltage regulator, you will need to use a voltmeter, the scale of which should be in the range from 0 to 15 V. Diagnostics should be carried out only on a well-warm-up engine. To do this, you need to start the car for 15 minutes and turn on the headlights.
The measurement is made between the ground terminal and terminal 30. For most vehicles, the correct value is easy to find as it ranges from 13.5 to 14.6 volts. Values below 13 V indicate that the part needs to be replaced urgently.
This method is one way to test your alternator without a car. Diagnostics requires access to the battery and the device itself. The voltmeter is used in measurement mode and is connected to the common ground and the B+ terminal of the battery. When a special device is turned on in its window, the indicator should not exceed 0.5 mA. If this value is higher, it means the diodes are faulty or the integrity of the winding insulation is damaged.
This check must only be carried out with the motor connected. This method is quite problematic and requires a lot of time and accuracy. The essence of diagnostics is to measure the current strength of devices that consume electricity. The engine should be running and the speed should be as high as possible. The probe is connected to the wire going to terminal 30 or B+.
Then turn on all the electrical appliances in the car and record the multimeter readings. After receiving the results, you should add the numbers. Then turn on all electrical appliances and compare the readings of the measuring instruments with the sum of the previous tests. It is normal for the indicator to be 5A less than the amount received, but it increases to indicate a fault. spare parts.
The engine must run at the highest possible speed. Connect the multimeter to terminal 67. The meter will immediately show the result and the value of the excitation current. During normal operation of the generator, this value is in the range of 3-7 A.
The condition of the winding can be checked not only visually, but also using special instruments. The manipulation consists of carrying out preparatory work:
- dismantling the brush holder;
- dismantling the voltage regulator;
- removing slip rings;
How to test a generator for performance at home
Make sure that the winding is not damaged. Once the preparation work is completed, an ohmmeter will be required. The spindles of the device are attached to the slip rings and stator, and the test is carried out. Normal values are from 5 to 10 ohms.
How to check a generator on a car without removing it and without having the necessary tools
Diagnostics of the generator in a disassembled state is carried out using an ohmmeter. The device is connected to terminal 30 and the generator housing. This part must always be clean, since even a small amount of dirt can lead to a change in the obtained data.
- Using an ohmmeter, all components and parts are checked one by one, so that at the end of the diagnosis, you can make a list of damaged parts. It is quite possible to eliminate detected faults on your own. You will need a minimum set of tools, as well as a full set of spare parts.
Connecting the VAZ 2107 generator
The procedure for replacing a generator on a VAZ 2107 consists of its removal, installation, and connection. To dismantle the generator, follow this algorithm:
1. Be sure to turn off the power to the car by removing the negative terminal from the battery.
2. Next, disconnect the connector from the generator.
3. Having removed the protective cover, disconnect the terminal with a “10” key, and then remove the wire.
4. After loosening the generator, remove the drive belt.
5. Using a 17mm wrench, unscrew the nuts and remove the adjusting bar.
6. After unscrewing the lower mounting nut, remove the bolt and bushing.
7. You can dismantle the generator.
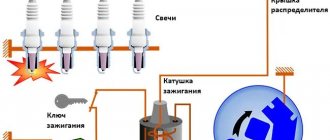
Install the new generator in reverse order. Before you begin installing the generator device, we recommend that you familiarize yourself with the electrical connection diagram for the VAZ 2107 generator.
Connection diagram for the VAZ 2107 generator
Numbers from 1 to 6 indicate the main elements of the power supply system:
mounting block with relays and fuses.
measuring device for monitoring voltage.
battery charge indicator lamp.
Adjusting the tension of the generator belt
After installation, the belt tension should be adjusted. To do this, loosen the 2 bolts securing the unit. Using a pry bar, tighten the belt and secure it with a nut on the adjustment plate. Next, check the degree of tension by lightly pushing the belt in between the pulleys.
The deflection should be between 10 and 17 mm. Please note that the tension procedure must be repeated until the correct value is obtained. Having optimally tensioned the belt, finally tighten all the fastening nuts. At this point, the connection of the generator can be considered complete.