Every motorist expects an ideal response to his actions from his car while driving: pressing the gas should accelerate the car, turning the steering wheel should change its direction, and pressing the clutch pedal should disconnect the gearbox from the engine to change gears.
Any malfunction that slows down this reaction, or even blocks it, not only leads to discomfort, but also increases the likelihood of an accident. To eliminate unpleasant consequences, many mechanisms are equipped with adjustment.
Let's look at common issues related to clutch adjustment.
Purpose of the clutch
The clutch, as many drivers know, is a complex mechanical device. It is installed between the gearbox and the engine. The operating principle is based on the transmission of torque to the gearbox shaft from the motor shaft.
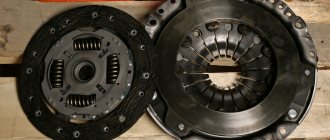
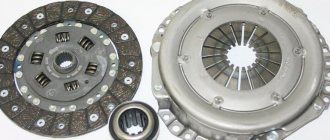
The clutch includes a large number of components. These include the drive and driven disks, flywheel, bearings, casing, bolts, etc. Most modern vehicles are equipped with a single-disc clutch, consisting of a drive and a mechanism. Drives, in turn, are also divided into types.
The operating principle of a standard mechanical device is quite simple. With its help, the torque of the “engine” is transmitted to the gearbox shaft. The system forces two disks to interact: the master and the slave. The force is transmitted through the drive.
As for the multi-disc clutch, it is installed on automatic transmissions. It is also called "wet". Since there is no pedal on a car with an automatic transmission, power is transmitted through a servo drive.
Thus, we can say with confidence that adjustment is needed for cars with a manual transmission. Most often, drivers carry out the procedure in relation to domestic cars.
Features of clutch in automatic and manual transmission
The clutch can be single or double disc. Depending on the principle of operation, it is divided into “wet” (in the presence of oil or lubricant) and “dry”. So, automatic transmissions most often have a multi-plate wet clutch.
Due to the absence of a pedal, the force in the automatic transmission is transmitted by a servo drive, or actuator. The entire installation is controlled using a control unit and a hydraulic distributor. In a manual transmission, two types of clutch operate alternately. Actuators differ in their operating principle:
- Electric (otherwise known as a stepper motor). The control unit constantly receives data on engine speed, and at a certain speed the servo drive receives a corresponding signal. The transmission mechanism disconnects the crankshaft and input shaft.
- Hydraulic – hydraulic cylinder. In the drive mechanism, the oil pump transmits pressure to the distributor, under certain conditions to the servo drive. After changing gears, the pump force decreases.
When is adjustment needed?
Many drivers do not understand that the absence of problems with the clutch does not mean it is working correctly. If the device does not function correctly, this leads to a reduction in the service life of the coupling mechanism and gearbox.
Adjustment is required for the following reasons:
In a mechanical drive when replacing the clutch cable.
When the pedal stroke changes due to wear of the friction linings.
Transmission malfunction is another reason why adjustment is required. If the gear is difficult to engage or does not engage at all, this means that the clutch is not pressed.
Foreign cars most often do not need the procedure. They already have a special self-regulating mechanism. Usually domestic cars require adjustment. It needs to be done every 10 thousand kilometers, but it is better to study the maintenance schedule and check it.
In addition, adjustment is also necessary after replacing or repairing the clutch. The need for the procedure is indicated by the following factors:
The car starts jerkily.
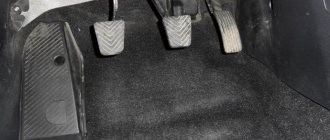
The pedal is pressed with difficulty.
The hydraulic drive has low fluid level.
Extraneous sounds are heard when changing speeds.
If there is no certainty that adjustment is necessary, the driver should conduct a test. First you need to turn on the engine, release the clutch and move off. The car did not move, but the pedal went down completely? This indicates that the pedal travel has increased. The opposite is evidenced by the situation when the car started moving even before the foot was removed from the pedal.
What is regulated
The procedure for recycling cars at the legislative level is regulated by the following regulations:
- Federal Law No. 7 of January 10, 2002 - introduces requirements for environmental protection when operating vehicles.
- Federal Law No. 89 of June 24, 1998 - provides legal regulation of recycling and waste management.
- Government Decree No. 938 of 08/12/1994 establishes the requirement to deregister a car with the State Traffic Safety Inspectorate for disposal.
- Order of the Ministry of Industry and Trade of Russia No. 8 dated January 14, 2010 - establishes the procedure for obtaining a discount on the purchase of a new car when participating in the state free recycling program.
How to adjust the clutch pedal?
Adjustment of the clutch pedal should be carried out without the presence of air in the system. It should not get into the hydraulic drive, but if this happens, cleaning will be required.
The mechanical clutch is adjusted using a nut in the steering column. The pedal stroke changes as the nut rotates in different directions. After the adjustment, you need to press the pedal all the way three times, and then take measurements again. The setting will have to be repeated if the result is poor. If the adjustment is successful, the locknut should be tightened on the bracket. It prevents the adjusting mechanism from loosening.
If hydraulic adjustment is required, the spring must first be removed from the cylinder bracket and fork. After this, measurements are taken of the spaces between the fork and the pusher. The optimal value is 5 mm. You can achieve its installation by rotating the adjusting nut.
The listed operating algorithm is applied to simple systems. If the car is equipped with other clutch drive systems, the owner should study the instructions for the car. It contains regulation rules.
How to adjust pedal free play on Nissan cars
As the clutch parts (disc and basket) wear out, the free play changes, and therefore requires adjustment. On a Nissan car, the clutch drive can be different - mechanical and hydraulic, so the PS adjustment is carried out differently. For example, a cable is installed on Nissan Sunny cars in bodies N13 and N14, Almera, Primera; Qashqai, Tiida, Almera Classic, Note, Maxima cars are equipped with a hydraulic drive.
However, a hydraulic drive can also be installed on Sunny or Primera, much depends on the type of engine and model generation. Nissan “hydraulics” are usually equipped with cars with more powerful internal combustion engines (2.0/ 2.5/ 3.0 l); cars with 1.4/ 1.5/ 1.6 l engines come with a clutch cable.
On a Nissan N14 car, the cable is adjusted in the area of the clutch fork; the adjustment mechanism is located at the very end of the cable.
The same cable is installed on the Almera, and in order to shorten it when the DS linings are worn out, car owners add washers, and in this case it is no longer secured with a lock nut.
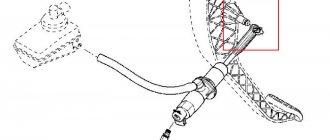
Like on a Hyundai car, the GCS on Nissans is located next to the pedal; these parts are connected to each other by a rod on which there is an adjustment.
To adjust the free play of the PS on the Nissan Almera N16 ( />
Adjustment on different car models
Different car models have different clutch adjustments. The fact is that each brand sets its own permissible pedal free play.
For example, let's take VAZ 2108, 09 and 99. To work, the owner will need to take measurements and find out the distance between the fully depressed pedal and the floor. The normal value is 18-20 cm. After pressing the pedal with your hand, you also need to measure the distance. It should be about 6-7cm. The second value is subtracted from the first value obtained. If the numbers do not correspond to the optimal ones (13-14 cm), then adjustment is required. This is done using an adjusting nut, which must be rotated to increase the pedal stroke. On a VAZ 2107 car, in order to make adjustments, you need an overpass.
Adjustment on the Lada Kalina occurs differently. First, the driver should open the hood and, after unscrewing the bolts, remove the filter and mass air flow sensor. Next you will need to unscrew the clamp and remove the cable. Using a caliper, measure the distance from the fork to the leader. The result should be 2.7 cm. The adjustment occurs in the same way as the previous method - by rotating the nut with an open-end wrench.
Checking the gap and adjusting the clutch fork
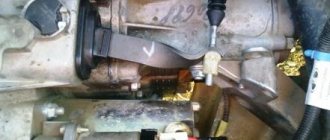
To check the operation of the clutch fork, you need to find the threaded bushings at the end of the clutch cable and measure the difference in the gap between them at rest and in the recessed position. The ruler must be placed near the cable and the edge of the housing. After the lever is pressed all the way, the distance is measured.
The second step is to pull out the lever and repeat the measurement. The indicators are compared against the manufacturer's data and, if necessary, adjusted. To do this, loosen the lock nut (VW has a wing nut) and turn it out as necessary, reducing or increasing the gap. After all the actions, firmly fix the clutch pedal and squeeze it several times. To check the effectiveness of the actions taken, the measurements must be repeated and the results compared.
What happens if you don't adjust the clutch?
Adjusting the clutch is a futile exercise for some drivers. They do not notice that the transmission response has decreased, so they are in no hurry to carry out the procedure. What happens if you ignore any clutch related problems?
First, the friction disc will begin to slip. The box will receive torque “with losses”. A correctly adjusted cable will not save the situation, since the car’s dynamics will still disappear due to a decrease in the disc hooks. The car will not be able to accelerate normally. As a result of ignoring the problem, it will be necessary not only to replace the worn part, but also other expensive elements.
There will be a lack of engagement between the discs. A strange sound will appear when changing speeds. In this situation, you need to adjust the pedal free play.
Problems with the clutch lead to late or early engagement. Late represents a situation when the mechanism is triggered when the pedal is released. Early hooking indicates triggering in the down position. Lack of tuning causes the car to move away abruptly. This leads to wear on the gearbox, engine and basket elements. As a result of this, accidents occur.
You can adjust the clutch yourself. But before the procedure, you should make sure that the problem is related to a settings failure and not to a mechanism malfunction. It is best to turn to the experts. If you decide to repair and adjust the clutch yourself, you will need tools. The driver should stock up on a tape measure, lubricant, and keys 13-17.
Preparing for work
Initially, it is recommended to find a place where it is most convenient to inspect the car and replace the part. Since you will have to work not only under the hood, but also under the car, the best assistants will be a lift, pit or overpass. If you do not have the opportunity to use one of these options, you can simply raise the car using jacks.
Also, before starting work, you need to make sure that you have everything you need at hand. To replace the cable you will need:
- new part;
- set of wrenches;
- screwdrivers.
On average, you can replace this element on a VAZ-2109 yourself in 20 minutes.
Clutch replacement
Replacing a clutch in a car falls into the category of rather complex repairs, so if a person is a novice motorist and has never done such things before, getting to work without a qualified assistant is a very risky business.
But in any case, when changing the clutch on a car for the first time, the owner gains the necessary experience, and in the future this work will no longer be particularly difficult. Just keep in mind that replacing the clutch will take time, and even with the right approach, this work can take half a working day.
What obvious preconditions lead to replacing the clutch? First of all, this is its slipping, especially when the car is loaded. It is prohibited to perform maneuvers, in particular overtaking, with a faulty clutch, since the control in this case may fail at any time.
To carry out this repair, you will definitely need an overpass or a special lift. To get to the clutch itself, some components of the car will have to be dismantled, such as the driveshaft, starter and gearbox, the removal of which will require the help of a partner. To remove the box you will need a special tool.
Inside, before removing the box, you will need to disconnect the gear shift lever. When the box is dismantled, check the condition of its seals. If they leak, they will also need to be replaced.
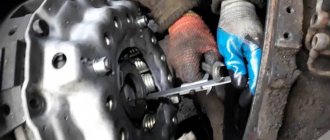
Now you need to remove the clutch itself. Having dismantled the latter, subject it to a careful inspection. First of all, the driven disk wears out and needs to be replaced, but you should also pay attention to the release disk and the release bearing. Based on their technical condition, it may be advisable to change the entire clutch, that is, as an assembly. But this decision will depend entirely on the condition of the clutch discs.
Now you need to install a new clutch. The installation itself will take a little time, but you will have to spend at least another 2-3 hours to reassemble all the dismantled components of the car. As a result, the most difficult stage of assembly is installing the gearbox in its original place. It is at this stage that the driver will need the help of a partner, because it is almost impossible to cope with this procedure alone.
Clutch mechanism of a VAZ 2106 car
A device with the simplest design that ensures the engagement of the power plant and gearbox. The mechanism is primitive, which makes its repair and maintenance as accessible as possible for the average motorist.
Description of design
Here are the elements:
- clutch pedal;
- master cylinder;
- pressure main;
- working cylinder;
- clutch fork.
Inside the structure there is a special liquid that ensures the transfer of impulse from the pedal to the fork.
How does the clutch drive work?
The principle of operation is this.
- The driver presses the pedal.
- The master cylinder piston, connected by a hinge to the pedal lever, forces fluid through the cylinder, creating excess pressure inside the line.
- The oil passes through the pressure line and enters the working cylinder.
- Next, the piston is pushed out and the clutch fork moves.
- The mechanism comes out of the hook and the motor is disconnected from the gearbox.
The principle of operation is the same for all modifications and versions. Some car enthusiasts install a dry clutch. The actual difference is only in the working element - the classic one contains liquid, the dry one contains a cable.
Clutch failure
Among the most common “diagnoses” of auto mechanics are:
- Breakdown of the head or working cylinder seal. Liquid flows out of the system, causing it to become airy.
- The pressure line is clogged or coked. The problem is a consequence of using counterfeit oil or not replacing it in a timely manner.
- Mechanical damage to the fork or working cylinder. The parts are located at the bottom of the car. Typically, users can damage the mechanism when driving over off-road roads or curbs.
- The easiest problem is the spring stretching or falling out of the mounting groove.
Symptoms of malfunctions
Problems arising from improper clutch adjustment.
- The car jerks. This means that the disc does not move far enough from the basket and that when the drive is pressed, the motor is not completely disconnected from the gearbox.
- The gears don't want to turn on. The symptom that arises in the above problem is similar.
- When you press the gas pedal hard, the car does not respond or accelerates too slowly. Jerking may also occur during steady driving.
- The clutch pedal is falling/too hard and the gears will not engage.
Let's sum it up
It is not difficult to adjust the free amplitude of the clutch pedal yourself. This requires minimal skills and a set of tools. For more information, we recommend that you refer to the operating instructions. It indicates the optimal parameters for full and free pedal travel. A well-adjusted clutch makes it possible to drive the car safely and comfortably. Gear shifts occur smoothly, without sudden movements or jerks. In addition, the car moves smoothly even at low speeds, which leads to less wear on the clutch.
| Tweet |
Do-it-yourself clutch adjustment on a VAZ 2109
The essence of the work is to set the required pedal pressure and measure the cable tension. Figuratively it looks like this:
- pedal height measurement;
- cable tightening;
- examination.
You can also watch a detailed report on the procedure in the video:
Clutch cable adjustment
Clutch cable calibration is performed as follows.
- The necessary tools are prepared: 2 keys No. 17, a ruler or tape measure, WD-40 or an equivalent.
- The car is driven onto a flat section of the road and the parking brake is put on.
- For safety, you can disconnect the battery terminals.
- On the left as the car moves, you need to find the cable itself - the part is attached to the gearbox housing with a special bracket.
- After this, the adjustment unit itself is located (the place of fastening to the gearbox). There is a rubber casing and two nuts that are tightened on the sides of the bar.
- Threads are filled with high-pressure fluid for better unscrewing.
- Next, simultaneously loosen the nuts using two No. 17 wrenches.
- Side No. 1 rotates clockwise to loosen the cable (the pedal falls down), to tighten it, you need to turn it in the opposite direction - the lever rises.
- When the required pretension of the structure is established, all nuts are tightened until they stop.
- Then you need to get into the car, squeeze the clutch all the way 5-6 times and check that the settings are correct, and adjust more if necessary.
Adjusting the clutch pedal free play
The position and free play of the clutch lever on the VAZ 2109 is set in this way.
- A tool is prepared - a ruler or tape measure, two keys No. 17.
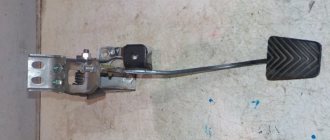
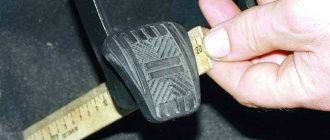
- Inside the car, you need to attach a measuring tape to the side of the pedal.
- When not pressed, the height from the floor is about 180-190 mm - this is normal.
Next, you need to press the lever all the way and remember at which mark the lower part of the pad stops. For example, 50-60 mm.
The factory has established that the clutch pedal stroke length should be 125-135 millimeters. This means that to calculate, we subtract the smaller number from the larger number and get the actual living. For example: 190-50=140 – this is acceptable (no more than 160mm is allowed). If the value differs from the standard by 15%, the cable tension needs to be adjusted.
After manipulating the tensioner, it is necessary to check the correct engagement of gears and the timing of the release bearing. If all standards are met, no additional calibration is required. It happens that the adjustment does not bring the desired effect, in this case it is necessary to contact a qualified technician - perhaps the problem is hidden inside the clutch unit itself.
Important Tips and Recommendations
Experienced drivers and mechanics recommend following simple rules to extend the life of the device.
- Do not overpress the pedal. This causes the disc to heat up and can cause it to wear out quickly.
- Use only high-quality brake fluid.
- Check the functionality of the device in a timely manner.
- If extraneous sounds or plugging occur, it is necessary to diagnose the mechanism.
Specialization : Graduated from the State Automobile University, worked for 20 years at GAZ-56, now I drive a Zhiguli.
Source
Clutch slave cylinder repair
To repair the control center, it must be removed from the vehicle. For this you will need:
- round nose pliers or pliers;
- wrenches 13 and 17;
- container for draining liquid;
- clean dry rag.
Dismantling of the RCS
Dismantling of the RCS is carried out in the following order:
- We install the car on an inspection hole or overpass.
- From the inspection hole, using a 17mm wrench, unscrew the tip of the connection between the hydraulic drive hose and the working cylinder.
Disassembly and replacement of faulty parts of the control center
To disassemble and repair the cylinder you will need:
- wrench 8;
- slotted screwdriver;
- clean dry cloth;
- some brake fluid.
The working cylinder is disassembled in the following sequence:
- We clamp the cylinder in a vice.
- Using an 8-mm open-end wrench, unscrew the air bleed valve and inspect it for damage. If a malfunction is suspected, we purchase a new valve and prepare it for installation.
Before replacing the piston cuffs and protective cover, the metal parts of the cylinder must be cleaned of dirt, dust, and traces of moisture using brake fluid and a clean rag. New seals and a cover are installed during the assembly of the RCS. First, the front cuff is put on the piston, then the rear one. In this case, the back cuff is fixed with a washer. The protective cover is installed together with the pusher. Assembling the device and installing it is done in the reverse order.
Video: repair of the VAZ 2107 clutch slave cylinder
Bleeding the hydraulic clutch
After any work related to depressurization of the clutch mechanism, as well as when replacing the fluid, the hydraulic drive must be pumped. For this you will need:
- brake fluid (0.3 l);
- rubber hose;
- key to 8;
- a vessel for collecting liquid (a 0.5 liter plastic bottle is suitable).
In addition, you will need an assistant for pumping. The procedure is as follows:
- After installing the control center and connecting the hose to it, fill the hydraulic drive reservoir with liquid to a level corresponding to the lower edge of the neck.
- We put one end of a pre-prepared hose onto the valve fitting to bleed air, and lower the other end into a container to collect liquid.
Setting the clutch drive
After bleeding, it is recommended to adjust the clutch drive. For this you will need:
- a caliper or (as a last resort) a ruler;
- wrenches 8, 10, 13, 17;
- round nose pliers or pliers.
The procedure for setting the clutch on carburetor and injection VAZ 2107 models is different. In the first case, the clutch pedal free play setting is adjusted, in the second - the amplitude of movement of the working cylinder rod.
For carburetor VAZ 2107, the drive is configured as follows:
- We measure the amplitude of free play (play) of the clutch pedal using a caliper. It should be 0.5–2.0 mm.
- If the amplitude goes beyond the specified limits, use a 10mm wrench to unscrew the locknut on the travel stop pin and, turning the stop in one direction or another, set the required backlash.
For injection VAZ 2107, the drive adjustment is carried out in the following order:
- We install the car on an inspection hole or overpass.
- Using pliers from below, remove the tension spring from the clutch fork.
- We determine the backlash of the working cylinder pusher by pressing the clutch fork all the way back. It should be 4–5 mm.
- If the play does not fall within the specified interval, use a 17 wrench to hold the rod adjustment nut, and use a 13 wrench to unscrew the fixing nut.
Slave cylinder hose
The hose connecting the pipeline and the working cylinder must be replaced if:
- visible damage accompanied by leakage of brake fluid;
- detection of cracks, swellings (bumps) on its surfaces;
- wear of threaded connections of tips.
Hoses produced by domestic enterprises have catalog numbers 2101–1602590 and cost about 100 rubles.
To replace the hose you must:
- Place the machine on an overpass or inspection hole.
- Raise the hood and locate the connection point between the hydraulic drive line and the working cylinder hose in the engine compartment.
- Use a 17 wrench to secure the hose tip, and use a 13 wrench to unscrew the fitting on the pipeline. Place a container at the end of the pipeline and collect the liquid flowing from it.
- Using a 17mm wrench, unscrew the tip of the other end of the hose from the RCS body. There is a rubber O-ring installed in the cylinder socket, which also needs to be replaced.
- Install the new hose in reverse order.
Thus, diagnosing, repairing and replacing the VAZ 2107 clutch slave cylinder is not very difficult even for an inexperienced car enthusiast. A minimum set of tools and recommendations from professionals will allow you to complete all the work with minimal investment of time and money.
Source
