A vehicle often requires adjustments to various controls and systems. For example, you may need to adjust the clutch pedal, which greatly affects the quality of driving a car with a manual transmission. This adjustment is quite easy to do without visiting service centers, and does not require any special knowledge or tools.
Why do you need a clutch?
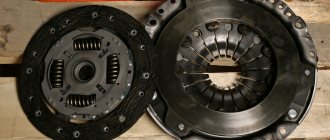
A clutch is a unit that is designed to mechanically connect the engine and gearbox. By itself, it represents a disk with a friction part that transmits torque from the engine to the gearbox.
The moment we release the accelerator, the clutch engages and rotates the gearbox, or rather its input shaft . When we press the clutch pedal, the connection is broken, the disc moves away and no longer spins the transmission input shaft.
Clutch structure and mechanism
The operating principle of a conventional mechanical device is simple: it transmits engine torque to the gearbox input shaft. It is based on the interaction of two disks - the slave and the master. You can close the connection, separating the power unit from the box, to change the speed. The force is transmitted using a drive: when the clutch is pressed, liquid under pressure enters the working piston. Then the cylinder rod acts on the fork and bearing, the moment is transmitted further to the mechanisms. After releasing the pedal, all drive parts return to their original positions. The basket and disc fit snugly against each other.
The drive is carried out hydraulically or mechanically. Pneumatics are rarely used. Most modern passenger cars are equipped with a single-plate friction clutch, consisting of several mechanisms:
- disk with basket;
- flywheel;
- bearing;
- torsion damper;
- crankshaft with its own bearing;
- tangential leaf spring;
- release bearing forks;
- guide pipe;
- working cylinder;
- input shaft;
- ball head bolt.
All this is neatly placed in the manual transmission housing.
A robotic gearbox works on the same principle - with the difference that actuators controlled by the unit are responsible for squeezing the clutch, and the drive here is electric.
Is there a difference between automatic and manual transmissions?
Automatic transmissions use an electronically controlled hydromechanical drive (sometimes a hydraulic distributor). There is no usual clutch here. Dry discs are completely absent, and on a manual transmission they are the main element. The torque converter (or converter) is responsible for turning on/off the torque on automatic transmissions. Instead of discs, oil turbines are used, which is why the automatic transmission torque transmission and cancellation device is called “wet”.
If a manual clutch most often has a single-disc clutch, then an automatic clutch usually has a multi-plate clutch. Due to the absence of a separate accelerator, the force is transmitted by an actuator or servo drive.
How to use the clutch accelerator
Many drivers do not know how to use this control at all and make a lot of mistakes that put the unit out of action ahead of schedule. The most important rules of use are listed below:
- As you know, the left foot should always be ready to engage a new gear, so it should be located on a special platform on the left side in order to quickly and promptly move to the accelerator and disengage the gear.
- It is not allowed to constantly keep your foot above this vehicle control. Firstly, the leg gets very tired, which causes discomfort and therefore makes it difficult to drive, and secondly, with a slight load on it, the release bearing begins to rotate, which accelerates its wear. In addition, when the pedal is slightly depressed, the disc begins to slip, which leads to its wear.
- The pedal must be pressed quickly to the full stop; it must also be released quickly, but smoothly, to avoid jerking and abrupt activation. It is not allowed to keep the clutch pedal depressed for a long time, this will shorten the service life of the bearing. Thus, the pedal should be operated as follows: “press and release.”
- You need to press the clutch pedal with your toe, while your heel should always be in the air. This provides complete control over the mechanism, without accidental slipping of the foot.
- It is a good habit to disengage the gear before starting the engine. Thanks to this action, the load on the starter is reduced.
Clutch diagnostic methods
The main symptoms of a faulty mechanism:
- Slippage (when the disk and basket, when connected to the motor, rotate at different angular speeds).
- Strong vibration inside the mechanism, especially noticeable when starting from a standstill and accelerating.
- Noise generated when the clutch operates.
- Violation of the accelerator stroke.
Diagnostics of the clutch of modern cars requires the use of professional equipment. However, you can do a simple test yourself. To check, press the pedal several times with the engine off. Then listen. Creaks, clicks, and other extraneous sounds will indicate problems with the box.
Another test is carried out in neutral speed mode. The clutch pedal is pressed all the way, then reverse gear is engaged. If you hear a crunching or crackling noise, one of the drives is faulty.
The check at the third stage is carried out in motion. The gears are sequentially switched to 3, then the gas pedal is sharply depressed. If the car does not accelerate, but the crankshaft speed increases on the tachometer, this is a sign of a malfunction. At the same time, it begins to smell unpleasantly of burnt rubber.
Serious damage to the transmission device can be judged by an unsuccessful attempt to engage one of the gears. Therefore, when the motor is turned on, you need to use all speeds.
What is pedal free play?
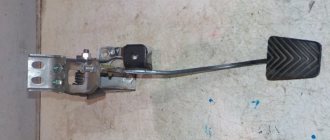
The free play of the clutch pedal is the distance it travels before it starts to engage. To feel this moment, you just need to slowly depress the pedal and evaluate the effort with which it goes along a particular period of the path. At first, the pedal will move quite freely, and then it will become harder - this moment is considered to be the end of free play.
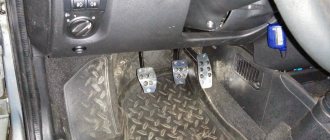
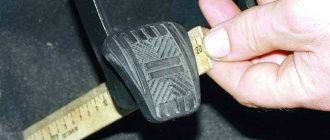
This value greatly affects the quality of gear shifting . If the gears are engaged with noise, and the engagement of the clutch is accompanied by jerks, then it makes sense to measure this value. To do this, take a simple ruler and measure the distance from the floor to the rubber pedal pad. For different car models, this value can vary greatly, but on average, the value is about 160 millimeters.
After this, you need to measure the free play of the pedal itself. The resulting value must be compared with the passport data, and if it differs, then adjusted.
Clutch pedal adjustment
When testing of the clutch pedal has been completed and an increase or decrease in the level of free play has been identified, you can begin to independently adjust the pedal (by changing the length of the accelerator cable), or contact a specialized service station. Of course, self-adjustment will not require financial costs, but in order to adjust the position of the clutch pedal, you will need to carry out some actions under the bottom of the car.
This means that an inspection hole will be required. If one is not available, or the car owner is not confident in his abilities, then it is better to contact a service station specialist. To prevent the automotive clutch system from breaking down and requiring significant investment, you should not only pay attention to changes in the usual clutch pedal travel, but also regularly measure the level of its free play.
Share:
How is free play adjusted?
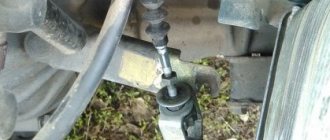
Most modern cars have a hydraulic clutch drive. To adjust the free play, you need to find the pusher rod and then measure the distance from it to the release fork.
It is quite possible that after measurements this value does not correspond to the norm, so remove the spring and turn the rod nut in the desired direction to change the specified distance. Thus, achieve 5 millimeters between the rod and the fork, and then put the spring in place.
Adjustment of this parameter on the clutch cable drive is achieved by loosening it or tightening it using a special nut located directly on the gearbox. To do this, loosen the lock nut and rotate the adjusting nut until the desired distance from the pedal to the floor is obtained.
After this, the locknut is tightened, and this value is considered to be adjusted. As you can see, there is nothing complicated here.
What are the reasons and what to do if the clutch picks up at the very bottom - at the end of the stroke
During the operation of the car, its components, assemblies and individual parts wear out, which is why some of them are called “consumables”. In the clutch design, the disc friction linings wear out. This leads to an imbalance in the clutch system settings.
Under such circumstances, urgent adjustment of the drive cable is required. The clutch design can be mechanical or hydraulic.
In the first case, each motorist needs to adhere to the following algorithm:
- Open the hood, find the rod to which the cable from the clutch pedal is directly attached.
- Using WD-40 penetrating lubricant, treat the nuts securing the rod, and then loosen them.
- Turn the adjusting nut away from the clutch pedal. This will reduce its free movement.
- At the next stage, you need to make a control measurement of the amplitude of the pedal movement. If the result is positive, all that remains is to tighten the control nut until it stops. If the parameters need correction, then you need to tighten the nut closest to the adjustable pedal until it stops.
After the adjustments have been made, you need to check the operation of the clutch, which, in a good situation, should function without “noise and dust”, and should be easy and pleasant to press.
In this case, the gear shift lever must “stick” precisely and smoothly. The car should not slip or jerk when starting to move. In the case of a hydraulic clutch, the adjustment technology is somewhat different, since such a drive often has an automatic adjustment function. On the other hand, it will not be difficult to adjust it manually if a control nut is provided on the working cylinder pusher.
With the machine raised, adjustments should be made using the following procedure:
- Check the brake fluid level inside the expansion tank.
- Find a pusher on the working cylinder whose function fully corresponds to its name.
- Use pliers to unhook the spring from the clutch fork.
- Move it forward, and then measure the distance between it and the pusher.
- At the next stage, release the plug and then take similar measurements. If the values are outside the recommended range, then direct adjustment must be made.
- Next, press out the spring of the fork and working cylinder.
- Screw the nut towards the working cylinder.
- After taking the appropriate measurements, tighten the control nut. This should be done only when the required parameters have been achieved.
How to adjust the clutch?
The main task of the clutch is to temporarily separate (uncouple) the engine and transmission and smoothly connect them. These operations are necessary while driving to control a manual transmission: shifting gears, stopping, braking, starting the car.
If the adjustment of the free play of the clutch pedal is disrupted, the car stops moving normally, various problems arise - it becomes impossible to move away, gears are switched with a crunch, and the car can also slip and accelerate poorly.
How to adjust the clutch. General leadership
Checking the clutch cable clearance. Depending on the make of the car, the cable play on a mechanical clutch can be checked and adjusted in different ways.
There are three main ways:
Some vehicles can use either of these methods. But the measurement must be carried out between the points given in the car manual or in the operating instructions.
Checking and adjusting the clutch fork. The vehicle must be securely raised on ramps or stands. We also use the handbrake to lock the wheels.
On some vehicles with underbody protection, it can be very difficult to reach the locknut and turn it if necessary. In this case, you will need a special wrench that has a connector and a universal disk to perform this procedure.
Gap measurement. We measure the distance between the operating lever clutch and a reference point, such as the edge of the clutch housing. The first operation is carried out with the control lever at rest, and then when it is in the pressed position. The difference between these two measurements is the amount of free play of the lever on the cable. This is the gap in the clutch cable.
Another way to check and adjust. We find the place where the clutch cable protrudes beyond the fork and the nuts on the threaded bushing.
Checking and adjusting the clutch cable. This method is used on some older cars.
Checking and adjusting the hydraulic clutch. Many hydraulic couplings are self-adjusting, but some designs allow manual adjustment to compensate for friction plate wear.
How to adjust the clutch on a VAZ 2110, 2111, 2112
1). Place the car on a level surface and apply the parking brake. Open the hood and disconnect the negative terminal from the battery.
2). Next, using a ruler installed perpendicular to the accelerator and the floor, we measure the travel distance of the drive. We measure the distance from the floor to the place where the rubber gasket on the accelerator begins. If this distance is more or less than 16 cm, then adjustment will need to be made.
3). So, open the hood of the car, after which we find the fastening of the system cable with the pedal. As a rule, it is located opposite the driver's seat. Pay attention to the 2 nuts that are located at the end of this cable. In the photo they are marked with numbers 1 and 2. We unscrew the nut numbered 1, but not all the way, and we tighten or unscrew the second one until the desired free play of the accelerator, that is, until the move is equal to 12 - 13 cm.
4). Please note that when the second nut is loosened, the free play will increase, and when tightened, it will decrease.
5). Next, we sit in the driver’s seat and press the clutch pedal several times until the very end, after which we lower it. We do this again and check the free play indicator. If necessary, the procedure can be repeated.
6). After the clutch is adjusted, push the limiting sleeve into the fork until it stops.
7). At this point the adjustment process can be considered complete.
How to adjust the clutch on a VAZ 2108, 2109, 2199
1). When the pedal is released, you need to use a tape measure to measure the distance from the floor to its lower edge. It should be within 18-20 centimeters.
2). Next, press the pedal with your hand all the way to the stop and measure the distance from the floor, again to the bottom edge. It should be within 6-7 centimeters.
3). From the first result obtained, 18-20 cm, we subtract the result of the second measurement, 6-7 cm. As a result, we get 13-14 cm. For cars of the VAZ 2108 and VAZ 2109 brands, this value is considered normal.
4). If this value differs in one direction or another, you will need to readjust the clutch. That is, we either tighten it up or weaken it.
5). We hold the adjusting nut with one wrench, and with the second we slightly loosen the lock nut.
6). By rotating the adjusting nut clockwise, we increase the pedal stroke, and therefore it should move downward.
7). We take measurements and if the result is satisfactory, we tighten the locknut and the work can be considered complete. But if not, then you will need to do this operation again.
How to adjust the clutch on a Lada Kalina?
1). Open the hood and remove the air filter. To do this, unscrew the bolts securing the air filter housing to the hood. Then disconnect the mass air flow sensor. Next, unscrew the clamp and remove the air filter housing.
2). Pull out the cable by the threaded end to the maximum possible distance. In this case, it will be necessary to overcome the resistance exerted by the spring attached to the PS.
3). Holding the cable in this position, using a caliper we measure the distance between the plastic leash and the fork lever. It should be 2.7 cm.
4). If the distance does not match, then using an open-end wrench, we either tighten or loosen the tension nut.
5). Next, we survive the clutch pedal again and take measurements again. If it was not possible to achieve the desired result the first time, you can repeat it again.
6). After the distance has been adjusted, install the air filter in place.
How to adjust the clutch on a VAZ 2107
To adjust the clutch of the VAZ 2107, you need to drive onto a pit or overpass. But in cases where this is not possible, we install the car on supports using a jack, observing all safety measures.
1). The free play must be adjusted so that the distance from the top position of the pedal to the stop is 0.4 - 2 millimeters. Otherwise, you will need to make adjustments. Using a 10mm wrench, unscrew the nut locking the limiter slightly and by rotating it set the required gap.
2). If the VAZ 2107 engine system provides fuel injection, then you will need to remove the protective shield.
3). Before applying the lubricating mixture to the threads of the pusher, clean it from dirt.
4). We check the stroke of the pusher, since the stroke of the release bearing depends on it. Push the fork back all the way, the pusher stroke should be four to five millimeters. Since significant force is required, it is better to disconnect the spring from the lever.
5). The stroke of the pusher is adjusted using a 17 key. It is also necessary to restrain the pusher adjusting nut from turning, but using a “13” wrench, loosen the lock nut.
6). Fixing the pusher using the “8” key, using the “17” key we set the required 4-5 millimeters.
7). We fix the locknut.
8). We check the pedal travel, which should be approximately 30 millimeters from its top position until it turns off. If necessary, you can perform the operation again.
How to adjust the clutch on a Gazelle?
How to adjust the clutch on a Lada Priora?
There are two ways to measure the required position of the cable.
The first method is to orientate along the clutch pedal, the movement of which should be within 125 - 123 millimeters. But the second method is to measure the length of the cable coming out of the casing. When released, it should be 27 millimeters.
In most cases, drivers use the first option, which is explained by greater reliability. It is the procedure for the first option that we will describe in detail.
1). Using a 17mm wrench, unscrew the locknut that secures the cable casing in the box socket.
2). Next, in order to achieve the required pedal travel in the mentioned range, unscrew or tighten the second one.
3). Using a threaded plastic end cap, we correct the sag of the cable. We fasten without tightening the nuts and check for softness of gear engagement. If the clutch is adjusted correctly, the nuts can also be fixed.
How to adjust the clutch on a Lada Granta?
How to adjust the clutch on a VAZ 2114, 2115
1). Tighten the handbrake and remove the battery for safety.
2). In the engine compartment we find the clutch cable. In the photo it is indicated by three red arrows.
3). Using 2 wrenches, loosen the nuts securing the cable end, and then tighten or loosen them to ensure that the pedal stroke is 125 - 135 mm.
4). We sit in the driver's seat and press the clutch pedal all the way at least 3 times. Then we measure it and its progress again. If necessary, we adjust.
How to adjust the clutch on a Niva?
When the trip actuator needs checking
The free play of the clutch pedal must be checked and adjusted every 20 thousand km. This also needs to be done if the car starts to move at the very beginning or at the end of releasing the pedal. A correctly adjusted clutch release drive causes the car to start moving when the pedal is released approximately halfway.
Adjustment of the drive with hydraulics and with a cable is slightly different. To adjust the hydraulic drive, as a rule, you need a pit or overpass. Cable adjustment is usually done in the engine compartment from above, simply by opening the hood.
Why the extra pedal?
The clutch is a structural element of a car that takes part in the transmission of torque to the wheels from the engine and allows this transmission to be briefly broken, which is performed by the driver when he presses the clutch pedal. When considering the question of its purpose and role in driving a car, it is impossible, at least briefly, not to touch upon the structure of such a mechanism.
However, before understanding the design of the control mechanism, it is necessary to make a reservation that it must be used quite carefully. It is not for nothing that when driving a car, the left foot does not touch the pedal, but should lie in a place specially provided for it. This is due to the fact that when the engine is disconnected from the wheels, the ability to control is sharply reduced; the car moves only by inertia. This type of driving is especially dangerous on wet or slippery roads.
In such cases, the same braking must be performed without pressing the clutch. Otherwise, the car may skid with unpredictable consequences, especially for beginners who are not ready for such a change in the car’s behavior. It is best to be guided by one general rule - when driving on a flat road, if there is no need to change gears, you should drive the car using only the gas and brake. The same applies to driving downhill; in this case, coasting or driving with the engine disconnected from the wheels should not be allowed.
The engine must always be ready to transmit and the wheels to receive the required torque. Only then do you retain full control over the behavior of the car. Therefore, you should use the clutch pedal only when necessary, only in cases where you cannot do without it, such as when changing gears or starting to move. Keeping in mind that you need to do this carefully and carefully, since during the gear shift process sudden dynamic loads may occur on various components of the machine.
The main signs by which you can understand that it is time to adjust the clutch
The approximate mileage interval at which it is recommended to check and adjust the clutch operation is 10,000 kilometers. It is worth checking the car maintenance schedule established by the manufacturer - other numbers may be indicated here.
Clutch adjustment is required after replacing/repairing the clutch or its elements, for example, the drive cable. The procedure is required even if there is a suspicion of deviation of the pedal amplitude from normal values:
- the car starts moving jerkily;
- the clutch pedal sinks or moves with difficulty;
- the fluid level in the hydraulic drive decreases;
- When changing gears you notice shock, noise and vibration.
A simple test will help you determine if the clutch needs adjustment. We start the engine, smoothly release the clutch pedal and slowly move away. If the car remains in place when the clutch is fully released, then the pedal travel has increased. If the car starts moving before you even take your foot off the pedal, its travel is too slow.
This is interesting: Repairing shock absorbers with your own hands: creaks, knocks, leaks?
How the clutch works
In its most general form, its design is shown in the figure below.
Without going into details, it should be noted the presence of such components as the flywheel (1), which is also part of the engine, as well as the driven disk (2), clutch basket (3) and, of course, the drive, which includes almost all other parts, including including the clutch pedal (11). Here it is only necessary to say that a rather enlarged and simplified presentation of the design is given, which in no way, however, interferes with the understanding of its meaning, the role of this mechanism on the machine. To properly understand the design, it is necessary to clarify that the drive connecting the clutch pedal with the mechanism itself can be:
- hydraulic, as shown in the figure above;
- mechanical;
- pneumatic;
- electric, etc.
Clutch malfunctions and maintenance
Malfunctions of the clutch mechanism observed in operation include incomplete engagement (slipping of the driven discs), incomplete disengagement (the clutch is driven), abrupt engagement and incomplete return of the pedal to the initial position, wear or destruction of the release clutch bearing.
Malfunctions
Incomplete engagement (slippage) of the clutch occurs when the car starts from a standstill or when driving uphill, when the clutch pedal is released and when the throttle pedal is pressed, the engine crankshaft increases the speed, but the car does not develop the appropriate speed or it decreases (when driving uphill) .
Slippage occurs when there is no free play of the clutch pedal, wear and oiling of the friction linings of the driven disks (due to excessive lubrication of the release clutch bearing), breakage or weakening of the spring that pulls the release clutch, breakage of the pressure springs, warping of the driven disks and wear of the splines of the drive shaft of the gearbox.
Reducing the gap between the end of the release clutch bearing and the levers entails a decrease in the free play of the clutch pedal.
Incomplete disengagement of the clutch is detected by noise when the vehicle is engaged in gear, despite the full “squeezing” of the clutch pedal, and is a consequence of an increase in its free play, jamming (sticking) of the driven disks and misalignment of the clutch release levers, as well as a consequence of air entering the hydraulic drive system or wear of the sealing cuffs of the pistons of the main and working cylinders.
Abrupt engagement of the clutch indicates jamming of the engagement clutch on the drive shaft of the gearbox due to wear and scuffing of the working surfaces or destruction of the surface of the friction linings, and may also be the result of incorrect adjustment of the gaps (the gaps are not the same) between the clutch release levers and the release clutch bearing.
Incomplete return of the clutch pedal to its initial position may occur as a result of increased friction in the joints of the clutch drive intermediate shaft or in the pedal shaft bushings, breakage or weakening of the drive release springs.
Premature wear and destruction of the release clutch bearing can occur as a result of untimely lubrication or too frequent and prolonged clutch disengagement.
Clutch maintenance
When servicing the clutch mechanism, check the free play of the pedal and the nature of the clutch operation when engaging gears: absence of slipping when transmitting torque, complete disengagement, smooth engagement (with a lubricated clutch drive mechanism). The specified clutch state is achieved by correctly adjusting the free play of the clutch pedal.
The amount of free play of the clutch pedal corresponds to the set gap between the clutch release bearing and the release levers (1.5 - 4 mm) and for most domestic cars is: passenger cars - 32 - 40 mm, trucks - 32 - 50 mm.
The free play of the clutch pedal is measured with a ruler (Figure 1, a) with two sliders 1 and 2. The free play of most cars is adjusted by changing the length of the clutch rod by rotating the nut or fork of the clutch (Figure 1, b).
Figure 1 – Clutch adjustment
a – checking the free play of the pedal; b – adjustment of the pedal free play; 1 and 2 – engines on the ruler; 3 – base of the ruler; 4 – clutch pedal; 5 – adjusting nut; 6 – clutch drive rod
The gap between the pressure levers and the clutch bearing is adjusted with the clutch removed in a special device by rotating the nuts of the set screws.
When adjusting clutches, in which the compression of the driving and driven disks is carried out by one central spring , it is necessary to first adjust the force of pressing the spring, then the free play of the clutch pedal.
In a hydraulically driven clutch, the free travel of the pedal is determined by the gap between the pusher and the piston in the master cylinder (Figure 2), the idle stroke of the master cylinder piston until the compensation hole is closed, the gap between the release clutch bearing and the heads of the release levers.
Figure 2 – Clutch release drive of the GAZ-21 Volga car
1 – threaded tip; 2 – plug; 3 – pedal release spring; 4 – buffer; 5 – release clutch bearing; 6 – switch off lever; 7 – clutch release fork; 8 – release spring for the release fork; 9 – eccentric pin; 10 – pedal axis; 11 – pusher; 12 – piston of the main cylinder; 13 – cuff; 14 – main cylinder; 15 – bypass hole; 16 – cap; 17 – bypass valve; 18 – piston of the working cylinder; 19 – working cylinder; 20 – pusher tip; 21 – lock nut; 22 - pusher
Most often in operation, the amount of free play of the clutch pedal changes as a result of a decrease in the gap between the clutch release bearing and the heads of the release levers.
This gap is checked by the free play of the end of the clutch release fork (3 - 4 mm for GAZ-21 Volga cars) and is adjusted by changing the length of the working cylinder pusher. The gap between the pusher and the master cylinder piston is adjusted with an eccentric bolt connecting the pusher to the pedal lever.
How to check and adjust a hydraulic clutch
The operation of a mechanical and hydraulic drive has its own design differences. In this regard, in order to adjust the hydraulic clutch, it is necessary to check the total length from the pusher rod to the fork. According to the standards, it should be about 5 mm.
Then disconnect the spring from the working cylinder bracket. There is an adjustment nut on the rod, by unscrewing which you can change the stroke of the fork to the desired result. The general concepts of changing the working and free play may differ depending on the vehicle manufacturer. Before you begin self-adjustment, you need to read the manual for your vehicle or watch training videos:
Adjusting the hydraulic drive
To adjust the hydraulic clutch pedal, you first need to make sure that there is no air in the system. In the absence of air inside the system, the pedal should not be soft when pressed, and after releasing it should return to its original position on its own.
If the tests have convinced you that the hydraulic drive is working properly, check the free play of the clutch release fork. For many models, this parameter should be in the range from 4 to 5 mm. What it should be for your car, check with its manufacturer. After this, check the pedal travel without load; for many models it should be within 25–30 mm. If the free play of the clutch release fork is normal, and the idle value of the pedal does not fall within the recommended limits, look for a malfunction in the clutch master cylinder piston pusher or in the clutch release fork.
Features of clutch in automatic and manual transmission
The clutch can be single or double disc. Depending on the principle of operation, it is divided into “wet” (in the presence of oil or lubricant) and “dry”. So, automatic transmissions most often have a multi-plate wet clutch.
Due to the absence of a pedal, the force in the automatic transmission is transmitted by a servo drive, or actuator. The entire installation is controlled using a control unit and a hydraulic distributor. In a manual transmission, two types of clutch operate alternately. Actuators differ in their operating principle:
- Electric (otherwise known as a stepper motor). The control unit constantly receives data on engine speed, and at a certain speed the servo drive receives a corresponding signal. The transmission mechanism disconnects the crankshaft and input shaft.
- Hydraulic – hydraulic cylinder. In the drive mechanism, the oil pump transmits pressure to the distributor, under certain conditions to the servo drive. After changing gears, the pump force decreases.
Why is this necessary - to break the torque transmission from the engine
Everything is very simple. Depending on driving conditions, different torques are supplied to the wheels. Its value can be changed using the gearbox by selecting the desired gear. However, when the gears in the box are in mesh and spinning, it is impossible to change gear. Of course, you can try, but the result will be replacing the destroyed checkpoint. To avoid this in any driving mode, as well as at the beginning of movement, a clutch is used in the car’s design. If you press it, the connection between the gearbox and the engine is broken, as a result of which it becomes possible to calmly change gear or move off.
Purpose of clutch and its types
The clutch is designed to transmit engine torque to the input shaft of the gearbox and to briefly disconnect the engine from the transmission during gear changes. Depending on the method of transmitting torque, it can be frictional or hydraulic. Friction transfers engine energy to the transmission through friction. It can be multi-disc, single-disc, dry or wet (if the discs are placed in liquid). Hydraulic transmits torque through the flow of a special fluid. All production passenger cars with manual transmission are equipped with a single-plate dry clutch. It consists of the following components and parts:
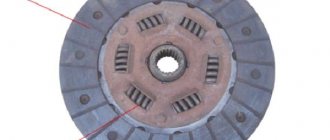
- The driven disk, which has a damper of 6 springs, absorbs the shock load on its hub when the engine is connected to the transmission. The driven disc hub fits onto the input shaft of the gearbox. The connection of this pair is splined.
- Thrust type ball release bearing with lubricant placed inside it for its entire service life during manufacture. It is designed to disconnect the engine and transmission. It is not maintained throughout its entire service life.
- Flywheel attached to the crankshaft flange. Essentially, it is the master disk.
- The basket is a unit consisting of a pressure plate, a diaphragm spring and a housing. It is attached to the flywheel, and the driven disk is clamped between the flywheel and the pressure plate. Modern baskets do not require adjustment.
- A fork designed to transmit the shutdown drive force to the release bearing.
How to determine the amount of free play
The free play of the clutch pedal is the distance that the pedal must travel before the clutch begins to disengage.
The free travel of the clutch pedal differs from the clutch release travel by a slight pressing force.
The beginning of shutdown can be determined, firstly, by the sound of rotation of the release bearing (if the motor is running), and secondly, by an increase in the severity of pressing (regardless of whether the motor is running).
