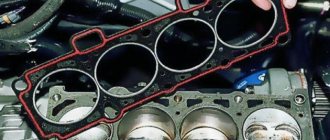
The power plant of a car is a rather complex device, consisting of many mechanisms and systems that interact with each other. The basis of any engine is the cylinder block and its upper part - the cylinder head. Structurally, it was not possible to connect these two parts without placing a gasket between them to ensure tightness between the specified elements of the power plant, as well as to ensure the connection of the channels of the lubrication and cooling systems so that the working fluids do not mix and do not penetrate the cylinders. At the same time, the gasket must perform its functions under very difficult conditions - high pressure, significant temperature, exposure to oil and coolant.
The article was written thanks to the “Crafts” website. This is a creative portal that contains the best master classes on needlework, practical tips on the house, knitting, embroidery, decoupage. Handmade gifts for loved ones will give memories for many years and will captivate with their individuality and exclusivity. Here are the best ideas with instructions for making applications and crafts that will become unique souvenirs, decorations for your home, apartment, or suburban area.
Any cylinder head (cylinder head) gasket consists of many layers, including sheet steel, cardboard, fiber, and cork. All these layers are well compressed and covered with a layer of sealing substance.
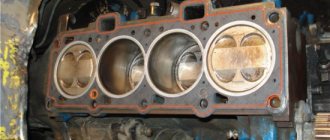
Despite the material the gasket is made of, there is always the possibility of its breakdown. And if you do not pay attention to such a malfunction in a timely manner, it can lead to significant damage to the power plant and major repairs with the replacement of the cylinder-piston group or cylinder block.
Signs of gasket failure
Signs of a cylinder head gasket failure
The main signs of gasket failure are:
- the appearance of a white emulsion on the dipstick when checking the oil level. This deposit on the dipstick means that the gasket has ruptured between the holes through which oil and coolant pass;
- thick white smoke. Indicates that there is a breakthrough in the gasket between the hole through which the coolant flows and one of the cylinders. In this case, the white color of the exhaust gases is given by the evaporating liquid that has entered the cylinder. Additionally, placing your hand near the exhaust pipe while the engine is running will help you verify that the gasket is broken. The coating remaining on the hand should be tasted on the tongue - if it is sweet, then the liquid is getting into the cylinder;
- the presence of oil stains on the surface of the coolant in the expansion tank. Multi-colored oil spots will indicate that, as a result of a breakdown, oil began to enter the channel with the passing coolant;
- bubbles in the expansion tank when the engine is running. This sign will indicate that, as a result of a gust, exhaust gases penetrate into the coolant channel;
- a sharp whistle when the engine is running, accompanied by oil leaks on the cylinder block. This is the clearest sign that there has been a breakdown of the gasket with an outlet. It occurs rarely, often after the engine has been modified with preliminary removal of the head;
- the most hidden type is a breakdown between the cylinders. There are no particularly obvious signs, except for a drop in power and an increase in fuel consumption, which may be the result of a malfunction of other mechanisms. Only a compression test will help verify the presence of such a breakdown, and even then not always. The same misalignment of the valves can give such symptoms;
If such symptoms appear, the only option for eliminating this malfunction is to replace the cylinder head gasket of the VAZ 2114.
It is noteworthy that this gasket is disposable and is replaced every time, so any modification to the engine associated with removing the head must be accompanied by a replacement.
Overhaul of the VAZ 2114 engine 8 valves with your own hands - all details
Many car enthusiasts, taking into account the price of a VAZ car and the possible cost of repairs in a car repair shop, are thinking about how to remove the VAZ 2114 engine with their own hands.
This article is intended specifically for thrifty and independent car owners, in which we will figure out how to remove the engine, install it back, what options for this procedure exist and how to check the compression after the repair. In addition, we will look at how to do this yourself without involving other people.
Necessary tool
Engine repairs involving gasket replacement, although labor-intensive, can be done independently if you have the necessary equipment at hand.
Everything you need to perform the operation is listed below:
- sets of open-end and socket wrenches (you will especially need keys for “10”, “13”, “17” and “19”);
- a set of heads of the same dimensions, as well as a special “Torh” head;
- torque wrench;
- screwdrivers;
- pliers;
- containers for draining technical fluids;
- rags;
- sealant;
Reinstalling the head
Now you can carefully install the cylinder head in its place, making sure that at this moment the gasket does not slip out or move to the side. Of course, the guides fix it, but you should still be extremely careful.
Next, we will need a torque wrench, since the bolts will have to be tightened with a certain torque. It is also worth keeping in mind that the tightening order must be observed. The diagram below shows the sequence in which to twist:
Sequence of repair work
Installing the cylinder head
Also need a new head gasket and valve cover gasket. Having all this, you can begin the renovation. The sequence of actions for repairs is as follows:
- The car is placed in the garage, the gearbox is set to neutral, and chocks are placed under the rear wheels. The first thing that is done after setting up the car is to de-energize the on-board network by disconnecting the “-” terminal from the battery.
- The pressure in the fuel system is relieved. For this purpose, there is a control valve on the fuel rail in the form of a regular tire valve. You need to place a container under this valve and clamp the spool. When the pressure is released, gasoline will leak out. You will also need to drain the coolant using drain plugs.
- On the engine, you need to set the piston of the 1st cylinder to the TDC position. To do this, remove the protective cover of the timing belt and rotate the crankshaft until the marks on the pulley, camshaft and flywheel match.
- The next step is to remove the valve covers. To do this, all pipes, the throttle drive rod, the accelerator drive bracket and the valve cover mounting nuts are disconnected from the cover fittings.
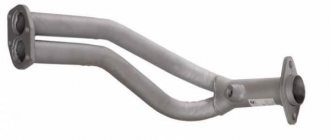
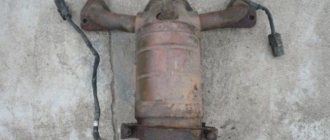
- The exhaust pipe of the exhaust gas removal system is disconnected from the exhaust manifold. These works are carried out under the car.
- The wiring is disconnected from the mass flow sensor, the air supply pipe to the throttle assembly is removed, after which it is completely dismantled along with the air filter housing.
- Then you need to disconnect from the head all the elements suitable for the head - pipes of the cooling system of the throttle assembly, vacuum booster, throttle drive linkage, ground wires, bracket for the exhaust manifold supply pipe.
- The intake manifold strut mounts are also loosened, and the struts themselves are removed. Next, the wiring is disconnected from - oil pressure sensors, coolant temperature and throttle position sensors, XX regulator, injectors, high-voltage wires from spark plugs.
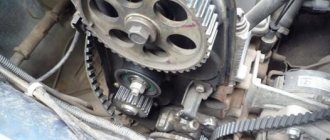
- Then the timing belt is removed. Before this, you need to once again check the alignment of the marks on the crankshaft pulley and the timing gear. After this, the belt tension is loosened and it is removed from the timing gear.
- To remove the camshaft gear, you will need to fix it through the technological holes and unscrew the fastening bolt. You need to remove it from the shaft carefully so as not to lose the key. After this, you will need to remove the rear cover, located behind the removed gear, from the head and block.
- The cooling system pipes are removed from the head along with the thermostat from the head, as well as the rest of the wiring. The fuel supply and drain pipes are also disconnected.
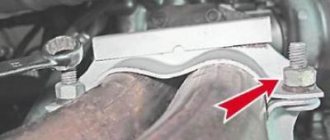
- All that remains is to unscrew the head bolts. But to do this, they must first be weakened, and in a strictly defined order. And only after relaxation do they completely unscrew. If disassembly is done correctly, after removing the bolts, you can remove the head and remove the damaged gasket. At this point, the first part of the repair is considered complete.
Dismantling the cylinder head on a VAZ 2109. Algorithm for replacing the cylinder head gasket yourself
It is necessary to remove the cylinder head (cylinder head) when replacing the gasket, block, as well as when repairing the piston group mechanism and its valves or when repairing the head itself. In addition, when tuning the engine or completely disassembling it, you also need to dismantle the cylinder head.
Before starting work, it is necessary that the car is installed on an overpass or inspection hole.
Assembly Features
Before assembly, you should check the bolts securing the head to the hood; their length should not be more than 13.5 cm; if they are longer, they can no longer be used.
You should also check the flatness of the head. If it was overheated, it is possible that it was warped and will require repair in the form of trimming the plane.
During assembly, the head bolts are tightened in a certain sequence and with a strictly defined tightening torque. Next, everything is assembled in the reverse order of disassembly.
Disassembly is also carried out in the same sequence if the power plant is being modified.
Also check out
- When disassembling the valve mechanism, it is necessary to place a wooden block under the valve plate.
Assemble and install the cylinder head in the reverse order.
Recommendations :
- Valve stems with engine oil. The same applies to guide bushings.
- Before installation, remove dirt, oil, and remnants of the old gasket from the surface of the cylinder block.
- The cylinder head gasket should be replaced using two special centering bushings.
- Install the mounting screws; the diagram below shows 4 steps on how to tighten them.
- The first tightening torque of the screws is 20 N.m (2 kgf.m);
- The second - with a moment of 69.4–85.7 N.m (7.1–8.7 kgf.m);
- The third - with an extension of 90°;
- The fourth is to turn the screws 90°.
Replacing valve seats
If the seats burn out and are destroyed, as well as if the heads are strongly recessed into the body (“sucked”) or have been subjected to repeated countersinking, they need to be replaced. The seats are replaced on a milling machine. The defective seat is bored with a milling cutter and removed from the socket. Then, according to the technology, the head is placed in a thermal oven and heated to 120-150 degrees. Saddle blanks in the form of rings are placed in liquid nitrogen to reduce their temperature to minus 40 degrees. Using tongs, place the cooled rings of future saddles into the sockets and lightly tap them into the body of the head. Further operations for processing seat chamfers are performed on a special milling machine or manually with a set of cutters.
Without removing the gearbox
If there is no pit, overpass and friends, you will most likely have to figure out how to remove a VAZ 2114 engine without a box. You can perform this procedure yourself, and you will not need any special physical activity. Part of this procedure will not differ in any way from the general algorithm, so we will focus only on the differences.
To prepare a working base you will need bricks and a jack. It is necessary to smoothly lift the car and place brick by brick under the front wheels, having first secured the rear wheels so that the car does not roll.
The key differences between the methods begin when you completely free the motor head from the wires connected to it:
- Remove the pulley and muffler.
- We remove the head itself with the camshaft - here it is important to pay attention to the bolts. If they are hexagonal, you will be able to remove the head together with the camshaft, if not (they come in the shape of an asterisk), then you will inevitably remove them separately.
- Now we unscrew the front pulley, first turning on the fifth speed and placing a brick on the brake.
- We unscrew the generator and go directly to the gearbox, on which there is a nut and three bolts.
- Unscrew the crab and put it aside.
- We fix the engine and lower it onto the prepared cushion.
Homemade support for engine removal
BE CAREFUL! Sometimes the engine does not want to fall off the box on its own, in order to fix this you will have to gently push it with a crowbar.
When you put it back together, don't forget to secure not only the engine, but also the box itself with rope. To carry out reassembly without removing the box, you will need an assistant.
Fault diagnosis
Before starting work, it is logical to make sure of the feasibility of this event, initiated by the following reasons:
- The time has come to perform periodic checks, adjustments, and replacement of parts and components. Determined by mileage (15,000 – 30,000 km), operating conditions of the vehicle.
- The appearance of characteristic symptoms of damage, the occurrence of breakdowns.
The main signs signaling the driver to pay attention to the valves are:
- noticeable loss of engine power;
- “tripleting” of the engine, which manifests itself when operating at different loads (one or several cylinders fail, the mixture in the combustion chamber does not ignite, ignites with a delay, is not completely consumed, the phenomenon of detonation occurs);
- noticeable increase in fuel consumption;
- the car moves jerkily, the idle speed “floats”;
- the appearance of soot and soot on the spark plugs;
- extraneous knocks, noises in the engine compartment.
Similar symptoms are typical for different types of car malfunctions. An engine is not a fountain pen. Unreasonable disassembly and reassembly is a long, troublesome undertaking. You should first make sure that it is necessary.
Idle cylinder detection
If unstable engine behavior occurs, it is necessary to try to localize the cause, moving from simple checks to complex diagnostic examination methods. You should first make sure that the starter is working properly and that the battery is fully charged.
- Start the engine and leave it at idle speed.
- Raise the hood.
- Remove the spark plug cap from the first cylinder. The engine has stalled - the cylinder is working, no changes have occurred - intervention is required. In this way, go through the remaining cylinders.
- Change spark plugs and high-voltage wires on rejected cylinders. Repeat testing. The persistence of the situation indicates a search for a breakdown inside the engine.
Presence of spark, fuel
Check for spark. On an engine equipped with an injector, disconnect the injector power supply connector. Unscrew the spark plugs one by one, lean the body against the ground of the car, start the starter, watch, observing safety precautions. It is more convenient to perform these actions together (one is under the hood, the other is in the cabin).- Make sure there is fuel supply. On a cold engine, connect the injectors, disconnect the ignition module control connector. Turn out the spark plugs. Use the starter to crank the engine for seven to ten seconds. The threads of the spark plug seats are filled with fuel - this is normal. Dry holes mean problems with fuel supply. Questions arise about the fuel system and electronic control unit.
What is this?
Engine overhaul refers to the work of a master aimed at returning the engine to a state as close as possible to its original state. In this case, most of the nodes are changed or restored. This type of repair is resorted to when there is a lot of wear on the parts of the unit.
The list of work may include grinding the crankshaft journal and camshaft, installing new pistons and springs, and honing the cylinders. If too many engine components are faulty, then it is more advisable to completely replace it.
The following signs indicate that it is time to overhaul the engine on the VAZ-2114:
- The appearance of red, black or dark gray carbon deposits on the spark plugs.
- Increased oil consumption.
- The occurrence of knocking in the engine.
- Increased fuel consumption.
- The appearance of smoky exhaust.
- Bad traction.
- Engine overheating.
- At idle, the engine runs unevenly.
- Reduced power.
Major repairs proceed approximately according to this scheme:
- Preparing the engine for dismantling (disconnecting wires, hoses, gearbox).
- Removing the engine.
- Removal and inspection of the cylinder head.
- Disassembling the unit for diagnostics and cleaning.
- Block boring. Grinding the crankshaft. Application of hone to the cylinder walls.
- Weight distribution of connecting rods, pistons.
- Block assembly.
- Restoring the head (replacing caps and guides, straightening seats).
- Assembling the engine and installing it in the engine compartment.
- Connection.
- Functionality check.
Approximate price
On average, a major overhaul of a VAZ-2114 engine costs from 22,000 rubles.
Engine repair cost broken down:
- Dismantling – 500 rubles .
- Installation – 600 rubles .
- Replacing oil scraper caps - 2000-4000 rubles .
- Pulling the engine sump - about 490 rubles .
- Crankshaft grinding - from 900 rubles .
- Replacing the crankshaft bearing - about 330 rubles .
- Honing and boring on a standard block - from 1000 rubles .
- Replacing the valve cover - 420-620 rubles .
- Replacement of the engine mount - from 540 rubles .
Replacing the engine on a VAZ-2114 will cost approximately 5,500 rubles . This does not include the price of a new unit.
What does the price depend on?
Motorists who need engine overhaul of a VAZ-2114 are faced with different prices for such a service.
The cost depends on the influence of factors:
- Engine capacity.
- The prestige of the service company, its pricing policy.
- Urgency.
- Scope of work.
- Difficulty of repair.
- The need for a specialist to visit.
- Cost of spare parts.
- Equipment used.
- Automotive technician qualification level.
The more work is required to restore the engine of a VAZ-2114 car, the more expensive the service of a specialist will cost. You will have to pay extra for urgency and a specialist visit.
Where and from whom can I order the service?
If an engine overhaul of a VAZ-2114 is required, then there are several options:
- Take the car to a car service center.
- Contact a private master.
- Repair the unit yourself.
A major type of repair requires extensive knowledge, skills, experience, certain equipment and tools. Therefore, only a master of a service center can carry out a high-quality engine restoration. Car service centers issue a warranty certificate. You should contact private traders only on the advice of good friends. Among such workers there are often low-skilled people. In addition, they do not provide a warranty card.
Approximate cost of overhauling an eight-valve engine
Unfortunately, car engines do not last forever. Over time, “oil burn” begins, compression drops, noises and knocking appear, as a result of which it is necessary to carry out a “overhaul”. At the beginning of January 2015, I overhauled engine 21083 on a 1998 VAZ-2110 car. Compression on all cylinders dropped to less than 8 and knocking noises were heard from worn pistons. The repair was carried out on a turnkey basis, the owner left the car with me and 5 days later he came and picked up the repaired car. During the repair, I tried to record all expenses so that I could estimate the total cost of a typical engine overhaul.
