Electrical equipment of the VAZ 21214 car
Symbols on the diagram
1. Left front light. 2. Headlights. 3. Coolant temperature sensor. 4. Sound signal. 5. Throttle position sensor. 6. Mass air flow sensor. 7. Electromagnetic valve for adsorber purge. 8. Injectors. 9. Right front lamp. 10. Side direction indicators. 11. Rechargeable battery. 12. Electric heater motor. 13. Additional resistor for the heater motor. 14. Differential lock warning lamp switch.15. Windshield wiper relay. 16. Starter 21214. 17. Windshield wiper motor.18. Generator VAZ-21214. 19. Windshield washer motor.20. Ignition module. 21. Spark plugs.22. Controller. 23. Idle speed control. 24. APS status indicator. 25. Temperature indicator sensor.26. Oil pressure warning light sensor. 27. Socket for portable lamp(*). 28. Brake fluid level warning lamp switch. 29. Diagnostic block. 30. Relay for turning on the heated rear window. 31. Headlight high beam relay. 32. Relay for low beam headlights. 33. Electric fuel pump with fuel level sensor. 34. Starter activation relay. 35. Additional fuse block.36. Main fuse block. 37. Relay-breaker for direction indicators and hazard warning lights. 38. Reversing light switch. 39. Brake light switch. 40. Cigarette lighter VAZ-21214. 41. External lighting switch.42. Illumination lamps for heater control levers. 43. Rear fog light switch. 44. Rear window heating switch. 45. Heater motor switch. 46. Rear window wiper and washer switch. 47. Hazard switch. 48. Ignition switch. 49. Instrument lighting switch. 50. Windshield wiper switch. 51. Windshield washer switch. 52. Horn switch. 53. Turn signal switch. 54. Headlight switch. 55. Electric fuel pump relay. 56. Vehicle speed sensor. 57. Lamp switches located in the door pillars. 58. Interior lamps. 59. Rear window washer motor. 60. Instrument cluster. 61. Parking brake warning lamp switch. 62. Main relay. 63. Tail lights. 64. License plate lights. 65. Rear window wiper motor. 66. Rear window heating element. 67. Crankshaft position sensor. 68. Knock sensor. 69. VAZ oxygen sensor. 70. Electric fan relay. 71. Electric fans. 72. Injection system fuse block. 73. To the interior lamp. 74. To the courtesy light switch in the driver's door. 75. APS control unit.
Wiring diagram VAZ 21214 Niva
(2011), electronic gas pedal.
ELECTRICAL CONNECTION DIAGRAM FOR FRONT WIRING HARNESS 21214-3724010-44
1 – right headlight; 2 – starter relay; 3 – front harness block to the instrument panel harness block; 4 – air temperature sensor; 5 – coolant temperature sensor; 6 – oil pressure warning lamp sensor; 7 – sound signal; 8 – brake fluid level sensor; 9 – left headlight; 10 – pads for the front harness, the sidelight harness and the right side turn signal; 11 – pads for the front windshield wiper motor harness and electric motor; 12 – windshield wiper motor; 13 – blocks of the front harness and connecting starter wire; 14 – starter; 15 – rechargeable battery; 16 – generator; 17 – front harness block and connecting generator wire; 18 – right side turn signal; 19 – right side headlight; 20 – electric motor for washers; 21 – pads for the front harness, sidelight harness and left side turn signal; 22 – left sidelight; 23 – left side turn signal. A1, A2 – grounding points of the front wiring harness. A3 – grounding point of the hood ground wire. A4, A5 – grounding points of the connecting motor wire with the battery and housing.
ELECTRICAL CONNECTION DIAGRAM FOR IGNITION SYSTEM WIRING HARNESS 21214-3724026-44
1 – controller; 2 – diagnostic block; 3 – mass air flow sensor; 4 – coolant temperature sensor; 5 – phase sensor; 6 – electric fuel pump module; 7– block of the instrument panel wiring harness to the block of the rear wiring harness; 8 – ignition coils; 9 – spark plugs; 10 – electronic accelerator pedal; 11 – throttle pipe with electric drive; 12 – electric fan of the engine cooling system, right; 13 – electric fan of the engine cooling system, left; 14 – knock sensor; 15 – blocks of the wiring harness of the ignition system and the wiring harness of the injectors; 16 – nozzles; 17 – solenoid valve for purge of the adsorber; 18 – control oxygen sensor; 19 – diagnostic oxygen sensor; 20 – crankshaft position sensor; 21 – APS control unit; 22 – APS status indicator; 23 – ECM fuse block; 24 – fuse for the power supply circuit of the electric fuel pump; 25 – electric fuel pump relay; 26 – left engine cooling system electric fan relay; 27 – relay for the electric fan of the right engine cooling system; 28 – ignition relay; 29 – ignition system wiring harness block to the instrument panel wiring harness block.
ELECTRICAL CONNECTION DIAGRAM FOR INSTRUMENT PANEL WIRING HARNESS 21214-3724030-44
1 – additional relay; 2 – relay-interrupter of direction indicators; 3 – windshield wiper relay; 4 – ignition switch; 5 – alarm switch; 6 – rheostat; 7 – switch for headlights and direction indicators; 8 – windshield wiper and washer switch; 9 – main fuse block; 10 – additional fuse block; 11 – instrument cluster; 12 – external lighting switch; 13 – rear window wiper switch; 14 – rear window heating switch; 15 – rear fog light switch; 16 – heater motor switch; 17 – additional resistor of the heater electric motor; 18 – heater electric motor; 19 – relay for high beam headlights; 20 – low beam headlight relay; 21 – rear window heating relay; 22 – rear fog light relay; 23 – cigarette lighter; 24 – differential engagement sensor; 25 – brake signal switch; 26 – reverse lamp switch; 27 – handbrake warning lamp switch; 28 – illuminator; 29 – illuminator; 30 – instrument panel harness block to the front harness; 31 – block of the instrument panel harness to the radio; 32 – block of the instrument panel harness to the ignition system harness; 33 – instrument panel harness block to the rear harness; 34 – indicator lamp for turning on the differential;
35 – control lamp for heated rear window; 36 – clutch pedal position signal switch; 37 – speed sensor. A1, A2 – grounding points of the instrument panel wiring harness. A3 – grounding point of the heater motor.
REAR HARNESS ELECTRICAL CONNECTION DIAGRAM 21214-3724210-44
1 – rear wiring harness block to the instrument panel wiring harness block; 2 – rear wiring harness block to the ignition system wiring harness block; 3 – switch for the interior lighting in the driver's door pillar; 4 – switch for interior lighting in the passenger door pillar; 5 – left interior lamp; 6 – right interior lamp; 7 – electric fuel pump with fuel level indicator sensor; 8 – rear window heating element; 9 – additional brake signal; 10 – right lamp; 11 – left lamp; 12 – license plate light; 13 – license plate light; 14 – electric motor for rear window wiper; 15 – rear window washer electric motor. A1 – grounding point of the rear window heating ground wire. A2 – grounding point of the right lamp. A3 – grounding point of the left lamp. A4 – grounding point of the wiring harness of the license plate light housing. A5 - A8 - grounding points of the rear wiring harness assembly.
Electrical diagram of the Niva Chevrolet fuel pump with description
Contains all structural elements of on-board wiring and equipment. The diagram in the photo is not divided into separate blocks. Here is a description of the location and connection of some ECM elements in the circuit.
In the photo, the fuel pump relay is numbered 21, and the fuse module is numbered 25.
What is a relay
A relay is called an electromagnetic switch, which is designed for switching during abrupt changes in the input value (current, voltage) in electrical circuits. In simple terms, it is a device that turns on when a voltage signal is applied to it, and turns off when the voltage disappears. The current that switches the device is very low, and to start the fuel pump a large current is required. Therefore, it is also called a kind of amplifier.
What does it consist of?
There are different numbers of relays, but almost all of them perform similar functions. This device consists of a contact group, which we can see by removing it from the block. Inside it there is a coil with a certain number of turns of copper wire, a return spring and an armature. All this is assembled in a certain sequence and located on the board. A photo of the contact group and the shape of the relay can be seen below, or you can enter it in a search engine and see all the types and types. We are interested in the Chevrolet Niva fuel pump relay, which looks like this.
Relay operating principle. The fuel pump relay is used only in engines with injection type. Carburetor engines use a mechanical fuel pump. The Niva (injection) car uses a 12V electric fuel pump. The electrical circuit of its operation includes power wires, a fuse, a relay, as well as fuel reading sensors in the tank. Thus, when you turn the car key, power is automatically supplied to the relay. It, in turn, operates instantly and closes the contacts that power the pump. This is how the fuel pump turns on briefly, as a result of which, when we sit behind the wheel and turn the key, we hear its buzzing, indicating its operation.
Location in Niva
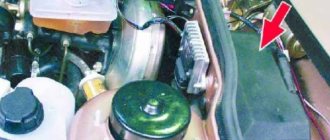
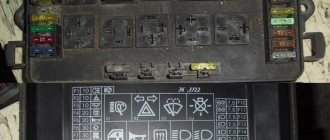
On the right side under the glove compartment there is a cover, and under it there is part of the electronics of the Niva car, the second part is under the dashboard on the driver’s side. Under this cover you can see the location of four relays. The device that is responsible for turning on the fuel pump and its operation is located under the third number. Next to it is a 15A fuse, which is designed to protect the circuit and electrical components of the fuel pump.
location of the relay box in the car
Methods for diagnosing the fuel pump relay
You can use several methods to check.
- Connect the low side of the contacts to a 12 volt power source. At the same time, a working relay clicks. The high part needs to be connected to a dial with a light bulb. If the lamp lights up when the relay is triggered, everything is in order.
- The second method is to connect a tester. We set up the device to measure resistance and also connect it to the low side. The measured resistance should be compared with the nominal value.
Supply system
The power supply for the electric fuel pump in Shnivy is presented simply. The contact group starts from the ECU and closes to the fuse. Next, through the protective relay, the circuit goes to the fuel pump. The car's electronics read data from the sensors and send a signal to the engine to supply more or less fuel.
The absence of additional elements and unnecessary electronics ensures increased design reliability.
Trouble-shooting
The engine will not start if the fuel pump does not supply gasoline to the fuel line.
In this case, the check begins with the fuse. If it is working, you need to make sure there is voltage at the fuel pump terminals. For diagnostics you will need a multimeter. Raise the rear seat and remove the cover covering the pump. If, when the ignition is turned on, 12 volts comes to the terminal and the pump motor does not work, the unit needs to be replaced.
Often the pump stops working due to terminal oxidation. Therefore, inspect the connector and, if necessary, clean it of corrosion.
If there is no power supply, it is necessary to check the operation of the relay and the integrity of the wires.
Interruptions in operation or insufficient engine power are a consequence of loss of pump performance and a drop in pressure in the line. This happens for three reasons:
- Voltage drop due to oxidized contacts.
- The coarse filter mesh is dirty.
- Pressure regulator malfunction.
First, check the status of your contacts. Then dismantle the fuel pump and remove the strainer. At the first sign of contamination, the mesh should be replaced with a new one.
Checking the operation of the pressure regulator requires a pressure gauge. It connects to the fuel line outlet. The operating pressure when the ignition is on should not be lower than 3.6 Bar.
A fairly common option: “It’s getting cold outside. I got into the car, started it, and the car immediately stalled!” My first thought was “the fuel pump is broken.” The starter spins briskly, but doesn't grab a beat.
0) When the car is working properly, when you turn the ignition key, you hear a click from the fuel pump relay (under the glove compartment, at the passenger’s feet), after which the fuel pump hums for 4-6 seconds (increases pressure), after which the relay clicks again. Also, the relay and pump operation can be heard while the starter is running. (But due to the operation of the starter itself, it is very quiet).
In my case, the relay was audible, but the pump was silent.
But you should keep in mind that clicks and the pump will only be heard the first 2 turns of the key. After this, Boshev’s “brains” block the work of pressure, it is believed that there is pressure in the system.
You can reset the negative terminal from the battery for a few minutes (reset the “brains”). After this, the pump will turn on again.
Make sure there is gasoline in the gas tank. (although the relay will click without it, the pump will be audible even without it).
What to check, where to crawl. 1) We get under the hood. Fuel rail (where the molds are) At the end of the ramp (from the windshield side) there is a cap. Under the cap there is a spool (valve) that, when pressed, gasoline should flow from the ramp in a good stream. After several attempts to start the key, there should be a trickle. You can check with two people (one turns the ignition key, the second checks the pressure in the rail). If there is pressure, everything is fine with the fuel pump. That's not the reason.
If there is no pressure, then the problem is probably with the fuel pump.
2) Check the fuel pump fuse. It is located under the glove compartment. At the feet of the front passenger. We move the seat to the rearmost position and crawl there:
The fuse is 15 A. Sometimes the fuse is intact, but its seat is bad (it does not press well). It is recommended to carefully rotate the “legs” of the fuse.
This way the contact will be more reliable. Checking the operation of the fuel pump (by sound or pressure in the rail)
3) Check the fuel pump relay. Indirectly, a faulty fuse may be indicated by the absence of a characteristic “click”. If it “clicks”, then everything is fine with it. It is located in the same place as the fuse.
The two middle relays can be swapped. They are interchangeable. Relay 752.3777-121 For 12 V and 30 A. If there are no clicks, then there is a problem with the wiring (a break somewhere). If there are clicks, then check the operation of the fuel pump. If we don’t work, we move on.
4) there is a hatch under the rear right seat. Let's open it.
Two gas hoses and one electrical connector. We remove the connector, and the 2nd and 3rd contacts of the chip should be 12 V when the key is turned (and the starter is running). Check with a multimeter. If there is no voltage, then the circuit is open. (including you need to check the total “mass” in the trunk, at least make sure that the side lights and turn signals in the rear lights are on) If there is voltage on the “chip”, then there is something wrong with the pump itself.
5) Remove the fuel pump. It is advisable to have less than 1/3 of a tank of gasoline. I recommend tying the hoses and electrical wire so that after disconnecting from the fuel pump they do not fall into the niche. Unscrew 12 M10 nuts. We get the fuel pump.
6) Diagnostics of the fuel pump. Dry the fuel pump. Provide 12 V in home laboratory conditions. Check all terminals. Sometimes it burns noticeably:
Also check the mesh filter. If the problem is with the fuel pump, then I recommend installing a new one.
Mine lasted 8 years. If old, tired pumps are still working, they cannot create the necessary pressure (the error on the BC is “lean mixture”).
All models of fuel pumps are interchangeable. Previously they had a short glass. Now with deep. Get the latest version of the pump. Just so that the connector for connecting the electrical harness fits (but for now they are all the same). Old fuel pump 21236-1139009
Main malfunctions and their possible causes
Problems in the operation of the fuel pump manifest themselves in the operation of the engine, which begins to behave incorrectly:
- Doesn't start or stalls.
- It idles, but does not pick up high revs.
- Doesn't develop enough power.
- Unstable at idle.
Similar symptoms also appear in case of malfunctions of ignition, injection and other key systems. However, it’s worth starting by checking the operation of the pump.
Problems arise for the following reasons:
- Broken wires or oxidation of contacts in the power supply circuit of the relay and fuel pump.
- Pressure regulator malfunction.
- Failure of the fuel pump relay or fuse.
- Fuel filter clogged.
Important: if the coarse filter is dirty, not enough gasoline is supplied to the electric motor and it overheats. If the problem is not corrected in time, the fuel pump will fail.
Fuel pump fuse
In the standard Chevy Niva circuit, the element is responsible for protecting the corresponding relay from overload and voltage surges. The fuel pump has not been changed and the wiring connection is relevant for cars of 2003, 2005 and 2006. Also, nothing has changed after restyling.
In cars with air conditioning, the arrangement of the elements may differ. The “features” of the manufacturer should be taken into account. The part can be installed anywhere.
Chevrolet Niva fuel pump fuse: where is it located?
Installed in an additional mounting block located under the glove box. The photo shows its exact installation location. There is a blue insert here, which is relevant for cars from 2004.
A relay is also located next to the entire structure - indicated by an arrow in the figure. This arrangement is relevant for almost all modifications of the car. The data will be correct for cars produced in the years:
- 2008;
- 2019;
- 2012;
- 2007;
- 2016;
- 2017;
- 2018.
The role of fuse in electrical circuits
Needed to protect electrical equipment from power surges and overloads. Each insert has a certain value and current strength, upon reaching which the sensitive element burns out and the circuit opens.
The structure of the fuse and its principle of operation
A modern fence is a plastic body with two metal legs. There is a fusible element between the terminals.
The principle of operation is to destroy the sensitive element under the influence of a current exceeding the permissible value. For example, a short circuit occurs in the network, the fuse blows, and the node is not damaged.
Explanation of symbols
For obsolete parts, markings were applied to the surface of the packaging. And the building did not have any special designations.
Options
The standard circuit fuse is rated at 15 A, which is sufficient to operate the device. Some users, if there are problems with the mechanism, install high-power fuse links in the circuit. Experts categorically do not recommend doing this due to the increased likelihood of damage to the pump and fire hazard.
Relay structure and its purpose in a car
The device is designed to be able to turn the pump on and off by electronic control.
Design and principle of operation
The Chevy Niva fuel system uses a submersible fuel pump, which is based on a commutator motor with two permanent magnets on the stator.
Power is supplied to the pump through a relay, the control contact of which is connected to the engine control unit. The circuit is protected by a fuse, which prevents the electrical wiring from catching fire in the event of a short circuit.
The fuel pump relay is located inside the car under the glove compartment. The fuse box is located nearby.
Often, a fuel pump is not called the electric motor itself, but a module that includes:
- A plastic case that performs a load-bearing function.
- Coarse filter that retains coarse-grained contaminants.
- The pressure regulator is a bypass valve that returns excess fuel to the tank.
- A sensor and float that read information about the fuel level in the tank and transmit the data to the on-board computer.
The electric pump is installed below the gasoline level. This ensures lubrication and cooling of its parts. If you run out of fuel completely and force the electric pump to run dry, it will quickly break down.
The rotation of the pump impeller ensures pressure in the fuel line within 3.6-4 Bar. If this indicator is exceeded, the pressure regulator bypass valve is activated.
Gasoline enters the impeller through a mesh filter, which protects the assembly from large foreign particles. Fine contaminants do not harm the fuel pump.
Electrical wiring components
The standard Niva Chevrolet wiring diagram is divided into several sections for better maintainability and ease of maintenance.
- Front part - a set of cables connects all equipment located in the engine compartment of the car.
- The interior part - the unit is additionally divided into independent zones, which allows you to power different groups of equipment without the risk of damaging or overloading the main elements.
- Instrument panel compartment - a bundle of cables combines the lines from all gauges, sensors and indicators.
- The stern assembly - the bundle is responsible for voltage and control of equipment located on the rear side of the vehicle.

