In this article we will talk about how to make sound insulation on a VAZ-2109 with your own hands. “Nine” is rightfully considered the most popular model. It was desirable in the 80s as soon as it appeared on the meager Soviet market, so either party officials or no one could own such a car. In the 90s, the market situation became simpler, queues became a thing of the past, but only those who had money bought cars. As a rule, these were bandits and businessmen (however, in those years these words were synonymous).
Features of the "nine"
Today, the “nine” has not lost its popularity - it is a pretty good alternative to old foreign cars, and it is much cheaper to maintain. Very often this car is used as a “platform” for installing music - a subwoofer, speakers. And the sound quality depends on how tightly all the casing elements are installed.
And with this, everything is bad in the VAZ-2109 - all elements made of plastic are fitted extremely poorly. Literally everything creaks and rattles - the trunk shelf, door panels and dashboard. And if you install even not very powerful speakers in the car, unpleasant extraneous sounds will constantly irritate your ears. It is unlikely that you will be able to achieve perfect sound.
Materials for work
Of course, even if you spend tens of thousands of rubles on purchasing soundproofing materials, as well as on the services of specialists, you will not be able to bring the car closer to even a budget modern foreign car, for example, a Hyundai Solaris. But you will still be able to significantly reduce the noise level in the cabin from the engine, gearbox, and wheels.
As a rule, the following materials are used when carrying out noise insulation work on a VAZ-2109 car:
- Vizomat.
- Vibroplast.
- Bitoplast.
- Splen.
But to choose a material, it is recommended to study the features of each of the listed ones. This is what we will do now.
Sounds from contact with road and air
The sounds generated when the car comes into contact with the road are transmitted to the cabin not only, and even not so much through the air, but through structural elements - wheel hubs, shock absorbers, levers, and the car body. Pebbles flying out from under the wheels hit the fender liners or wheel arches, and the sound comes into the cabin through body vibration. Pasting the bottom with soundproofing material somewhat changes the frequency characteristics of sounds penetrating into the cabin, but their intensity changes slightly. It is important that such sounds are very informative. If there is significant noise of this kind, you should reduce your speed and, if possible, choose a more suitable section of the road for driving.
The noise that occurs when a car interacts with air does not occur mainly on large planes of the underbody, roof and doors. It is generated in cracks, loosely fitting joints, gaps that have expanded during the long-term operation of your VAZ 2109. Adding a layer of sound insulation has little effect on the level of these noises, especially considering the need to keep the windows slightly open in the summer when there is no air conditioning as standard on the car.
Typical for the VAZ 2109 is the noise created by the car itself outside the cabin. “Nine” is an old car. A decade and a half has passed since the release of the last series from AvtoVAZ. And like any old man, your VAZ 2109 groans and groans while driving. Something is rattling in the suspension, valves are knocking, the muffler is siphoning. Of course, you can try to isolate yourself from these grunts with soundproofing. But wouldn’t it be better to give the veteran proper care - stretch the suspension, adjust the valves, repair the muffler?
Pasting the engine shield with sound insulation does not solve most of the problems, does not muffle the sounds of the front and especially rear suspension, and does not interfere with the humming and growling of the muffler. Only the engine noise, which, when properly adjusted, usually does not irritate anyone, is somewhat reduced.
Vibroplast
This material is based on a composition of bitumen and a thin layer of foil (usually aluminum). Vibroplast is ideal for soundproofing VAZ-2109 doors, hood, trunk, and floor. Its main function is to absorb vibration, but it also performs well as a sound-proofing material.
You can find two types of vibroplast on sale - “Gold” and “Silver”. The only difference is in thickness - for “Gold” it is 2.3 mm, and for “Silver” it is 0.3 mm less. As a result, these types of vibration absorbers have different weights - 3 and 4 kg, one square meter weighs. If it is necessary to treat a large surface area, then it would be more rational to use the Silver absorber. The reason, as you can guess, is the cost - if you use Gold, you will spend a lot of money, and it has slightly better efficiency.
Vibroplast is a self-adhesive material, but if you want to do all the work efficiently, you need to warm up the surface on which you plan to apply it. In this only case you will get the most durable contact of the material with the body element.
Lada 2109 082 › Logbook › Crickets and noises in the cabin Samar 2109-2114
Good evening everyone. Due to the fact that my previous post about body sores of the Samara family caused a good stir and received the most views in my blog, I decided to continue sharing my experience and observations of everyone’s favorite AvtoVAZ.
This time I’ll tell you a little about the common crickets, noises and knocks in the cabin of any hatchback of the Samara family.
1. Trunk lid.
In my opinion, it is the trunk lid that most irritates the owner of the chisel, with its creaking, knocking, clanging, etc. What is the reason for the trunk rattling? Most likely it is a bad trunk lock and an unstable body. I defeated the trunk lyada very easily (in my opinion). I screwed thick pieces of rubber along the edges of the lid, thereby securing the lyada from rattling on bumps and when turning. When the trunk is closed, the gap between the body and the rubber is 1-2mm. I also placed two washers (2mm thick) and a piece of a bicycle tube in the middle under the counterpart of the trunk, after which the trunk began to close a little more difficult, but securely and tightly. Of course, you could do what many do - install a lock against viburnum, grants, etc. But I’m a student :) and my finances are only enough for gasoline) Well, the best way to get rid of the trunk sound in the cabin is to install a body strut (namely the body, not the glasses!) and install a viburnum lock. This method works well, I tested it personally with a friend in 2114.
2. Back of the rear seat.
Probably almost
EVERYONE
has a creaking rear seat back.
The Internet is full of ways to combat this problem. Some people put a boot on the steering tip, others cut off the mushrooms themselves (pins) on which the back is fastened. Someone remakes these fasteners and replaces them with a bolt or puts a bottle cap on them. EVERYTHING IS PASSED!
Guys, there is one
100%
effective method on how to remove squeaking. It's ridiculously simple. You just need to wrap the elastic band, which is located under the back lock. I covered it with 2 layers of thin self-adhesive carpet and put it in place. The back has become very difficult to fasten, sometimes not even the first time, but when you fasten it, it will shut up forever.
Vizomat
This is a standard soundproofing material that has recently been used in cars such as Granta and Priora. The difference from the one discussed above is that the visomat has higher rigidity, so it covers the surface much better. Indeed, in some cases, soft materials can be pressed through (for example, in the trunk and on the floor). But rigidity is also a disadvantage of the material, since it is a little more difficult to work with.
Vizomat can be purchased on the market in the following series:
- PB with a thickness of 2 or 3.5 mm.
- MP (multilayer material with high strength).
- Q1 (material with increased elasticity).
Many car enthusiasts prefer Vizomat PB-3.5 materials. It has good characteristics (mechanical absorption coefficient 0.19), and most importantly, low cost.
How to make an additional muffler resonator with your own hands
Making a muffler resonator with your own hands is quite simple; now we will discuss each step in detail. First you need to make an outer casing, it can be made from any steel pipe with thin walls: which looks like this:
The end part looks like this:
Then you need to take perforated iron with a thickness of 4.5 mm. This is enough to insert it into the end part, as in the photo below:
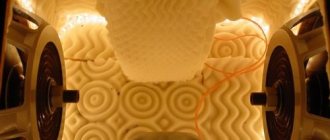
Next, you need to fill the resonator with something; ordinary tin sponges are perfect for this purpose.
Then you need to pull the resonator body onto these washcloths, as in the photo:
Then you need to take rivets and rivet the entire structure, so you don’t even need to weld it, like this:
For those who like to cook, you can also brew the end parts to the central part.
When everything is ready, you need to process the seams and you can paint them with heat-resistant paint, and after that the quietest muffler on your car is ready.
Bitoplast
This material is ideal for soundproofing the hood of the VAZ-2109. It consists of foam rubber, which is impregnated with bitumen. A layer of self-adhesive is applied on top. This material allows for fairly effective noise reduction - approximately 90%. And most importantly, it has high elasticity and shrinks almost to zero.
On sale you can find material with a thickness of 5 and 10 mm. It is recommended to use it for soundproofing the VAZ-2109 panel, as well as other plastic elements. But if the surface has a large area (for example, a ceiling), then even a thick centimeter-long material will not be enough. In this case, experts recommend using an analogue of bitoplast - Accent. It has a higher density and also has a layer of aluminum foil.
Splen
It also belongs to universal soundproofing materials and is made of polyethylene foam. In addition, splen has very good thermal insulation properties. It has a closed cell structure, so it does not absorb liquid. It is convenient to work with the material, as it has a self-adhesive layer. On sale you can find two types of splen - with a thickness of 4 and 8 mm (their weight is 370 g and 600 g per square meter, respectively). Typically, splen is used to cover the partition of the engine compartment and wheel arches.
Sheet selection
You must immediately understand that for different parts of the interior, it is necessary to use different materials. And that vibration isolation is not the same as heat and noise insulation. The noisiest part of the VAZ 2114 is, of course, the engine compartment and the gearbox tunnel. This also includes the wheel arches, namely the pillars. It was chosen to glue StP Bimast bomb Premium on them. I got 4 sheets. iSilver 30 was placed on the floor of the cabin. It took 12 sheets. iSilver 30 10 sheets were used for the doors and ceiling and hood. A Barrier 8 x 2 sheets for the ceiling was purchased. and BiPlast 10K to eliminate crickets. There is the same material, but with tape. It turns out more expensive. It’s easier to take one leaf and have someone cut it into strips 1-1.5 cm wide. The most Jewish part of the purchase! As a heat and sound insulating material, we chose a simple roll on the construction market. Its price is 1000-1200 rubles. Moreover, there are 30 square meters. In the end, it was left for gluing the roof))) According to the receipt 6725 materials StP + 1100 rubles market.
What to use?
As you can see, there are a large number of materials available for sale. And choosing the most suitable one will be difficult for those who are doing soundproofing of the VAZ-2109 with their own hands for the first time.
To carry out the work, it is best to use the following materials:
- Vibration isolation - can be done with either Vizomat or Vibroplast. It must be glued directly to a metal surface. These materials will prevent extraneous noise from entering the cabin.
- Sound absorber - Accent or Splen can play its role. It must be glued on top of vibration-proofing material. With the help of Spleen you can muffle all the noise that comes into the cabin from the outside.
- Bitoplast can be used as an anti-squeak material. It must be glued to plastic parts that rub against each other or come into contact with metal surfaces.
There is no need to stick shielding material on top of all layers, since Spleen already has a foil coating.
Where is the noise coming from?
First, let's determine the main places through which noise enters the cabin. These include:
- hood;
- doors;
- bottom;
- partition between the engine compartment and the passenger compartment;
- interior roof;
- luggage compartment.
It is these elements that are subject to processing.
Do-it-yourself car soundproofing, what materials are required
What materials and tools are needed
In order to carry out high-quality soundproofing work on the VAZ-2109 with your own hands, you will need the following set of tools:
- Construction hair dryer.
- Scissors (the sharper the better).
- Stationery knife.
- A roller or scraper will be needed to roll and level the material.
- The tape is double-sided and reinforced.
- Solvent or white spirit.
- Roulette.
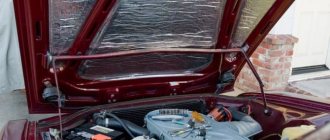
The first stage of the work is a complete disassembly of the entire interior. You will need to remove the seats, door panels, ceiling, and all trim elements. There should be bare metal left. It must be cleaned so that not even a small amount of dust remains.
How to paste over metal elements
Quite often, the factory sound insulation of the VAZ-2109 does not suit car owners. Yes, and it becomes unusable quite quickly. Once you have completely cleaned the interior, you can begin installing soundproofing materials. You need to start with the largest elements by area.
You need to perform the following manipulations:
- Vacuum the entire body, treat metal elements with solvent or acetone. If you find rust, the procedure becomes more complicated. First, all areas must be cleaned and treated with a rust converter. Then coat with primer and paint.
- Determine the area of the body from which you will begin gluing the material. After this, you can cut out a piece of Vibroplast that will correspond to the size of the area.
- Heat the material with a heat gun to about 40 degrees, remove the protective layer and apply Vibroplast to the body parts. Be sure to roll the material onto a metal surface.
- Please note that the larger the area of contact of the material with the surface, the stronger the contact will be. But you shouldn’t process the wheel arches in one piece - you need to cut out several.
- The sheets must be glued end-to-end, the gaps should be minimal. All contact lines must be taped using reinforced tape.
- When you complete the installation of the first layer, you can begin gluing the Splen or Accent. Such materials are also self-adhesive; the installation principle is the same as with Vibroplast.
Lada 2109 Vazentador › Logbook › Making the exhaust “quieter”
So my little lovers of cans and their modifications)) In this post there will be a story about how I made the exhaust quieter... Initially, when I bought the exhaust system, I didn’t even bother about the sound and selected the can according to the design that matched the body kits and that’s all for me liked. As a result, after starting the Vazentador plant, I realized that the jar was mega loud. Of course, it’s fun sometimes even when you’re racing straight away... but in everyday life it’s already starting to get boring. As a result, I began to think what and how... Fortunately, there is our favorite site and there was a lot of advice on what and how (a topic was created in the group). And by a general consensus between myself and myself, I decided to try to refill the jar with glass wool.
Well, we go to the garage, remove the can and saw it...
We also see glass wool there, already burnt and with a half-empty middle, we shake out all this crap from there
Rinse, etc. ...Next I made small cuts on the pipe, which is closer to the resonator, in order to increase the blown space of the can, otherwise, given its size, there is not enough space there anyway
Then we grab the glass wool... although wait, first we put on rubber gloves
otherwise you are guaranteed a fun sleepless night
And we begin to hammer our jar tightly (any auxiliary objects will do: a hammer, a crowbar, hands, etc.)
I got one and a half sheets of cotton wool in there, pretty good for this micro-jar... Well, having finished my work, I went to a friend who was a metal “surgeon” and he, as a “doctor” who took the oath of a welder-saw-sawker, surgically sewed up my creation for me)) )
Satisfied, I fly to the garage, quickly put everything back together and voila...
Good luck to everyone on the roads and have fun driving))
Source
What should happen?
The result should be a completely covered floor and ceiling with two layers of insulation. If you have a limited amount of material, you can only cover the space between the stiffeners. Be sure to cover the wheel arches, the partition between the passenger compartment and the engine compartment, the tunnel under the muffler pipe, and the inside of the hood.
To soundproof the luggage compartment, it is best to use Decor rather than Spleen. This is almost the same material, only on top it is covered with a tougher leatherette. Therefore, such material can serve as interior trim for the trunk. All work is done in the same way as when finishing the ceiling. First, Vibroplast is glued on, then sound insulation.
Soundproofing doors
Before soundproofing the doors, you need to completely remove the factory anti-corrosion coating. Otherwise, it will not be possible to properly glue the insulating materials. Start with the outer walls. You need to stick Vibroplast Gold on them (it has better elasticity). Try to cover as much area as possible. It is worth noting that it is inconvenient to work with, since everything is limited by the size of the technological hole.
If speakers are installed in the doors, then Vibroplast can be glued around them. This will only improve the quality of the speaker system. But you shouldn’t completely fill the holes between the door walls, since Vibroplast absorbs moisture quite well. Splen must be glued to a vibration insulation layer. Afterwards, you can install a sheet of material over the entire area of the door, after which you cut a hole for the speaker.
How to work with plastic
Now that the soundproofing of the VAZ-2109 floor, ceiling and doors has been completed, you can begin processing the plastic elements. After all, it was because of them that the car received the nickname “rattle”. It is necessary to process the following elements at this stage:
- In the trunk, you need to glue the side shelves from below, the entire interior trim, as well as the entire contact area between the shelf and the body with Vizomat.
- To get rid of squeaking in the back seat, you need to use Litol-24. All guides and locks must be treated with this lubricant. Afterwards, lay strips of Bitoplast in the places where the back and saddle touch.
- It is recommended to cover the racks completely with Visomat.
- The instrument panel must be laid in those places where it is in contact with body elements. As you understand, the entire panel will need to be removed. All plastic elements that come into contact with each other must also be treated with soundproofing materials.
Comprehensive sound insulation of the “nine” is a rather painstaking process, it will take 2-3 days. But if you can do it yourself, you won't need to use any expensive equipment. All work is fully justified, the comfort of driving a car is significantly increased.
Beautiful modifications to the VAZ 2109 panel
Every driver of a domestic car wants to make the instrument panel of his VAZ-2109 as bright and original as possible. Here is one of the options for how beautifully you can modify this element of the machine.
You will need a soldering iron. Next you need to buy numbers and a scale panel. It is important that they are translucent from the inside. You should also purchase an ultraviolet lamp. It is powered by 12 volts. Therefore, nothing needs to be changed.
You will also need a fluorescent marker or paint. It will change color if exposed to ultraviolet light. This technique is often used in modern nightclubs. You will also need ordinary light bulbs with sockets, like those in the “tidy”. There is no need to change the LEDs; they will remain in place. Everything you need is there, you can get started.
First you need to remove the plastic, then the dashboard. Also, don't forget about the black plastic that surrounds the glass. We disassemble the standard insert, as well as the arrows. Most often, there are no holes in the new insert. Therefore, you will have to do them. For the arrows, the holes will be needed wider than in the standard trim. Otherwise, the arrows will start to stick.
Next you need to dismantle the lighting that is installed. The work should be done carefully so that the plastic is not damaged. We take out the board with the light bulbs. We install a neon light bulb instead of the usual ones, and stick a plastic protection on top. It used to have factory bulbs screwed in. Don't forget about the control unit for the new neon light bulb. Be careful not to reverse the polarity at all times.
If this happens, nothing will shine. Next you need to screw in the instrument lighting bulbs. This should be done in parallel to the neon lamp. We lay the wiring from the inside; first, for this you need to make holes in the partitions.
Let's check if everything is correct. The light bulbs inside should be adjusted. Next we put on the overlay and seal it. After these steps, all we have to do is paint the hands with a purchased fluorescent marker or paint. It is advisable to repeat painting after 10 minutes. After this, the arrows can be installed in their place. This completes the tuning.
Check the work, otherwise you will have to disassemble everything. If there are no problems, you can assemble everything in strictly reverse order. After such tuning, the interior of the VAZ 2109 will be equipped with a colorful panel like good foreign cars. If desired, you can use fluorescent paint to paint the dashboard trim in the place where the needle reaches its limit. It looks very nice.