Engine cooling system VAZ-21083
1 – expansion tank; 2 – expansion tank plug; 3 – steam removal hose; 4 – hose from the expansion tank to the thermostat; 5 – radiator supply hose; 6 – radiator outlet hose; 7 – left radiator tank; 8 – aluminum radiator tubes; 9 – sensor for turning on the electric fan; 10 – right radiator tank; 11 – drain plug; 12 – radiator core; 13 – electric fan casing; 14 – electric fan impeller; 15 – electric motor; 16 – pump gear pulley; 17 – pump impeller; 18 – camshaft drive toothed belt; 19 – heater radiator outlet pipe; 20 – pump supply pipe; 21 – tap; 22 – heater radiator; 23 – hose for draining fluid from the heating of the inlet pipe to the carburetor heating block; 24 – carburetor heating block; 25 – exhaust pipe; 26 – heater supply pipe; 27 – hose for draining fluid from the heating of the inlet pipe and the carburetor heating unit; 28 – coolant temperature indicator sensor; 29 – thermostat.
VAZ-2111 engine cooling system (with fuel injection system)
1 – expansion tank; 2 – plug; 3 – steam removal hose; 4 – hose from the expansion tank to the thermostat; 5 – coolant temperature sensor in the outlet pipe; 6 – throttle unit; 7 – radiator supply hose; 8 – radiator outlet hose; 9 – left radiator tank; 10 – right radiator tank; 11 – drain plug; 12 – radiator core; 13 – electric fan casing; 14 – electric fan impeller; 15 – electric motor; 16 – pump gear pulley; 17 – pump impeller; 18 – camshaft drive toothed belt; 19 – heater radiator outlet pipe; 20 – pump supply pipe; 21 – tap; 22 – heater radiator; 23 – coolant drain hose from the throttle pipe; 24 – coolant supply hose to the throttle pipe; 25 – coolant temperature indicator sensor; 26 – exhaust pipe; 27 – heater supply pipe; 28 – thermostat; 29 – coolant level sensor.
Description of design
The cooling system is liquid, closed type, with forced circulation. The tightness of the system is ensured by the inlet and outlet valves in the expansion tank plug. The exhaust valve maintains pressure in the system when the engine is hot (due to this, the boiling point of the liquid increases and steam losses are reduced), it opens at a pressure of about 1.1 kgf/cm2. The intake valve opens when the pressure in the system decreases relative to atmospheric pressure by 0.03–0.13 kgf/cm2 (on a cooling engine). The thermal operating conditions of the engine are maintained by a thermostat and an electric radiator fan.
The coolant pump is a vane, centrifugal type, driven from the crankshaft pulley by a camshaft drive timing belt. The pump housing is aluminum. The roller rotates in a double-row bearing with a “lifetime” supply of lubricant. The outer ring of the bearing is locked with a screw. A toothed pulley is pressed onto the front end of the roller, and an impeller is pressed onto the rear end. The distance from the mating surface of the pump cover to the outer end of the pulley should be 52±0.5 mm, and to the outer (facing the block) end of the impeller - 39.8±0.1 mm. A thrust ring made of a graphite-containing composition is pressed to the opposite end of the impeller, under which there is an oil seal. If the pump fails, it is recommended to replace it as an assembly.
The redistribution of liquid flows is controlled by a thermostat with a solid heat-sensitive element. On a cold engine, the thermostat valve closes the pipe leading to the radiator, and the liquid circulates only in a small circle (through the thermostat bypass pipe), bypassing the radiator. On VAZ-2108, -21081, -21083 engines, the small circle includes the heater radiator, intake manifold, carburetor throttle assembly heating unit (on engines with semi-automatic starting - and the liquid chamber of the semi-automatic starting device). On the -2111 engine, fluid is supplied to the heater and the throttle assembly heating unit.
At a temperature of 87±2 °C, the thermostat valve begins to move, opening the main pipe, while part of the liquid circulates in a large circle through the radiator. At a temperature of about 102 ° C, the main valve opens completely, and the bypass valve closes, and all the liquid circulates through the engine radiator. The stroke of the main valve must be at least 8 mm.
The radiator consists of two vertical plastic tanks (the left one has a baffle) and two horizontal rows of round aluminum tubes with pressed-on cooling plates. To increase cooling efficiency, the plates are stamped with a notch. The tubes are connected to the tanks through a rubber gasket. The liquid is supplied through the upper pipe and discharged through the lower. Next to the inlet pipe there is a thin pipe for the steam pipe.
The electric radiator fan on VAZ-2108, -21081, -21083 engines is switched on by a sensor-switch screwed into the right radiator tank. Its contacts close at a temperature of 99±3 °C and open at 94±3 °C. On cars manufactured before 1998 (with an old fuse box), another sensor (TM-108) was installed that controls the fan motor through relay 113.3747 in the mounting block. On the -2111 engine, the fan is turned on by a signal from the electronic engine control unit (via a relay).
The expansion tank is made of translucent polyethylene, which allows you to visually monitor the liquid level. In its upper part there is a fitting for the steam removal hose from the engine cooling radiator.
To monitor the coolant temperature, a sensor is screwed into the engine cylinder head and is connected to a temperature gauge on the dashboard. An additional temperature sensor is installed in the engine exhaust pipe -2111, which provides information to the electronic engine control unit.
When the engine overheats, the control unit turns on the “Check Engine” warning light in the instrument cluster (see Controls and Instruments).
The heating system is described in the chapter Heating and ventilation system.
Replacing pipes
And when it’s time to change the heater radiator pipes on your VAZ 2109, don’t be afraid to do the replacement yourself. First of all, it is important to know where the stove radiator and its pipes are located. So, the heater radiator is located on the right heater casing (that is, to the right of the panel of heater control levers), direct access is blocked by the dashboard console. The price of the pipes themselves is a pittance, but for replacement at a service station they will demand a tidy sum, why? Now you will see for yourself. There are two ways to replace pipes (the methods are also suitable for replacing a stove radiator):
- The first - (the so-called classic) is carried out in accordance with the instructions (manual) for the operation, maintenance and repair of the VAZ2109.
- It involves removing the dashboard and draining the fluid from the engine cooling system.
- The second is simpler (folk), does not require complex manipulations
- In our article we will consider both methods so that you can choose the most convenient one for you.
"Folk" way
Folk craftsmen - these are brave and very desperate craftsmen - offer a much less labor-intensive method. The bottom line is that replacing the stove pipes (and the stove itself) is done without draining the coolant and without dismantling the instrument panel. The tools you will need are a set of screwdrivers, rags and a container (small) to drain the liquid from the pipes. In this case, replacing the heater radiator pipes is carried out according to the following scheme:
- Removing the terminals from the battery
- Close the heater tap
- We remove the right front seat (to make it easier to do the work)
- We unscrew the two screws securing the dashboard on the right side, and one screw located in the glove compartment, then, pulling the dashboard towards you, we place a wooden block
- Now there is a gap on the side of the passenger seat and you can get to the pipes and to the heater radiator itself
- Lay a rag on the floor of the cabin and prepare a container to collect the coolant
- Which will spill from the radiator and pipes
- We loosen the clamps of the pipes (photo above) and carefully, one by one, remove them from the radiator, replacing the container. 200 - 300 grams of coolant will drain into it
- Replace the pipes with new ones, and change the clamps, just in case.
- If necessary, unscrew the three bolts that secure the radiator to the stove and pull it down to the right
- We install the pipes and the new radiator in the reverse order.
Here are both methods, choose the one that suits you, and also watch a video on this topic.
Progress of work on replacing stove cables
Scheme of the VAZ-2109 stove
The first thing you need to do is turn off the power to the car. To do this, simply remove the negative terminal from the battery. Remove the panel trim in the area of the ashtray, radio and the mounting of the heater control levers - to do this, unscrew the 4 fastening bolts. Disconnect the wires from all switches: lights, foglights, radio, etc. Move the front seats all the way back or, in general, remove them so that they are not in the way. Remove the seat belt anchors on the floor. Also remove the plastic trim that holds the gear lever boot.
From under this casing you will need to remove the lower air duct. Very carefully disconnect the clamps from the faucet, and then the cables themselves. To make it convenient, first disconnect the leg heating flap rod (3), then the windshield heated flap rod (14), then the rod that controls the valve (19) and the rod that controls the flap (20). On the back of the heater, disconnect the wires that control the fan speed and the fastenings of the wires, backlights and levers. Not quickly, so as not to damage it, lower the heater control lever diagonally down. Now you can remove the cable and replace it with a new one.
Usually all the cables to the lever that controls the heater are included in the kit. You can’t buy them separately, but the set itself is not expensive, about 200 rubles.
After replacing the cables of the VAZ-2109 stove, the heating system should be assembled in the reverse order.
If you are not confident in your abilities and are afraid that you will not cope with the task, contact a car service. But keep in mind that the cost of replacement work will be decent, since replacing such a small part as a cable requires complete disassembly of the dashboard and quite a lot of time.
Replacing the heater inlet pipe on a VAZ-2108 car
If you value your vehicle, strive to ensure that your V8 not only moves, but pleases you with its trouble-free and highest quality work, then it is useful for you to periodically carry out preventive inspections. Sometimes the car itself announces problems with specific sounds, characteristic hissing, and leaking. However, you, as the owner of a car, may not notice a problem that has already arisen, but also one that is just emerging. All components have their own service life, after which they have to be replaced. Sometimes individual parts and mechanisms fail ahead of schedule due to various circumstances, including the frequency and duration of trips.
Replacement process
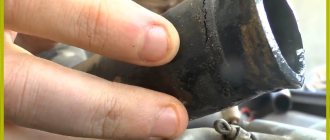
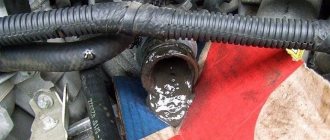
It's puddles like these that make drivers scratch their heads and wonder what action to take. Not every VAZ-2108 car owner knows how to replace a cracked pipe. We hasten to assure you that the replacement process itself is unlikely to seem like one that requires the use of great physical force. However, along with this, you need to prepare yourself for the fact that you will have to lose some time, since getting to the problem pipe will not be so easy. You will need to unscrew and remove some other devices that prevent access to the pipes.
Algorithm of actions
First of all, remember that replacing elements involved in the cooling and heating system can only be done after the engine has completely cooled down. For this reason, give your car a chance to sit, rest after a long trip, and allow the engine to cool down. At this moment, you can afford not only to drink a cup of coffee, but even watch your favorite movie. You can personally spend the same time allocated for forced waiting by visiting specialized stores. Search for all the necessary auto parts, including purchasing an intake pipe.
The store specialist will definitely ask you what diameter the heater pipes of your VAZ-2108 have. If you do not have such information, then either measure in advance or find the answer to your question on the Internet. Once you have everything in place to carry out the replacement, and the engine has already cooled down, you can begin to take immediate action. By the way, when dismantling devices, we recommend that you visually inspect them to make sure that they are in working order, and not bite your elbows when, in a few days, such a lengthy disassembly is required again due to the failure of another device. Pay special attention to hoses and rubber products.
Prepare a large container into which to drain the coolant. This is important, because when the components are disconnected, willy-nilly, the liquid will not just begin to flow out, but will flow in a continuous stream. Of course, if the fluid has already been used up, it’s not a shame to lose it, but if you just recently changed it, it’s better to keep the fluid so as not to expose yourself to additional unforeseen financial expenses.
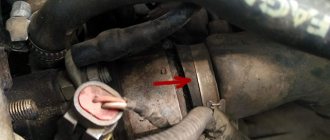
In most cases, the hose is secured to the fittings using clamps. Take a screwdriver in your hands and loosen the clamp, then move it up a little to release the intake pipe. If you recently changed it, it can be removed without any problems, but if the installation process was carried out several months ago or even years, it will not be so easy to remove it. The pipes turn out to be “stuck” to the fittings. It is impossible to use physical force to disconnect a cracked pipe, since both it and the fittings are not very strong elements, so brute force can cause additional problems.
In cases where your careful efforts have not brought you closer to your cherished goal, pick up a hacksaw for metal and carefully cut off the pipe. Then cut the remaining part in several places and carefully remove it too.
Before putting the new pipe on the fitting, apply a special sealant to it. After this, tighten the clamps tightly to ensure a secure fit. All that remains is to refill the coolant. We recommend that you first remove the mixing chamber heating pipe that goes to the carburetor. This little trick will allow you to prevent the system from becoming airy.
So, replacing pipes is not a complicated procedure, especially if you first read the recommendations. It is only important to accompany each action with extreme care so as not to provoke damage to additional elements of the heating and cooling system.
Radiator check
In most cases, there is a failure of one part of the VAZ-21099 stove. The check can begin with the radiator of the heating system.
In this case, it is advisable to carry out the check after any of the following manifestations appear in the cabin:
- specific smell;
- steam coming from exhaust vents;
- rapid evaporation of the liquid used for cooling.
In such situations, it is initially recommended to check the radiator, and any actions are best carried out after the engine has been turned off and it has had time to cool down.
If, nevertheless, no problems were found in the radiator, most likely the VAZ-21099 heater valve will need to be replaced. However, additional steps are required before this happens.
First of all, you need to carefully inspect the radiator you are using for potential leaks and the condition of its design.
How to check the radiator before understanding whether the heater valve of a VAZ-21099 car needs to be replaced or not.
At the very beginning, you need to disconnect and remove the car battery. After this, the antifreeze is drained from the cooling system. The next stage is the sensor and motor. Now you can remove the casing fasteners and carefully disconnect all the wires. In addition, you can remove the protective cover. The final stage is to disconnect the hoses, slightly tilt the radiator to the side and pull the part out. In most cases, replacement of rubber shock absorbers installed on special radiator holders is required. After removing the unit, you will need to install tight plugs on the pipes or holes to which they are connected. According to this scheme, air is gradually pumped into the radiator
It is important to note that the air pressure should not exceed 0.2 MPa. Then it is allowed to lower the radiator into a bath of water, remembering that the unit must be completely covered
The appearance of air bubbles indicates a leak in the seal and the need to replace the radiator. If there are no bubbles, the unit is only clogged and requires flushing to clean it.
After the preliminary action, care should be taken to adjust the tap of the VAZ-21099 stove and ensure full heating of the car interior.
The device of the VAZ-21099 stove
There would be no question of any comfort while traveling in a VAZ-21099 car if the interior of this sedan were not equipped with a heating system. Moreover, ensuring a comfortable temperature in the cabin can be considered a secondary task, and the main one is heating the glass (windshield and side front doors) to ensure visibility in conditions of reduced temperatures.
The VAZ-21099 uses a heating system that is classic for all cars, in which the air is heated using an additional radiator of the cooling system installed in the cabin under the dashboard. Thanks to this location, it is possible to provide heating for several zones - airflow onto the windshields and side windows, under the feet and directly into the cabin itself.
To ensure the efficiency of the stove, it is necessary that the flow movement is not spontaneous (due to temperature changes), but forced. And for this purpose, the heating system is additionally equipped with an electric fan.
Electrical component of the stove
Below is an electrical diagram for turning on the fan. For it to work, you need a temperature sensor, which is located in the radiator. When the coolant reaches a certain temperature, the sensor gives a signal and the fan turns on automatically.
- Mounting block.
- Ignition.
- Additional resistance (resistor).
- Motor.
- Button that controls the motor.
A – to the terminal with a plus sign “30” of the generator.
Some cars still have an old mounting block installed, in which case the fan is turned on via a relay.
Design of the VAZ-21099 heater
And then everything is simple: the created flow passes through the radiator honeycombs, where heat exchange occurs, as a result, heat is transferred to the air, which then blows into the required zones through the air ducts.
The design of the VAZ-21099 stove includes several main components:
- stove body made of plastic;
- heating system radiator (connected to the cooling system);
- electric fan;
- air ducts;
- heater control mechanism.
This car used heaters of two modifications (old and new), which were slightly different in design, but their components were completely identical.
Housing, radiator, dampers
Thanks to the housing, the required redirection of heating is ensured, since the movement created by the fan motor is immediately fed into it, rather than being dissipated. The body of the VAZ 2109 stove itself consists of two halves, connected to each other with special brackets. To reduce flow losses, a seal is placed between its halves. Partitions are made inside both halves, which provide the correct direction.
There is also a niche inside this case into which the radiator is installed. Initially, the radiator was made of brass, but now it is almost always made of aluminum. The design of the stove radiator 2109 is identical to the main one (consists of two tanks, tubes through which coolant circulates, and plates that form honeycombs), but is significantly smaller in size.
Video: The stove in the VAZ 2108, 2109, 21099, 2110, 2111, 2112, 2113, 2114, 2115 HEATS poorly
Air is blown through the stove dampers, also installed inside the housing. These elements are movable, and thanks to them it is possible to close some and open other air ducts. There are three of them in total - the main one (heater control), an air duct that redirects between the foot area and the supply to the cabin, and a damper for supplying flow to the windshield.
Additional flaps are installed on the side and central deflectors. It turns out that by default, air from the housing constantly blows onto the deflectors and this is done so that the flow always has an exit. Thanks to the existing dampers, it is possible to provide simultaneous supply of hot air to several zones at once (the interior and the windshield or the windshield and the footwell area).
The main heater damper provides air flow to the radiator or bypasses it. This is all done because the heater also plays the role of a forced ventilation system for the interior. This allows for a supply of cool air in the summer. And to do this, you just need to redirect the movement bypassing the heat exchanger, and the supply of heated coolant to the radiator itself will stop. To disconnect the heat exchanger from the cooling system, a heater tap is used, which is located on the supply pipe in front of the radiator.
Heating system elements
The stove diagram clearly shows the location of its main functional elements. It should be noted that the design of the stove on the VAZ-2108, 2109 and 21099 models is the same. Many car owners know that the heater in these models is not fully developed. As a result, the interior is not heated properly, so a decision is made to modify the stove with your own hands. Just in this case, it is important to know the design of the heater so as not to confuse anything.
The design of the stove of the VAZ-2109 car, whether it is a high panel or a low one, is absolutely identical. Therefore, the information presented will be useful to owners of this model with any instrument console.
Knowing the main points and what is located where, you can already try to independently deal with the problems that arise and fix the malfunctions that appear, while saving money and time on trips to the service station.
Heaters old and new
Finally, we note that the VAZ-21099 of different years of production used heaters with certain design features that related to the angle of the radiator and the location of the main damper.
In so-called old-style stoves (on cars before 1998), the radiator was installed almost vertically, and the main damper was located under the heat exchanger. There was a partition between the rear wall of the case and the radiator, which formed a channel that provided air supply down the case.
When the damper was open, the air flow moved through the radiator, where it was heated and supplied to the air ducts. In ventilation mode, the main damper closed the heat exchanger, forming, together with the front wall of the housing, another channel through which the flow went directly to the air ducts.
In the new model stoves (on cars produced since 1998), the radiator position angle was significantly smaller than on old heaters, which is believed to provide a larger contact area of the air flow for heat exchange.
The position of the main damper and its shape also changed (it became arched). It began to be located above the radiator. In the closed position (ventilation mode), the damper ensures air movement along the shortest path to the air ducts. In heating mode, it blocked the cold air supply channel to the air ducts and directed the flow down the housing, from where it went to the heat exchanger.
How can you restore the functionality of a car heater?
In most cases, disruption of functionality occurs due to deflectors, which can still be dealt with. In this situation, insufficiently warm air blows onto the car window. The main task is to configure the functionality of the VAZ-2109 stove.
At the very beginning, you should remove the front dashboard to ensure access to the flap that cuts off cold air. In this case, you need to check its functionality. To do this, it is recommended to check the tight fit of the element to the casing through which air flows are transmitted.
Most often, a large gap is formed between the closing element and the walls of the gutter. Forcibly lifting the damper upward should reduce the existing gap. To do this, use regular pliers. Initially, you need to find the fastening cable located on the right side of the gas pedal, and then carefully bend the wire. This will ensure maximum protection against cold air flow.
Completing all of the above tasks will prevent material costs. Moreover, there will be a good opportunity for successful adjustment of the stove.
How to check the condition of the VAZ-2109 pipes
Ideally, an inspection hole is needed to inspect the machine. In a garage this is not always possible, so craftsmen came up with another way out of the situation - they installed the VAZ-2109 on an overpass. You will also need a powerful jack; the car is placed on reliable supports.
To inspect the condition of the VAZ-2109 cooling system, stock up on the following tools:
- a lighting fixture with a protective cap that prevents injury from fragments of a broken lamp in case it falls;
- antifreeze to top up the fluid in the expansion tank to the maximum level.
Follow the step-by-step instructions and the test will be completed without any difficulties:
- Disconnect the negative terminal from the battery.
- Lay plywood or a thick sheet of cardboard on the flooring.
- First inspect the engine compartment, it is important to understand that the temperature of the cooling radiator and engine is equal to the air temperature.
- Evaluate the tightness of the connections of the pipes on the fittings that approach and extend from the radiator.
- The fit of the expansion component to the thermostat must also be carefully checked and felt by running your palm along the bottom of the connections. If the tightness leaves much to be desired, liquid is released.
- Tighten the clamps properly, but do not over-tighten, otherwise you may damage the pipe.
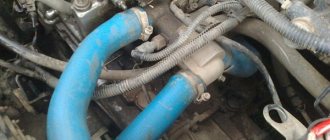
- Lie down on the cardboard placed under the VAZ-2109 and inspect the pipe along with the incoming pipe of the water pump. The hoses responsible for the interior heating system are also important.
- Pay attention to the pipes under the hood.
- Do not go past the rubber channels adjacent to the carburetor.
- Tighten the radiator drain plug and antifreeze temperature gauge securely.
Reasons for the release
The first step is to figure out why the coolant is being thrown out of the expansion tank.
- Wear of CO elements. In particular, we are talking about pipes and connecting hoses. They are constantly exposed to high pressure and temperatures. Therefore, over time, their wear and tear is a completely natural phenomenon. As a result, antifreeze begins to be thrown out.
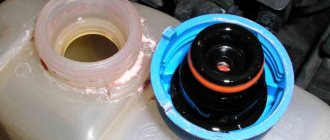
- Low quality components. If natural wear and tear is typical for used cars and cooling systems that have been in operation for quite a long time, then when using low-quality components, even on a completely new or updated cooling system, serious problems can arise. An example is simple burrs on the neck of the expansion tank. Because of them, the lid does not fit tightly enough, which leads to a gap and the release of antifreeze.
- Expansion tank. Alas, the quality of the plastic from which expansion tanks for the VAZ 2109 are made today leaves much to be desired. Because of it, the plastic simply bursts under high pressure.
- Faulty engine. If the engine itself is not working correctly, the coolant may boil. This leads to damage to the thermostat, radiator, and pump.
From this we can conclude that the quality of the CO directly depends on the technical condition of the car and the quality of the components used.
Signs of coolant emission
It is important to understand that coolant can be thrown out not only through the expansion tank cap, but also inside the system. It is important to monitor the condition of the CO and identify signs of a leak in time.
Antifreeze evaporates very quickly, so traces of it are not always visible.
- If coolant is released through the reservoir, puddles immediately form under the car.
- If liquid enters the cabin due to a malfunction of the CO, this can be determined by the smell. It has a sweetish tint.
- Antifreeze also often leaks into the engine system. Such a breakdown is determined by white smoke emanating through the exhaust pipe.
- The most unpleasant and dangerous situation is the release of antifreeze into the engine crankcase. If this happens, a white emulsion will appear on the surface of the oil filler cap.
- Periodically checking the space under the timing belt cover will determine whether the pump has failed. If yes, then you will find high humidity there.
Signs of boiling
If there are problems with the engine, antifreeze may simply boil in the CO. There is nothing good about this, so it is important to detect the malfunction in time. There are five main signs of coolant boiling:
- The temperature gauge jumps to 130 degrees;
- White foam appears at the filler neck;
- The engine stops working properly;
- The coolant level in the expansion tank rises sharply;
- White smoke comes out of the exhaust pipe.
Dismantling the worn-out cooling system of the VAZ-2109
If the coolant hoses are not in perfect condition, you will have to replace not only one worn component, but the entire system.
To install new parts, you need to dismantle the old ones.
Do-it-yourself dismantling of the cooling system consists of the following steps:
- Remove the cap from the expansion tank.
- Unscrew the heating valve inside the VAZ-2109, rotate the lever clockwise until it hits the end point.
- Remove the crankcase protective part by carefully unscrewing the fasteners.
- The coolant is drained into a prepared container with a volume of up to 8 liters. To do this, it is convenient to use a metal canister - it is easiest to drain antifreeze from it back into the VAZ-2109. Clean the area near the radiator drain plug and cylinder block, making sure that no dirt gets into the antifreeze. Place the container under the radiator.
- When the antifreeze is drained, tighten the plugs located on the radiator and housing.
- Replacing cooling pipes in a VAZ-2109 also involves dismantling work inside the cabin. Unscrew the bolts securing the instrument panel, get rid of the passenger and driver's seats - you can move them as far back as possible.
- Disconnect the clamps connecting the transmission tubes and provided for filling new antifreeze from the heater tap. It is located between the engine compartment and the passenger compartment.
- If they are pulled out, remove the rubber pipes by turning them on different sides. The parts have to be replaced, so they need to be trimmed with a sharp knife. Do not pull with force, otherwise you may damage the metal fixation of the fittings.
- Using a flathead screwdriver, remove the valve located in the engine compartment.
- Using pliers, release the holder from the heater tap drive rod.
- Clean the faucet and blow out the inside with a pump.
- Remove the pipes gradually, you need to dismantle everything coming from the engine and radiator. Remember how they were fixed - at the stage of installing new components, this will help to install them back quickly and correctly.
Checking the functionality of the heater tap
If the cold or hot air supply modes do not switch, the cause may be a loose damper control cable or souring of the mechanism itself. How to open the tap of the VAZ-2109 stove in this situation?
To do this, you need to remove the side panel of the dashboard on the passenger side. Then check the condition of the cable and if this is the reason, then connect it back into place. You can also, without removing the panel, put your hand under the dashboard, where the VAZ-2109 heater tap is located, and move the VAZ-2109 heater damper lever to the desired position. If the lever does not give in, then most likely it has gone sour and must be replaced.
Removing and replacing the heater valve
To replace the VAZ-2109 heater tap, you need a set of tools available to most drivers:
- a set of Phillips and slotted screwdrivers;
- a set of open-end wrenches No. 10 and No. 13 or socket heads of these sizes, as well as a wrench with a ratchet mechanism and a cardan;
- silicone sealant;
- container for draining coolant;
- metal brush;
- universal penetrating lubricant WD-40 or its equivalent;
- inspection hole, overpass or lift;
- rags to protect the interior flooring from antifreeze.
Ceramic, ball, and electric valves for the VAZ-2109 stove are available for sale. Which heater valves for the VAZ-2109 are better than those listed? With rare use, ball mechanisms are more susceptible to souring, and the electronic automatic heating control system “SAUO” is much more difficult to install. Ceramic mechanisms produced in Russia or “LUZAR” are free of these shortcomings.
Many experienced drivers advise simply replacing the heater taps with water taps. The benefit of this solution is not only in cost, but also in reliability - the coolant either constantly circulates or is easily closed manually at the pipe. Another way to make it easier to change the heater faucet of a VAZ-2109 is to abandon it altogether; the cabin temperature in this case is regulated by air dampers.
Instructions on how to change the heater tap of a VAZ-2109:
- Before replacing the valve of the VAZ-2109 heater, place the car on an overpass and, unscrewing the cap on the radiator, drain the coolant into a container prepared in advance.
- When the radiator is empty, use a screwdriver to loosen the clamps on the pipes going from the engine to the heater, then use WD-40 and a metal brush to clean the threads on the studs securing the part to be replaced. When finished, completely unscrew the clamps.
- Carefully remove the hoses one by one; they may contain residual antifreeze that needs to be drained.
Important! Do not skip this step, because it will not be possible to remove the valve of the VAZ-2109 stove with the hoses connected
- Having removed the side trim of the torpedo from inside the cabin, check the condition of the pipes and change them if necessary.
- Then, under the car, using a socket wrench No. 10, unscrew the nuts securing the part to be replaced on the VAZ stove
- Returning to the car interior, pull the faucet towards you (where the right passenger seat is), remove the spring clamp and disconnect the control cable from the part being replaced.
- We take a new spare part and reassemble it in the reverse order.
Important! To prevent future leakage of coolant at the joints of the pipes, it is necessary to treat it with silicone sealant, and also to increase the service life, install rubber seals where the heater faucet is located on the VAZ-2109. https://www.youtube.com/embed/QxX3tCjapJE. https://www.youtube.com/embed/QxX3tCjapJE
https://youtube.com/watch?v=QxX3tCjapJE
We make sure that the radiator plug is in place and fill it with coolant to the required level. Then we start the engine and, having gotten rid of air pockets, check the proper operation of the heater modes. This completes the replacement of the VAZ-2109 heater valve.
Having learned how to replace the heater tap, you can repair your car yourself, without visiting a service station and avoiding unnecessary repair costs.
- Home
- Auto garage
- How to Open the Faucet on the Stove VAZ 2109
Independent replacement of the VAZ stove tap2109
highest and lowest panel
Based on practice, usually the heater valve needs to be replaced if it starts to leak or becomes stuck so that its regulator stops moving. An old one cannot be repaired, and it cannot be sold restored. Although without this element, interior heating cannot work normally.
How exactly to replace a damaged heater tap on a VAZ-2109 car is done is described in this article.
Instructions for self-replacement of VAZ-2109 cooling pipes
Installation of new hoses for the VAZ-2109 cooling system is divided into the following stages:
- Use a wire brush to go over the joints, and then polish the surfaces with a clean cloth. Any small speck can cause a blockage in the cooling system.
- Treat the clamps with a fine abrasive file, because when tightening the rubber pipes with clamps, they can easily be damaged by sharp corners.
- Place the treated clamps on the pipes; if the pipes do not give in, wash the edges of the fitting with a liquid soap solution.
- You should tighten the pipe carefully, try to avoid distortions. The fit must be 100%, exactly in diameter.
- Retighten all elements, connections and plugs.
- Fill the expansion tank with antifreeze and tighten the cap.
Video instructions for replacing VAZ-2109 cooling hoses can be viewed below:
Sources:
https://wiki.zr.ru/%D0%A1%D0%B8%D1%81%D1%82%D0%B5%D0%BC%D0%B0_%D0%BE%D1%85%D0%BB %D0%B0%D0%B6%D0%B4%D0%B5%D0%BD%D0%B8%D1%8F_2108 https://masteravaza.ru/sistema-otopleniya/u-zubily-sistema-otopleniya/zamena- patrubkov-pechki-vaz-2109-131 https://remam.ru/vozdsys/zamenit-priyomnij-patrubok-otopitelya-vaz-2108.html https://avtocity365.ru/ustrojstvo-i-ekspluatatsiya-avtomobilya/ustrojstvo- pechki-vaz-21099/ https://ladaautos.ru/vaz-2109/samostoyatelnaya-zamena-patrubkov-oxlazhdeniya-vaz-2109.html
