Car sensors work very simply: when they receive physical data (be it various engine speeds or temperature) or chemical data (exhaust emissions), they convert it into electrical signals and transmit it to the vehicle's control unit. The unit is responsible for interpreting them and instructing the actuators to operate in accordance with the conditions or operation of the engine.
These sensors are very important as they are designed to ensure that the vehicle performs well and of course to prevent failures in its various systems.
Both modern and diesel cars have different sensors. Their classification corresponds to the function performed:
- Mechanical sensors: designed to open and close circuits.
- Electronic sensors: efficient and fragile.
- Electrical Sensors: These sensors have a coil or resistance that is responsible for sending a signal to the control unit.
Reverse sensor for Lada Kalina car
Car sensors work very simply: when they receive physical data (be it various engine speeds or temperature) or chemical data (exhaust emissions), they convert it into electrical signals and transmit it to the vehicle's control unit. The unit is responsible for interpreting them and instructing the actuators to operate in accordance with the conditions or operation of the engine.
These sensors are very important as they are designed to ensure that the vehicle performs well and of course to prevent failures in its various systems.
Both modern and diesel cars have different sensors. Their classification corresponds to the function performed:
- Mechanical sensors: designed to open and close circuits.
- Electronic sensors: efficient and fragile.
- Electrical Sensors: These sensors have a coil or resistance that is responsible for sending a signal to the control unit.
How to independently cope with replacing the speed sensor on Kalina
Any modern car is equipped with a variety of sensors to ensure comfortable and convenient use of the car. Sensors determine various parameters of the car’s operation, for example, engine temperature, the amount of fuel remaining in the tank, etc. In this article we will look at what the Kalina speed sensor is, where it is located, what malfunctions are typical for it and how to change the device.
Reverse sensor
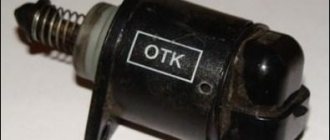
The Kalina reverse sensor is located on the transmission unit housing. The sensor on Kalina is necessary to ensure that the rear lights turn off when reversing stops. The ABS sensor (anti-lock braking system) monitors the movement of the car based on sensor readings.
The solenoid on the transmission allows the transmission to be locked in the event of a sensor failure.
If you do not lift the special ring located on the transmission gear selector lever, it will not be possible to engage reverse gear. The lift transmits an electrical impulse from the coil, the core is pulled into the coil, and the transmission is engaged. The same pulse generates a signal that allows you to activate the reverse indicator. The core is returned to its place during the reverse process. A pulse is generated inside the coil, which causes the lamps to turn off.
- Installation . Ease of installation is a point to consider. While you can always call a technician to install it, the reality is that detailed guides and instructions make it possible to do it yourself.
- Ease of use . In addition to being easy to install, the sensor is easy to use. In addition, its maintenance is minimal.
- Durability . The device must be shockproof and waterproof, otherwise it will quickly become unusable.
Characteristics of the 3X sensor
Let's figure out what the 3X controller is!
Purpose and principle of operation
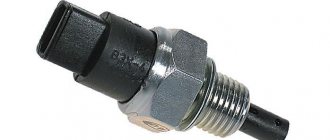
The reverse sensor on the Lada Kalina is located on the gearbox. The purpose of this device is to ensure that the rear lights turn off immediately when you stop reversing. The above-mentioned gearbox has a special coil installed that blocks reverse gear if problems arise with the sensor.
There is a ring on the gearbox lever with which reverse gear is given. As soon as this special part is lifted, a current charge is given to the coil, which draws in the coil core. These actions free up space for changing reverse gear. This pulse also signals the reversing indicators to turn on. If the headlights are turned off, the opposite situation is created when the core falls into place.
Location of the reverse gear
Typical faults
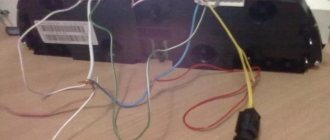
Lada Kalina is not a bad car, but there is one feature in it that completely spoils many of its advantages. This feature concerns the inclusion of reverse gear. The wiring on the gearbox is so thin and vulnerable that they can break at any moment if you do not handle them carefully.
There are other common problems:
- When you can reverse, but the light does not light up. If we are talking about one lamp, then the problem is with it and it will need to be replaced, if both do not light, you need to examine the circuit between the part and the lamps.
- Reverse indexing chain problem. In this case, you need to diagnose the ring on the gearbox.
- Often work stops due to the wires that lead from the sensor to the bottom of the machine, where the wire is affected by the environment and the contact can easily oxidize.
Cleaning the throttle body
Reverse sensor malfunction
This is not a serious fault, its repair can be systematically postponed, but it should still be carried out. The light indicating reverse gear is not required for driving, although it is necessary to communicate your intentions to other drivers.
Sometimes it happens that the lamps do not activate, although the reverse gear is engaged. In some cases, only one of the lamps does not light up. If one lamp does not work, then that is the reason. You can easily replace it yourself without visiting a service center. When two lamps fail at the same time, this requires checking the electrical circuit coming from the sensor.
Due to their location, patch cables are prone to frequent breaks.
Replacing the sensor requires experience:
- First you need to disconnect the wires.
- Unscrew the reverse switch and screw in a new one. This must be done quickly, otherwise a lot of oil will leak out.
- You can simply place a clean container under the crankcase to collect the oil. Then you need to fill it back.
Apart from the need to have this sensor in perfect working order, in practice it can provide invaluable assistance when performing a complex maneuver on the road. This is especially important if lighting conditions are poor.
The repair will be easy, especially if it involves replacing a fuse or lamp. If the fault comes from the gear switch - the least common - the repair is somewhat more difficult.
Replacing the lamp
Access to the light bulb is usually easy and in some vehicles this is explained in the manual itself. Simply remove the outer casing and start loosening the screws.
The next step is to remove the lamp from the socket. To do this, simply twist the lamp and let the metal part slide down the lamp holder guides.
As soon as the bulb is removed from the socket, it will be possible to see signs that the lamp needs to be replaced.
After replacing the lamp, you need to check its functionality. To do this, you need to turn the key, turn on the ignition and engage reverse. In this case, the new light bulb should light up.
Checking and replacing the fuse
After replacing the lamp, it still does not work, the problem is probably in the fuse. To fix it, you need to again use the car's owner's manual, which will help you determine the correct fuse.
Checking the electrical wiring
If the current does not reach the lamp socket, you should check the rest of the electrical circuit in reverse order.
- Check your repair manual for the color and route of the reversing wires.
- Probe each wire along its entire length.
- In most cases the wire will disappear into the cable where you can't reach it.
- In this case, you should be extremely careful, because you risk damaging the working wire.
- Once you have identified the faulty section of the wire, remove it and install a piece of new wire in its place.
Important! Be sure to provide high-quality insulation at the wire connection points. The quality of the insulation primarily determines the reliability of the contact and the safety of the driver. You can also eliminate the possibility of a short circuit.
Video - Reverse gear does not light up on VAZ 2108, 2109, 21099. We are looking for the reason
Because You are not logged in. To come in.
Because you are not a trusted user (phone number is not verified). Enter and confirm your phone number. Read more about trusts.
Because The topic is archived.
"Lada Kalina": reverse sensor
The Kalina reverse sensor is located on the gearbox housing. It is designed to ensure that the rear lights turn off synchronously with the end of reverse gear. There is a special solenoid (coil) on the gearbox, which blocks reverse gear in case of problems with the sensor. If the sensor does not work, then you will not be able to engage reverse gear.
Main reasons
- The fuse has blown. Both lamp bulbs are protected by one fuse link. Together with the lamps, the fuse will most likely protect some other circuits. Therefore, if your car’s taillights not only stop lighting, but also, for example, the dashboard backlight does not work, the first thing you need to do is check the fuse. You can find out which “socket” in the mounting block the lamp circuit goes through from the repair and operating manual for your car. In many cases, the main circuits are shown graphically on the inside of the fuse box cover.
Instead of a burnt-out insert, install only a fuse of the same rating. Installing a fuse link with a higher rating may cause the vehicle to catch fire. You can familiarize yourself with all the selection rules in the article “Classification of fuses for cars.”
- Limit switch faulty.
- Open circuit (breaking off pins in connectors, chafing wires).
- Formation of oxides, corrosion at the junctions of contacts, burning of pins.
- Poor ground contact of the lights. In case of problems with the general “mass”, brake lights and turn signals may also not work. It is extremely unlikely that both bulbs stopped lighting at the same time due to contact problems in the lanterns. But a bad ground can cause the reverse gear light to not light up on only one side. Of course, in this case it is worth checking the lamp itself.
Operating principle of the display system
There is a special ring on the gear shift lever. You can't shift into reverse without it. When this ring is lifted, a current pulse is produced (it is transmitted to the coil), which retracts the coil core, and the space for engaging reverse gear is freed up. The same impulse creates a signal to turn on the reverse indicators.
In the reverse process, on the contrary, the core falls into place, this creates a pulse in the coil, which is transmitted to the rear light control system, and they turn off.
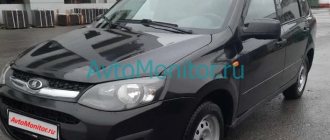
Lada Kalina is a wonderful car. Maybe not the best, but definitely excellent for the money they ask for. Moreover, compared to many analogues in its price range, it is significantly superior to them. But there is one thing: unfortunately, it cannot be done without unpleasant “little things”.
A lot has been thought through in this car: the chassis, the engine, the air conditioning system, etc. But the reverse sensor is located at the bottom of the car, in the gearbox, and the wires stick out from it like needles on a Christmas tree, thin and defenseless. They are the ones who constantly break.
According to many motorists, problems with reverse due to broken sensor wires are one of the most common problems with the Lada Kalina.
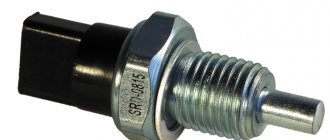
Place of the switch in the light switching circuit
On cars with manual transmission, voltage to the lamps when reversing is supplied through a limit switch (the so-called frog), which is screwed directly into the gearbox housing. When reverse gear is engaged, the switch button is pressed inside the gearbox. The contacts inside the “frog” bridge, and current begins to flow to the lamps.
On the circuit diagram for turning on the reversing lights, we can see that on the VAZ 1118 Kalina, the current from the battery through the ignition switch (No. 2) is supplied to fuse F1. Passing through the fuse that protects the switching circuit, “+” goes to the limit switch (No. 10). The contacts are in a normally open state and close only when reverse gear is engaged. Thus, current begins to flow to the light bulbs. The second contact of the lamps is connected to the “–” battery through the common ground contact of the lamps.
On cars with automatic transmission, the role of the limit switch lies with the selector position sensor. Information about changing the location of the gearshift knob is transmitted to the engine ECU, the light control unit.
How to check the "frog"
- Remove the headlight switch chip.
- Turn on the ignition.
- Using a small piece of wire, connect the contacts of the reverse gear sensor connector to each other.
If the reverse lights are on, then the problem is in the “frog”. Some drivers disassemble the switches, clean the contacts, after which the device continues to work properly. It is up to you to judge the appropriateness of such measures. But keep in mind that on many cars (including VAZ models) the limit switch is located below the oil level in the gearbox. We recommend simply replacing the power sensor. To minimize oil loss, jack up the car on the side where the end switch is installed.
Restoring functionality
Reverse problems can occur throughout the reverse indication circuit. Therefore, you should not rush to drive the car onto an overpass and change the sensor. To begin with, it is worth checking out the more accessible places (but no less important).
Let's start with the ring on the gear lever. In principle, some craftsmen can easily disable both the sensor and the gearbox lock in 1 hour. But you shouldn't do this. This is not just a display system. It is also a security system. And since they did it (they didn’t save money on it), then this is a reasonable requirement. And any safety requirements, as you know, were written by those who neglected them.
The thing is that first gear and reverse gear are switched in the same way in the Lada Kalina: “toward and forward.” But the first speed is engaged simply, and the reverse with the help of a ring. Some protection “from accidents”. This is why you need a reverse sensor.
If you lift the cover that covers the gearshift lever, then under it you will find several wires running from the ring to special connectors. These wires are specially made not solid, but through a connector, because they are always in motion (the lever is pulled all the time). That's why they often break. It's worth checking them out first.
Description of the speed sensor
Some car enthusiasts confuse the speedometer sensor with the reverse speed sensor, but this is incorrect. Where is the speed sensor located on Lada Kalina 8 or 16 valves, what is the pinout of the connector, how to check the device? First, let's look at the main theoretical points.
Location, purpose and device
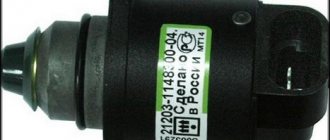
The speed controller in the Lada Kalina car is a device made in a plastic case in the form of a cylinder. Inside the body there is a sensitive component that determines the speed of movement. As you can understand, the main purpose of the device is to accurately determine the speed limit.
Replacing the sensor
Replacing the sensor is easy, but requires some skill and knowledge.
You can see the sensor by looking under the car from the front, after turning the steering wheel to the left. But the replacement is done on an overpass or from a pit:
- First of all, you need to disconnect the wires.
- Then unscrew the reverse switch from the box and immediately screw in a new one. If you hesitate, a lot of oil will leak out of the box. Therefore, everything must be done quickly. When unscrewing, do not stand directly under the box, the oil will simply flow out. It is recommended to let the machine cool down a bit before replacing the sensor. Then the oil pressure will not be so strong (and its fluidity will decrease slightly). But most importantly, keep the new sensor on hand.
- They pulled out the old one and immediately installed a new one. Then oil loss will be minimal.
If you do not have enough experience, simply place a clean container under the crankcase to catch the spilled oil. Then it can be refilled.
We change the idle and reverse sensors on Kalina without outside help
For stable engine idle operation, the Kalina idle speed sensor is designed. In this article we will talk about the Lada Kalina - about the characteristic features of the device on this car, what problems may arise and how to fix them, and recommendations for replacing the device will also be given.
Reverse sensor
Let's take a closer look at the XX sensor.
Purpose and principle of operation
The idle speed sensor is an electric motor with a conical needle of a certain thickness. This device is located on the throttle body next to the throttle position device, and is secured with two screws or using technical varnish.
The device has a single purpose: to stabilize the engine idle speed, and everything happens this way:
- When the engine is idling, a certain volume of air enters, which allows it to operate normally.
- The device does not read or control anything, it does what the ECU tells it to do. The unit controls, reads and, according to the tachometer readings, gives a command to the XX regulator.
- If you warm up the car engine to the optimal temperature, the controller will maintain speed. If it is not warmed up, then due to the operation of the IAC controller, the speed will increase. This manipulation will ensure the optimal engine temperature at higher speeds by analyzing the operation (author - RussianTuning).
Typical faults
Like any systematically operating device, the DXH may experience various problems, for example:
- The car suddenly stalls while idling.
- The DXX turnover is not systematic and “floats”.
- When starting the engine without preheating, the controller does not start working and the sensor does not rotate as it should.
- It suddenly stalls when changing gear on the gearbox.
- The DHW speed hangs after releasing the pedal or when activating various automotive equipment.
When all these strange things happen to a car, it is obvious that the problem lies with the regulator. Unfortunately, this device does not have self-diagnosis, so to figure out what exactly is the cause of the malfunction, you need to check it yourself. And if it can’t be fixed, then replace it. Replacing the idle speed sensor on Kalina will be covered below.
Part location
XX sensor replacement guide
Replacing the idle speed sensor does not require much time or special skills.
- It is necessary to turn off the engine and allow the car to cool slightly.
- Disconnect battery.
- Remove the required regulator from the throttle assembly.
- Disconnect the plug and unscrew the two bolts. Then pull out the entire structure.
- With a new sensor, return everything to its previous position in the reverse order.
Photo gallery “Installation instructions”
Below you can find out how dismantling occurs.
1. Find the location of the regulator. 2. Remove the regulator from the throttle assembly. 3. Pull out the idle speed sensor.
Characteristics of the 3X sensor
Let's figure out what the 3X controller is!
Reverse Controller Replacement Guide
To make a replacement, even an ordinary car enthusiast will need some skills and knowledge.
- First of all, the AC located under the car must be disconnected from the wiring.
- The switch must be carefully removed from the box and immediately replaced with a new one so that the oil does not leak out. Under no circumstances should you stand under the box, because oil can get on your face and clothes.
- It is best to let the car cool down a little before replacing, because in this case there will not be much pressure on the oil.
“Replacing the phase sensor Lada Kalina”
You can learn more about how to replace the device on your car from the video from the author Alexandr V.
Sorry, there are no surveys available at this time.
Source: https://labavto.com/vaz/lada-kalina/datchiki-holostogo-i-zadnego-hoda-zamena/
Related Issues
In some cases, the reverse still turns on, but there is no lamp. It is important to look at the overall plan here. If we are talking about one of the lamps, then most likely the problem is there. Although this is rare. If both lamps do not turn on, then you need to “ring” the circuit from the sensor to the lamps.
If only one of them does not light, then most likely the reverse lamp needs to be replaced.
This is done from the trunk. Remove the casing and unscrew the lamp socket (counterclockwise). Then you need to remove the lamp itself from the socket. Press and turn counterclockwise. Done, install the new lamp in reverse order.
Source
Burnt out lamps
One of the most common problems is a burnt out lamp. To check this, remove the light bulb from the holder and connect it to the battery terminals with a short wire. If the light comes on, then the fault must be looked for at another point in the electrical circuit.
First, check that the light bulb socket and electrical terminals are clean and bright. If there are any signs of corrosion, clean the socket with wet and dry paper, then reinstall the bulb and retest.
A burnt out light bulb is the most common cause
If the reverse light still does not come on, the fuse may have blown. Also, everything indicates a blown fuse if two reversing lights are constantly on. In this case, a replacement will be needed. Fortunately, getting to the fuse box where they are located will not be too difficult for you.
Diagnostics
Checking the controller can be done in several ways; we recommend that you familiarize yourself with each of them in more detail. For the first two methods you will need a voltmeter.
- First, the sensor must be removed. Find its installation location, disconnect the connected connector, unscrew the fixing nut and remove the device from the mounting location.
- Then take a voltmeter and figure out the pinout of the connector. The connector has three contacts, the first of which is usually a positive contact, the second is an output signal, and the third is a negative contact. One of the tester probes should be connected to contact number 2, and the second probe should be grounded - connected to the engine body or car body.
- Afterwards, you need to rotate the controller to determine whether there are pulses in the operating cycle and measure the output voltage. To do this, you need to install a piece of pipe on the sensor axis and rotate the device at a speed of approximately 3-5 km/h. The voltage and frequency in the tester depend on the rotation speed of the controller (the author of the video is Artem Kulzhanov).
Removal and replacement instructions
To replace the device, you will need:
- two screwdrivers - with a Phillips and a flat tip;
- wrench or socket wrench 10;
- rag.
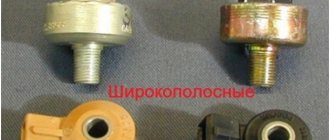
You will also need a new sensor - Kalinas may use different controllers, so before purchasing, find out exactly which one you need.
So, how to replace the sensor yourself:
- First, you need to turn off the power to the device and put the car on the parking brake by lifting the lever in the cabin.
- Open the hood. At this stage, you need to gain access to the sensor; for this, as we have already reported, you will have to remove the air duct going to the air filter. Alternatively, you can try to move it to the side. To remove, use a flat blade screwdriver to unscrew the clamps.
- Having seen the controller at the installation site, you will need to disconnect the wiring connector connected to it.
- Now take a wrench or socket and unscrew the nut that secures the sensor in its mounting location. The nut itself is located in an awkward place, so unscrewing it may take time. It may be that the nut is stuck to the mounting location, although this rarely happens. To unscrew it, treat the landing site with WD-40.
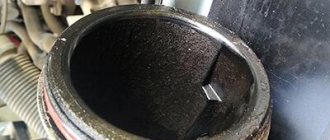
- Then take a flat-head screwdriver and disconnect the device from the transmission, and then remove it. Using a rag, clean the installation area; this can also be done before removing the sensor. Clean the surface thoroughly to prevent dirt from getting into the box itself.
- Now you can begin installing the new controller. Install the device and connect the connector with the wire to it. Don't forget to reinstall the air pipe.