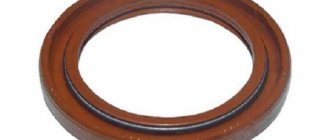
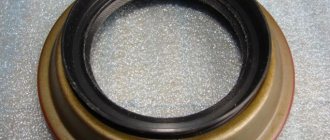
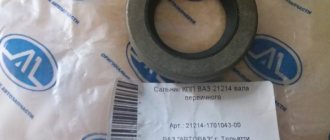
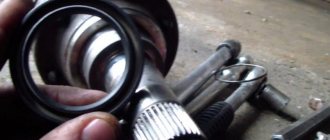
The rear axle gearbox oil seal (REA) is a lip seal located in the mechanism housing on the installation side of the bevel gear bearings. The main function of the oil seal is to ensure the tightness of the gearbox, eliminating the leakage of lubricant located in the rear axle housing.
Causes of wear
The lip seal of any vehicle component wears out over time, losing its properties. One reason is physical wear and tear. But the oil seal can also be damaged by the aggressive influence of oil on it, for example, when using low-quality lubricant. In addition, the oil seal itself may be initially defective.
If the oil has barely come out, then there is no need to rush to replace the cuff, but you need to periodically monitor the condition of the element and, if a leak occurs, make repairs.
Signs of wear
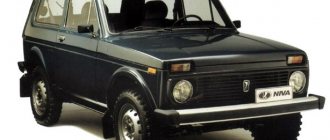
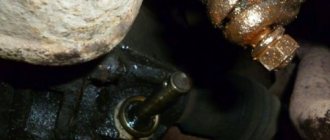
The main sign of a worn VAZ 2121 shank oil seal is the presence of oil leaks on the rear axle in the area where the REM flange is located. To identify a faulty element, it is enough to drive the car into an inspection hole or overpass, or simply crawl under the car. If the cuff is worn heavily, then after a long period of parking an oil puddle will form under the rear axle. If you neglect to timely replace the rear gear oil seal, this will lead to increased wear of the internal elements of the mechanism due to lack of lubrication and their subsequent failure.
Replacing the cuff
If the lip seal has become unusable, it only needs to be replaced, since the element is non-repairable (rubber ages over time and cannot be restored). To replace the oil seal, you need to know the size of the element:
- outer diameter 68 mm;
- internal diameter 35.8 mm;
- height 12 mm.
To carry out repairs, you will need to prepare the following list of tools:
- key to 13;
- 24mm head and knob;
- hexagon 12;
- powerful slotted screwdriver;
- hammer;
- dynamometer and torque wrench;
- container for draining oil.
The process of replacing the shank oil seal is carried out with the rear axle hanging and is carried out as follows:
- Unscrew the rear axle housing plug and drain the lubricant into a prepared container.
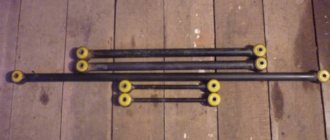
- We unscrew the fastening bolts of the rear cardan to the RZM flange, move the shaft to the side and secure it with wire to the longitudinal link of the bridge.
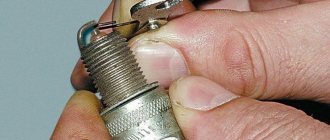
- Using a dynamometer, we determine the moment of resistance to gear rotation by turning the flange nut clockwise.
- To hold the flange, insert the cardan bolts into the holes and screw the nuts onto them.
- We place a mounting spatula or screwdriver between the bolts and unscrew the nut with a socket and wrench.
- Remove the nut and washer from the shank.
- We dismantle the flange itself by hitting it with a hammer through a wooden adapter.
- To remove the oil seal, hook it with a screwdriver and remove it.
- We apply Litol-24 to the working edge of the new cuff, after which we mount the part into the crankcase using a suitable attachment.
- We put the flange and washer in place and tighten the nut with a torque wrench with a torque of 117–255 N*m (12–26 kgf*m), using a dynamometer to control the moment of resistance of the bearings to turning the drive gear. If during the initial measurement of the moment of resistance the value was at least 6 kgf*cm, then when re-tightening it is necessary to increase it by 1-2 kgf*cm. If initially the value was 6 kgf*cm, then we achieve a torque of 6-9 kgf*cm. At the same time, the tightening torque should not exceed 12-26 kgf*m. If, while tightening the nut, the moment of resistance exceeds 9 kgf*cm, the spacer sleeve on the bevel gear will need to be replaced.
- After the adjustment work, we install all the elements in the reverse order.
Replacing the rear axle oil seal Niva 2121
Reg.: 02/04/2009 Messages: 225 From: planet Norilsk.
Age: 38 Car: 21213 95 Reg.: 04/30/2010 Threads / Messages: 3 / 1802 From: Moscow, TiNAO Age: 31 Car: MMC Pajero Sport 05
Reg.: 07/25/2009 Messages: 15 From: Yakutia Age: 35 Car: VAZ 21214 2008, VAZ 21101 2006
Reg.: 06/27/2007 Messages: 1765 From: Moscow Age: 51 Car: 21213, 1999
Name: Alexey Reg.: 03/05/2005 Threads / Messages: 62 / 4065 From: Moscow, Northern Administrative Okrug Age: 39 Car: Shniva 2016 70 tkm
Sever18
Wash the semi-axial bearing as a preventative measure (you need to remove one of the cheeks) and fill it with new grease. At least lithol. Anybody will be better than it was.
There is no need to buy any additional rings, etc.
Reg.: 06/03/2011 Messages: 68 From: Omsk Age: 62 Car: 2131 2001
Reg.: 06/17/2011 Messages: 95 From: Ukraine, Alchevsk Age: 34 Car: VAZ 2121 1982
But I also decided to change the bearings on the axle shafts and the seals. I bought 2121 for the Niva. I brought it to the garage and started putting the oil seal on the axle shaft, but it reached halfway and that’s it. Next comes the thickening of the axle shaft. The store said that the axle shafts on the VAZ 2101 and 2121 are the same. It turns out I have a VAZ 21213 rear axle? I think the bearing will fit. The numbers match 62208r
Added after 8 minutes 26 seconds:
Also in the store the seller said that the seals are installed on the VAZ 21213, I don’t remember anymore, I think it’s from the VAZ 2110
Name: Nikolay Reg.: 11/12/2008 Threads / Messages: 4 / 1073 From: Ruza.Moscow region. Age: 49 Car: VAZ21214. 2001, MP 7.0
Reg.: 02/27/2011 Messages: 1474 From: Biysk Age: 43 Car: VAZ-2131 1.8 carb 2002 (Was: 2121 84 2121 93 21213 01 2123 2007)
Maintenance of the axle shaft 21213. The bearings on the axle shafts 2121.21213, 2123, 21214 are the same. Only the seals are different: On 2121, the oil seals are 2101. On all other axle shafts, the drive seals are 2108-2110. Locking bushings for 2121 are their own. All the others have their own 21213. etc. The only difference is the presence or absence of ABC on the car. If there is ABC, then the bushing is appropriate. Bottom left 2121. Right 2123 under ABC, top - 2123-21213 (without ABC):
Reg.: 11/07/2010 Messages: 30 From: Bratsk Age: 37 Car: VAZ-21213 '96
Reg.: 12/02/2010 Posts: 37 From: Maloyaroslavets Age: 59 Car: VAZ 21213 1999
I'll write down how I removed the axle shaft. Maybe it will be useful to someone. We begin removing the axle shaft as in the manual, and end by screwing the wheel on with the reverse side. It was not possible to “pull” the axle shaft with manual effort. My weight is too low. Next, I proceeded as follows: 1. Attach a chain (about 2.5 m long) to the holes of the disk (symmetrically). It turned out to be a loop that I was going to hit (emphasis on the “U”) with a sledgehammer. 2. I placed a log at the end of the loop, on which I placed a chain, and placed a heavy piece of iron (a counterweight from a washing machine) into the resulting loop so that the loop would not fall off the log. 3. I was about to take a sledgehammer, but the log fell, and when I picked it up and lightly hit the loop with a piece of iron to tighten the chain, a miracle happened: the AXLE MOVED. No problem further.
Added after 1 minute 24 seconds:
In point No. 1, the emphasis is on the first “U”, otherwise not everyone will understand.