One of the sore spots of a passenger car is its sills. They are constantly exposed to moisture, mechanical damage, and the aggressive environment of reagents that are sprinkled on roads.
If they are not repaired and maintained in a timely manner, then the time comes when through holes form in them, the strength of the car’s structure is compromised and their replacement is required. You can do this work yourself.
A video of replacing thresholds with your own hands will be a good help. By following the detailed instructions, this work can be done on your own, significantly saving your finances.
Design features
In the traditional version, the threshold consists of three elements. These include:
- connecting elements;
- structural reinforcement;
- outer panel.
They are attached to each other using spot welding - for this you will need a special device, here you can study the instructions on how to make spot welding with your own hands.
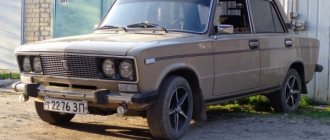
Vulnerabilities of the Lada Kalina
Let's study them. Let's take the hatchback as an example as the most popular version of the Lada Kalina. The hatchback has a medium-sized, harmoniously proportioned silhouette and is made of medium-quality materials. The headlights of the Lada hatchback are medium-sized, teardrop-shaped, often fail to work, and as a rule, the contacts burn out quite quickly. In extreme frost conditions, the headlights even crack, and it is not necessary to cling to them; the damage occurs on its own, without any reason.
The foam rubber of hatchback seats is also not of good quality. It remains in perfect condition for no more than three years, and then turns into something frightening and unaesthetic. Therefore, knowledgeable car owners prefer to immediately, after purchase, replace standard seats with better ones. Installing seats on a hatchback does not take much time, and this is a plus.
Professionals also include the sealing of windows and doors among the shortcomings of the Lada Kalina hatchback model. If installed anyhow, it soon leads to squeaking, and it has to be changed. Rear door locks often jam; this is a purely VAZ problem that most car owners are familiar with.
Replacing the threshold on a VAZ
If you wish, you can replace the VAZ thresholds yourself. For this purpose you will need:
- Do the prep work. It is necessary to remove both doors and fenders, and remove the seats from this side of the car. Remove the wheels. Remove flammable materials from the work area. Turn off the battery.
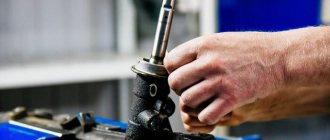
- Using a grinder, cut off the rusty part. Cut off threshold connectors. Clean the surface for attaching the new threshold. Lubricate the treated surface with a corrosion neutralizer.
- If necessary, use metal patches to recreate the structure of the car body to attach a new part.
- The front of the amplifier is attached to the old case. Welding points are cleaned.
- The bottom of the amplifier is aligned with the connector.
- The parts of the front part of the threshold are adjusted and secured with clamps.
- The outer part of the threshold is fixed to the car body using self-tapping screws.
- First of all, the bottom of the threshold is welded, and the connector is attached to the bottom of the housing.
- The threshold is securely welded and the seams are cleaned.
Read here - Curtains for the kitchen: ideas for combination (design photo)
«>
The work is completed by applying primer, putty and paint. The tightness of the seams is checked.
Tool needed
To replace the threshold we will need a set of screwdrivers, a welding machine, an angle grinder, a pneumatic chisel, hammers, hooks, straighteners, and a workbench.
If you do not have the skills to work with such a tool, then you can turn to people who have already encountered this for help.
Niva repair
It is important to understand that the thresholds on the Niva consist of an amplifier, external and internal parts. Accordingly, the amplifier consists of a middle, front and rear part.
Replacing thresholds on a Niva with your own hands consists of the following steps:
- Using a screwdriver, the strength of all the above parts is tested. Those structures where a hole can be punched must be replaced.
- The door is removed, the seat, floor mats, seat belt and other flammable parts are removed. The battery is disconnected.
- Using a grinder, the damaged part is cut off and the joint is cleaned. If necessary, part of the bottom is cut off and metal patches are welded.
- New threshold elements are welded in strict sequence. The attachment point is cleaned and treated with an anti-corrosion substance.
- Putty, primer and paint are applied.
We can assume that the threshold replacement is complete. The car structure is assembled in the reverse order.
Characteristics of protective elements
From such a blow, the trim itself will only suffer, it will crack, and then it can be easily replaced with a new one, and the repairs that would be necessary if the molding was missing will no longer be needed. The disadvantage of plastic products is their fragility. They cannot stand either time or harsh climatic conditions. In severe frosts, they crack even from the slightest blow, which, of course, is bad.
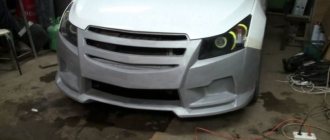
Need to restore a badly damaged car? You can’t do without a composition that includes fiberglass. Do you want to modernize your bumper or headlights, give them an original look and improve their shape? And here you can’t go without fiberglass. Moldings made from this material are durable, lightweight, quite affordable, and not much more expensive than plastic ones.
In terms of technical parameters, stainless steel comes first. After all, it is difficult to find any other material that is stronger and more reliable than steel. Having installed steel moldings, you can be sure that it will last, if not for centuries, then for decades. Yes, and steel looks more impressive, richer, more stylish and luxurious, and does not make it look like a budget, like plastic. But there are two nuances.
Useful tips
Before you replace the thresholds with your own hands, you need to listen to some tips:
Check it out here too!
- DIY illuminated ceiling: 85 photos of the best options! Types of lighting: spots and features of their connection, LED backlight, diode backlight, “starry sky”
Assembling a shower cabin with your own hands: assembling the tray, preparing and installing the walls, installing the portal. All stages of assembly with photos
How to make ventilation with your own hands - we ensure freshness in the house, create comfort yourself (photo + video)
- study the design features of this car brand;
- it is important to inspect the car and determine the elements to be replaced;
- purchase these items in new condition in advance;
- prepare the necessary tools, which include spot welding, grinders, clamps, hand tools;
- place the car on a flat surface;
- it is important to understand that the car cannot be moved until the end of the work, as this may lead to deformation of its body;
- the work looks better when replacing the entire threshold structure rather than parts of it;
- all connections must be strong, these points should be thoroughly cleaned;
- it is important to use a high-quality anti-corrosion substance to treat all areas with damage to the paintwork;
- then putty and primer are applied, after each stage cleaning is carried out;
- Particular attention should be paid to the selection and application of paint and varnish material; the aesthetic appearance of the car will depend on this.
By doing this work yourself, you can achieve high quality and significantly save your budget.
Simple manual
How much does it cost to collect your own auto kart?
DIY karting: detailed description Shaped metal parts cost a lot of money. Even more than corrugated sheeting or metal tiles, therefore it makes sense to make a simple machine for bending sheet metal, and with its help make as many corners, ebbs and other similar parts as you need, and exclusively to your own dimensions.
If you're worried about appearance, you shouldn't be. On sale today there is sheet metal not only galvanized, but also painted. In all designs, the sheet is fixed tightly, so that when working it does not slide on the table, which means that the paint does not rub off or get scratched. It is also not damaged in places of bending. So the products will look quite decent. If you try, they will look even better than what they sell on the market.
Powerful sheet bending machine from brands
This sheet bending machine will require a flat surface (table), preferably metal, three corners with a shelf width of at least 45 mm, and a metal thickness of at least 3 mm. If you plan to bend long workpieces (more than a meter), it is advisable to take wider shelves and thicker metal. You can use brands, but this is for bending metal sheets of large thickness and length.
You will also need metal door hinges (two pieces), two large diameter screws (10-20 mm), wings on them, and a spring. You will also need a welding machine - weld the hinges and make holes (or a drill with a metal drill bit).
For a homemade sheet bender, a 70 mm brand was used - three pieces of 2.5 m each, two bolts of 20 mm in diameter, a small piece of metal 5 mm thick (for cutting jibs), a spring. Here's the procedure:
- Two brands are folded, and grooves are cut into them at both ends for hinges. The edges of the recesses are beveled at 45°. The third tee is cut in the same way, only the depth of the recess is made a little larger - this will be the clamping bar, so it should move freely.
Cutting notches for hinges
Boil the loops well
Weld pieces of reinforcement to the bolt head
Homemade sheet bender in progress
This option is very powerful - you can bend long workpieces and sheets of considerable thickness. Such scales are not always in demand, but they can always be reduced. The video suggests a similar design of a smaller size, but with a different fastening of the clamping bar. By the way, no one bothers you to also install a spring on the screw - it will be easier to raise the bar. What’s interesting about this design is that you can make beading on it, something that such devices usually cannot do.
From a corner with a different type of clamping bar
This model is welded from a thick-walled angle, the frame is made like an ordinary construction sawhorse, which is welded from the same angle. The handle is from a luggage trolley. The design of the screws is interesting - they are long, the handle is curved in the shape of the letter “L”. Convenient to unscrew/screw.
Photo of replacing thresholds with your own hands
Check it out here too!
- How to make an arch from plasterboard: we make an interior arch according to photo instructions. 120 photos of arches in the interior
How to make a balcony with your own hands - tips on how to make a balcony in an apartment beautiful. Step-by-step guide to the use of modern building materials + 70 photos of the best design options
Installing a compartment door with your own hands - step-by-step instructions for installing sliding doors and tips on choosing fittings (110 photos + video)
How to repair sills and the underbody of a car with and without welding
The sills and underbody of the car, like many other parts of the body, receive damage over time that cannot be avoided during intensive use of personal equipment.
But before repairing damaged thresholds, it is necessary to clearly define the restoration methods used in practice. As an option, the possibility of repairing car sills without welding should not be excluded. For a better understanding of existing techniques, it is advisable to familiarize yourself with the varieties of these cabinet products.