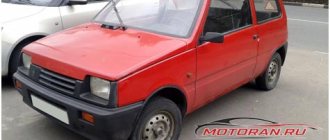
Many owners of VAZ cars perform service work themselves, which allows them to significantly save on vehicle maintenance. In this article we will tell you how to change the oil in a VAZ 2107 engine. It should be said that such work is not difficult, so every car owner can do it.
Why do you need to change the oil?
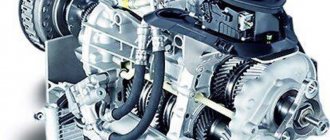
As you know, the engine is the heart of any car. And the heart cannot function without blood. In this case, the blood is motor oil, which lubricates moving parts and also cools various components in the engine.
Over time, such a lubricant loses its characteristics, becomes dirty and cannot effectively cool the engine, which leads to various serious breakdowns. To prevent such problems with the engine, the VAZ 2107 oil change should be carried out every 15 thousand kilometers. Moreover, if the car is used in the city, it is best to reduce the service interval to 10,000 miles.
1.5. Frequency of replacement of operating fluids and lubricants
| GENERAL INFORMATION |
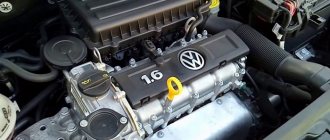
Engine oil
must be replaced every 10,000 km. For a new car, it is necessary to change the oil after the break-in period (after 2500 km). When changing the oil, you must install a new oil filter (ZMZ-4062 engine) or its filter element (all engines). For oil change procedure, see in subsections 2.3.2, 2.3.2.2 and 2.3.3.3. Into the engine crankcase
It is recommended to fill in the same brand of oil as was in the engine. If you fill in oil of a different brand, you must first flush the engine lubrication system with oil of the same brand that will be poured into the engine. To do this, drain the old oil and fill in new oil 2–4 mm above the “0” mark on the oil level indicator (dipstick). Start the engine and let it idle for about 10 minutes. Then drain the oil, replace the oil filter or its filter element and add fresh oil.
Coolant
must be changed once every 2 years or after 60,000 km (whichever comes first). For the procedure for replacing the coolant, see in subsection 2.4.4. It should be borne in mind that the coolant is poisonous, so you should not suck it into your mouth when pouring it. When working with coolant, it is recommended to use safety glasses and not to smoke or eat. If the liquid gets on exposed skin, wash it with soap and water. Gearbox oil
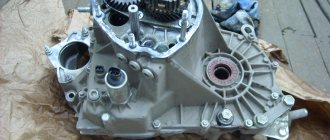
must be replaced after 60,000 km. For oil change procedure, see in subsections 3.3.2 and 3.4.2. Every 20,000 km, you need to check the oil level in the gearbox and top up if necessary. The oil level in the crankcase should reach the edge of the filler hole. If the drained oil contains metal particles or is very dirty, the box should be washed. To do this, pour 0.9 liters of fresh oil into its crankcase. Raise the rear of the car with a jack. Start the engine and, engaging first gear, let it run for 2-3 minutes. Then drain the oil and refill with fresh oil. When checking the oil level, you need to clean the surface of the breather from dirt and turn its cap several times to remove any dirt trapped under it. Oil in the rear axle housing
must be changed after 60,000 km. The oil is changed in the same way as in a gearbox. After 20,000 km, you need to check the oil level in the crankcase and top up if necessary. The oil level should reach the edge of the filler hole. When checking the oil level, you need to clean the breather from dirt in the same way as you did for the gearbox. Do not reuse drained brake fluid. Brake fluid
In clutch and brake drives, they must be changed once every 2 years, regardless of the vehicle’s mileage. Clutch and brake drives use domestically produced brake fluids “Rosa”, “Rosa-3”, “Tom”, “Neva” or their foreign analogues on a non-petroleum basis, the quality level of which is not lower than DOT-3. Do not use other brands of fluids, especially petroleum-based fluids.
.
Brake fluid is hygroscopic, so it should not be stored in open containers.
The procedure for replacing brake fluid is as follows:
1. Remove the brake master cylinder reservoir cap.
2. Remove the rubber protective caps from the air release valves on the wheel cylinders and place rubber hoses on the valves, the ends of which are lowered into glass containers.
3. Unscrew the valves no more than one turn and, pressing the brake pedal all the way, drain the fluid. As soon as liquid stops flowing out of the hoses, tighten the air release valves.
4. Pour the drained brake fluid out of the vessels and put them in place.
5. Pour fresh fluid into the master cylinder reservoir, unscrew all air release valves one turn and, pressing the brake pedal all the way, fill the brake system. In this case, you need to constantly add fluid to the master cylinder reservoir. After clean brake fluid begins to flow out of the hoses placed on the air release valves, tighten the valves.
6. Bleed the brake system to remove air from it (see subsection 6.9).
7. Close the brake master cylinder reservoir with a plug. Remove the hoses from the air release valves and put protective caps on them.
The fluid in the clutch hydraulic drive is replaced in the same way.
What kind of oil should I use?
It should be said that most power units from the Volzhsky Automobile Plant are easy to maintain. Therefore, in this case, there is no need to use expensive synthetic oil. And at the same time, you should not skimp on the quality of lubricant.
We can recommend that you stick to the golden mean and choose inexpensive semi-synthetic technical fluids from Luckoil and other well-established manufacturers for this work.
It is recommended to use all-season semi-synthetic oil with viscosity parameters 10w-40. To perform this work, you will also need to purchase the appropriate filter element, which must be suitable for your car. The cost of such consumables is usually about 2000 rubles.
The 1.5-liter gasoline engine injector, which is installed on the VAZ 2107, contains about 3.5 liters of lubricant. You will need to purchase about 4 liters of oil, which can later be refilled when the car is used when it is burned out.
You can often read on the Internet or hear recommendations from VAZ 2107 owners to carry out the appropriate flushing of the engine with the injector when changing the technical fluid. We can say that such flushing is necessary only if the machine is operated in difficult conditions and the quality of the oil leaves much to be desired.
If such washing is carried out on a regular basis, the lubricant is washed out from hard-to-reach places, which invariably worsens the subsequent operating conditions of the engine. That is why we do not recommend that you flush the engine when replacing the lubricant in it.
Overhaul of VAZ 2107
In some cases, major repairs of the VAZ 2107 power unit can be partially carried out without dismantling it. Before starting work, thoroughly rinse the engine and engine compartment with running water and dry. Without removing the motor you can replace:
- crankcase seal;
- cuffs of both collectors;
- crankshaft oil seals;
- pump;
- generator;
- gasoline pump;
- carburetor.
The cylinder head is also easily removed from the engine without dismantling.
A major overhaul involves the restoration of engine elements, as a result of which the technical parameters will correspond to the parameters of the new engine. For this:
- the entire piston group is changed;
- cylinders are bored;
- the crankshaft is ground;
- liners are changed.
I remember how I got into the first major engine overhaul due to my own stupidity. I went out onto the field. There was a ravine ahead, so I drove in my “seven”. I couldn’t go further up the hill, and I couldn’t go back either. Basically, the car is stuck and skidding. Then an acquaintance came up, he was collecting something there - flowers or plants of some kind. He says: “You’re doing it wrong, you need to give it back, and then sharply forward. Let me sit down, and you push me when he moves forward.” Well, I agreed like a fool. The car skidded for about half an hour, no use. I called a tractor, which I wanted to do before. They pulled out the car. I sat down and drove back home. A few meters later the check flashed. It turns out, as I later found out, all the oil leaked while the car was slipping. It’s good that the tractor didn’t go far. I had to take the car for a major overhaul, replacing the piston and boring the shaft.
The need for major repairs is determined by the condition of the cylinder block and piston group. If most of the elements are well preserved, you can limit yourself to replacing individual parts. If even slight block wear is detected, cylinder honing will be required.
Sometimes VAZ 2107 owners buy a repair kit, which includes a reground crankshaft and a piston set. It is also recommended to purchase an incomplete cylinder block for major repairs. Since in this case the gaps are not misaligned, replacing the block will be quite simple. However, most often you have to buy a complete cylinder block, including an oil pump, pan, cylinder head, etc.
It is recommended to disassemble the internal combustion engine on a professional stand, after first removing the flywheel and clutch assembly. If there is no such stand, the dismantled engine is firmly fixed and only then its repair begins.
Typically, a major overhaul of a VAZ-2107 engine involves:
- disassembling the cylinder head, followed by cleaning and checking;
- inspection of rocker arms and valves;
- valve repair or grinding;
- dismantling pistons and connecting rods;
- dismantling the crankshaft;
- checking the condition of the cylinder block and cleaning it;
- checking the camshaft;
- inspection of bearings and checking them for play;
- removal and installation of rings;
- checking clearances;
- inspection of seals and their replacement.
Thus, almost any repair of the VAZ-2107 can be carried out independently. To do this, you need to have certain skills and a set of repair tools, as well as follow step-by-step instructions from specialists.
Step-by-step instructions for changing the oil
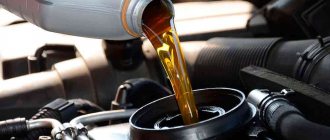
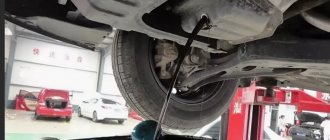
- Before you begin directly replacing the technical fluid, you should warm up the car engine to operating temperature. After this, we drive the car onto an overpass or lift, turn off the engine and place a container with a volume of about 4 liters under the oil pan.
- Open the hood and unscrew the filler cap, which is located on the valve cover, by hand.
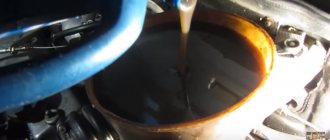
- Next, use a 12mm wrench to unscrew the drain plug, which is located on the engine sump. Proceed with extreme caution, as you can burn yourself on the hot lubricant.
- We wait until the technical fluid has completely drained from the engine, after which we can begin further work. As a rule, this takes about half an hour. Remember that if you do not unscrew the filler cap, this will create increased pressure in the system, which prevents oil from flowing out of the drain hole.
- The oil filter can be unscrewed either using a special wrench or a screwdriver, which pierces its body and acts as a lever, which allows you to unscrew the filter from the thread. Be careful as there may be a small amount of grease in the filter element. If you do not have a puller, you can try to unscrew the filter by hand. Just be careful, as you can get burned on a hot engine.
- We screw back the drain plug in the oil pan and install a new filter element. It is necessary to pour a small amount of oil into the filter, and also lubricate the existing rubber O-ring. The oil filter must only be tightened by hand.
- After tightening the drain plug and filter, you can begin to pour oil into the engine. This is done through the filler plug on the valve cover. Fill in about 3 liters and wait 5-10 minutes, which is necessary for the oil to settle and check its level with a dipstick. The oil level should be between the corresponding marks on the dipstick.
- We start the engine, at this time the oil pressure light should light up, then go out after 5-10 seconds. The engine should run for several minutes, then turn it off and wait about 20 minutes.
- We check the oil level with a dipstick, as well as the oil filter and plug for leaks. If necessary, add oil to the average level on the dipstick.
This completes all service work. Every car owner can perform such engine maintenance. At the same time, he will save several thousand rubles that he would have paid at a service station for such an oil change.
Leaks and problems
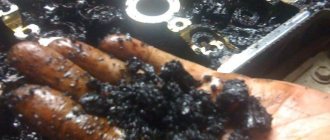
The higher the mileage of the VAZ 2107, the more problems appear, as in principle with any car. Most often this is due to natural wear and tear of the engine, causing oil to burn. Although the manufacturer allows for a small consumption.
There can be many reasons why an engine eats oil. And in each case they can be individual. But, over the years of the model’s existence, we can talk about the most common places where leaks occur.
If the breather is spewing or throwing oil, or if there is oil in the exhaust manifold, this may indicate a serious problem with the oil rings. In this case, you can try decoking with dimexide. But it is better to use special auto chemicals designed for these purposes.
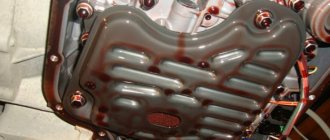
A leak from under the valve cover may be due to a worn gasket. Sometimes simply replacing the gasket does not solve the problem. Since the cover itself may have significant curvature. Therefore, in some cases it will have to be replaced.
A white emulsion in the engine or on the oil filler cap may indicate condensation. This is a common occurrence when temperatures change from minus to plus, mainly in autumn or spring.
But if the emulsion is also observed on the dipstick, then this is already a sign of more serious problems. Most often we can talk about a broken cylinder block gasket. And in rare cases, a cracked cylinder head may be to blame.
Also, with this problem, you can find oil in the expansion tank. Sometimes, simply replacing the gasket is not enough. It may be necessary to grind the head itself, and this is completely different money for repairs.
All this is general information, which may manifest itself differently on each specific vehicle, since everyone’s operating modes are different. The same applies to places of leaks or oil leaks. Therefore, it is impossible to identify the cause from a distance.