With the massive appearance of large-pattern cast wheels, previously hidden from view, actuating brake mechanisms have become noticeable, which means they can be considered a design element of the exterior. Manufacturers of general purpose vehicles do not pay much attention to the appearance of brake calipers, but reinforced brakes installed as part of tuning are almost always brightly colored. This could not go unnoticed by automotive fashion trends.
The need to paint parts
Painting brake calipers is especially popular among sports car owners. Such vehicles have light alloy wheels, through which all parts of the braking system are clearly visible. If you paint them to match the body tone or another bright color, this will give the car additional style, enhance the impression of luxury and bring it closer to the appearance of racing cars.
Painting calipers also has a functional purpose. These parts have a porous structure; moreover, they are not covered with casings and are in contact with the external environment. As a result, dirt constantly accumulates on the calipers, dust mixed with technical fluids and road surface reagents accumulates.
Due to the difficulties of cleaning and washing due to inconvenient access, the following consequences arise:
- the cooling time of parts increases;
- heat exchange in the brake system deteriorates;
- the metal surface suffers from corrosion.
Painting brake discs and calipers creates a durable film on their surface that literally repels dirt and prevents it from penetrating into the pores. In this case, keeping the calipers clean is easy, and heat transfer in the system is optimized. The coating protects products from rust and mechanical damage from small stones. Only special heat-resistant paint is suitable for the job, because regular paint will crack and peel off in a couple of months when the calipers heat up.
What is the purpose of painting calipers and brake drums?
There is no special need to paint the calipers. They will already serve their allotted life, and a coat of paint will in no way lengthen or shorten their life. Therefore, the reasons why a decorative coating is created on them are purely subjective.
But a car, in addition to its utilitarian purpose, must also please its owner. If this were not necessary, the roads would be filled with monotonous plastic cars that can be cheaply stamped from recycled drinks containers.
So it still makes sense:
- the fashion for painting calipers began with the advent of expensive sports cars, which were equipped with special, very powerful and carefully designed brake mechanisms, this became a sign that the car was capable of slowing down quickly and always effectively;
- For many, it may seem like a paradox that the more powerful the brakes, the faster the car, but this is exactly so, and every driver wants to look fast, while the engine is not visible under the hood, and the brake calipers are open to everyone;
- there is a certain aesthetics in this, especially if the color of the calipers is in harmony with the color of the body;
- The external attractiveness of a car affects its price on the secondary market, although not always; signs of tuning may scare someone away.
In addition, painting the calipers is very inexpensive; you can always do it yourself.
Materials and tools
To disassemble the unit and remove parts, you will need a jack, a screwdriver, and a wheel wrench. Also for work you need to prepare:
- enough paint;
- masking tape;
- film, newspapers;
- white spirit or other degreaser;
- fine grain sandpaper;
- metal brush;
- rags;
- brush or spray;
- gloves;
- respirator;
- rust converter.
Remove the calipers or leave them on the car
As with any painting, the best option is to remove the part to be painted. Dismantled calipers will be easier to clean and paint from different angles. With complete dismantling, it becomes necessary to disconnect the brake hoses, which will entail the entry of air into the system and the further need to bleed the brake system. Therefore, a more suitable option for most car enthusiasts would be to paint the calipers without removing them. To do this, you need to cover all parts adjacent to the caliper that are not subject to painting. Another option would be to remove the calipers, but not disconnect them from the brake hoses. They will need to be placed on some kind of stand so that they do not hang on the hoses.
Color selection
Brake drums and calipers can be painted in absolutely any tone - the decision is made only by the owner of the car. The choice of shades of paints and varnishes is huge; there are both classic and the most non-standard paint colors on sale. Some car enthusiasts prefer to paint products in inconspicuous, practical colors - black, gray, brown, dark blue. Others choose bright colors - red, green, light green, yellow, orange.
When choosing paint for calipers, you should take into account the main color of the car, canopies, and rims. If you make the details green with a red body, it will look ugly and pretentious. It is better to consider a monochrome palette or find a successful contrasting combination:
- black body - white or red calipers;
- dark blue body - terracotta, light blue;
- green body - yellow, etc.
Nowadays, juicy, acidic shades with the addition of fluorescent pigments are in fashion - fuchsia, lime, ultramarine and others. They must be used carefully and only taking into account the overall concept of the car.
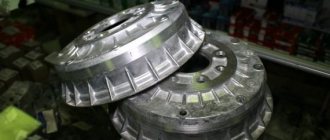
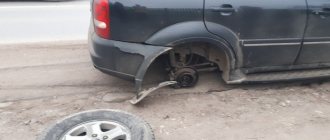
Initial data
Well, there is an ordinary car, and now “drums” are installed on many models. Starting with our AVTOVAZ, ending with the popular RIO, SOLARIS, POLO, ALMERA, AVEO. Often they are, of course, cast iron, and therefore will rust in two to three years. We need to restore them with our own hands. What exactly are we going to do today?
What paint to use
The choice of product based on composition and type must also be made thoughtfully, taking into account the characteristics of the operation of the calipers. Ordinary paint is not suitable for them, since it is not able to withstand temperature changes and the aggressive influence of external factors. Using powder would also be a mistake: this material cannot withstand high-temperature exposure and exhibits strength only under standard operating conditions. Only applying 3-4 layers of such paint will create a more durable coating on the calipers, which is quite expensive and impractical.
To give parts an attractive appearance and protect them from the adverse effects of temperatures, you need to use specialized heat-resistant paint. It has the following advantages:
- ease of application, high quality and evenness of the layer without streaks;
- wide palette of matte and glossy shades;
- excellent protective properties against corrosion, mechanical damage, the influence of reagents and other chemicals;
- decrease in thermal conductivity;
- increasing the service life of calipers.
The paints contain acrylic resins, organic solvents, plasticizers and other targeted additives. The most resistant paints and varnishes to high temperatures additionally include organosilicon components and silicates. Paints are available in cans, bottles and aerosols. The latter are the most convenient form, allowing even novice painters to paint car parts.
The disadvantages of aerosols include high cost and high consumption of material, so you will have to buy it with a reserve. Also, when covering calipers with a spray can, you need to cover the surrounding parts more carefully, otherwise splashes will get on them too.
Also on sale are kits for painting calipers, including paint and all the necessary equipment for the job. Heat-resistant acrylic coatings allow you to protect the surface of brake system parts for a period of 5 years or more without the need for repainting.
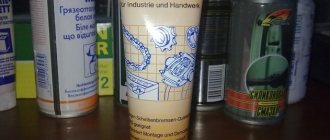
The best paint brands that work well for calipers are:
- Foliatec. Heat-resistant premium paint, available in different shades - glossy, matte, with a metallic effect. The material is very durable, chemically resistant, wear-resistant, and allows you to obtain a durable coating. Available in aerosols and cans.
- Motip. A more budget-friendly option for paint and varnish material for calipers. Produced only in cans. Withstands coating heating up to +650 degrees, has good hiding power, high quality adhesion to the surface, and has powerful dirt-repellent properties.
To come in
Already have an account? Sign in.
Latest Visitors 0 users online
No registered user is viewing this page
In an article about aluminum and cast iron rear drum brakes
, we noted that the big disadvantages of cast iron are their gradual oxidation and, as a result, rust. It should be noted that this applies to almost all machines. Sooner or later they bloom and after three to four years they are simply all covered with “rusty spots”, which, of course, does not look very neat. Therefore, the question very often arises: what and how to paint the drums? So that they don't rust as much as possible? Let's find out...
To be honest, painting wheels is not that difficult, but it is almost impossible to completely protect them from rust. Cast iron, of course, prevents this phenomenon for a long time, but still it is not a non-ferrous metal and rust is a completely understandable process of its life, and under the wheels of a car, especially in winter, we can observe a salt-sand mixture that fights ice, but also makes cars rust and rot faster, and drums are no exception. So you won’t be able to protect 100%, but you can try for a long enough period.
Do I need to remove parts before painting?
There are two ways to paint calipers - with and without dismantling. The first method has a number of undoubted advantages, which is why professionals use only it. Here are the advantages of removing calipers:
- more convenient work;
- uniform painting of parts from the outside and inside;
- no risk of spraying paint on rims or fenders.
If you do not remove the calipers, the applied layer will not be even, and the part will remain completely unpainted on the sides, bottom and back. Poor-quality coating is not capable of providing products with the required level of protection.
There are also disadvantages to dismantling the calipers - the work will be more labor-intensive, complex, more tools will be required, and after returning the parts to their original place, the system will need to be bled.
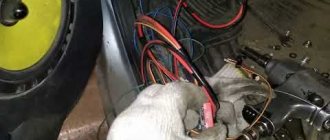
Dismantling
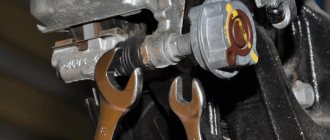
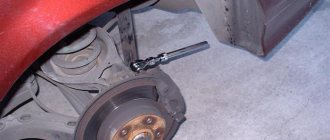
In this case, you cannot do without a set of keys and a jack. When the wheels are removed, you need to carefully inspect the calipers for any dirt or oxide that could interfere with the normal operation of the calipers. The nitrous can be treated with WD-40 or simply tapped with a hammer.
We recommend that you carefully remove the rubber hose connecting the caliper to the car: it is not as difficult to break as it seems at first glance, but purchasing a new one will be quite expensive. The photo shows where you need to press the keys to remove the calipers.
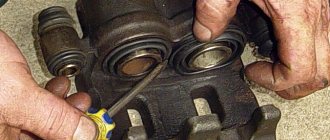
Don’t forget to clean the boots thoroughly, but you don’t need to pull out the pistons all the way, as this can lead to leakage of technical fluid. After cleaning, apply the grease that always comes with the brakes. If there is none, then you can always take litol or another liquid that contains lithium soap.
Preparing for painting
Before painting the calipers, you need to check their technical condition - you may first need to repair or replace parts. For removal, use a jack, placing it in order to fix the machine in a raised state. Unscrew the wheels, carefully inspect all components, then remove the parts.
Each caliper is held on by two bolts: if they are difficult to unscrew, you will first have to fill the joint with WD-40 liquid or tap it well. To paint the calipers, only the wheel rims can be removed from the outside.
Preparing parts for painting is done as follows:
- remove all traces of corrosion using a wire brush, sandpaper, and rust converter;
- if the metal has reached a high degree of rusting, clean it by sandblasting or using a drill with a special attachment;
- Rubber parts are cleaned from dirt and dust;
- the pistons are cleaned with sandpaper with the finest grain, acting extremely carefully and without removing them completely (otherwise the brake fluid may leak out);
- wipe the calipers with a degreaser;
- insulate with masking tape, film, newspapers all moving elements that cannot be painted (otherwise the paint, after heating, will act as a lubricant and interfere with braking);
- Cover conductive hoses and other unpainted parts with masking tape.
How to paint calipers: operating technology
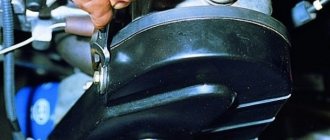
1. In order to paint the calipers as accurately as possible, you need to open access to them by removing the wheels. It will be convenient to first remove two wheels on one side of the car, and then carry out the work on the other. Use a wrench and a jack, as well as special stands, to securely support the car. After removing the wheels, access to the calipers is open and you can begin processing them.
2. First of all, the caliper must be thoroughly cleaned of a layer of dirt and chemical reagents, as well as traces of corrosion, using a wire brush. You can use a drill with special attachments. Then clean the surface with sandpaper. Special attention should be paid to hard-to-reach places. After all, high-quality cleaning is crucial in how to paint calipers and preserve the result for a long time.
3. Now you need to cover the area around the calipers, which should not get paint. To do this, we use masking paper or regular film, and fasten everything with masking tape. We especially protect the surface of the rotor and brake pads - they are prohibited from being painted!
4. Then the surface of the caliper must be degreased. Remember: all stages of cleaning from dirt and grease must be carried out as thoroughly as possible. After all, the quality and durability of the painting will depend on this.
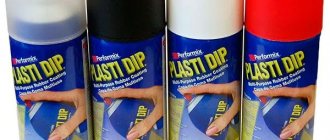
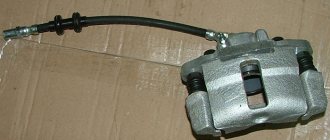
5. Now we’ll find out how to paint the calipers. To do this, take a bottle of Motip Caliper Enamel and shake it thoroughly. We begin to apply layers of paint, drying each of them a little for a few minutes. In total, you need to apply 4 layers, making the first two light, and the third and fourth thick. Try not to overdo it, otherwise smudges will appear. The paint dries quickly - already 20 minutes after applying all the layers, you can remove the protective paper and put on the wheel.
6. We process the remaining calipers in the same way and admire the result!
Motip caliper enamel will make the surface of the parts resistant to aggressive substances and minor damage. In addition, the paint is heat resistant up to 120°C and will last on the calipers for a long time. By the way, no preliminary priming is required before applying Motip paint!
Painting process
The calipers are processed in a well-ventilated area with bright lighting. First you need to do a wet cleaning so that there is no dust on the walls and floor. The container with paint is opened immediately before work, introducing a hardener into it (if required) or simply mixing well. Shake the can thoroughly.
The paint and varnish material is applied in 2-3 layers at intervals of 30 minutes. The work must be done carefully and smoothly so that no drips form. It is more convenient to do this from a spray can, or use a spray gun from a distance of 25-30 cm. The second layer should be applied at an angle of 90 degrees relative to the previous one - this way the likelihood of streaks will be minimal.
The drying time of the material is usually short, and the machine can be used after 24 hours. You must first install the parts in their proper place, checking the degree of drying of the surfaces manually.
By painting the calipers, you can easily give your car an original and stylish look. Also, the use of paint will help maintain the integrity of parts and significantly extend their service life.
What do you need?
In order to paint them, we first need to prepare. So, what do we need:
- A metal brush, you can use a drill, or you can use a regular hand brush.
- Mounting tape, usually paper.
- Rust reducer
for treating wheels. - High-temperature primer, or regular one.
- High temperature paint.
- Degreaser, usually "thinner" or "white spirit"
- I recommend gloves and a respirator.
It will take about 500 - 700 rubles for everything, maybe a little less, because at home you most likely have solvent and gloves. So the main cost will be on paint and primer.