VAZ hatchbacks of the 2112 family were produced with one of two 16-valve engines: 21120 and 21124. The volume of these engines is different, and they even differ in appearance. But if the engine design has 16 valves, then changing the oil on a VAZ-2112 will take 15 minutes. The point is that the oil filter will be accessible from under the hood. And we will change this filter.
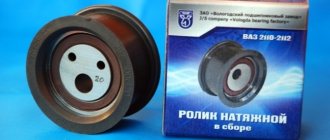
Tips for choosing an oil filter are presented in the video:
All steps to change oil for engine “21120”
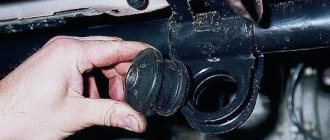
We change the oil with the engine fully warmed up. First, engage the handbrake and unscrew the neck plug. Then remove the plastic cover.
Fastening – 4 metric screws
Possible options: fastening with screws (key “10”) or with rubber bands. In the second case, simply move the lid up.
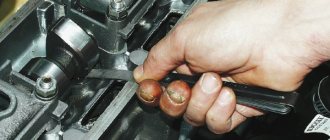
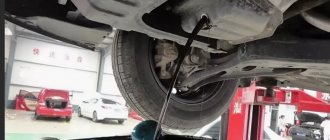
There is a plug on the bottom of the oil pan. It is unscrewed with a 17 key. First you need to substitute an empty container.
The plug is unscrewed with a key
As a result, 3.2-3.3 liters of waste will be drained. You need to wait at least 10 minutes.
When the oil is drained, the plug is returned to its place. Recommended tightening torque is 28.7-46.3 N*m.
Replacing the oil filter
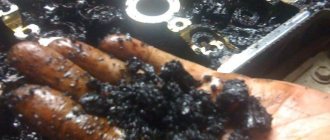
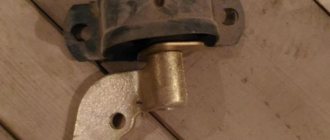
If the filter will not be replaced, proceed to the next chapter. The filter housing is very easy to find: you need to stand near the right wheel and look under the exhaust manifold.
Found the oil filter housing
The old filter can most often be unscrewed by hand. If that doesn't work, take a puller. Installation of a new filter is done as follows:
- Residues of “working off” are removed from the crankcase;
- The filter housing is filled halfway with oil (100-120 ml). Also lubricate the rubber gasket with oil;
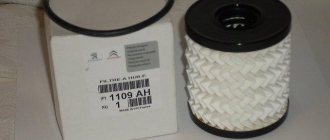
Prepared the part for installation
- The new filter is installed in place.
The tightening force for the filter housing is 37.48–87.47 N*m.
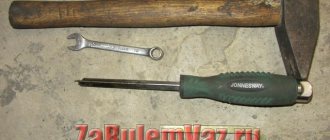
Instead of a puller, a screwdriver is sometimes used. Then the filter jar is pierced closer to its bottom!
Finishing touch
Know that on a VAZ-2112, changing the oil does not end with one fill:
- 3.2 liters of new material is gradually poured through the neck;
- Start the engine and wait 3-4 minutes. It’s good if the Oil Can lamp goes out;
- Stop the engine, remove the dipstick, check the level;
You need to know how much to add
- If necessary, top up.
Instructions
- We warm up the engine to 45-50 degrees. Warm oil has better fluidity and will drain better from the engine during a complete replacement. Our task is to remove as much as possible the old dirty and used fluid that no longer has useful properties from the engine and fill it with new one. If a lot of old dirty oil remains in the crankcase, it will be swept away with the new one and will worsen its beneficial properties. Warm up the engine for 5-7 minutes before starting, this will be sufficient.
- For easy access to the drain plug (and in some models the oil filter is also attached from the bottom) and the bottom of the car as a whole, you need to jack it up or drive into an inspection hole (the best option). Also, some models may have engine crankcase “protection” installed.
- We open air access to the crankcase by unscrewing the filler cap and dipstick.
- Place a large container (equal to the amount of oil being poured).
- Unscrew the drain plug with a wrench. Sometimes the drain plug is made like a regular “bolt” under an open-end wrench, and sometimes it can be unscrewed using a four- or hexagon. Don't forget to wear protective gloves, the oil will most likely wake you up warm, but you need to be careful.
- We wait about 10-15 minutes until the waste flows into a basin or cut-off plastic canister.
- Optional but very effective! Flushing the engine with a special liquid is not included in the maintenance regulations and is not mandatory - but. By getting a little confused, you will be much better at flushing out the old, black oil from the engine. In this case, wash with the old oil filter for 5-10 minutes. You will be surprised at the black oil that comes out with this liquid. This liquid is very easy to use. A detailed description should appear on the flushing fluid label.
- Changing the sedum filter. The seat (the place where the filter is located) needs to be wiped dry with a rag to remove dust and dirt, and only then install a new filter pre-soaked in oil. Lack of oil in the new filter before starting the engine can cause oil starvation, which in turn can cause filter deformation. Overall this is not a good thing. Also remember to lubricate the rubber O-ring before installation.
- Fill in new oil. Having made sure that the drain plug is screwed in and a new oil filter is installed, we can begin to fill in new oil using the dipstick as a guide. The level should be between the minimum and maximum marks. Also, you need to remember that after the first start of the engine, some oil will leave and the level will drop.
- In the future, when the engine is running, the oil level will probably change; be careful during the first few days of operation. Recheck the oil level using the dipstick after the first start.
Differences in replacement for engine “21124”
On the VAZ-21124 engine everything looks simpler than on its younger brother:
- The plastic cover is always attached with rubber bands;
- The oil filter can be found in one second (near the catalyst on the right).
Oil filter housing on a VAZ-21124 engine
Follow all the steps we have listed above.
Receiver VAZ-21124 is a work of art
The oil dipstick is located between the second and third receiver tubes.
Materials and replacement regulations
For all 16-valve engines on 2112 hatchbacks, the volume of the lubrication system is no different. It is 3.6 liters. When replacing, pour 3.3, and if the filter is changed, then 3.4 liters (plus another 100 ml into the filter itself). The choice of material does not depend on the engine type.
| Brand | Viscosity | API quality class |
| LIQUI MOLY OPTIMAL | 10W40 | SL/CF |
| LUKOIL-SUPER | 5W40, 10W40, 15W40 | SG/CD |
| LADA SUPER | 5W40, 10W40, 15W40 | SG/CD |
| ESSO ULTRA | 10W40 | SL, SJ/CF |
| MOBIL SUPER S | 10W40 | SL, SJ/CF |
| SHELL HELIX PLUS | 10W40 | SL/CF |
| HAVOLINE EXTRA | 10W40 | SL/CF |
| ZIC A PLUS | 5W30, 10W30, 10W40 | SL |
| MANNOL RACING | 15W40 | SL/CF |
| NOVOIL-SINT | 5W30, 5W40 | SG/CD |
| NOVOIL-SUPER | 5W30, 5W40, 10W30, 10W40, 15W30, 15W40, 20W50 | SG/CD |
| UTEC NAVIGATOR | 5W40, 10W30, 10W40, 15W40, 20W40 | SG/CD |
| MANNOL ELITE | 5W40 | SL/CF |
| ESSO UNIFLO | 10W40, 15W40 | SL, SJ/CF |
| TNK SUPER | 5W40, 10W40, 15W40 | SL, SJ/CF |
| SHELL HELIX SUPER | 5W40, 10W40 | SL/CF |
| MOBIL 1 | 0W40 | SL, SJ/CF |
| MOBIL SUPER M | 10W40, 15W40 | SL, SJ/CF |
| VALVOLINE DURABLEND | 10W40 | SL/CF |
| MANNOL CLASSIC | 10W40 | SL/CF |
| VISCO 2000/3000/5000 | 10W40 or 15W40 or 5W40 | SL/CF |
| LUKOIL-LUX | 5W40, 10W40, 15W40 | SJ/CD |
| MANNOL EXTREME | 5W40 | SL/CF |
On a working engine, the oil level between changes remains above the MIN mark. That is, they do not top up. In general, on the VAZ-2112, oil changes are performed once every 15 thousand km. The filter is changed at the same time.
The use of API SF oils on engines 21124 or 21120 is unacceptable. There are no such materials on our list.
How to check the oil level in Grant
After we changed the oil in the engine, started the engine and it ran for a while, we wait until the oil drains into the sump and check its level.
We take out the oil dipstick and check the level. It should be between min and max. If necessary, add oil and enjoy the work done.
Service center specialists recommend regularly replacing the lubricant in car engines. Changing the oil in the Lada Granta engine should be carried out at certain intervals, and you should pay attention not only to the choice of fluid, but also to the mileage the car has accumulated since the last replacement of the substance. It is important to monitor the condition of the motor to prevent premature wear of components. If the time has come to change the lubricant in the power unit, you should not “wrap up” additional kilometers; it is more prudent to purchase a new fluid, because the old one, most likely, has already lost its original properties.
Articles
- 2108-1012005, -07, -08 or 2105-1012005 – filter for engines 21124 and 21120;
- 2112-1009146 – neck cover (until 2003);
- 1119-1009146 – neck cover (from 01.2003);
- 2101-1009140 – cover gasket;
- 2108-1009156 – conical plug M22x1.5 (all internal combustion engines 2110-2112);
- 2112-1009045 – oil dipstick (21120 and 21124);
- 2112-1104252, -03 – O-ring for the dipstick.
Analogs (oil filter)
- PATRON PF4050 or PF4047
- BOSCH 0 451 103 274
- KITTO C0065 or C0024
- WIX FILTERS WL7168
- MEYLE 714 322 0001
- STELLOX 20-50023-SX
2163-13-05a-02
To prevent oil leakage from the oil pan, a thin layer of rubber is vulcanized along the surface of the washer hole.
To prevent oil leakage from the oil pan, a thin layer of rubber is vulcanized along the surface of the washer hole.
To prevent oil leakage from the oil pan, a thin layer of rubber is vulcanized along the surface of the washer hole.
Let's examine the puck. If the rubber seal is damaged, replace the washer with a new one. If you do not have a new standard washer, you can install a copper washer with a hole diameter of 18 mm under the plug. Drain the oil for at least 10 minutes. We wrap and tighten the drain plug. We remove oil leaks from the engine oil pan.