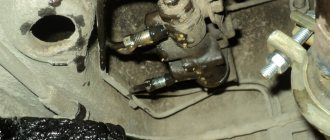
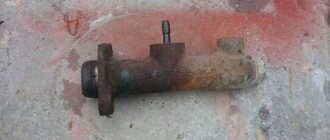
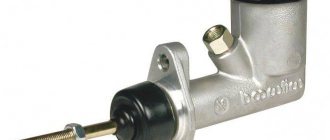
Dismantling the hydraulic drive
To perform the operation we will need:
- container for operating fluid and a large-volume syringe.
- set of wrenches and sockets;
- screwdriver and pliers.
The order of work is as follows:
- Brake fluid is pumped out from the expansion tank of the master cylinder of a VAZ 2107 car using a syringe. A rubber tube is disconnected from the drive, from which the remains are also poured into the prepared container. If liquid gets on paint surfaces, they must be wiped with a damp cloth.
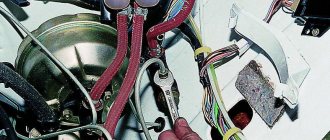
- Using an open-end wrench set to “10”, unscrew the fitting of the pipeline connecting the main and working hydraulic drives.
- Using a “13” socket and an extension adapter, unscrew the nuts holding the assembly to the engine compartment panel.
- To remove the master cylinder from the studs, simply press the clutch pedal, this will move it out of place, after which you can pull it out by hand.
The work on removing the unit is completed, and you can begin installing the spare part.
Hydraulic drive installation
Replacing a mechanism involves purchasing it in a retail network or via the Internet. Installation work is performed in the following sequence:
- The clutch master cylinder of the VAZ 2107 is put on the studs and pushed all the way to the base.
- The nuts are screwed onto the fasteners and tightened with a wrench to “13”.
- The union nut of the pipeline laid to the working hydraulic drive is screwed into the main cylinder.
- The rubber tube is connected to a plastic connecting element and secured with a clamp.
- The expansion tank is filled with brake fluid, which enters the main and slave cylinders of the clutch through tubes. Replacing the fluid in the system is mandatory due to wear products.
Upon completion of installation of parts, it is necessary to inspect and check the tightness of the nuts. Replacing the main or working clutch drive of a VAZ 2107 car ends with bleeding the system.
Nobody wants to experience discomfort while driving, especially if it is associated with problems in driving. Owners of domestic “classics” have to devote more time and effort to the condition of their car, because they are used to doing everything with their own hands. We can say with complete confidence that if the car owner has already mastered the process, then he can also repair the hydraulic drive of the transmission clutch, just study the technology.
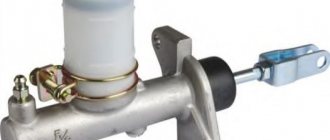
In order for the replacement of the VAZ 2107 clutch slave cylinder to be justified, it is good to know its purpose and the first signs of a malfunction. The torque transmission system on classic VAZ models is driven by a hydraulic drive, the main task of which is to transmit force when pressing the clutch control pedal.
In turn, the hydraulic drive consists of two cylinders: the main and the working. When the pedal is applied, pressure is created in the main center, as a result of which the brake fluid is pumped through the valve into the working cylinder (WC). The latter activates the rod, which squeezes the fork, thereby selecting gears.
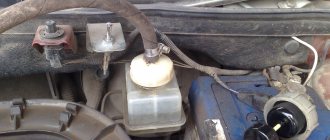
Traditionally, the control center is located on the gearbox housing and secured with two bolts, so it can only be reached from under the bottom of the car. The operation of both cylinders depends on the presence of brake fluid, so you need to monitor its level, especially since this is not difficult to do - the container is located in the engine compartment.
When is it necessary to replace a faulty clutch slave cylinder on a VAZ 2107: signs and causes
In most cases, clutch control problems are associated with loss of tightness, when the pedal loses its elasticity when pressed. However, this fact is not so bad, but the inability to engage the gear is already serious.
If we put together the signs indicating the need to replace the clutch slave cylinder on a VAZ 2107, we get the list:
- A drop in the level of brake fluid in the reservoir, which indicates a loss of tightness of the hose or brake fluid. The breakdown is also determined by the spots under the car.
- Periodic “failures” of the pedal or its soft movement indicate air entering the system. Failure may be the result of a worn cuff or cracks in the working cylinder body.
- A gradual loss of pedal stiffness and difficult gear shifting indicate a broken RC spring. In this case, the fluid level remains unchanged, and adjusting the pedal does not produce any results.
Liquid leakage from the master cylinder is signaled by similar signs, so during inspection you need to pay attention to its condition.
Tips and tricks
As the main advice when choosing this unit, you should mention the quality of materials when purchasing. The purchased parts must have the manufacturer's markings and series and batch numbers. Many enterprises have their own information resources where you can check the originality of a part by simply checking the batch numbers and the specific part.
Also, in the process of replacing the VAZ 2104 clutch slave cylinder, it is necessary to strictly follow the sequence of actions and accurately calculate the tightening torque of the hoses and pipes from the fluid tank to the main part in order to avoid cracking of the rubber and plastic parts of the body.
Also, once every few thousand kilometers, it is necessary to carry out an inspection of the entire assembly, since the vast majority of cars of these models have significant mileage, the likelihood of unexpected breakdowns is quite high.
How to change the Lada slave cylinder yourself?
To work you will need the following set of tools:
- Pliers.
- Open-end wrench “17”.
- Head "13".
It is more comfortable to carry out the repair process on an inspection pit or overpass. If this is not possible, the front part of the machine must be jacked up and placed on supports, having previously secured the rear wheels with shoes. Further work is carried out on the following transitions:
- Loosen the nut of the hose tip in the RC plug using a 17-mm open-end wrench.
- Using pliers, disconnect the tension spring.
- Unbend and remove the cotter pin at the end of the pusher using pliers.
- Using a 13mm socket, unscrew the two bolts securing the cylinder to the gearbox housing.
- Disconnect the bracket that was secured with bolts.
- Having removed the pusher from the fork, take the RC in your hand and, using a 17mm wrench, completely unscrew the tip nut and remove the hose.
- Replace the clutch slave cylinder on a VAZ 2107, and immediately tighten the hose tip to avoid loss of brake fluid.
- Attach the new part in reverse order.
A certain part of car enthusiasts prefer to drain the old brake fluid before surgery, believing that this will allow them to get rid of dirt in the system. Be that as it may, bleeding and adjusting the clutch
will have to do it anyway.
How to bleed the clutch control system?
For the quality of transmission operation, the absence of air in the system is important, which is why bleeding is done. The procedure is similar to bleeding the brakes. An assistant is needed to complete the work:
- Fill the reservoir on the master cylinder with brake fluid.
- Place a rubber hose of the appropriate diameter onto the fitting. Place the other end of the hose in a container with some liquid.
- Ask an assistant to press the pedal 5-6 times and hold it in the pressed position.
- Using a “10” wrench, unscrew the fitting half a turn and release air bubbles, then tighten the fitting and repeat the procedure until the air in the liquid completely disappears.
During work, it is important to monitor the fluid level in the tank and replenish it in a timely manner.
Communities › Auto club VAZ and Lada Classic. › Blog › How to replace the clutch master cylinder of a VAZ-2107
If you begin to notice that there are visible leaks from under the cuff on the side of the clutch pedal, and there is a wet mark under the hood at the place where the cylinder is attached, while there is a sharp decrease in the brake fluid level in the reservoir, and the clutch is not being released well, then it’s time to change the clutch master cylinder.
Full size
Leaking from under the cuff
We buy a new clutch cylinder and find time for repairs - with good skill, you can do it in an hour.
Full size
So, we need to arm ourselves with: - An open-end wrench for 8 and 13 - A socket wrench for 13 with an extension - A flat and figured screwdriver - VD-40 or an analogue, a metal brush - A medical dropper or hose for pumping - A rubber bulb or syringe for pumping liquids— Clean jar for liquid
To begin with, use a bulb or syringe to pump out the liquid from the tank.
Full size
Then we disconnect the expansion tank and move it to the side so that it does not interfere. Using a 13 mm wrench and a screwdriver, unscrew and remove the pipeline nut, as well as the tank hose and also move it to the side, having previously cleaned the area with a brush and sprayed it with VD.
Full size
Now use a socket head to unscrew the two bolts securing the cylinder to the body and remove it, not forgetting to hold the engraving washers so that they do not fall.
Full size
It's difficult to climb, but it's possible
We scrape off the old sealant from the seat and wipe everything thoroughly. Now you can install a new cylinder. But first we check the presence of grease under the boot - everything is normal.
Full size
From the passenger compartment, we position the piston pusher in the center of the opening; it should fit into the hole in the cylinder cuff without any problems.
Full size
The tip sticks out
We coat the flange of the new cylinder with a thin layer of automotive sealant, let it dry a little and insert it into place.
Full size
We install new engraving washers and tighten the bolts. Press the clutch pedal and make sure that the pusher is in place and the cylinder is working. We return the pipeline and hose to their place.
Full size
We fill the reservoir with drained brake fluid and begin bleeding the clutch. According to the standard instructions you need to: 1. Place one end of the hose onto the clutch bleeder fitting, and lower the other end into the jar.
Full size
2. Sharply depress the clutch pedal 4-5 times at intervals of 2-3 seconds and keep it pressed.3. Using a size 8 wrench, unscrew the fitting approximately 3/4 of a turn; liquid with air bubbles will begin to come out of the hose.
Full size
4. After the flow of liquid stops, tighten the fitting and repeat operations 2 and 3 again until the bubbles stop completely. In this case, it is necessary to ensure that the liquid level in the tank is above the minimum and, if necessary, add it.5. Tighten the fitting, remove the hose, and put on the protective cap.
Now, pressing the pedal, we check the clutch - the moment of pressing the clutch should be clearly felt, the pedal should not “fall through”. We check the connections between the hoses and the pipeline for leaks, add fluid to the tank to the required level and close the lid.
Let's disassemble the old cylinder and see why it started leaking. First, use a small screwdriver or awl to remove the retaining ring.
Full size
We do this carefully, since the piston inside is spring-loaded and can suddenly fly out along with the remaining brake fluid.
Full size
We inspect the piston - surface wear and small scuffs are clearly visible, especially at the edges.
Full size
The same is true on the pusher piston; accordingly, the cylinder mirror is also worn out, the rubber rings do not press tightly.
Full size
Replacing the o-rings may help, but not for long, which is why it is recommended to replace the cylinder completely, especially since it has already reached its 10-year mark.
How to repair the working cylinder of a classic “seven” clutch?
In certain cases, car enthusiasts prefer to independently purchase not only couplings, but also spare parts for cylinder restoration on their own. This option allows you to save some money if you follow the following points:
- Clamp the part in a vice and unscrew the plug at the back.
- Remove the rubber cap.
- Remove the retaining ring from the plug side.
- Extract the internal elements of a node.
- Using a 10mm wrench, unscrew the bleeder fitting.
In order for the replacement of a repaired clutch slave cylinder on a VAZ 2107 to be of high quality, you need to:
- Inspect the condition of the spring and replace it if necessary.
- Replace all rubber seals.
- Inspect the node mirror.
- Clean the fitting.
Before assembly, all parts should be lubricated with brake fluid. You cannot use gasoline or diesel fuel, because the rubber will lose its quality. Change the gasket under the plug only if there are leaks. Having assembled and installed the unit, we finish the process by bleeding the system.
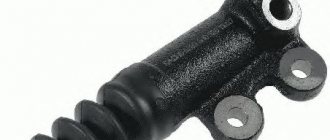
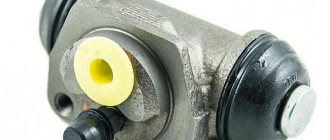
The slave cylinder is the cylinder in the clutch system that directly moves the clutch fork, is mounted underneath and contains the clutch bleeder. As you guessed, today we will talk about replacing the VAZ 2106 clutch slave cylinder with our own hands.
Replacing the clutch slave cylinder VAZ 2106
1. Disconnect the tension spring.
2. Using pliers, remove the cotter pin from the end of the pusher.
3. Using a 17mm wrench, loosen the fastening of the hose tip in the cylinder plug.
4. Using a 13mm socket, unscrew the two bolts securing the cylinder to the clutch housing.
5. Holding the hose tip with a “17” wrench and rotating the cylinder by hand, disconnect it from the hose.
6. To reduce fluid loss, immediately screw a new cylinder onto the hose tip. Next, install the cylinder in the reverse order of removal and adjust the gap between the pusher and the fork.
After installing the new cylinder, we bleed the clutch hydraulic system. Note that after this the hydraulic drive also needs to be pumped.
Clutch problems? Does it not engage completely, is the clutch pedal “soft” or does it fail altogether? All this will tell us that the time has come to repair the clutch - the master and slave cylinders! How this is done will be discussed in this article. Here you will find: instructions for repairing the clutch on a VAZ 2107 car, a useful video, tips and features of this type of work. Here you will find information on how to change cylinders, repair and bleed them.
Adjusting the clutch release drive of the VAZ 2105 Zhiguli
- Repair manuals
- Repair manual for VAZ 2105 (Zhiguli) 1980-1992.
- Adjusting the clutch release drive
Clutch pedal and master cylinder
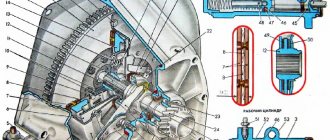
| 1 – main cylinder body; 2 – bypass (compensation) hole; 3 – fitting gasket; 4 – fitting; 5 – lock spring washer; 6 – piston of the main cylinder; 7 – sealing ring; 8 – pusher piston; 9 – hook; 10 – pedal axis; 11 – bracket for clutch and brake pedals; 12 – clutch pedal servo spring; | 13 – clutch pedal release spring; 14 – clutch pedal travel limiter; 15 – clutch pedal; 16 – piston pusher; 17 – protective cap; 18 – retaining ring; 19 – inlet; 20 – sealing ring (ring valve); 21 – piston bypass hole; 22 – working cavity of the cylinder; 23 – spring; 24 – gasket; 25 – plug |
EXECUTION ORDER ↓ Comments ↓ 1. Vehicle operation 1.0 Vehicle operation 1.1
Starting the engine 1.2 Controlling the gearbox 1.3 Driving the vehicle 1.4 Braking and parking 1.5 Operating a new vehicle 1.6 Adjusting the ignition timing 1.7 Precautions when operating the vehicle 1.8 Caring for the body 1.9 Storing the vehicle
2. Vehicle maintenance 2.0 Vehicle maintenance 2.1 Maintenance operations 3
General data 3.0 General data 3.1 Technical characteristics of vehicles 3.2. Controls 3.3. Control of interior ventilation and heating 3.4 Tightening torques for threaded connections 3.5 Tools for repair and maintenance 3.6 Used fuels, lubricants and operating fluids 3.7 Basic data for adjustments and control 4. Engine 4.0 Engine 4.1 Possible malfunctions, their causes and methods of elimination 4.2 Removal and engine installation 4.3 Engine disassembly 4.4 Engine assembly 4.5 Engine bench testing 4.6 Checking the engine on a car 4.7. Cylinder block 4.8. Pistons and connecting rods 4.9. Crankshaft and flywheel 4.10. Cylinder head and valve mechanism 4.11. Camshaft and its drive 4.12. Cooling system 4.13. Lubrication system 4.14. Power supply system 4.15. Carburetor 2105-1107010 4.16. Carburetor 21051-1107010 5. Transmission 5.0 Transmission 5.1. Clutch 5.2. Gearbox 5.3. Cardan transmission 5.4. Rear axle 6. Chassis 6.0 Chassis 6.1. Front suspension 6.2. Rear suspension 6.3. Shock absorbers 7. Steering 7.0 Steering 7.1 Possible malfunctions, their causes and methods of elimination 7.2. Inspection, check and adjustment of the steering 7.3. Steering mechanism 7.4 Rods and ball joints of the steering mechanism 7.5 Bracket for the pendulum arm 8. Brakes 8.0 Brakes 8.1 Possible malfunctions, their causes and methods of elimination 8.2. Checking and adjusting the brakes 8.3 Clutch and brake pedal bracket 8.4 Vacuum booster 8.5. Main cylinder 8.6. Front brakes 8.7. Rear brakes 8.8. Rear brake pressure regulator 8.9. Parking brake 9. Electrical equipment 9.0 Electrical equipment 9.1 Possible malfunctions, their causes and methods of elimination 9.2 Circuits protected by fuses 9.3. Battery 9.4. Generator 9.5. Starter 9.6. Ignition system 9.7. Lighting and light signaling 9.8. Sound signals 9.9. Windshield cleaner 9.11. Heater fan electric motor 9.12. Control devices 9.13. Carburetor pneumatic valve control system 10. Body 10.0 Body 10.1 Possible malfunctions, their causes and methods of elimination 10.2. Doors 10.3. Hood, trunk lid, bumpers 10.4. Body glazing, windshield and headlight glass washers 10.5 Instrument panel 10.6. Seats 10.7. Heater 10.8. Body frame repair 10.9. Paint coatings 10.10. Anti-corrosion protection of the body 11. Vehicle modifications 11.0 Vehicle modifications 11.1. Features of repair of VAZ-21051 and VAZ-21053 cars 11.2. Features of repair of VAZ-2104 and VAZ-21043 cars 11.3 VAZ-21044 cars with a fuel injection system 11.4. Design of the central fuel injection system 12. Electrical diagrams 12.0 Electrical diagrams 12.1 Interactive electrical diagram of the VAZ-2105 car 12.2 Electrical diagram of the VAZ-2104 car 12.3 Electrical connection diagram of the injection system 12.4 Connection diagram of the instrument cluster 12.5 Connection diagram of the brake system warning lamps 12.6 Connection diagram of the headlight cleaners and washers 12. 7 Connection diagram for the electric motor of the heater fan 12.8 Connection diagram for the windshield wiper and washer 12.9 Connection diagram for the turn indicators and hazard warning lights
Clutch replacement
Often, car owners prefer to simply replace clutch parts, since the cost is low and time can be saved significantly. Therefore, you can first consider the process of replacing clutch parts.
Replacing the clutch master cylinder
So:
- First you need to drain the fluid from the clutch reservoir. This can be done using a syringe - select the liquid and pour it into another container.
- You can also remove the hose from the master cylinder fitting and insert it into the same container. Slightly straighten the clamp on the fitting to make it easier to remove the hose. Do whatever is more convenient for you.
- After this, you need to unscrew the pipe fitting that fits the clutch slave cylinder.
- Then spray the two studs that secure the clutch master cylinder to the car body with WD-40 or an equivalent to prevent breaking them when unscrewing the nuts.
- Take a 13mm wrench or a socket with extensions (whichever is more convenient) and unscrew the two fastening nuts one by one.
- Remove the clutch master cylinder.
Ready! Withdrawal completed. Now let's install the new cylinder:
Advice! Before installing a new master cylinder, pay attention to the condition of the clutch reservoir flexible hose. It often happens that it cracks at the end. There are two options - either replace the hose or cut it (if the length allows).
- First you need to get the drive rod from the clutch pedal into the hole in the new master cylinder. For convenience, ask a friend to press the clutch pedal a little.
- Then install the clutch master cylinder onto the mounting studs.
- Tighten the fastening nuts with a 13 mm wrench or a socket with extensions.
- Using a 10mm wrench, connect the pipeline from the clutch slave cylinder.
- Install the clutch reservoir flexible hose.
- Fill the reservoir with brake fluid to the filler neck.
The master cylinder has been replaced.
Replacing the clutch slave cylinder
Now we will change the clutch slave cylinder on a VAZ 2107:
Advice! When unscrewing and tightening the slave cylinder mounting bolts, be careful not to strip the threads in the gearbox housing.
- Remove the spring from the slave cylinder.
- Next, you need to unscrew the tube that connects the main and working cylinders using a 10mm wrench.
Brake fluid will flow from it - put the cap on the end of the tube, which is located on the bleeder fitting of the working cylinder. - Unscrew the two bolts securing the working cylinder using a 13mm wrench and remove them together with the plate.
- Remove the slave cylinder.
Removed. Now we will install a new clutch slave cylinder on the VAZ 2107:
- To begin, unscrew the adjusting nuts in approximately the same way as they were set on the old cylinder. This will help you either avoid clutch adjustments altogether or reduce them to a minimum.
- Then insert the slave cylinder push rod into the fork.
- Screw the two bolts together with the plate. As practice shows, it is most convenient to tighten the upper bolt first, and then the lower one.
- Connect the fluid supply tube. Screw it into the cylinder with a 10mm wrench.
- Put the spring back on.
After replacing the working cylinder, it must be bled. If both the clutch master and slave cylinders were replaced at the same time, then read the bleeding method below:
- Unscrew the bleeder fitting 1 turn.
- Wait until liquid flows out along with air bubbles.
- When the air bubbles come out, tighten the fitting until it stops.
- Put on the cap.
- The pumping is over!
Installing the clutch master cylinder repair kit
VAZ-2106, main brake cylinder operating principle, design, repair It is not difficult to determine when it is necessary to repair the main cylinder; the main signs of its malfunction are:
- Insufficient clutch release (clutch drives)
- Any type of leakage, whether from under the nuts securing the hose and tubes, or from the end from under the rubber seals
- Master cylinder stuck in pressed position
In my situation, the main leak was due to a worn out sealing ring, in other words, fluid flowed down the clutch pedal into the passenger compartment.
I started the repair by dismantling the reservoir hose, unscrewed the clamp on the main cylinder and quickly removed it from the main cylinder, turned it up and pinched it behind the reservoir cap so that the liquid did not flow out of the reservoir. Next, I unscrewed the tube that goes to the working cylinder, I did this with a special key, it’s a pity there is no photo, but you can buy one without any problems at any auto store. All that remains is to unscrew the main one itself, it is secured with two 13 nuts and remove it from under the hood.
Main removed
The boot was removed and it was noticeable that fluid was flowing from here.
Having picked up the boot with a screwdriver, I saw exactly where the liquid was flowing from; the assumption was absolutely correct.
Next, you need to wipe the cylinder, remove dirt and rust.
After cleaning the dirt, you can begin disassembling. To do this you will need an awl or similar object.
Corkscrew ring
Corkscrew ring
We take out the ring
Next, you need to carefully remove the insides, keeping in mind that the piston is under the action of a spring.
This is what it looks like
Next, you need to clean the master cylinder body, you cannot scrape the parts with a screwdriver, sandpaper, etc., this is just in case, I use a rag with brake fluid. In repair manuals, I often came across such expressions that if rips, scratches, etc. appeared on the parts, then it is unusable. But despite all this, practice shows that despite all the risks, provided that a high-quality repair kit is installed, the master cylinder works without problems. I used this kit:
Repair kit for clutch master cylinder VAZ
We remove the old rings, clean all the grooves and holes. There should be no dust or debris there.
The ring is removed, clean the piston, install a new one
Pure "Innards"
And by the way, here is the reason for the clutch cylinder leaking:
The ring is not worn evenly
After cleaning and replacing the rings, you can assemble the cylinder, below is a photo of what should be there and how:
Here is a photo not cleaned, I added it here to show the correct assembly
Having assembled the cylinder, install the corkscrew ring
Bleeding the clutch on a VAZ 2106
After the repair has been made, it is necessary to bleed the clutch. In all repair manuals you can find standard instructions for bleeding the clutch, but it may not always help.
- The first bleeding option is standard; it consists of filling the tank with liquid, unscrewing the bleeding fitting, putting a hose on the fitting, and lowering the other end into a container with clean liquid. Then, by pressing the pedal, we monitor when the air stops being released, and also do not forget to control the level in the tank.
- The second method is to use an assistant - one person presses the pedal 4-6 times and keeps it pressed to the floor. The second unscrews the bleeder fitting; air bubbles should come out of the fitting; as soon as they stop coming out, you need to screw the fitting in and then release the pedal. And so on until normal operation of the pedal is restored and air bubbles stop coming out.
- There is also the simplest method of pumping, but which does not always work - to implement it you just need to pour liquid into the reservoir and unscrew the fitting on the working cylinder. The liquid will flow by gravity through the entire system and when it begins to flow steadily out of the fitting, it can be closed and the pumping can be considered complete.
Clutch repair
Now let's consider another option - using a repair kit for the clutch cylinders - main and working.
Master cylinder
So, we have removed the main cylinder and now we begin to disassemble it.
So:
- We start by removing the fitting. Use a screwdriver to remove the retaining ring.
- After which you can easily remove the fitting with the gasket.
- Now remove the rubber boot (protective cap) by simply prying it with a screwdriver or other convenient object.
- Now, using a 22 key on the other side, you need to unscrew the plug of the VAZ 2107 clutch master cylinder.
- You also need to remove the retaining ring from the boot side. This can be done using two screwdrivers, or special pliers. It is more convenient to use expansion pliers.
- Now you can easily remove all the insides of the cylinder.
Now about damaged parts and their replacement:
- All rubber seals should be replaced. 2 rubber rings - on the piston and pusher rod, one on the fitting, and we also replace the protective cap if necessary.
- If necessary, replace the spring. If it is deformed or damaged.
- Also pay attention to the internal mirror of the cylinder. It should not have burrs or chips.
- If the piston is damaged or the pusher is bent, then it is better to replace the cylinder with a new one.
Assembly:
- When assembling, all parts should be washed very thoroughly.
Note! Never wash parts in gasoline or oil and do not allow these liquids to get inside the cylinder. Lubrication is carried out only with brake fluid!
- Put all retaining rings back.
- Tighten the clutch master cylinder plug tightly!
Then install the cylinder back on the car. This is how the clutch master cylinder is repaired on a VAZ 2107 car.
Working cylinder
So:
- Clamp the VAZ 2107 clutch slave cylinder in a vice and unscrew the rear plug.
- Remove the protective rubber cap.
- Remove the retaining ring from the plug side and remove all internal parts of the working cylinder.
- Using a 10mm wrench, unscrew the bleeder fitting.
About details:
- Check the condition of the spring.
- Replace all rubber seals of the VAZ 2107 working cylinder.
- Check the condition of the working cylinder mirror.
- Wipe the inside with a clean cloth if necessary.
- Clean the bleeder fitting. If the edges on it are “licked”, replace it.
Assembly:
- Wash all parts in brake fluid.
- Lubricate each part with brake fluid during assembly.
- Reassemble all parts in reverse order.
- Install the retaining ring, protective cap and plug.
Install the VAZ 2107 clutch slave cylinder on the car (see above).
Bleeding the clutch on a VAZ 2107
For clutch performance, it is very important that there is no air inside the system. To do this, you need to bleed the clutch. This is done on the principle of bleeding the brakes. Two people will be required. So:
- Pour brake fluid into the clutch reservoir.
- Place a hose of suitable diameter onto the bleeder fitting of the working cylinder. Place the other end in a bottle (or other container) with brake fluid.
Important! The second end of the bleeding hose must always be below the liquid level in the container.
- Unscrew the bleeder fitting approximately half a turn.
- At this time, the second person, at the command of the first, presses and releases the clutch pedal.
- Repeat the last step until all the air has left the system and only brake fluid comes out without bubbles.
Important! Maintain the brake fluid level in the expansion tank!
- Next, you need to press the clutch pedal and, without releasing it, tighten the bleeder fitting.
- Put a cap on it.
Thus, we pumped the clutch and completed the repair of the VAZ 2107 clutch. The attached photos clearly show some details of the process. We really hope that this article helped you repair clutches on a VAZ 2107 with your own hands!
The dry single-plate clutch of the classic type on the Chevrolet Lacetti has proven to be durable and quite reliable. The hydraulic drive ensures easy pedal travel and precise force dosage. With proper care, it requires repair after a long run, but the whole picture is spoiled by the release bearing assembled with the working cylinder. Replacing the Chevrolet Lacetti clutch slave cylinder is on our agenda today.
The main malfunctions of the VAZ 2101-2107 clutch and their symptoms
The main signs of a malfunctioning clutch mechanism are difficulties in shifting gears. In particular, the most common symptoms and causes that cause them are:
- The gear does not engage when starting from a stop with the clutch pedal depressed. In this case, there may be several reasons. First, we check the free and working travel of the clutch pedal. The free play should be no more than 2 mm; it is checked as shown in the diagram above. The full travel of the clutch pedal should be no more than 30 mm. In this case, there must be force on the pedal. Otherwise, the hydraulic clutch fork drive is most likely to blame. Secondly, to check the drive, we check the fluid level in the expansion tank. We make sure that the drive system is sealed, there are no fluid leaks and the clutch release fork has a working stroke of about 6 mm. If an air lock appears in the system, pump it and repeat the test, eliminating the causes of the leak.
Release bearing 2101-1601180
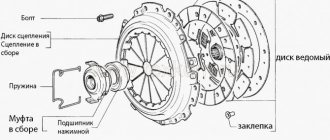
- Gears are difficult to engage, shift poorly, with noise and grinding. If the above faults are not found, most likely, we have wear on one or more elements of the clutch mechanism. As a rule, the release bearing 4 and the friction pads of the driven disk 2 most often wear out. Less commonly, the membrane springs of the clutch basket 3 are destroyed. Also, poor clutch performance can be caused by wear on the working surface of the flywheel (this is observed after 180-200 thousand mileage). Clutch release fork 2101-2107
- The clutch drives. It is an unpleasant situation when the clutch
does not disengage completely when the pedal is fully depressed. In this case, the culprit is either the adjustment of the free play of the pedal, the adjustment of the travel of the clutch release fork, deformation of the fork, or wear of the release bearing. In addition, there may be problems with the hydraulic drive or the basket. VAZ 2101-2107 clutch assembly - The clutch is slipping. The opposite situation occurs when, when the pedal is released, there is not sufficiently tight contact between the drive and driven disks and the torque is not completely transmitted to the gearbox, or not transmitted at all. In these cases, wear of the friction pads of the driven disk, incorrect adjustment of the pedal free play, or deformation of the clutch release fork must be blamed.
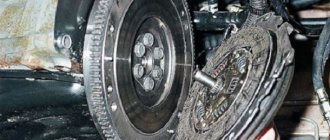
In most cases, to eliminate malfunctions (if the problem is not in adjusting the free play of the pedal or the fork drive), it is necessary to dismantle the clutch and troubleshoot it with the possible replacement of the release bearing, driven disk or the entire clutch assembly. What are we going to do now?
How to replace the clutch slave cylinder on a VAZ 2101-VAZ 2107?
1) To remove it, you must first secure the wrench and, using the wrench, unscrew the nut that secures the hose to the cylinder.
Note that to tighten this nut, you only need to loosen it, not completely unscrew it, and then remove it from the cylinder;
2) Next, set the key aside, then use pliers to remove and then completely remove the output spring from the cylinder.
3) Without removing the pliers, unscrew and then remove the pin from the hole located at the piston end of this cylinder.
Video clip. This is one of the parts that often gets lost, so put it in the front so it's easy to find and reinstall!
4) Next, remove the two bolts that secure the cylinder to the transmission clutch housing using a wrench.
5) Now remove the bracket from the cylinder, which was also screwed to the cylinder itself, which serves to mount the exhaust spring.
6) Then, with your hand on the slave cylinder, carefully remove it by removing the pusher, indicated by the arrow, from the hole in the fork.
7) Next, completely unscrew the nut that secures the hose to the cylinder, and then completely remove the cylinder from the machine.
Before you remove this nut, have a plug or container ready for all the brake fluid from the hydraulic clutch hose. Now that everything is ready, carefully unscrew the nut securing the hose, disconnecting the hose from the cylinder, and then drain all the used brake fluid from the hole in the cylinder itself!
Of course, it would be better to drain all the fluid from the hose into the tank and install a new cylinder
, pour brand new brake fluid into the hydraulic clutch, because when the fluid drains, it washes the entire system of any dirt that is in it! (For information on how to add brake fluid to the clutch reservoir, see the article “Replacing clutch fluid”)
1) The new clutch cylinder is installed in the reverse order of removal.
When installing the cylinder, be sure to blow out the clutch! (For information on how to disengage the clutch
, see in the article: “Removing the clutch for a VAZ”)
Below you will see a video clip for more details on replacing this cylinder:
There are two main reasons to replace or repair a brake master cylinder (MBC). First, it's leaking. Traces of brake fluid leakage are clearly visible on the vacuum booster or, in the absence of vacuum, in the car interior. The second reason is a “soft” and ineffective brake pedal. The second reason becomes relevant only after checking the serviceability of the working brake cylinders of the rear and front wheels, and all brake pipes and hoses. If you are faced with similar problems and you are happy with the LADA car VAZ-2101, VAZ-2104, VAZ- 2105
, VAZ-2106, VAZ-2107, Classic, then this article on replacing and repairing the brake master cylinder will be of interest to you. I can immediately say that this work is not difficult, it only requires your desire, time and attentiveness. So, read on and get down to business with confidence)))
Service life of the clutch slave cylinder on a Chevrolet Lacetti
Packaged.
The Lacetti clutch basket and driven disc can easily last 130–150 thousand, while at the same time, you have to think about replacing the working cylinder after 30–35 thousand km.
Flaws
Such an insignificant resource is primarily associated with cuff leakage and wear of the cylinder mirror
. The matter is complicated by the fact that the cylinder and the release bearing are one unit. This is what Korean engineers decided to reduce the cost of the design.
Prices and articles
New clutch slave cylinder installed.
They made the design cheaper, but added headaches to Lacetti owners - the price of the original cylinder is about 4 thousand rubles
, and to replace it you have to remove the gearbox.
Catalog number of the part - 96286828
according to General Motors, however, the
Valeo 804 513
; this company supplies clutches to the conveyors of many companies, including GM. This cylinder is sold by the officials, both articles are current.Many people improve the hydraulic clutch system by installing an external slave cylinder from the Daewoo Nexia or Chevrolet Aveo T200.
Cylinder from Daewoo!
But we won’t go into collective farming today, since both cylinders, native and external, have slightly different characteristics.
Signs of a faulty hydraulic clutch
The hydraulic clutch system is combined with the brake system and, naturally, it uses the same brake fluid.
Towing a trailer greatly reduces the life of the clutch!
The life of the working cylinder is greatly influenced by operating conditions.
- towing a trailer, loading the car, driving style, frequent and prolonged disengagement of the clutch. Here are the main reasons when the release bearing along with the working cylinder asks for scrap:
- Clutch disengagement with jerking, discs slipping.
- Increased noise of the release bearing.
- The clutch moves and does not disengage completely.
- Leaking brake fluid at the junction of the gearbox and cylinder block.
