Purpose of the battery
As you know, the battery is an expensive part of vehicles, so buying a new one when the old one is damaged or the performance has decreased is not a very smart decision.
Fortunately, replacing the electrolyte in the battery can be a way out of this unpleasant situation. If this procedure is performed correctly, then in a short time it will be possible to return the battery to its previous performance. Every motorist knows that the battery design looks extremely simple and includes a number of simple components. Among them:
- Lead plates that cover the entire body.
- Electrolyte is a special liquid that is considered the connecting element between these plates.
As a result of a chemical reaction, two elements accumulate and conduct electric current.
Given the importance of the role of the electrolyte, its volume and quality can determine the final performance properties of the battery .
We are talking not only about the indicators of generated energy, but also voltage. If the level of the substance begins to decrease and the quality decreases, this can significantly deteriorate the performance of the battery. Deformation of lead plates is considered a fairly common phenomenon, and it is the decrease in the quality of the electrolyte that causes the chemical reaction to weaken. Ultimately, precipitation, cloudiness and all kinds of evaporation occur in the battery, which leads to such troubles as the lack of interaction between the elements to generate energy. To restore the part to its former efficiency, it is important to replace the fluid as quickly as possible.
What could be the result?
In some cases, the operations described in this article help to completely restore the battery. At the same time, its service life will not be long: 0.5 - 1 year (sometimes 2-3 days). But it is possible that replacing the electrolyte in a car battery will not give any result. This is true for some modern models of maintenance-free batteries. Their design is such that the electrodes are installed in envelope separators. The sediment does not fall to the bottom of the jar, but remains in the envelope itself and it is impossible to wash it even with strong water pressure. Therefore, the electrolyte can be changed, but only in maintained batteries. In other cases, it is better to buy a new battery and not waste time.
Possible faults
In most cases, car batteries suffer from a problem such as loss of density. The trouble is due to a variety of reasons, namely:
- Aging.
- Sulfation of plates.
- Incorrect maintenance.
The most common factor is considered to be sulfation of the plates, which is caused by a constant lack of proper charging. To understand the principle of destruction, it is enough to remember school chemistry and evaluate the processes that occur in the device.
As you know, inside the battery there are lead grids, which, in turn, are filled with lead dioxide.
During the discharge, reduction of lead oxide begins at the cathode and oxidation (reverse process) at the anode. In simple words - on the plus and minus. In both the first and second cases, the formation of lead sulfate begins, and the density of sulfuric acid rapidly decreases. Many car owners often make a big mistake - having measured the density indicators, they begin to add electrolyte, increasing the density to the required level. As a result, further sulfation occurs and complete damage to the battery .
Experts advise starting to measure density only on a fully charged device with normal acid quality. Even if the built-in battery indicates 100% charge, it may not be accurate.
Replacement features
Unfortunately, not all motorists know whether it is possible to change the electrolyte in the battery of their vehicle. In addition, among more experienced specialists there are disagreements about the need for this procedure. There are two opinions:
- Replacing the electrolyte is completely useless and even dangerous. It's better to buy a new element.
- Replacing the electrolyte is the key to successful battery operation and is a very important action that should be carried out as often as possible.
In principle, both statements have the right to life.
If you have the financial means, buying a new battery is an excellent solution, since the new model will work much more efficiently than the old one, even a refurbished one.
But not every car owner can afford such an expensive pleasure, so all that remains is to replace the electrolyte on time and try to monitor the condition of the battery. We recommend: How to properly install a battery in a car You should start replacing the fluid inside the battery only under the following circumstances:
- If it becomes cloudy and loses its base shade.
- If a characteristic sediment appears at the bottom.
- If its level has dropped significantly. By the way, in this case, you can simply add electrolyte, but there should be no sediment or cloudiness at all.
In the absence of such problems, it is strictly prohibited to replace the electrolyte by independent efforts, without having the appropriate experience.
Any mistake can cause serious damage to important components of the car, as well as a decrease in the efficiency of the battery. But if the node’s productivity is low, proper replacement may be the best “resuscitation.”
Battery cleaning
If the motorist has decided to get to work and is now trying to figure out how to change the acid in the battery, it is important for him to correctly follow the step-by-step instructions and move step by step from one action to the next.
First, you need to carry out several preparatory measures, namely, removing the electrolyte from the cans. Considering the aggressiveness of the environment in which the procedure will be carried out, starting it without the use of protective equipment is strictly prohibited.
So, to increase your own security you need to take:
- Protective rubber gloves.
- Rubber bulb.
- Container for draining.
- Rags.
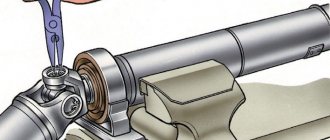
Next, you need to take into account the guidance and not miss important points. To free the battery and provide yourself with access to the banks, you need to remove the terminals and move the structure to a flat surface . Then you should remove the protective strip and unscrew the caps on the cans.
It is important to note that some battery models do not allow motorists to freely access the banks, since they are non-removable. In this case, you will have to drill special holes in the housing through which liquid will be supplied. A drill is used for this purpose.
After performing these steps, all that remains is to suck out the old acid using a rubber bulb, completely emptying the jars. The unnecessary liquid is poured into any suitable container. At this stage, it is important to exercise extreme caution : contact of acid with skin can lead to disastrous consequences.
If this happens, it is important to treat the affected area of skin with soap and water as quickly as possible. We recommend: Car battery diagnostics
If there is significant sediment inside the battery reservoirs, do not invert the battery to drain the acid. If particles end up on the contacts, this can lead to a “breakdown”, after which it will become almost impossible to restore the device.
If the tanks are completely emptied of old acid, it is necessary to remove plaque and sediment using distilled water. As is known, such a liquid is a powerful dielectric, which reduces the risk of breakdown.
You can even gently shake the battery after filling the jars to loosen any sediment or old fluid. Then the resulting consistency is poured out.
How to change the electrolyte in a car battery and when it is needed
So, now let's look at a situation where a complete replacement of the electrolyte in the battery is required. Most often, a visual assessment and some other characteristic signs help to understand whether the electrolyte in the battery needs to be changed.
As a rule, the need for replacement is indicated by:
- cloudy electrolyte in the battery, color change;
- it is not possible to achieve the required density after charging the battery;
Experts also recommend completely changing the electrolyte in cases where a relatively new battery began to quickly discharge after being fully charged using a charger; during a check it was revealed that there was no electrolyte in the battery in one bank; the electrolyte had previously frozen, etc.
In practice, cloudiness indicates that the battery was initially filled with low-quality electrolyte; it is also possible to use a low-grade product for topping up. Also, cloudiness is caused by pouring running water rather than distilled water. It is also possible that the water being added contains foreign impurities.
The next reason that the electrolyte is cloudy is damage and shedding of the plates. At the same time, one should not exclude the possibility of a short circuit in one section or in several at once. As a rule, the appearance of a cloudy gray precipitate indicates shedding of the plates; a black or dark color of the electrolyte is a sign of poor quality of the main components of the electrolyte (water and/or acid). A brown color indicates that the battery has a short circuit.
It must be taken into account that in the event of shedding or short circuit, the decision to change the electrolyte in some cases may not lead to a positive result. The fact is that to restore functionality, it is also necessary to separately repair the battery sections, and such an operation requires special equipment.
In other cases, replacing the electrolyte in the battery at home is quite possible. Moreover, a correctly performed procedure can significantly extend the life of the battery. To implement the task, you will need to prepare in advance:
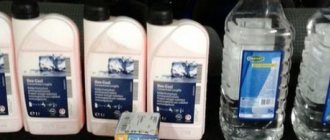
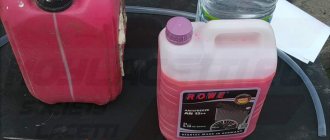
- fresh electrolyte with the desired density;
- distilled water;
- hydrometer for measuring density;
- a rubber bulb or syringe for pumping out old electrolyte from cans;
- funnel for easy filling of clean water and electrolyte;
- container for draining old electrolyte, pumped out excess, etc.
Regular glass jars or bottles work well as containers as they are not affected by sulfuric acid. It is also advisable to have safety glasses and rubber gloves, since working with acid solutions requires compliance with certain safety rules.
The fact is that electrolyte, after contact with open skin, can cause chemical burns. This solution also poses a significant danger to the eyes. If electrolyte gets on the skin, it should be washed off immediately with a soda solution. In case of contact with eyes, rinse them with plenty of water and immediately seek professional medical attention.
We also recommend reading the article about what to do if the electrolyte in the battery is frozen. From this article you will learn about the reasons that lead to freezing, as well as ways to restore the functionality of the battery.
So let's move on to the replacement. Let us note right away that at the initial stage you need to know how to properly drain the electrolyte from the battery. It is quite obvious that many people strive to quickly remove fluid from the battery, without thinking about whether the battery can be turned over when replacing the electrolyte.
It would seem that it is enough to unscrew the caps on the cans, turn the battery over and drain the old electrolyte from the case. Please note that in half of the cases this approach leads to permanent battery failure. The fact is that the sediment particles that settled in the lower part, after turning over, get stuck between the plates. As a result, a short circuit will further occur in the battery. If you have not previously serviced the battery, then we recommend that you familiarize yourself with how to properly fill the battery with electrolyte.
- The first step is to remove the battery and wipe the case, removing various contaminants. For these purposes, it is best to use a rag that is pre-moistened in a solution of water and soda. To make the solution itself, dilute a couple of tablespoons of soda in a liter of water.
- Then you need to loosen the filler plugs on the battery, after which the electrolyte level, its condition, and color are checked. You also need to assess the battery charge level using a multimeter.
- If the liquid clearly needs to be replaced, then the old electrolyte is then pumped out of the cans with a bulb, syringe, or any other similar solution.
- Next, you need to pour distilled water into the empty jars, after which the battery is slightly rocked. This is needed for washing. Rinse the battery several times, draining the water from the cans at each stage. This must be done until the water becomes completely clear.
- Then you can pour fresh electrolyte into the jars, and you do not need to immediately strive to bring its density to normal.
- Now the battery needs to be charged from the charger. Only after the charging process is complete is the density checked with a hydrometer.
- Additionally, before taking measurements, it is recommended to wait time for the battery to cool down. Usually it takes 1.5-2 hours. Then (based on the data obtained from measurements) an adjustment is made by selecting the desired ratio of water or electrolyte.
In practice, the replacement procedure involves pumping out the electrolyte from each jar, after which it is drained into a container prepared for this purpose. It should be taken into account that the liquid cannot be completely removed in this way.
- For the most effective removal, you need to slowly tilt the battery case, selecting the liquid. However, you need to remember that turning the case over is strictly prohibited, as was said above. To avoid holding the battery, you can place blocks or other objects under the case to support it.
- You can also additionally install a flexible tube on the nose of the bulb (for example, from a dropper). The main thing is that the diameter of the tube allows it to be put on tightly and fixed.
- After draining the liquid from the jars, the tilted battery is placed in its normal position, then distilled water is poured into each jar through a funnel.
- During washing, it is not allowed to shake the battery, sharply tilt the case, etc. A few smooth tilts in different directions will be enough. After this, the water is drained and the washing procedure is repeated.
- Now you can fill in the electrolyte, but you should not immediately bring its quantity to the desired level. The fact is that electrolytes on sale have an increased density. This means that the solution must then be diluted with distilled water. At the very beginning, it will be enough to stick to approximate indicators, since the density is brought to normal after charging the battery.
We also add that after the electrolyte has been filled, you need to smoothly tilt the battery several times (as when washing). This will remove air from the battery cans. Now the plugs can be covered, but not tightened completely. The battery itself must be left for a couple of hours. This is necessary to settle the liquid in jars.
Then you will need to check the electrolyte level and its density again, adding acid or water if necessary. Also, if necessary, you can add a special additive to the electrolyte, which helps remove sulfates from the electrodes. Next, you need to wait until, under the influence of the electrolyte, all remaining air is completely released from the housing, and the additive also dissolves. Note that the additive dissolves in about 2 days. After this, the battery can be charged.
Acid preparation
It is important to understand that you cannot take any electrolyte and pour it into the reservoir. For this purpose, you need to select a special acid that meets strict specifications. And one of them is density.
It is desirable that the density indicator be 1.28 g per cubic centimeter. To determine accurate data, you need to use a hydrometer. It is no secret that many store-bought models have a density of 1.40 g, so it is important to clarify this point at the purchasing stage.
Experienced motorists create electrolyte with their own hands, but its quality is far from desirable and is at a low level. As a result, battery performance is compromised.
To avoid risks, it is better to purchase finished products.
After completing the cleaning of the cans and the preparatory steps, you can proceed to filling the electrolyte. During this action the following applies:
- Watering can.
- Latex gloves.
- The solution itself.
In addition, the motorist needs to use a hydrometer, which will allow a preliminary density check. Ideally, it should be at the level of 1.28 g per cubic centimeter. Provided that the displayed indicator corresponds to the norm, you can slowly fill the tank, having previously allocated the required amount of acid for each of them.
Useful recommendation: if the electrodes are coated with sulfate deposits, it can be removed by adding special additives to the liquid.
The tanks should be filled evenly and gradually, removing excess with a rubber bulb. They also need to be wiped with a cloth or napkin. Further filling of the cans is simple and does not require any professional approach. It is enough just to determine the density indicators and gradually fill the empty jars with liquid.
We recommend: Lead-acid batteries for Daewoo Nexia: parameters and polarity
If the tanks are completely filled, under no circumstances should you start working with the battery . It is better to leave it for 24-48 hours in idle mode. This will allow the additives to completely dissolve and the air to escape. Only after this can you begin charging and checking.
How to disassemble the battery to add electrolyte
Algorithm of actions required to add water to the electrolytic solution of a maintenance-free power source:
- Remove the sticker located on the top cover of the power source housing.
- Under the label there is a plastic strip that needs to be pryed off from the side with a flat-head screwdriver. Pull the element upwards; plugs of the battery cans are attached to the parts of the batteries on the lid. Centra power supplies have a similar design. Then the owner can begin to determine the level and density of the electrolyte, as well as replace the solution.
- If the plate cannot be removed (for example, on Varta or Bosch products), then you need to visually determine the location of the filler necks of the cans.
- Pierce the lid with a thin awl, then perform circular movements associated with lowering the blade down. Piercing is performed until the tip of the awl begins to contact the battery electrodes.
- Place a mark on the tip to determine the distance from the cover to the top edge of the plates.
- Pull the awl out of the hole and then measure the resulting gap. Since the liquid level should be located 12-15 mm above the upper edge of the electrodes, the owner can calculate the value of the gap between the surface of the electrolyte and the plane of the housing cover.
- To fill the water, use a medical syringe with a volume of 10-15 cm³, equipped with an elongated needle. Then you need to cut the needle to the previously measured distance; the plastic spout should not fall into the holes made.
- Fill the jars with water until the required level is reached. Checking whether the reservoir is full is done by lifting the syringe plunger. If air is drawn into the tank, water continues to be added.
- After filling the cans, you need to rock the body of the power source in different directions, which will allow you to evenly distribute the water in the solution. Shaking the product is prohibited due to the risk of slag getting between the plates. Wait 20-30 minutes, and then carry out a control level measurement. If the volume has dropped, then an additional portion of water is introduced.
- Seal the holes with sealant; the factory label will not stick to the original place. Charge the power supply and then test the performance of the product. It should be taken into account that the technique provides a temporary restoration of battery characteristics.
Device check
If two days have passed, you can begin charging activities.
For the first charge, take a special device that produces a voltage of 12 V. At this stage, it is necessary to remove the protective plugs and connect the charger to the battery. Then cyclic charging begins, which consists of repetitions of the charge-discharge circuit. The optimal current should not exceed 0.1 ampere. For the first procedure, such indicators are quite enough. The battery is charged until the charge level reaches 100%. To check, take a voltmeter, which is used to determine the voltage of each section or terminal. It is important to make sure that the voltage at each section is not lower than 2.3 V, and at the terminals - not lower than 13 V.
By following these recommendations, you can improve the technical performance of your old device without much difficulty. Timely replacement of the electrolyte will restore the battery to its previous performance and make it more productive. If the procedure does not solve the problem, and the cause of poor functionality is explained not by the liquid, but by the plates themselves, then resuscitation work will not bring any success.
The only way out of the situation is to purchase a new device, since the old one cannot be restored.
After replacing the electrolyte, how long should the battery be charged?
Before charging the battery after replacing the electrolyte, let the battery sit for several hours. It is allowed to rock the body to remove air bubbles. The battery charging mode involves the use of low charging currents - 0.1A. The process is carried out in a charge-discharge cycle, controlling the density. The solution should not be allowed to boil excessively due to the possible loss of water concentration.
If excessive sulfation of lead plates is detected, it is permissible to use an additive to dissolve plaque. This process will not affect the quality of the new solution. The time for complete dissolution of the oxide is about 2 days.
The final measurement of the density and degree of charge is carried out no earlier than two hours after disconnecting the battery from the charger. When controlled by a tester, the voltage at the terminals will indicate a full charge of 14–15 V. But the process should be continued for another two hours to ensure the stability of the density indicator.
Helpful operating tips
In order not to wonder whether it is possible to change the electrolyte in the battery, it is better to properly monitor its condition and take into account the basic operating rules. One of the most important is ensuring a balanced temperature regime: when the temperature drops to certain levels, the acid can freeze.
The minimum density of the battery at temperatures up to minus 30 degrees Celsius should be equal to 1.29 g. If the temperature is lower - up to 1.32 g. If there are no optimal indicators, then you will have to restore them by adding sulfuric acid.
The fact is that an electrolyte with a lower density will very quickly freeze and become unsuitable for further use, since any chemical processes will cease to take place in it. As density increases, the freezing point decreases. If it so happens that ice appears inside the battery, you can only hope that it did not deform the lead plates. If damage occurs, the battery will have to be repaired or completely replaced.
Knowing how to properly change the electrolyte in a battery, you can avoid the need to contact a service center and overpay for expensive repairs.
What do you need to know before doing the work?
You already know that battery electrolyte contains acid. Its concentration in the solution is insignificant, however, if drops get on open areas of the body, a chemical burn can occur. To avoid this, protect your eyes, skin and respiratory system from harmful effects before performing the operation.
If the solution gets into your eyes or skin, immediately rinse the affected area with plenty of water and then consult a doctor. This will help avoid health problems.